Showing posts with label Valentine's Day. Show all posts

Thursday, December 10, 2015

It's Different Living Up On a Mountain


My sister-in-law has the most fantastic sugar cookie recipe that we have nicknamed "Cugar Shookies" (because my mom kept mispronouncing it one particular day). We originally posted it here. However, I live up on a mountain and whenever I make these cookies, they come out of the oven fluffy and puffy...and then they deflate. Darn altitude!

This recipe, on the other hand, works up here on my mountain. It is also a fantastic sugar cookie recipe which was originally shared on the same post as the Cugar Shookies. I'm sharing it again here because it is officially the only kind of cookies I have made this Christmas. I'm trying to lose my baby weight and having all sorts of Christmas cookies lying around won't help me in that endeavor.

Besides, we've had a lot of holiday fun this Christmas just decorating these sugar cookies with all sorts of fun sprinkles and candies. This recipe makes a LOT of cookies, so you will have plenty for your own family as well as plenty to give to others.


Karrie's Sugar Cookies

Ingredients:

2 cups sugar
2 cups butter or margarine, softened
6 eggs
2 tsp vanilla (or almond flavoring)
1 pinch salt
7 cups flour
3 tsp baking powder

Directions:

Cream sugar and butter. Add eggs and vanilla. Add flour mixed with baking powder and salt. Roll out the sugar cookie dough and cut out cookies.

Bake at 350 degrees for 8-10 minutes. Do not overbake (in fact, you don't even want these cookies to start to brown).

Source: My Mom's friend, Karrie. When we got the recipe from her, she called them "John's Sugar Cookies." I don't know who John is, but he knows how to make a good sugar cookie.

Notes: Who doesn't love sugar cookies? These are awesome.


Sugar Cookie Frosting

Ingredients:

4 cups confectioners' sugar
1/2 cup shortening
5 tablespoons milk
1 teaspoon vanilla extract (or you can substitute almond extract)
Food coloring, optional

Directions:

In a large bowl, cream together the confectioners' sugar and shortening until smooth. Gradually mix in the milk and vanilla with an electric mixer until smooth and stiff, about 5 minutes. Color with food coloring, if desired.

Source: Allrecipes.com, submitted by Kathy Brandt. You can find it here 

Notes: I like my frosting to be creamy, smooth, and easily spreadable, so depending on the consistency, I sometimes add a little more than 5 tablespoons milk. I start with 5 tablespoons and add additional milk, if necessary, a tablespoon at a time until I reach the consistency I want. This is my go-to sugar cookie frosting recipe. It's perfect.

Tuesday, August 20, 2013

Another Egg-Free Cookie Recipe


I found these around Valentine's Day this year (hence the name of Valentine Cream Wafers). However, I didn't get a chance to make them until now.

I really wanted to try them because they didn't have eggs in them and my youngest son is allergic to eggs.

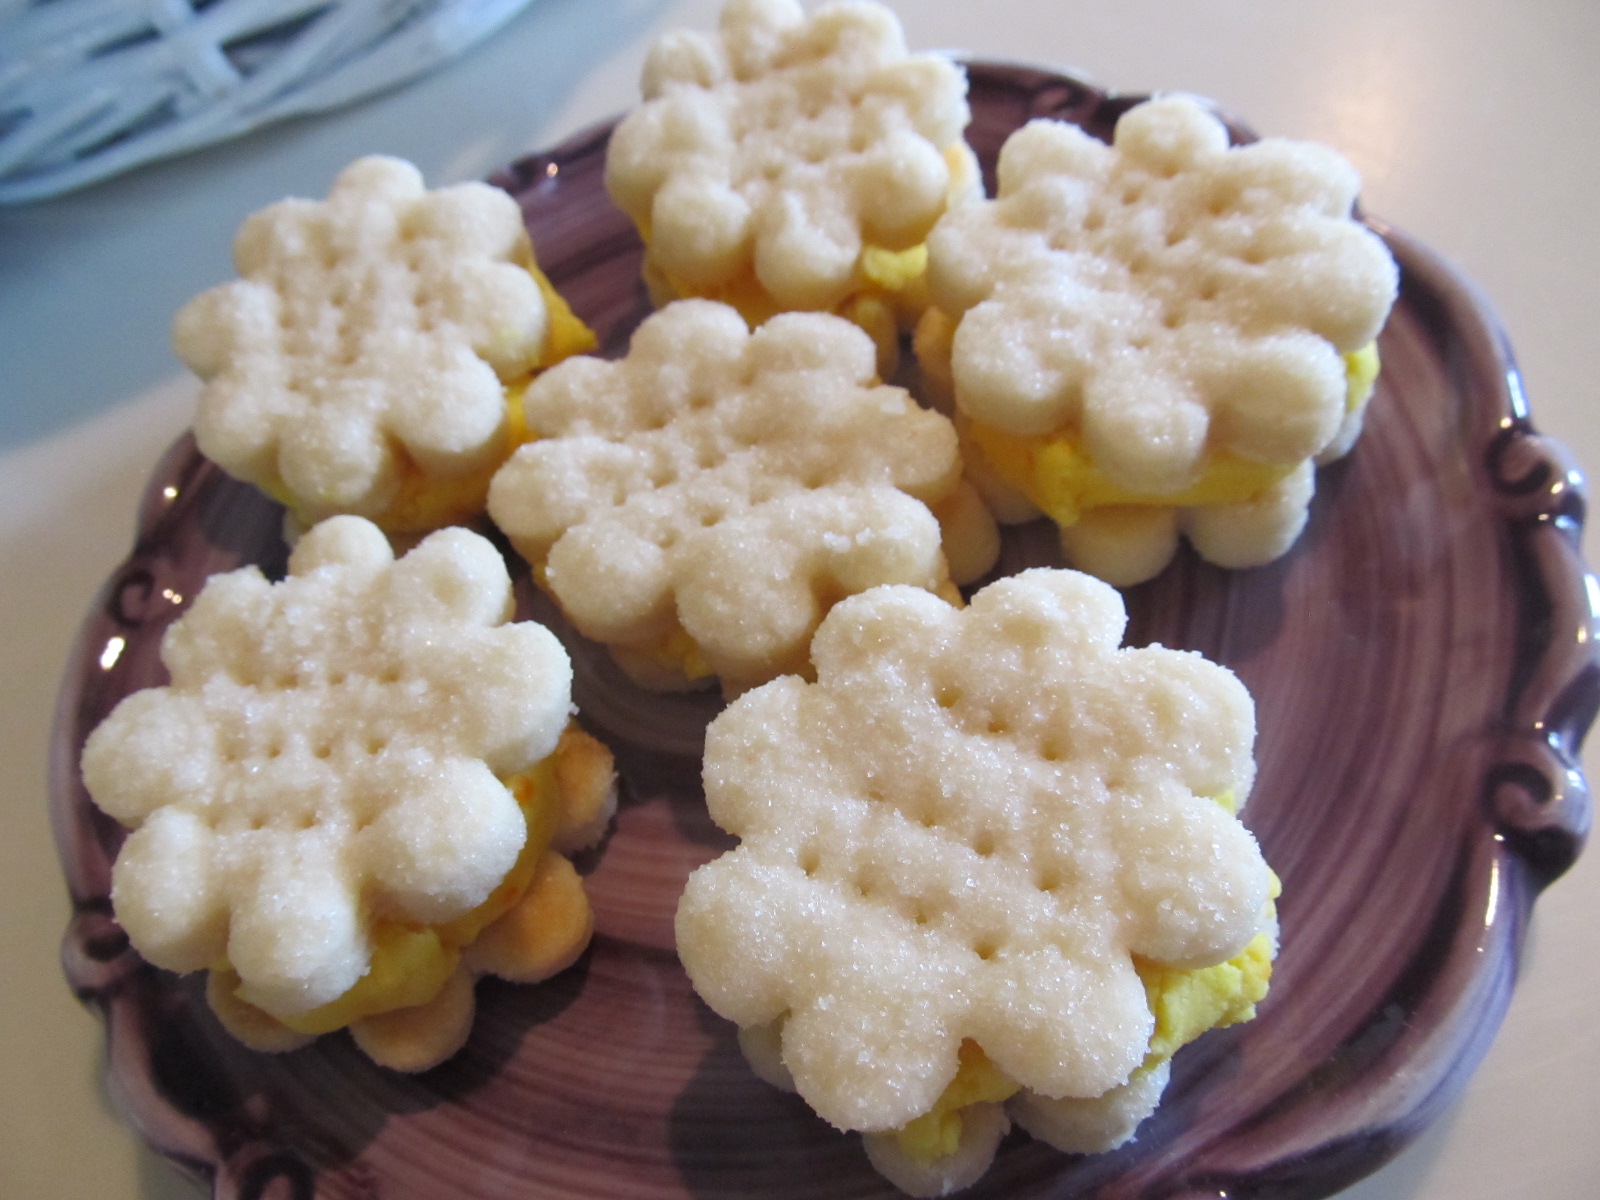
Holy cow, these are good. They are hard to describe. The cookie itself is like a cross between a really flaky pie crust and a sugar cookie...the addition of frosting to make it into a sandwich cookie is perfection. These are so melt-in-your-mouth good.

Rather than making hearts, I made flower shapes. You could do all sorts of shapes. These would also be really cute as stars, four leaf clovers (if you had a sturdy, rather than delicate cookie cutter shape), Christmas trees, simple circles, etc.


Valentine Cream Wafers

Ingredients:

Wafers:

2 cups all-purpose flour
1 cup butter, softened
1/3 cup heavy whipping cream
Granulated sugar

Creamy Filling:

1 1/2 cups powdered sugar
1/2 cup butter, softened
1 teaspoon vanilla
Red liquid food color (or any color you like to match the shape of cookie you choose to make)

Directions:

In medium bowl, mix flour, 1 cup butter, and the whipping cream with spoon. Cover and refrigerate about 1 hour or until firm.

Heat oven to 375 degrees F. Roll one-third of dough at a time 1/8-inch thick on lightly floured surface. (Keep remaining dough refrigerated until ready to roll.) Cut with 2 1/4-inch heart shaped cookie cutter. Generously cover large piece of waxed paper with granulated sugar. Transfer cutouts to waxed paper using pancake turner. Turn each cutout to coat both sides. Place on ungreased cookie sheet. Prick each cutout with fork about 4 times.

Bake 7 to 9 minutes or just until set but not brown. Cool 1 minute; remove from cookie sheets. Cool completely, about 15 minutes.

Meanwhile, beat powdered sugar and butter until smooth. Add vanilla. Beat until fluffy. Divide frosting into six small bowls. Add the following different amounts of red liquid food color to one of each of the bowls starting with a toothpick, 1 drop, 3 drops, 7 drops, 12 drops, and 25 drops to make different shades of pink. (see notes)

For each sandwich cookie, spread about 1 teaspoon frosting on bottom of 1 cooled cookie. Top with second cookie, bottom side down; gently press cookies together. (see notes)

Makes 44 sandwich cookies.

Nutrition information: 1 serving is 100 calories, 7g fat, 20 mg cholesterol, 55 mg sodium, 10 g carbohydrate, 0 g fiber, 5 g sugar, 0 g protein.

Source: Betty Crocker website. You can find it here.


Notes: I used shortening in place of the butter for the frosting. I had made a separate batch of cookies that day that also used two sticks of butter, and call me crazy, but I kind of draw the line at using over a pound of butter in one day. One pound is enough for me, thank you. I know shortening is kind of the same thing, but it is less expensive than butter. :)

I also didn't divide the frosting and do varying shades of food color. That would be adorable...but I didn't have the time or the energy. One shade was enough for me!

Finally, when the recipe says "gently press cookies together" let me stress the word "gently." These cookies are so delicate that they crack and crumble very easily. What I found that worked best was to place the first cookie onto a flat surface (not by holding it in your hand). Then gently press the frosting onto the first cookie, and then oh so very gently place the other cookie on top, and very, very gingerly and lightly press the cookie onto the frosting, just so it will stick together. Any more pressure than that and you are going to have a delicious little cracked cookie sandwich. Once you get the hang of it though, you can assemble the cookies pretty quickly. I ended up cracking about 4 cookies before I got the hang of it. After that, it was a breeze.