Showing posts with label Sources: Pinterest. Show all posts

Wednesday, June 18, 2014

Inspired By Our Neighbors To the North


We recently made a recipe for Nanaimo Bars. This recipe has a slight variation in that they are lemon flavored instead of your traditional bars which are vanilla flavored (or sometimes they are made with a custard filling).

We found that these bars were good (though a little messy for the younger crowd), but that they only got better with time. I would suggest making them the day before you plan to serve them.


Lemon Creme Nanaimo Bars

Ingredients:

Crust:

1/2 cup butter
1/3 cup cocoa powder
1/4 cup sugar
1 egg
1 1/4 cup graham cracker crumbs
1 cup shredded coconut
1/4 cup chopped walnuts or pecans, optional

Filling:

1/2 cup softened butter
1 box lemon pudding mix (3.4 oz)
1/4 cup milk
1 1/4 cup powdered sugar

Topping:

4-5 oz. chocolate
1 tablespoon butter, shortening, or coconut oil

Directions:

In a saucepan over medium heat, melt butter, and add cocoa and sugar. Stir until well combined. Quickly add egg before mixture becomes too hot, stirring quickly to mix egg in well. Continue cooking and stirring for another minute or two, to let the mixture thicken. Remove from heat.

Stir in graham cracker crumbs, coconut, and nuts (if using). Press mixture into a 9x9 pan (ideally, pan would be lined with parchment paper) and let chill while you make the filling.

For filling, combine butter, pudding mix, milk, and powdered sugar, beating until smooth. Spread filling over crust layer, and return to refrigerator.

For topping, melt chocolate and butter in the microwave in 30-second increments, stirring between each. Spread chocolate over filling layer, using a knife to spread evenly.

Let bars chill at least 1 hour before serving. Use parchment paper to remove bars from pan, and cut into 9 large or 16 small squares. For best results, serve chilled and store in refrigerator.

Source: mycookingspot.com, but the link doesn't seem to be working, so I can't add a hyperlink here.

Notes: As I said, we liked these on day one, on day two, they were fantastic.

Saturday, March 22, 2014

No Recipe Required


We had a combined birthday party for the cousins on my side of the family. We decided to do a minion theme (a la Despicable Me). For dessert, we made some minion cupcakes (inspired by Pinterest).


Minion Cupcakes

Ingredients:

Frosted cupcakes
Twinkies
Smarties
Black gel frosting
Black string licorice

Directions:

Cute Twinkies in half. Place one Twinkie half on each cupcake (standing up). Decorate Twinkies to look like minion faces.

Source: Pinterest (numerous posts--I don't know where the idea originated).

Notes: This was actually quite easy. Practice makes perfect and I improved with each cupcake.


Above: The minion on the first row, far left, is the first one I did. You can tell by the unsteady hand with the black gel frosting. :) As I said, I got better as I went along. The one in the far left on the back row is the last one I did...and it occurred to me that I should have made more with just one eye. Oh well!

Sunday, March 31, 2013

As Easy As It Gets


This snack cake or breakfast cake has only two ingredients. I don't think it gets any easier than this.


Pineapple Angel Food Cake

Ingredients:

1 box angel food cake mix
1 can crushed pineapple, do not drain

Directions:

Preheat oven to 350 degrees F.

Mix cake mix and pineapple in a large bowl by hand. Pour into an ungreased 13x9 inch pan.

Bake for 28-30 minutes.

Cool on wire rack. Cut into squares and serve.

Source: I found this recipe as well as many variations on this same idea on Pinterest.

Variations:

Angel food cake lemon bars: use 1 to 2 cans lemon pie filling in place of the pineapple (1 can for a more cake-like consistency, 2 cans for a denser texture). Bake at 350 degrees for 25-30 minutes.

Cinnamon apple cake: use 1 can of apple pie filling in place of the pineapple. Bake at 350 degrees for 35-40 minutes.

Fruit pie cake: use 1 can of your favorite fruit pie filling (blueberry, cherry, raspberry, peach, etc.) in place of the pineapple. Bake at 350 degrees for 30-40 minutes.

Notes: Holy cow. It doesn't get any easier than this. The only thing I would watch is the baking time. The many recipes I found had sometimes similar and sometimes dissimilar bake times. You want to bake it until the top is golden brown and a toothpick tested in the center of the cake comes out clean.

Saturday, January 19, 2013

It Can't Be True


 When considering titles for this blog post, the following options came to mind:
  1. Too Good To Be True
  2. No Way!
  3. I Can't Believe It
  4. Dangerous Knowledge
  5. Uh-Oh
  6. Using a Microwave?
  7. I'm In Trouble
The reason for this is because when you see this recipe, you will think to yourself, "No way. This is too good to be true. I can't believe it and I won't believe it."

Then, after you have tried this recipe, you will think to yourself, "Uh-oh. This is dangerous knowledge to have. I can't believe you can make this with a microwave. If I don't find someone to share this with, I am going to be in trouble."

The recipe I am going to share is for homemade microwave caramels. These are unbelievably just as good as the homemade caramels that you make using a pot and a candy thermometer. Only this time, no pot or candy thermometer is necessary.

The one and only time I tried to make caramel before this was a failure. I watched that candy thermometer like a hawk and I stuck to that recipe like glue (two cliches in one sentence. Are you proud of me?). It looked good...but then it hardened...and hardened. It wasn't delicious, soft, melt-in-your mouth caramel. It still turned out to be delicious (after all, it had cream, sugar, and butter in it...how can you go wrong?). However, it turned out to be hard candy. So, I ended up melting the whole thing in the microwave so that it was pourable again, and I poured it into sucker molds and made caramel suckers. Still lovely and deliciously edible, but not what I had been hoping for. I have been reluctant to try my hand at candy-making ever since (candy making definitely doesn't come naturally to me).

I think it is impossible to fail with this recipe, if you follow it. This caramel was soft, chewy, and delicious. Find someone that you need to give a thank you gift to, because otherwise you will gain 5 pounds eating this stuff in two or three days! I gave a third to a next-door neighbor, a third of it I sent to work with my husband to share with his co-workers, and we kept a third of it to eat at home. Delicious!


Microwave Caramels

Ingredients:

1/2 cup butter (1 stick)
1 cup white granulated sugar
1 cup light brown sugar
1 cup light corn syrup (such as Karo Syrup)
1 can (14 oz) sweetened condensed milk

Directions:

Spray an 8x8-inch glass baking dish with nonstick cooking spray.

Combine all ingredients in a large microwave-safe bowl. Cook in 2 minute increments, stirring after each, for a total of 12 minutes.

Pour caramel into 8x8-inch baking dish and allow to cool completely. Cut caramels into desired sized pieces and wrap each individual caramel in waxed paper.

Store in an airtight container, or in the refrigerator.

Source: I originally found the idea on Pinterest. It can be found on at least a dozen different blogs and websites. Here are the two sites that I got the recipe from (the first site includes a halved version of the recipe--I think it is the original source. The second site includes the recipe as shared above.) Halved version from Food.com found here. Recipe as shown above found here.

Notes: I kept a tally on a piece of paper as to how many minutes the caramel had been in the microwave because I knew that I would lose track of it otherwise. One of the versions of the recipe that I found off of Pinterest also included 1 teaspoon of vanilla. If you decide to add this, I would suggest adding it in while you are stirring the caramel mixture before you cook it for the last two minutes. I originally cut my caramel into 40 pieces (ten cuts across and four cuts down). However, I realized that because this made for pretty thick caramels that I could cut each of those pieces into three or four pieces each. So, I would say that, depending on how small or big you want your caramels to be, you could get anywhere from 40 large to 120 smaller pieces of caramel out of one batch.


Above: I started out with the plan to cut 40 pieces of caramel.


Above: After awhile, I started cutting the original pieces of caramel into thirds. They were still good-sized pieces of caramel. If I had started doing it that way, I would have ended up with 120 pieces total. If you want them in-between these two sizes, I would suggest cutting them into 80 pieces (7 cuts down the pan, 10 cuts across the pan).

Yum! I could have eaten them all! (Don't worry...I didn't eat them all...but I ate way more than I should have!)

Tuesday, January 1, 2013

Comfort Food: Baked Potatoes and Soup Combined


I think the title says it all. So, why don't I just go ahead and share the recipe?

Slow Cooker Baked Potato Soup

Ingredients:

5 pounds russet potatoes, washed but not peeled, diced into 1/2 inch cubes
1 medium to large yellow onion, diced
10 cloves of garlic, minced (or 5 teaspoons bottled minced garlic)
8 cups chicken broth or stock
16 oz. cream cheese, softened
1 tablespoon seasoned salt

Optional toppings:

Crumbled bacon
Shredded cheese
Green onions

Directions:

Add potatoes, onion, garlic, seasoning, and chicken stock to slow cooker.

Cook on high for 6 hours, or on low for 10 hours.

Add the softened cream cheese and puree soup with an immersion blender until the cheese is incorporated and about half the soup is blended. (If you don't have an immersion blender, you can puree the soup in batches in a blender. Just be careful not to fill the blender more than 3/4 full. If you fill a blender all the way full of hot liquid, it can explode when you blend it).

Stir well. Top with your choice of garnishes and enjoy.

Yields 10-12 servings

Source: I found this on Pinterest. It is from a site called "Mama Loves Food" and you can find it here.

Notes: My goodness, this was so good! I loved this. I probably blended about 3/4 of the soup (as opposed to half of it). I also only used 8 oz. of cream cheese. I felt it would be plenty, and for me, it was. This soup is so creamy and flavorful. Delicious!

This made a lot. It definitely serves 10-12 people, if not more.

2014 Update: I made this again this winter. Man, this is such a good soup recipe!


Above: I have made this many times, and each time I make it, it is to die for.

Just a Cute Idea...No Recipe Required


One of the handy things about Pinterest is often you can just find some cute ideas without actually needing a recipe to do it.

This is one of those cute ideas that we found for one of our Christmas-themed deserts.


Snowman Cupcakes

Ingredients:

24 white cupcakes
White frosting
Coarse sanding or decorating sugar
Mini chocolate chips

Orange wedge gummy candies

Directions:

Make cupcakes (either from scratch or using a cake mix according to package directions). After cupcakes have cooled, frost them with your favorite homemade or canned white frosting. Pour sanding or decorating sugar in a bowl. Dip frosted cupcakes into the sugar to coat. Decorate snowman faces with mini chocolate chips. Cut orange wedge gummy candies into smaller wedges for the snowman noses.

Source: Pinterest.

Notes: These were yummy as well as cute and the kids loved them.

Tuesday, July 17, 2012

Yes, I Have a Hispanic Heritage...


I have an interesting bloodline.  From my father's side, he's half Irish and half Swedish.  From my mother's side, she's half Hispanic and half Irish.  So, that makes me 1/2 Irish, 1/4 Swedish, and 1/4 Hispanic.  As for the Hispanic portion, from doing some family history work, it appears that half of that was directly from Spain and the other half is from Mexico.

Lately, I have been making a lot of Mexican food.  I don't know.  It just
sounded good!  But it got to the point that my husband started teasing me about being fully Hispanic now because of how much I was cooking it.  My reasons for making so much Mexican food have been three-fold.  First, it's so yummy and it's really easy to replicate good Mexican food at home.  Second, it's easy to keep Mexican ingredients on hand in the pantry.  Third, I was finding recipes that fit the ingredients that I had.  So, voila!  Lots of Mexican food.

So, let me share the latest installment of Mexican recipes!

Now, I'm off to make some Italian food for dinner to prove to my husband that I can make other kinds of food! 


Southwestern Chicken

Ingredients:

Nonstick cooking spray
1 cup cubed cooked chicken or turkey
1 (8-ounce) can whole kernel corn, drained
1 (4-ounce) can chopped green chili peppers, drained
2 beaten eggs
2/3 cup skim milk
3/4 cup all-purpose flour
1/4 teaspoon salt
1/8 teaspoon pepper
1/2 cup finely shredded cheddar cheese (2 ounces)
1/2 cup salsa
1/2 cup plain low-fat yogurt or sour cream

Directions:

Spray a 9-inch pie plate with nonstick cooking spray. 

In a medium mixing bowl, stir together chicken or turkey, corn, and green chili peppers.  Spread mixture in pie plate.

In the same bowl, stir together eggs and milk.  Beat in flour, salt, and pepper.  Pour over chicken mixture.

Bake, uncovered, in a 400 degree F. oven for 25-30 minutes or till top is set and lightly browned.  Sprinkle with cheese and bake for 2-3 minutes more or until cheese melts.

Serve with salsa and yogurt or sour cream.

Makes 4 servings.


Nutrition information: 333 calories, 22 g protein, 36 g carbohydrate, 11 g fat, 181 mg cholesterol, 1,019 mg sodium, 302 mg potassium.

Source: This recipe comes from the Better Homes and Gardens New Dieter's Cook Book: Low-Calorie Home Cooking.  ISBN 0-696-01974-4


Notes: This recipe is so great.  It's so easy, so pantry friendly, and so satisfying.  This is a recipe that my Mom and I discovered when I was a teenager.  Yum!  It is shown above without toppings.  Oh, and FYI, it holds its wedge shape better if you let it cool for a few minutes after getting it out of the oven.  All of the other pictures aren't really in a wedge shape because I couldn't wait that long!  I was hungry!


Chile-Colorado Burritos (original recipe)

Ingredients:

1 1/2-2 pounds stew meat or other beef cubed (shredded works too)
1 large can mild enchilada sauce (19 oz)
2 beef bouillon cubes
1/2 can refried beans (optional)
8 burrito size flour tortillas
1 cup shredded cheddar cheese

Directions:

Put beef, bouillon, and enchilada sauce into a crock pot and cook on low for 7-8 hours, or until meat is very tender.

When beef is done (very tender and flakes off when stirred), taste and add salt to taste, if desired.  Heat up refried beans in the microwave and set your oven to broil on high.

Place 1/2 cup of the meat (drained with a slotted spoon) and a spoonful or two of beans.  Roll into a burrito.  Place in a broil-proof baking dish or jelly roll pan.  Pour the remaining enchilada sauce from the crock pot over the burritos.  Sprinkle with some cheddar cheese.  Broil until cheese is bubbly, about 2-4 minutes.

Source: I found this recipe on Pinterest.  It is from a blog called "Food Pusher," and you can find the original post (with much prettier pictures than mine) here.

Notes: The original author notes that tortilla chips are a fantastic way to make sure none of the sauce goes to waste!  It's a great way to dip into the extra sauce and cheese.


Above: before pouring the remaining sauce/meat mixture on top.

Chile-Colorado Burritos (my version)

Ingredients:

Mexican-Style Shredded Beef (recipe originally found here and posted below for your convenience)
Enchilada sauce (recipe found below. Canned can also be used)
1 can fat-free refried beans
8 burrito-size tortillas
Shredded cheese

Directions:

Make enchilada sauce (recipe below).

Mix leftover shredded beef into the enchilada sauce.

Preheat oven (you can either broil the enchiladas until the cheese is melted, or you can bake at 350 degrees F. until bubbly and the cheese is melted--about 25-30 minutes).

Spread 1-2 tablespoons refried beans onto each tortilla.  Top with about 1/4 cup beef (served with slotted spoon to drain some of the liquid).  Roll into a burrito.

Place in broil-safe baking dish or foil-lined jelly roll pan.  Repeat until all eight burritos have been rolled up.

Top with remaining beef/enchilada sauce mixture.  Top with shredded cheese and broil or bake until bubbly and cheese is melted.

Source: See original recipe above.  Again, this came from a blog called "Food Pusher."


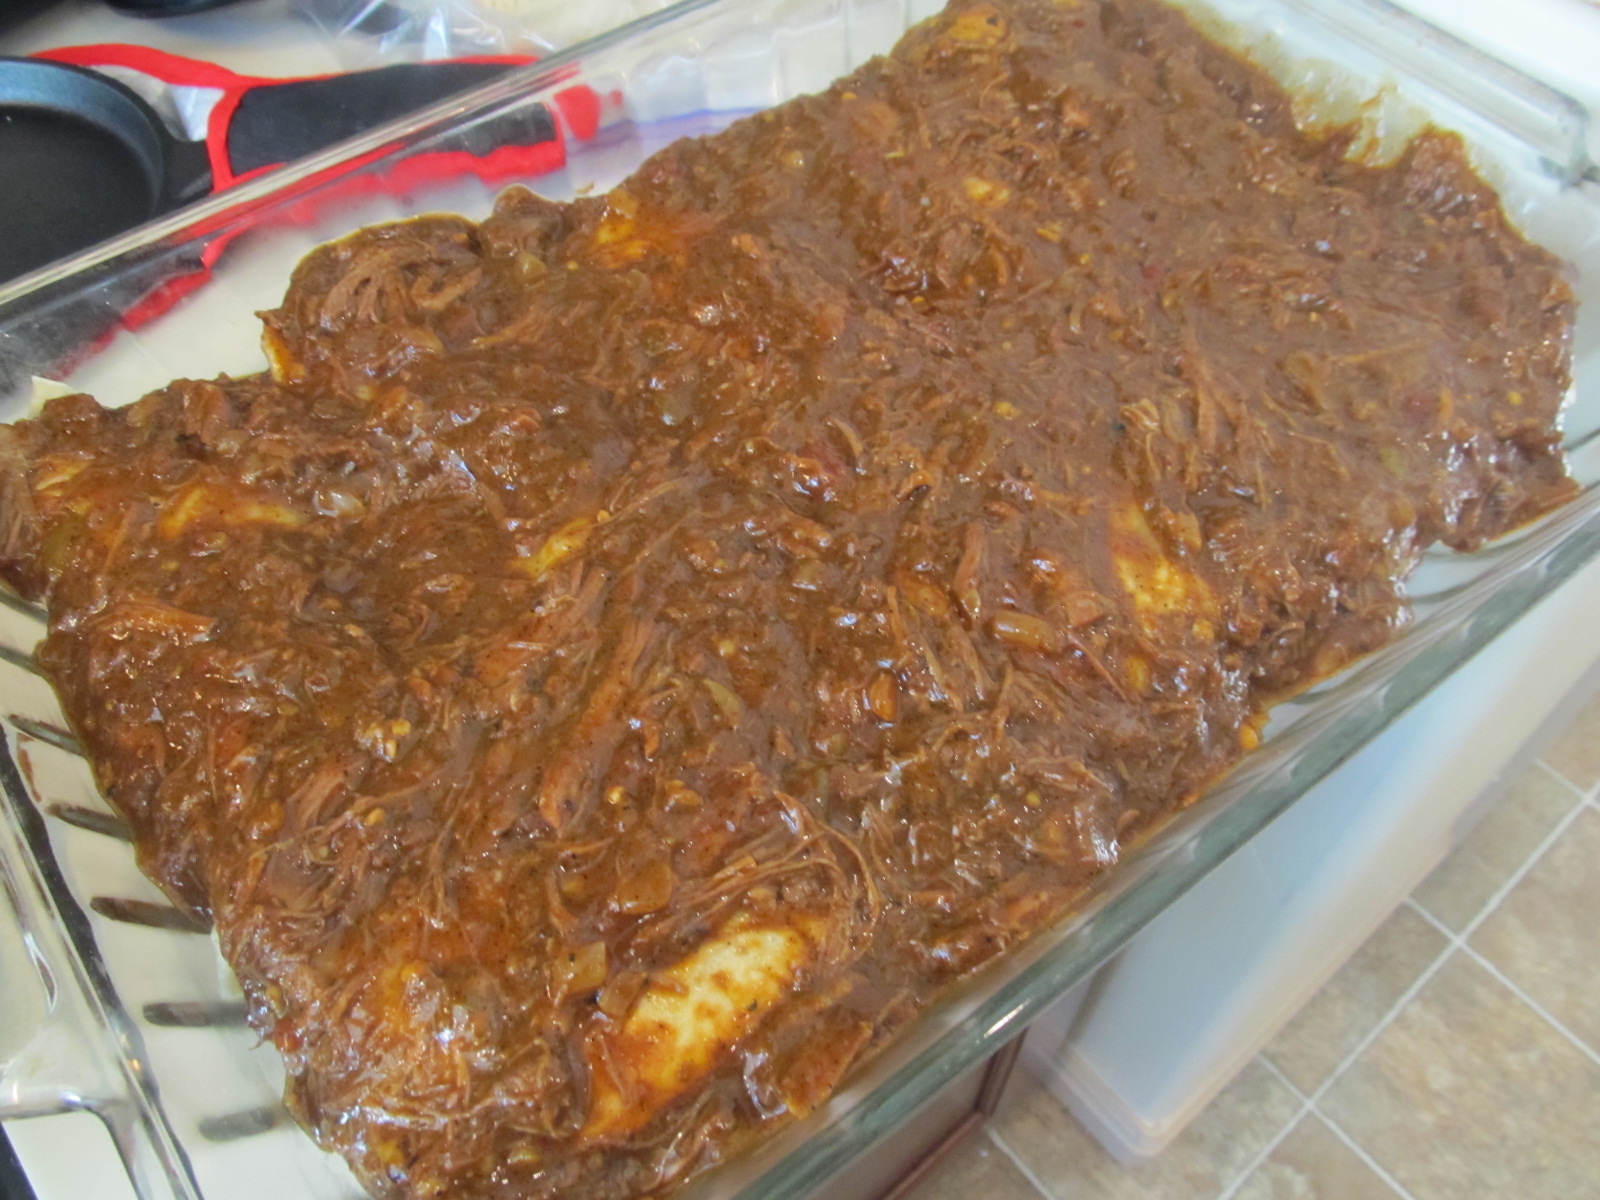
Above: after pouring the remaining sauce/meat mixture on top and before adding the cheese.

Notes: I made the changes I did based on the ingredients I had.  I made a homemade enchilada sauce because I didn't have a can of enchilada sauce, yet I had all of the ingredients to make enchilada sauce from scratch. I used Mexican-Style Shredded Beef because I had a TON leftover from a family gathering.

But let me tell you, holy cannoli these were good!  The enchilada sauce I made tasted almost like a mole, but it added such a smoky richness.  I will be making these enchiladas each and every time I have leftover Mexican-Style Shredded Beef, let me tell you!  Last time, I used the beef to make quesadillas, but never again!  Burritos from here on out!


Above: After broiling.  My broiler is slower than mud, so I got a little too comfortable and accidentally broiled it longer than I would have liked.  I would have liked the cheese to be more melty and less browned, but it still tasted great.

Mexican-Style Shredded Beef

Ingredients:

1 boneless beef chuck shoulder roast (about 3 pounds)
1 tablespoon ground cumin
1 tablespoon ground coriander
1 tablespoon chili powder
1 teaspoon salt
1/2 teaspoon ground red pepper
1 cup salsa or picante sauce
2 tablespoons water
1 tablespoon cornstarch

Directions:

Place roast in slow cooker.  Combine cumin, coriander, chili powder, salt, and red pepper in a small bowl.  Place beef in slow cooker.  Pour spices over beef and top with salsa.

Cover; cook on low 8-10 hours or until meat is tender.

Remove beef from slow cooker.  Trim and discard excess fat from beef.  Shred meat with two forks.

Let cooking liquid stand 5 minutes to allow fat to rise.  Skim off fat.  Blend water and cornstarch until smooth.  Wish into liquid in slow cooker.  Cook, uncovered, 15 minutes on High until thickened.  Return beef to slow cooker.  Cover; cook 15-30 minutes or until hot.  Adjust seasonings.

Serve as a meat filling for tacos, fajitas, enchiladas, quesadillas, or burritos.  Leftover beef may be refrigerated up to 3 days or frozen up to 3 monhts.

Source: This recipe came from a cookbook called "Simple 1-2-3 One Dish" ISBN-13: 978-1-4127-2323-7.


Above: Oooh, this was tasty.

Enchilada Sauce

Ingredients:

1 tablespoon vegetable oil
1 cup diced onion
3 tablespoons chopped garlic
1 teaspoon dried oregano
1 teaspoon ground cumin
1/4 teaspoon ground cinnamon
3 tablespoons all-purpose flour
5 tablespoons hot chili powder
4 1/2 cups chicken broth
1/2 (1 ounce) square semisweet chocolate

Directions:

Heat oil in a large saucepan over medium-high heat.  Saute onion until tender.  Stir in garlic, oregano, cumin, and cinnamon; saute for a few minutes.

Stir in flour and chili powder, stirring until evenly coated.  Slowly whisk in chicken broth; reduce until sauce reaches desired consistency.  Stir in chocolate until melted and well blended.

Source: Allrecipes.com recipe submitted by Anna Marie.  Found here.

Notes: I added 3 tablespoons of sugar because I worried that it would be too spicy for my little boys.  It tasted fantastic.  As I mentioned before, it tasted more like a mole than an enchilada sauce, but it worked beautifully for these burritos.  It was really good.

No Recipe Required


Sometimes it's just nice to throw together a meal without having to hunt down the recipe.

Here are a few of my favorite "no recipe required" meals.  They definitely come in handy for me and I hope they will come in handy for you too.

I would love to hear some of your favorite recipe-free go-to meals too!


Slow Cooker Ranch Pork Chops with Mashed Potatoes

Ingredients:

4 pork chops
1 packet ranch dressing mix
1 can condensed cream of chicken soup
Instant mashed potatoes or your favorite homemade mashed potatoes

Directions:

Place pork chops in a single layer in your slow cooker.  Sprinkle ranch dressing packet evenly over your pork chops.  Top each pork chop with the cream of chicken soup (1/4 can per pork chop).

Cook on low heat for 6-8 hours.

Serve pork chops and gravy with mashed potatoes.

Source: I saw an idea similar to this one on Pinterest.  You can find the recipe I originally found here.  It's from a blog called "Chef in Training."  Apparently, she got that recipe from another blog called "Real Mom Kitchen", which you can find here.  So, share and share alike!

Notes: I was looking for a meal to make that consisted of things I already had in the house and with the exception of the potatoes from the original recipe, I had everything.  So, rather than making the garlic-Parmesan potatoes that the original recipe called for, I used two packages of Idahoan instant mashed potatoes.  It tasted great and it was a lot easier than making mashed potatoes from scratch!  Though her mashed potato recipe looks fantastic and I'll need to try it.


Kid Friendly Pizza Bites

Ingredients:

1 can refrigerated biscuits (8 biscuits--16.3 oz)
1/2 cup pizza sauce (from a jar)
1/2 cup mozzarella cheese
Toppings, to taste (such as pepperoni, olives, Canadian bacon, pineapple, cooked and crumbled sausage, etc.)
Additional pizza sauce for dipping, if desired

Directions:

Preheat oven to 350 degrees F.

Cut each biscuit into quarters.  In a bowl, mix biscuits, pizza sauce, and toppings until the sauce has evenly coated the biscuits.

Pour biscuit/pizza sauce mixture into a 9-inch pie plate.

Bake for 20 minutes.  Top with mozzarella cheese and bake for another 5 minutes, or until the biscuits are done and slightly browned and the mozzarella has melted.

Source: I found the idea on the Pillsbury website here.

Notes: My boys love pizza, so I thought this would be a nice way to give them what they like and yet still mix it up.  They loved it.  My oldest son loves to dip his pizza bites in pizza sauce and/or ranch dressing.


Breakfast Burritos

Ingredients:

Tortillas
Scrambled eggs (salted and peppered to taste)
Shredded cheese
Salsa
Bacon

Directions:

Top each tortilla with scrambled eggs, shredded cheese, salsa, and bacon.  Roll up like a burrito (or eat it like a taco, if you prefer).

Source: I don't know who came up with this idea, but bless their heart!  

Notes: This makes a super easy, quick, and fulfilling breakfast, lunch, or dinner!


Biscuits and Gravy

Ingredients:

1 can refrigerated biscuits (8 biscuits--16.3 oz)
1 packet white country gravy mix
Sausage, optional (patties, links, or cooked sausage crumbles)

Directions:

Bake biscuits according to package directions.

Prepare gravy according to package directions.

Serve biscuits, halved, and topped with country gravy.  You can either serve the sausage on the side (my preference), or you can mix chopped or crumbled cooked sausage into the gravy.

Source: I don't know where this one came from, so let's just say...Denny's!  Ha ha!

Notes: This is one of my favorite breakfasts.  And it's hearty enough to serve for dinner too.  I prefer not to put the sausage into the gravy because the gravy is surprisingly low-calorie by itself.  So, then I can slather my biscuits in gravy without any guilt and still enjoy my sausage on the side.


Baked Potato Bar

Ingredients:

Large baking potatoes
Favorite toppings (butter, sour cream, shredded cheese, salt, pepper, crumbled bacon, chili, broccoli and cheese, etc.)

Directions:

Preheat oven to 350 degrees F.

Wash and scrub baking potatoes.  Pierce with a fork 3-4 times.  Wrap in aluminum foil, if desired.

Bake potatoes for 1 to 2 1/2 hours (depends on the size of your potatoes).  Check potatoes for doneness by piercing with a fork.  I would plan on at least 2 hours for large potatoes.  If they get done early, you can always keep them warm in a cooler or roasting pan.  But it's better to have them done early than underdone when it's time to eat!

Top potatoes with your favorite toppings.

Source: Just common sense, I guess!  I'll bet people have been doing this for centuries.


Notes: My ideal baked potato has butter, sour cream, salt, pepper, and shredded cheese mixed and mashed together while it is still piping hot.  Yum!

What is YOUR favorite way to eat a baked potato?  Any favorite toppings that I forgot to mention?


Stir Fry

Ingredients:

Chicken, beef, or pork, sliced thinly
Favorite fresh veggies (such as mushrooms, bell peppers, broccoli, water chestnuts, bean sprouts, snap peas, red onions, carrots, etc.)
Or, frozen stir fry vegetable mix
Bottled stir fry sauce (this time, I used House of Tsang General Tsao Sauce...yum!)
Rice

Directions:

Cook meat in a little oil until cooked through (or to desired doneness for beef). Remove meat and place on a plate.  Cover to keep warm.

Cook vegetables until crisp-tender.

Return meat to pan and add desired amount of stir fry sauce. Serve over brown or white rice.

Source: Again, I'm not sure who came up with this, but bless their hearts!

Notes: This is one of those great dinners to throw together than can be done so easily with any mix of meat and veggies that you have on hand.  It's fast and easy, but it's also a nice change of pace from the norm.


Navajo Tacos

Ingredients:

Vegetable oil for frying
Frozen roll dough (2 rolls per person), thawed, and slightly risen
Canned chili or ground beef (seasoned with favorite spices or taco seasoning mix)
Refried beans (or black or pinto beans)
Shredded cheese
Shredded lettuce
Diced tomato
Salsa
Sour cream
Additional favorite toppings: sliced black olives, sliced pickled jalapeno peppers, ranch dressing (or cilantro-lime dressing, salsa-ranch dressing, etc.), cilantro, etc.

Directions:

Heat oil in a deep frying pan or skillet until it reaches 375 degrees F.

Combine two rolls and flatten into a 6-inch circle.  Fry in oil about 30 seconds per side, or until golden brown.  Drain on paper towels.  Repeat until you have the desired amount of fry bread.

Source: I don't know when our family started making this, but Rhodes Bread was probably an influence.  You can find their recipe here.

Notes: I like to go the easy route and top my Navajo tacos with refried beans and chili rather than making seasoned ground beef.  But that's just me!  Do whatever you like!

BLT Sandwiches

Ingredients:

Bread
Bacon (2 slices per person, at least)
Iceberg lettuce
Sliced tomatoes
Mayonnaise
Mustard
Salt and pepper, if desired

Directions:

Cook bacon.  My preferred method is to bake the bacon (because when I make it on the stove-top I always get grease burns!).  You can bake the bacon at 400 degrees F. for 15-20 minutes or until desired doneness or at 350 degrees F for 30-35 minutes (if you want more in-dept directions, check out this fantastic recipe here.).

Toast bread and top with mayonnaise, mustard, salt, and pepper, if desired.

Place bacon, lettuce, and tomato on top of the first slice of bread and top with the remaining slice of bread. Enjoy!

Source: Let's face it, a lot of these "no recipe required" meals are old classics without a known source or origin.  Here's what Wikipedia has to say about it: The BLT evolved from the tea sandwiches served before 1900 at a similar time to the club sandwich, although it is unclear when the name BLT became the norm.