Showing posts with label Sources: Ward Cookbooks. Show all posts

Thursday, April 27, 2017

Easter Leftovers Part 4


We've posted this one twice before, but we made again this Easter and it is just such a good one, it is deserving of being included in this year's Easter leftovers.


Spaghetti Salad

Ingredients:

1 small package spaghetti ( 8 - 10 oz.)
4 medium tomatoes, diced
2 medium cucumbers, diced
Cubed spam or ham as desired
1 red onion, diced
1 small bottle Italian dressing
1/2 bottle Salad Supreme (found in the spice section)

Directions:

Cook spaghetti according to directions. (You may or may not break into pieces before cooking.) Drain. Rinse.  Add other ingredients and let set 6 to 8 hours in refrigerator before serving.

Originally submitted in our ward cookbook by Naomi Telford.

Notes:  Salad supreme is hard to find.  It's not a must.  I've made the salad with or without and it works great either way.  I don't think I have ever used spam, but it would work great.  Now Barelli brand spaghetti has cut spaghetti in a box.  This works great.  You don't need to break up the spaghetti, but the salad is harder to eat.

I can't stress enough how dependable this salad is for pot luck occasions.

We have posted this awhile back. You can find our original posts here and here.

Sunday, June 29, 2014

Very Similar


These two pork recipes taste very similar, but the preparation method is a little different. Either way, it makes for good eating!


Barbecue Spareribs

Ingredients:

2 tbsp. liquid smoke
2 tsp. salt
1 tsp. dry mustard
1 1/2 cups brown sugar
3/4 cup chili sauce
1/2 tsp. Accent

4 lbs. country style pork spareribs

Directions:

Mix together first six ingredients (liquid smoke through Accent).

Marinate ribs in sauce overnight or at least 2 hours.

Cook in slow oven at 275 degrees F for 2 1/2 hours or until done. We like to use a Dutch oven, but any oven friendly baking dish/pot will work.

Just before serving, remove to another pan and broil 3 minutes to brown, if desired.

Source: This came from an old ward cookbook and was submitted by Jeri Burton.

Notes: This is a great recipe. The pork is tender and flavorful. You can even make it in a Dutch oven over a camp fire.


Slow and Easy BBQ Ribs

Ingredients:

2 pounds boneless country-style pork ribs
1 can (5 ounces) unsweetened pineapple juice
1 medium onion, thinly sliced
1 garlic clove, minced
2/3 cup barbecue sauce
1/3 cup plum jam

Directions:

In a large skillet coated with cooking spray, brown ribs on all sides. Transfer to a 3-qt. slow cooker; top with pineapple juice, onion, and garlic. Cover and cook on low for 5-6 hours or until meat is tender.

Remove ribs; drain and discard cooking juices and onion. Return ribs to the slow cooker. Combine barbecue sauce and jam; pour over ribs. Cover and cook on high for 30 minutes.

Yield: 4 servings.

Source: Taste of Home. You can find the recipe here.

Tuesday, December 31, 2013

Is a 33 Year Old Recipe Retro?

One of the reasons that we started this blog was so we would have a central place for those recipes that we had trouble finding.  Finding a recipe doesn't sound that hard unless you saw how many cookbooks I have, totes full of printed recipes, papers floating around, etc.  Well, this recipe is a real keeper.  It was in a church (ward) cookbook that I bought at least 33 years ago while I lived in West Valley.

The whole process of ward/church cookbooks may fall by the wayside with today's technology and that will be a real shame.  There was something wonderful about having a whole book of recipes that were tried and true by your neighbors.  You learned very quickly who were the best cooks and who...shall we say...were a little challenged.

Well, this recipe is a real go-to recipe.  I have used it a few times when it's my turn to take dinner at the museum where I volunteer as a docent.  It has such a fresh taste and is always a favorite.  I took it once to a company pot luck and the president of the company went back for thirds, which was unheard of!!


SPAGHETTI SALAD

Ingredients:

1 small package spaghetti ( 8 - 10 oz.)
4 medium tomatoes, diced
2 medium cucumbers, diced
cubed spam or ham as desired
1 red onion, diced
1 small bottle Italian dressing
1/2 bottle Salad Supreme (found in the spice section)

Directions:

Cook spaghetti according to directions. (You may or may not break into pieces before cooking.)  Drain. Rinse.  Add other ingredients and let set 6 to 8 hours in refrigerator before serving.

Originally submitted by Naomi Telford.

Cook's notes:  Salad supreme is hard to find.  It's not a must.  I've made the salad with or without and it works great either way.  I don't think I have ever used spam, but it would work great.  Now Barelli brand spaghetti has cut spaghetti in a box.  This works great.  You don't need to break up the spaghetti, but the salad is harder to eat.

I can't stress enough how dependable this salad is for pot luck occasions.

We have posted this awhile back. You can find our original post here.

Thursday, May 12, 2011

You aren't a real mom until you've mastered the art of cookie making!


There is a funny episode of Friends where Monica is trying to make the perfect chocolate chip cookie so that one day she can be the mom who makes the worlds greatest cookie. Well, being a mom is a serious job and making an excellent chocolate chip cookie is definitely part of the gig. Lucky for me, my mom DID make the worlds greatest cookies! Chocolate Chip and Snickerdoodle! So I don't have to painstakingly find the perfect recipe like Monica. I inherited them!

First up: Snickerdoodle, pictured above. These are hands down the best snickerdoodles out there! For some reason or other, it seemed that my mom was the only one who could make them just right. My sister and I tried on occasion and the cookies would turn too flat or crispy. For this reason we believed my mother was leaving out an ingredient on the recipe intentionally so that she alone would be the master cookie maker. Well I tried my hand at them again and I mastered it. I'm not really sure what the trick was. They just turned out! I brought them to an activity for church for the 8-12 year old girls. On my way out from the activity I noticed one of the girls had taken a bite of the cookie an then thrown the rest away! This to me was beyond disturbing. I honestly was shocked. And betrayed. And if I wasn't the good person that I was I would have retrieved the cookie and made the little girl eat it. I don't know what is wrong with that kid. Anyway... I assure you that is not the typical reaction when taking one bite out of these cookies.


Giant Snickerdoodles

Ingredients:

1 cup butter or margarine, softened
1 ½ cup plus 2 Tbsp. sugar
2 eggs
2 ¾ cup flour
2 tsp. cream of tartar
1 tsp. baking soda
¼ tsp. salt
2 tsp. cinnamon

Directions:

In large mixing bowl with mixer at medium speed, cream butter, 1 ½ cups sugar and eggs until light and fluffy, scraping sides of bowl occasionally. In a separate bowl, combine flour, cream of tartar, baking soda and salt. Add to creamed mixture until well blended. Refrigerate for 30 minutes.

Preheat oven to 375 degrees. Combine remaining 2 tablespoons sugar and cinnamon in a flat open bowl. Shape dough into 2 inch balls and roll in cinnamon-sugar. Place 3 inches apart on ungreased cookie sheets. Bake 12-15 minutes until golden brown. Snickerdoodles will puff up at first, then flatten out to giant size during baking. Remove from cookie sheet and cool on wire rack.

Makes 2 dozen.


Next up: The Beloved Chocolate Chip Cookie. The bottom line is that the Chocolate Chip Cookie is like the Holy Grail of all cookies. It is everything a cookie ought to be. Crispy, chewy, doughy and of course sprinkled with rich creamy chocolate morsels. Yum! I don't care what anyone else says, Chocolate Chip Cookies really are THE cookie to master. Especially for moms. What kid could refuse? I made these as a young lass in my 4-H years and I won a blue ribbon at the fair. So here you have it, AWARD winning Chocolate Chip Cookies!


Chocolate Chip Cookies

Ingredients:

1 lb. butter or margarine
1 ½ cup white sugar
2 cups brown sugar
3 eggs
6 cups flour
1 ½ tsp. salt
1 ½ tsp. baking soda
2 tsp. vanilla
2 bags (4 cups) chocolate chips
Walnuts, if desired

Directions:

Cream together butter, white sugar and brown sugar.

Then add eggs, flour, salt, baking soda and vanilla. Once incorporated, add chocolate chips and walnuts.  

Mix well. Put on ungreased cookie sheet with ice cream scoop. Bake at 350 degrees for 8-10 minutes.

Tuesday, February 8, 2011

Comfort Food Side Dishes

I'm not going to lie...when it comes to weeknight meals, side dishes are usually an afterthought for me. Some nights, it's enough work to get the main dish on the table...let alone worrying about throwing together some elaborate side dishes. My weeknight side dishes are usually very, very simple (consisting of staples like the following: salad, some kind of quick bread, and simple veggies--frozen, fresh, or canned).

But the side dish should not be overlooked. Sometimes the side dish ends up outshining the main dish! I'm going to share some very old family favorite side dishes (that fall into the comfort food category).

The first few recipes are pretty basic to LDS culture. In fact, I'm going to share two versions of the "Funeral Potatoes" since it's so common (a rich version and a lightened up version). Why are they called "Funeral Potatoes," you ask? I think it has to do with the fact that they are so easy to make, plus you can make them ahead of time and bake them just before they are needed. Because of those two factors, they tend to make an appearance at a lot of luncheons following LDS funerals. Or maybe it's just because when it comes to comfort food, they're to die for! (Please excuse the pun).

I'm sharing quite a few potato side dishes because, for me at least, potatoes are the ultimate comfort food. I LOVE them! I hope you like these recipes too.


Baked Beans

Ingredients:

2 (29 oz) cans pork and beans
2 chopped onions
1 diced green pepper
1 lb. bacon, cooked and crumbled
1 cup ketchup
3/4 cup brown sugar
2 tbsp. Worcestershire sauce
Pepper, to taste

Directions:

Combine all ingredients well. Can be mixed ahead and stored in the refrigerator overnight. Bake covered for 3 hours at 300 degrees. Top with additional bacon, if desired.

8-10 servings.

Source: My Mom has been making this for years. I'm not sure where she got it from.

Notes: These baked beans are the perfect balance of sweet and savory.


Cottage Cheese Jello Salad

Ingredients:

1 (16 oz) container cottage cheese
1 (8 oz) can crushed pineapple, drained
1 (3 oz) pkg. Jello, any flavor
1 (8 oz) container Cool Whip

Directions:

Mix pineapple and Jello. Add cottage cheese and Cool Whip. Chill until set. Serve chilled.

Source: This is one of those LDS culture recipes that so many people make. I'm not sure where the original recipe came from.

Notes: For those of you who haven't had this, I know it might sound weird to combine cottage cheese, pineapple, Jello, and Cool Whip...but trust me, this stuff is addicting. I've also mentioned that I really don't like Jello in its jiggly form, but I love the flavor that it imparts to things when it doesn't become gelatin! The salad above is orange flavored with mandarin orange segments placed on top just for the heck of it.


Au Gratin Potatoes (aka Funeral Potatoes)

Ingredients:

6 medium potatoes (you can also use the equivalent amount of frozen, thawed, hash browns to speed up and simplify things)
1/4 cup butter
1 can cream of chicken soup
1 cup sour cream
1/3 cup chopped green onions (you can also use white or yellow onions, if you prefer)
1 1/2 cups grated sharp cheddar cheese
1/2 cup crushed cornflakes or potato chips
2 tbsp melted butter

Directions:

Bake or boil potatoes, then peel and shred or grate them.

Heat 1/4 cup butter with soup. Add sour cream, onion, and cheese. Mix well. Pour into 9x13 pan or casserole dish. Sprinkle with cornflake/potato chip and butter mixture. Bake at 350 degrees for 45 minutes.

Source: Probably just about every ward cookbook that has ever been printed.

  
Lightened Cheesy Potatoes (Funeral Potatoes)

Ingredients:

1 (10 3/4 oz) can reduced-fat, reduced-sodium condensed cream of chicken soup
1 cup shredded reduced-fat sharp cheddar cheese (4 oz)
1/2 cup fat-free milk
1/2 cup light dairy sour cream
1/3 cup finely chopped onion (green, white, or yellow), or 2 tablespoons dried minced onion
1/2 teaspoon ground black pepper
1 (30 or 32 oz) package frozen shredded or diced hash brown potatoes, thawed
1/2 cup crushed cornflakes or potato chips

Directions:

Preheat oven to 350 degrees. Lightly grease a 2 quart rectangular baking dish; set aside. In an extra-large bowl, combine soup, cheese, milk, and sour cream, onion, and pepper. Stir in potatoes. Spread mixture evenly in prepared baking dish.

Cover and bake for 45 minutes; stir potatoes. Sprinkle with cornflakes/potato chips. Bake uncovered, for 20-25 minutes more or until heated through and bubbly. Let stand for 10 minutes before serving.

12 servings.

Nutrition Information: 129 calories, 3 g fat, 11 mg cholesterol, 236 mg sodium, 20 g carbohydrates, 1 g fiber.

Source: This lightened version came as a loose mini booklet with one of my Taste of Home magazines.

Notes: I like that it adds the bit about allowing it to stand 10 minutes before serving because these potatoes get hotter than the blazes of the sun! Watch out or you could seriously burn your tongue.


Garlic Mashed Potatoes with Cheese

Ingredients:

6 large potatoes, cleaned and quartered (not peeled)
2 large cloves garlic, quartered
3 tbsp butter
1 tsp salt
1/2 cup half and half
Cheddar cheese, shredded

Directions:

Put potatoes and garlic in a large pot of water. Bring to a boil and cook for 40 minutes, or until potatoes are tender. When potatoes are done, melt butter in a separate saucepan, then add half & half. Warm for 2-3 minutes on low. Drain potatoes and garlic. Mash together, then add butter, salt, and half & half. Mash to desired consistency (smoothly mashed or lumpily smashed...it's up to you). Top with shredded Cheddar cheese.

Serves 6.

Source: Again, with some of these recipes that my Mom has been making for years, I have no idea where she got this from.


Notes: We now usually double or triple this since our family has grown.


Above: Add a little bacon too, if you like!


Mr. Wendel's Potato Salad

Ingredients:

7 lbs. potatoes
1 jar Best Foods Mayonnaise (regular size--larger jar)
1/3 cup red wine vinegar
1 1/2 tbsp prepared yellow mustard
1 1/2 tbsp dry mustard
1/ tsp (heaping) pepper
2 tsp salt
3-4 medium dill pickles, diced
1 medium onion, chopped very fine
Large handful of fresh parsley, minced
12 eggs, hard boiled, peeled, and quartered

Directions:

Boil potatoes in a large pot of salted water with the skins on. The skins will peel off easily after they have cooked (so you can save yourself the step of having to peel the potatoes prior to cooking them).

Slice the potatoes lengthwise only (they break up further when you stir all of the ingredients together). Then stir in mayonnaise, red wine vinegar, prepared mustard, dry mustard, pepper, salt, diced dill pickles, chopped onion, and minced parsley. Mix well.

Once everything else is mixed, stir in the eggs (adding them too early will break them apart too much). Chill until ready to serve.

Source: I had the most awesome choir teacher (Mr. Norman Wendel, as evidenced by the title of this recipe) when I was in high school. I was always very self-conscious about my singing voice, but he gave me the confidence to get out there and perform. Honestly, if it weren't for him, I don't think I would have had the guts to audition for the music program at BYU. Largely because of him, I graduated as a Vocal Pedagogy major. I wish all music teachers could be like him. He buoyed me up and taught me so much about music (technical music theory as well as how to just plain love and enjoy music). I tried out for his Madrigal group while I was in high school and got put on the party planning committee. For one of our parties, we had a potluck and Mr. Wendel brought this fantastic potato salad (I made sukiyaki...a recipe to share another day!). I craved this potato salad for years afterward and begged for the recipe. The problem was that he was one of those cooks who creates a recipe in their mind, but never writes it down. Luckily for me, his daughter (who I was in Madrigals with) finally pinned him down and watched him make it while she wrote down the methods, measurements, and equivalents for this recipe. She then shared this recipe with me. Yum! I'm sooooo grateful!

Notes: This is definitely a savory potato salad with some bite to it. I love the addition of dill pickles and hard boiled eggs. If you like a wussy, bland, or sweet tasting potato salad, this one isn't for you. Coincidentally, this potato salad is very similar to the potato salad that my in-laws have been making for years too (a recipe that THEY made up too. Though I'm not sure if they wrote theirs down or not). Destiny or coincidence? You decide!

Also, the picture I took doesn't do it justice.  This is a fantastic potato salad.  Here's what I did this time around: I made the whole batch, but I divided it into two bowls.  One bowl had pickles and eggs, the other bowl didn't.  All of the other ingredients stayed the same.

Tuesday, February 1, 2011

Sweet Concoctions Made with Rice Cereal


There are certain treats that just make you feel like a kid again (in the best way, of course). So, when you add melted marshmallows to rice cereal, it just takes you back to your childhood.

We celebrated my sister-in-law's birthday this past Sunday and in lieu of cake, she opted for Scotcheroos instead. Scotcheroos are basically rice crispy treats with peanut butter, chocolate, butterscotch chips, and other sorts of yummy things thrown in (with corn syrup and sugar instead of marshmallows).

So, I thought I would share the recipe for Scotcheroos in addition to the basic recipe for rice crispy treats (along with some fun variations, of course!). Oh, and if you can think of any additional variations for rice crispy treats, I would love to hear them!

Have fun being a kid again!

Scotcheroos

Ingredients:

1 cup white sugar
1 cup light corn syrup
1 cup peanut butter
6 cups crispy rice cereal
1 cup semisweet chocolate chips (we used milk chocolate chips)
1 cup butterscotch chips

Directions:

Butter a 9x13 inch pan.

In a saucepan over medium heat, combine the sugar and corn syrup, and bring to a rolling boil. Remove from heat, and stir in peanut butter. Mix in the rice cereal until evenly coated. Press the mixture into the prepared pan.

In a glass bowl, melt the chocolate and butterscotch chips in the microwave on medium; stirring occasionally until smooth and well blended. Spread over the top of the bars. Chill until chocolate is set. Remove from the refrigerator when set. Cut into bars and serve at room temperature.

Source: I got this from my mom. The recipe is basically floating around in a number of places. I'm not sure what the original source is.


Traditional Rice Crispy Treats and Variations

Ingredients:

1/4 cup margarine or butter
1 pkg. 10 oz regular or 4 cups miniature marshmallows
5 cups rice cereal (such as Rice Krispies Cereal)

Directions:

Melt margarine/butter in large saucepan over low heat. Add marshmallows and stir until completely melted. Continue to cook for 3 minutes longer over low heat, stirring constantly. Remove from heat.

Add rice cereal. Stir until well coated.

Using a buttered spatula or waxed paper (you can also do this with buttered hands), press mixture into 9x13 inch buttered pan. Allow to cool. Cut into squares.

Variations:

Caramel Rice Crispy Treats:

Melt 24 caramel candies with 1 tsp water and the margarine/butter. Add marshmallows and combine.

Chocolate Rice Crispy Treats:
Melt 2 oz unsweetened chocolate with the marshmallows.

Citrus Rice Crispy Treats:
Stir 1 tablespoon grated lemon, lime, grapefruit, or orange peel into melted marshmallows.

Jam Rice Crispy Treats:
Stir ¼ cup jam (any flavor) into melted marshmallows.

Peanut Rice Crispy Treats:
Add 1 cup salted peanuts to the marshmallows when mixing with the Rice Krispies cereal. You can use other nuts as well: for example, almonds or cashews.

Peanut Butter Rice Crispy Treats:
Stir in ¼ cup peanut butter with melted marshmallows.


Spice Rice Crispy Treats:
Add ½ tsp cinnamon into marshmallow mixture

Tropical Rice Crispy Treats:
Add 1 cup shredded coconut and ½ cup walnuts to the marshmallows when mixing with the Rice Krispies squares. Other additions could include: dried pineapple, dried mango, dried papaya, dried banana, etc.

Tutti Frutti Rice Crispy Treats:
Add ½ cup chopped candied cherries and ½ cup chopped pecans to the marshmallows when mixing with the Rice Krispies squares. If you don't like candied cherries, or want to try something different, any favorite dried fruit will work (such as dried cranberries, chopped dried apricots, etc.).

Christmas Rice Crispy Treats:
Add ¼ cup chopped red candied cherries and ¼ cup green candied cherries and ½ cup chopped pecans to the marshmallows when mixing with the Rice Krispies squares. You could also use red and green gumdrops, or other red and green candies.

Confetti Rice Crispy Treats:
Sprinkle rice crispy treats with sprinkle cake decorations.

Marble Chip Rice Crispy Treats:
Add 1 pkg (6 oz) semi-sweet chocolate chips, butterscotch, or 1 cup peanut butter chips with cereal/marshmallow mixture.

Cocoa Rice Crispy Treats:
Stir 1/3 cup unsweetened cocoa into marshmallow/cereal mixture.

Peppermint Rice Crispy Treats:
Add ½ cup crushed peppermint stick candy with marshmallow/cereal mixture. You can also use other hard candies with this variation.

Frosted Rice Crispy Treats:
You can drizzle rice crispy treats with melted milk chocolate, white chocolate, semi-sweet chocolate, butterscotch, or peanut butter chips. You can do this sparingly with drizzled designs, or you can completely coat the top of the rice crispy treats.

Rice Crispy Treats Cut Outs:
Use cookie cutters to cut the rice crispy treats into any shape you like. That way, you can make holiday-themed rice crispy treats. Snowmen or Christmas trees for Christmas, hearts for Valentine's Day, ghosts, pumpkins, or bats for Halloween, eggs for Easter, etc. Then, you can get creative with sprinkles and frosting to further decorate your rice crispy treats. This would be a fun activity for the kids to participate in too.

Finally...

Crispy Treats Using Any Kind of Cereal You Want:
You can use the recipe above and replace the puffed rice cereal with any kind of cereal you want. I found this particularly helpful when I needed to use up some leftover Halloween cereal. My boys loved it!


Above: Boo Berry Treats anyone?

Friday, January 14, 2011

Summer Soup


Well, I thought I'd continue my trend of posting seasonally inappropriate recipes!

Fall and winter are the perfect time for a hot bowl of soup. But what kind of soup can you enjoy in the summer when it is sweltering outside? Gazpacho, of course!

I don't mind winter...until about mid-January...and then I long for it to be over. This year hasn't been quite so bad because I have a sweet 2 year old son who is so much fun to play with in the snow. My son loves to eat the snow and you know what? I do too. That's one of the best things about snow. Not to mention the fact that my son loves snow ice cream too (and so do I!).

What? You've never tried snow ice cream? Okay, we'll take a quick detour...

Snow ice cream is so easy to make...as long as you have the right supplies! You just have to have a nice, fresh, pollution-free snowfall! There's no specific recipe either, because it's all about the right consistency and flavoring the ice cream to your taste. But here's the gist of it:


Snow Ice Cream

Ingredients:

Freshly fallen snow
Milk, to taste
Sugar, to taste
Flavoring of choice, to taste (vanilla extract, almond extract, other favorite extract flavoring, Italian Soda Syrup flavor of choice, etc.)

Directions:

Mix snow, milk, sugar, and desired flavoring together until you reach your desired consistency and taste. Use less snow if you want more of a shake-like consistency. Use more snow if you want a thicker ice cream. It's as easy as that!

Source: My grandma used to make this for my Mom and her sisters when they were kids. Then, my mom made it for us when we were kids.

Notes: You know, snow ice cream is one of the best things about winter. It brings back so many childhood memories for me. It just tastes soooooo good. The basic way to make it is to use vanilla extract for a basic vanilla snow ice cream. But I've used Italian soda syrup and made hazelnut and white chocolate snow ice cream so far this winter and those were super tasty too. So, get creative and have fun. If you're craving snow ice cream during the summer, you can satisfy your craving if you own an ice shaver or ice shaving machine. You can also make a snow slushy/snow cone and skip the milk altogether. You can mix the snow with Italian soda syrup, snow cone syrup, or soda pop until you find a consistency you like. I tried this with some sugar-free raspberry Italian soda syrup and it was really yummy--and a lot lighter on the calories too!

Okay...now on to the real purpose of this blog post. Gazpacho. Now, who wants cold soup in the winter time? Yuck! No one! But who wants a cold, refreshing, spicy, savory soup with a bit of crunch in the summer time? Most everyone (except my husband. He does NOT like gazpacho at any time).

I made the first gazpacho in the spring and summer, but failed to post it because I was waiting to get another gazpacho recipe from my mom...only to find out that I had the recipe all along! D'oh! It's kind of like The Wizard of Oz. The scarecrow, tin man, and cowardly lion travel to Oz to ask the Wizard for a brain, a heart, and courage...but they really had those things all along! I mean, come on, the scarecrow is always coming up with the game plan and the tin man cries at the drop of a hat. But the cowardly lion...well, he was pretty much a coward to begin with. So, I guess the trip to Oz was all for his sake!

Anyway, I hope you like these two gazpacho recipes.


Gazpacho

Ingredients:

2 1/2 cups tomato or vegetable juice (such as V8)
1 cup peeled, seeded, finely chopped fresh tomatoes
1/2 cup finely chopped celery
1/2 cup finely chopped cucumber
1/2 cup finely chopped green bell pepper
1/2 cup finely chopped green onion
3 tablespoons white wine vinegar
2 tablespoons extra-virgin olive oil
1 large clove garlic, minced
2 teaspoons finely chopped fresh flat-leaf parsley
1/2 teaspoon salt
1/2 teaspoon Worcestershire sauce
1/2 teaspoon freshly ground black pepper

Directions:

Combine the juice, tomatoes, celery, cucumber, bell pepper, onion, vinegar, oil, garlic, parsley, salt, Worcestershire sauce, and black pepper in a large glass or stainless steel bowl. Cover and refrigerate overnight.

Serve cold.

Serves 5.


Nutrition information: 117 calories, 2 g protein, 13 g carbohydrates, 6 g fat, 1 g saturated fats, 690 mg sodium, 0 mg cholesterol, 4 g fiber.

Source: South Beach Diet cookbook (this is an older version...I'll have to get the publication year later).

Notes: This is time-consuming because it requires a lot of chopping, but it is tasty! I usually double it.


Rico Mexican Market's Shrimp Gazpacho

Ingredients:

32 oz. Clamato Juice
10 oz. cocktail shrimp
1/4 cup jicama, diced
1/4 cup avocado, diced
1/4 cup celery, diced
2 Tbsp. green onion tops, sliced
1 Tbsp. yellow onion, diced
2 Tbsp. cilantro, chopped
1 Tbsp. garlic, minced
1 Tbsp. Worcestershire sauce
Garnish: Hot sauce, lime juice, and salt to taste

Directions:

Combine all ingredients. Chill and garnish as desired.

Source: This is one of my Mom's recipes. Judging from the title, I'm guessing it originally came from a place called Rico Mexican Market!

Notes: If you like a chunkier gazpacho, feel free to increase the amounts of chopped vegetables. Also, I accidentally bought tomato juice instead of clamato juice (they were right next to each other in the grocery store and I somehow reached for the wrong one. I didn't notice my mistake until I got home). It works just as well with the tomato juice as the clamato. So, if you hate clamato juice, just use tomato juice.

Wednesday, December 1, 2010

Thanksgiving--Dinner, Part 1: Turkey and Gravy

Above: "My first turkey!" Laurie.

Ahhh. Now on to the main course! Thanksgiving dinner! Now, when it comes to Christmas and Thanksgiving, the dinners are pretty much the same. Some years, we do the dinner twice (once on Thanksgiving and once on Christmas). Other years, we only do one or the other.

So, a lot of the recipes I am going to share here are also favorites for Christmas as well.

Oh, and I must apologize that because of how hectic it was to get dinner on the table, we didn't take many pictures!

Perfect Roast Turkey


If your roasting pan only fits sideways in the oven, turn the pan every hour so the turkey cooks and browns evenly.

Ingredients:

Serves 12 to 14

1 twenty- to-twenty-one-pound fresh whole turkey, giblets and neck removed from cavity and reserved
1 1/2 cups (3 sticks) unsalted butter, melted, plus 4 tablespoons unsalted butter, room temperature
1 750-ml bottle dry white wine, or 3 1/2 cups chicken broth
2 teaspoons salt
2 teaspoons freshly ground black pepper
Stuffing
1 cup dry red or white wine, for gravy (optional)
Giblet Stock (recipe below)

Directions:

Rinse turkey with cool water, and dry with paper towels. Let stand for 2 hours at room temperature.

Place rack on lowest level in oven. Heat oven to 450 degrees. Combine melted butter and white wine or chicken broth in a bowl. Fold a large piece of cheesecloth into quarters and cut it into a 17-inch, four-layer square. Immerse cheesecloth in the butter and wine/broth; let soak.

Place turkey, breast side up, on a roasting rack in a heavy metal roasting pan. If the turkey comes with a pop-up timer, remove it; an instant-read thermometer is a much more accurate indication of doneness. Fold wing tips under turkey. Sprinkle 1/2 teaspoon each salt and pepper inside turkey. Fill large cavity and neck cavity loosely with as much stuffing as they hold comfortably; do not pack tightly. (Cook remaining stuffing in a buttered baking dish for 45 minutes at 375 degrees.) Tie legs together loosely with kitchen string (a bow will be easy to untie later). Fold neck flap under, and secure with toothpicks. Rub turkey with the softened butter, and sprinkle with remaining 1 1/2 teaspoons salt and pepper.

Lift cheesecloth out of liquid, and squeeze it slightly, leaving it very damp. Spread it evenly over the breast and about halfway down the sides of the turkey; it can cover some of the leg area. Place turkey, legs first, in oven. Cook for 30 minutes. Using a pastry brush, baste cheesecloth and exposed parts of turkey with butter and wine. Reduce oven temperature to 350 degrees. and continue to cook for 2 1/2 more hours, basting every 30 minutes and watching pan juices; if the pan gets too full, spoon out juices, reserving them for gravy.

After this third hour of cooking, carefully remove and discard cheesecloth. Turn roasting pan so that the breast is facing the back of the oven. Baste turkey with pan juices. If there are not enough juices, continue to use butter and wine. The skin gets fragile as it browns, so baste carefully. Cook 1 more hour, basting after 30 minutes.

After this fourth hour of cooking, insert an instant-read thermometer into the thickest part of the thigh. Do not poke into a bone. The temperature should reach 180 degrees (stuffing should be between 140 degrees and 160 degrees and the turkey should be golden brown. The breast does not need to be checked for temperature. If legs are not yet fully cooked, baste turkey, return to oven, and cook another 20 to 30 minutes.

When fully cooked, transfer turkey to a serving platter, and let rest for about 30 minutes. Meanwhile, make the gravy. Pour all the pan juices into a glass measuring cup. Let stand until grease rises to the surface, about 10 minutes, then skim it off. Meanwhile, place roasting pan over medium-high heat. Add 1 cup dry red or white wine, or water, to the pan. Using a wooden spoon, scrape the pan until liquid boils and all the crisp bits are unstuck from pan. Add giblet stock to pan. Stir well, and bring back to a boil. Cook until liquid has reduced by half, about 10 minutes. Add the defatted pan juices, and cook over medium-high heat 10 minutes more. You will have about 2 1/2 cups of gravy. Season to taste, strain into a warm gravy boat, and serve with turkey.

Source: Martha Stewart website

Giblet Stock

Ingredients:

Makes about 3 cups.

Giblets, (heart, gizzard, and liver) and neck reserved from turkey
4 tablespoons unsalted butter
1 onion, cut into 1/4-inch dice (or halved and sliced)
1 celery stalk, with leaves, stalk cut into 1/4-inch dice, leaves roughly chopped (or roughly chopped)
1 small leek, trimmed, washed and cut into 1/4-inch dice, optional
1/2 teaspoon salt
1/4 teaspoon freshly ground black pepper
1 bay leaf
4 cups chicken broth

Directions:

Trim any fat or membrane from giblets. The liver should not have the gallbladder (a small green sac) attached. If it is, trim it off carefully, removing part of the liver if necessary. Do not pierce the sac; the liquid it contains is very bitter. Rinse giblets and neck, and pat dry.

In a medium saucepan, melt 3 tablespoons butter over medium heat. Add chopped onion, celery and leaves, and leek. Cook, stirring occasionally, until onions are translucent, about 10 minutes. Add salt and pepper, and cook 5 minutes. Add 4 cups water, bay leaf, gizzard, heart, and neck (do not add liver; it needs to be cooked separately or it makes the stock bitter). Bring to a boil, then reduce to a high simmer. Cook for 45 minutes, or until gizzard is tender when pierced with the tip of a knife.

Meanwhile, chop liver finely. Melt remaining tablespoon of butter in a small skillet over medium-low heat. Add liver, and cook, stirring constantly, until liver no longer releases any blood and is fully cooked, 4 to 6 minutes. Set aside.

After the 45 minutes of simmering, the liquid should reduce to about 3 cups. If it has not, increase the heat, and cook 10 to 15 minutes more.

Strain stock. Chop gizzard and heart very fine, and add to strained stock along with chopped liver. Pick meat off neck, and add to stock. Set aside until needed for gravy.

Source: Martha Stewart website

Notes: I simply put the onion, celery, neck and giblets into a pot with 4 cups of chicken broth. I did not saute the onion and celery first. Then I added the salt and pepper, bay leaf, and butter. I simmered this on low the entire time that the turkey was cooking. I did not reserve the liver to add to the finished gravy. I removed the neck and giblets, strained it and used the broth to add to the turkey pan drippings to make the gravy.

Perfect Turkey Gravy


Do not use a non stick pan when cooking your turkey. This way, there will be more crispy, cooked-on bits, which add flavor to the gravy.

Makes 3 cups

Ingredients:

Giblet Stock (recipe above)
Perfect Roast Turkey (recipe above)
1 1/2 cups Madeira wine (see notes)
3 tablespoons all-purpose flour (see notes)
2 teaspoons minced fresh rosemary, optional
3/4 teaspoon salt
1/8 teaspoon freshly ground black pepper

Directions:

Make giblet stock while turkey is roasting.
Transfer roasted turkey to a large platter. Pour juices from the pan into a fat separator. Set aside to separate, about 10 minutes.

Strain stock, discarding solids, and return to saucepan; warm over low heat. Place roasting pan on top of stove over medium-high heat. Pour Madeira into measuring cup, then into pan, and let it bubble; scrape bottom and sides of pan with a wooden spoon to dislodge cooked-on bits.

Make a slurry: Place flour in a glass jar with a tight-fitting lid. Ladle 1 cup stock into jar, and close lid. Shake until combined. Slowly pour into roasting pan; stir to incorporate. Cook over medium heat, stirring until flour is cooked, 2 to 3 minutes. Slowly stir in remaining stock.

Raise heat to medium high. Add the dark drippings that have settled to the bottom of the fat separator to roasting pan. Discard fat. Stir in rosemary. Season with salt and pepper. Cook 10 to 15 minutes to reduce and thicken. (For thicker gravy, add 1 more tablespoon flour and 1/2 cup less stock.)

Strain liquid from pan through a very fine sieve. Adjust seasoning. Keep warm in heat-proof bowl over a pan of simmering water until ready to serve.

Source: Martha Stewart website

Notes: I did not use the wine. The giblet stock and the pan drippings made a ton of gravy anyway. Extra liquid was not necessary. But if I had, I would have used half water or chicken stock and half red wine vinegar as a substitute. I am pregnant, after all, and I don’t usually cook with alcohol anyway. Also, since the combined drippings and giblet stock made a ton of liquid, 3 tablespoons of flour was not nearly enough to thicken the gravy. In fact, I probably used about a cup of flour mixed with some of the giblet stock to make a slurry. Even that didn’t thicken the gravy enough. I then added about 1/3 cup of cornstarch mixed with the gravy to make another slurry. That still didn’t thicken the gravy enough. At that point, everyone was hungry and we didn’t have time to work on the gravy any longer. So, it didn’t turn out as thick as I would like, but it tasted fantastic! Don’t feel like there’s a specific amount of flour or cornstarch that is needed for the recipe. Use as much as you need to get the thickness or consistency of gravy that you want.


Directions for Carving a Turkey (Martha Stewart)

Step 1—Preparation

Before carving the turkey, let it stand at room temperature for 20 to 30 minutes to allow the juices to saturate the meat; then transfer the turkey from the roasting pan or presentation platter to a carving board (use layers of paper towels or two clean kitchen towels to protect your hands from the heat). The best way to hold the turkey steady is to use your hand -- a carving fork doesn't provide the same grip and will pierce and tear the flesh.

Step 2

Cut through the trussing with scissors, taking care to remove all of the string.

Step 3—Remove Drumsticks

Remove the drumsticks first. Place the knife against the thigh, and cut down to expose the leg's second joint.

Step 4—Sever Drumsticks

Apply pressure at the joint with the knifepoint; twist the knife, and cut through to sever the drumstick. Repeat with the other drumstick.

Step 5—Slice Neck Cavity

Slice open the neck cavity with an oval incision that allows you to remove the stuffing while leaving the skin intact.

Step 6—Scoop Stuffing

Use a long-handled spoon to scoop out the stuffing from the body cavity; transfer it to a serving bowl.

Step 7—Slice Thigh Meat

Slice the thigh meat from the bone (the dark meat should be tender from resting in the juices).

Step 8—Slice Breast

Place the knife horizontally at the bottom curve of the bird's breast, and slice in toward the rib cage to create a "guide cut." Then make a slice from the top down alongside the rib cage. Be sure to cut carefully.

Steps 9-10—Create Slices

Cut vertically through the breast meat to create medallion slices, being careful to preserve some of the skin on each slice. Repeat steps 7 and 8 on the other side of the breast.

Step 10

Place the knife at the first wing joint; insert the knifepoint, and twist it to sever the wing. Repeat with the other wing.

Tools and Materials:

To prepare for carving, have the following equipment ready:
Warm serving platter
Pair of kitchen scissors
Flexible and sharp 10-inch slicing knife (a serrated blade will tear the meat)
Carving fork for arranging and serving the meat

If you would like instructions including pictures, go to: http://www.marthastewart.com/how-to/turkey-carving-101

Brining a Turkey

This year was the first year I, Laurie, made a turkey. See picture above. Like my sister, I also used the martha recipe for gravy, which was very delicious and very flavorful. Also like my sister, I had to add quite a bit more flour to get it to thicken up, but otherwise it was just perfect.

Also, like my mother and sister, I am now a believer in the cheesecloth basting method. It worked really well and gave us a nice juicy turkey, and even the leftovers were moist. The only thing I did differently then my other foodie family members was that I brined my turkey for 24 hours before cooking it. I got this recipe from a Martha Stewart cookbook. Now the key to a moist turkey, after my reading various sources is a few key points:

  • Let the turkey sit at room temperature for 2 hours before cooking. This goes for roasting a whole chicken, only it doesn't have to sit as long to get to room temperature.
  • Don't rely on the pop up thermometers that come with the turkeys. They will give you an over cooked bird. As my sister stated above, use a meat thermometer!
  • Last, Let the bird rest at least 20 minutes after removing from the oven before carving. This locks in the juices and results in a more tender, moist meat.
The brining method also helps to lock in the moisture, and gives the turkey a nice flavor. I am sure there are numerous variations of brines that would give different flavors that would be worth trying. Here is the recipe I used:

6 quarts water
1 3/4 cup course salt
1 cup sugar
3 medium onions, peeled and chopped
3 leeks, white and pale green parts only, chopped
3 carrots, peeled and chopped
3 celery stalks, chopped
3 dried bay leaves
6 sprigs thyme
6 sprigs parsley
1 T whole peppercorns

Combine 2 quarts of water with remaining ingredients in medium saucepan. Bring to Boil. stirring until salt and sugar are dissolved completely. Transfer to a large pot ( at least 5 gallon capacity) and add remaining 4 quarts of water. Let cool completely.

Lower defrosted or fresh turkey into brine. Cover and refrigerate 24 hours. Remove from brine, pat dry and let stand at room temp 2 hours.

Source: Martha Stewart Cooking School ISBN 978-307-39644-0

The only thing I did differently was I used a brine bag, which I got at bed bath and beyond for $5 because I didn't have a large enough stock pot.

Tuesday, November 30, 2010

Thanksgiving--Pies


What would Thanksgiving be without pie? I mean, come on, you have to have at least one pie!

When I was in Jr. High, my mom started a tradition...a tradition that was a blessing and a curse. The tradition that she started was to make a pie for each of us. So, after Thanksgiving dinner each year, we would watch "A Christmas Story" and eat pie. I'm the kind of person who can't resist options. So, if there are six kinds of pie, I don't want to have just one kind! So, every year, I would try a sliver or small slice of each kind of pie...which basically resulted in a full plate of different kinds of pie!

As our family has grown, so have the number of pies! We definitely "scaled down" this year (back to only 5 kinds of pie...but a total of 7 pies), but if I remember correctly, one year we made 18 pies! Yikes!

I'm going to share some of our favorite pie discoveries tonight (get ready for a LOT of recipes and one really long blog).

I hope you like them!


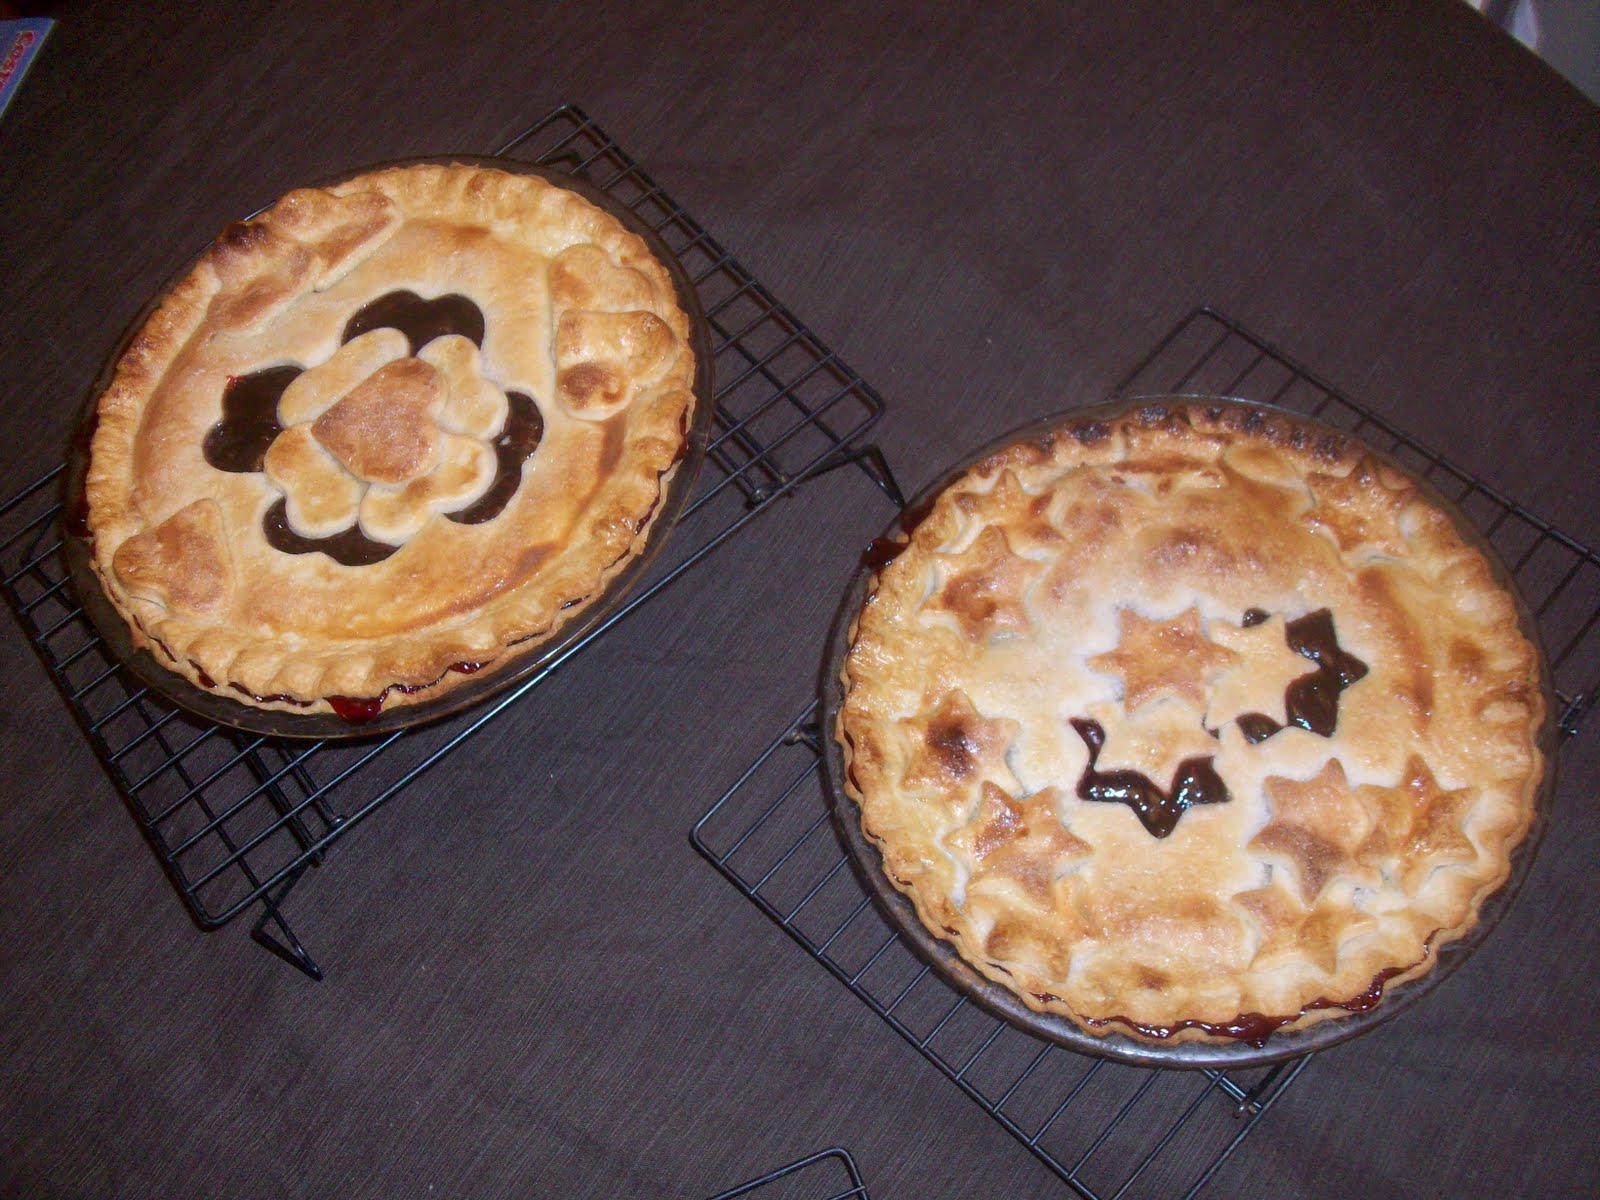
Above: Raspberry Pie using the Enrichment Night Pie Dough recipe. We simply used the pie dough recipe and two cans of raspberry pie filling per pie for the raspberry pies. We then brushed the pie crusts with an egg wash and sprinkled it with granulated sugar. We then followed the bake time for the pie crust recipe.

Enrichment Night Pie Crust Recipe


Ingredients (amounts refer to two-crust pies):

Two Pies:

2 cups flour, rounded
1 cup shortening, level
1 tsp. salt
½ cup cold water

Four Pies:

4 cups flour, rounded
2 cups shortening, level
2 tsp. salt
1 cup cold water

Six Pies:

6 cups flour, rounded
3 cups shortening, level
3 tsp. salt
1 ½ cups cold water

Directions:

Always use Crisco brand butter-flavored shortening.

Mix together: flour, shortening and salt with fingers until well blended. Slowly add water. If slightly sticky, press palm in plate of flour and pat dough ball. Form small ball of dough in pan (baseball size approximately). Roll on slightly floured surface. Place bottom crust in pan. Trim edges with back side of a table knife. Fill pie. Top with vented top crust after you moisten edge with finger to seal both crusts.

Bake at 400 degrees (375 degrees if your oven cooks too hot) for 50-60 minutes or until the pie shakes loose.

Refrigerate leftover dough. Bring to room temperature before using.


Here are some other pie recipes that were given to us along with the pie crust recipe at the Relief Society Enrichment activity years ago.

Apple Pie

Ingredients:

1 gallon of apples (canned in water)
6 ½ cup sugar
1 cup instant clear gel
½ square margarine
1 ½ cup diluted apple juice
2 tsps. Apple pie spice

Directions:

Examine gallon of canned apples and remove tough cores and skins, if any.

Bring apples, juice and margarine to a boil (medium high heat). Sprinkle with apple pie spice.

Mix sugar and instant clear gel with a fork. After apples boil, add sugar and clear gel mixture. Lower heat. Boil until thickened and clear. Cool. Refrigerate.

After putting in crust, sprinkle with apple pie spice before putting on top crust.

Razzleberry Pie

Ingredients:

5 cups water
3 ½ cups sugar
1 pkg. raspberries
1 pkg. boysenberries
1 pkg. blackberries
1 round cup pie tone (mixed with water until dissolved)

Note: Pie tone supplied at: Steffs, 3555 S. 700 W., SLC, UT or Kitchen Needs, Riverdale Road, Ogden, UT

Directions: Bring water and sugar to a boil. Add package of blackberries. Bring to a boil. Add pie tone mixture and cook until thickened. Remove from heat and pour into ice cream pale. Then gently fold in raspberries and boysenberries. Let cool, then refrigerate.

Blueberry Pie

Same as above, except use 3 packages of frozen blueberries.

Boysenberry pie

Same as above, except use 3 packages of frozen boysenberries.

Cherry Pie

Ingredients:

1 gallon cherries
6 cups sugar
4 tsp. almond extract
1 round cup pie tone (mixed with water until dissolved)

Directions:

Mix cherries, sugar and almond extract. Mix rounded cup of pie tone with enough water to dissolve (not quite 1 cup).

Bring cherries to a boil. Lower heat and add pie tone. Cook until thickened.

If filling appears to be too thin, stir in some tapioca. Tapioca can also be added later after cooling if too thin.

Basic Cream Pie Filling

(Makes enough for 2 pies)

Ingredients:

5 cups milk
2 eggs
1 cup sugar
1 (3 oz.) package of jello brand pudding (not instant pudding)
1 tsp. vanilla
½ tsp. lemon juice (if making any kind except chocolate)
½ cup corn starch
1-2 cups Cool Whip
1 pint whipping cream

Directions:

Mix all of your ingredients together in your pan. Cook on high until it is almost to a boil. Reduce your heat to medium and take off when it has started to boil again.

Mix 1-2 cups Cool Whip with 1 pint whipping cream after whipping.

Savory Pies using the Enrichment Pie Crust


Chicken Filling


Ingredients:

5-6 chicken breasts (5 cups chicken)
4 cups carrots (cooked about 10 minutes)
3 cups potatoes (cooked about 7 minutes)
1 cup celery (cooked about 10 minutes)
½ package frozen peas.
1 ½ cup flour

Directions:

Place chicken breasts in water. The water should be about 2 inches above the chicken. Boil until done.

Remove chicken and add 2 Tbsp. chicken base. Bring to a boil and thicken with flour and water (it should take about 1 ½ cup flour). After the gravy has cooked add chicken carrots, potatoes, celery and frozen peas.

Beef Filling

Ingredients:

2 lbs. ground beef
1 medium onion, chopped
Schillings brown beef gravy
Schillings beef stew mix (plus)
8 cups water
Cook until thickened
4 cups carrots (cooked about 10 minutes)
3 cups potatoes (cooked about 7 minutes)
1 cup celery (cooked about 10 minutes)
½ package frozen peas

Directions:

Brown ground beef and medium onion. Mix Schillings brown beef gravy, Schillings beef stew mix and 8 cups water in a saucepan until thickened.

Add carrots, potatoes, celery and frozen peas.


Above: Caramel Pie, Dear Abby's Pecan Pie, Eggnog Pie, and Banana Cream Pie
Banana Cream Pie

Ingredients:

9 inch baked pie shell
3 T. cornstarch
1 1/3 c. water
14 oz. sweetened condensed milk
3 egg yolks, beaten
2 T. butter or margarine
1 tsp. vanilla extract
3 bananas, sliced and dipped in lemon juice from concentrate and drained
Whipping cream, whipped

Directions:

In heavy saucepan, dissolve cornstarch in water; stir in condensed milk and egg yolks. Cook and stir until thickened and bubbly. Remove from heat. Add butter and vanilla. Cool slightly. Arrange 2 sliced bananas on bottom of prepared pie shell. Pour filling over bananas; cover. Chill 4 hours or until set. Spread top with whipped cream; garnish with remaining banana slices. Refrigerate leftovers.

Source: Mom will have to provide that!

Above: Caramel Pie without topping. It can be served without any topping, or you can top it with meringue or whipped cream.


Above: Caramel Pie topped with whipped cream. If you prefer, you can simply place a dollop of whipped cream on each slice. It is a pretty rich pie and putting a ton of whipped cream on top (as pictured above) is really decadent. Though it is the prettiest way to serve it!

Caramel Pie


This pie is time consuming and takes some patience, but it is worth it!

Ingredients:

4 T. cornstarch
1 ½ c. water, divided
2 eggs separated
1 ½ c. sugar
½ c. butter
1 tsp. vanilla
1 baked 9 inc. pie shell
1 T. sugar

In a bowl, dissolve the cornstarch with ¾ c. water. Beat the egg yolks and stir them into the cornstarch mixture. Set aside.

In a heavy saucepan with high sides, cook ¾ c. sugar over low to medium heat until it is completely melted and a golden brown color (increase the heat if the sugar takes a long time to melt. Don’t stir the sugar until the majority has melted on its own. Stirring too early will cool the sugar and make it take longer to melt).

Once the sugar is completely melted, add the remaining ¾ c. sugar, the butter, and the remaining ¾ c. water. This may create a cloud of steam, so stand back while you are adding the water!.

Bring the mixture to a boil and stir until the butter has melted and the sugar has completely dissolved.

(Usually, once the second batch of sugar is added with the water, the first batch of melted sugar hardens and becomes a ball of caramel candy. Try to break this up as best as you can. Stir this mixture—including the hardened caramel—until everything has dissolved. You may have to remove the ball of hardened caramel if it does not completely melt. But give it some time, because it usually does melt—or at least it shrinks considerably.)

Stir the cornstarch/egg mixture into the saucepan and bring the mixture to a low boil, stirring it constantly. Continue to boil slowly until the mixture thickens about 2 minutes.

Take the mixture off the heat, stir it until smooth, and let it cool. Stir in the vanilla and pour the filling into the baked pie shell.

To make a meringue topping for the pie, beat the egg whites until soft peaks form. Add 1 T sugar and continue beating until stiff peaks form. Spoon the meringue on top of the pie filling, spreading it right up to the edge of the filling. Bake at 350 for about 15 minutes or until the top of the meringue is delicately browned. Chill the pie before serving. Can be topped with whipped cream instead, if desired.

Source: The Anne of Green Gables Treasury, ISBN 0-14-017231-9, published 1991.

Notes: It takes awhile for the sugar to melt and caramelize, but this is such a yummy and unique pie. Feel free to use a little more corn starch if the mixture isn't setting up. But don't use too much because it will diffuse the caramel flavor of the filling. I stink at making meringue, so I almost always top this with whipped cream and it is fantastic!

Decadent Peanut Butter Pie


Ingredients:

1 prepared chocolate cookie pie crust
1 c. creamy peanut butter
½ c. sugar
8 oz. cream cheese, softened
4 ½ c. coolwhip, divided
1 jar 11.75 oz. hot fudge topping, divided

Drizzle:
2 T. hot fudge topping
2 T. creamy peanut butter

Directions:

Combine in a medium bowl, the peanut butter, cream cheese and sugar. Gently fold in 3 cups whipping topping. Spoon mixture into the pie shell. Using a spatula smooth mixture to edges of pie. Reserve 2 T of hot fudge topping and place remaining hot fudge topping into microwave bowl or glass measuring cup. Microwave for 1 minute. Stir. Spread hot fudge topping over pie to cover the peanut butter layer. Refrigerate until serving time. Just before serving, spread the remaining whipped topping (1 ½ c.) over hot fudge layer, being careful not to mix the two layers. Place the 2 T. hot fudge topping in a small plastic bag and knead for a few seconds. But a tiny hole in the corner of the bag and drizzle over pie. Do the same with 2 T. peanut butter going in the opposite direction of the hot fudge toppings.

Source: Mom will have to provide it. I don't know!


Eggnog Pie

Ingredients:

1 T. unflavored gelatin
¼ c. cold water
1/3 c. sugar
2 T. cornstarch
¼ tsp. salt
2 cups commercially prepared eggnog
1 tsp. vanilla extract
1 tsp. rum extract
1 c. whipping cream, whipped
1 baked 9” pastry shell

Directions:

In a small bowl, sprinkle gelatin over water; let stand 1 minute. In a saucepan, combine sugar, cornstarch and salt. Stir in eggnog until smooth. Bring to a boil; cook and stir for 2 minutes or until thickened. Stir in gelatin until dissolved. Remove from the heat; cool to room temperature. Stir in extracts; fold in whipped cream. Pour into pastry shell. Refrigerate until firm.

Source: Mom will have to provide it. I don't know!

French Apple Pie

Ingredients:

Pastry for 9 in. pie
¾ c. sugar
¼ c. flour
½ tsp. nutmeg
½ tsp. cinnamon
Dash of salt
6 c. thinly sliced pared tart apples (about 6 medium)
2 T. margarine or butter

Directions:

Heat over 425. Prepare pastry. Mix sugar, flour, nutmeg, cinnamon, and salt. Stir in apples. Turn on to pastry lined pie plate; dot with margarine. Top with crumb topping.

Mix 1 c. all purpose flour, ½ c. firm margarine or butter, and ½ c. brown sugar until crumbly. Bake 50 minutes. Cover topping with aluminum foil during last 10 minutes of baking. Best served warm.

Source: Mom will have to provide it. I don't know!

Heavenly Lemon Pie

Ingredients:

1 c. sugar
4 heaving T. cornstarch
¼ c. butter
1 T. grated lemon peel
¼ c. lemon juice
3 unbeaten egg yolks
1 1/3 c. milk
1 c. 8 oz. dairy sour cream
1 baked 9 inch pastry shell
Whipped cream

Directions:

Mix sugar and cornstarch; set aside. In saucepan melt butter, add lemon peel, juice, egg yolks and milk; blend. Gradually add sugar and cornstarch; cook over medium heat until thick. Mixture will be lumpy. Cool. Stir in sour cream; pour into pie shell. Chill. Top with whipped cream.

Source: Mom will have to provide it. I don't know!

Pineapple Pie

Ingredients:

1 (20 oz) can crushed pineapple
3 cup liquid (drained pineapple juice and water)
1 ½ cup sugar
½ cup cornstarch
2 Tablespoon lemon juice
2 tablespoon butter
2 eggs, beaten

Directions:

Boil juice, sugar, and cornstarch. Add pineapple. Remove thickened mixture from the stove and add 2 beaten eggs. Return to the stove and cook on low for a few more minutes. Remove from heat and add lemon juice and butter. Stir until well combined. Chill. Pour chilled mixture into a pre-cooked pie crust (can be homemade or store-bought frozen). Top with whipping cream and keep refrigerated.

Source: Mom will have to provide it. I don't know!

Pumpkin Pie (Karo)

Ingredients:

½ c. sugar
½ tsp. Salt
1 tsp. cinnamon
½ tsp. ginger
1/8 tsp. cloves
2 eggs
½ c. Karo light or dark syrup
1 (15 oz) can pumpkin
12 oz. evaporated milk
9 inch Deep dish pie, unbaked

Directions:

Mix sugar, salt and spices in a bowl. Add eggs and beat slightly. Add remaining ingredients; blend well. Pour pumpkin filling into pie crust. Bake at 425 for 15 minutes reduce oven temperature to 350 and continue baking for 40 to 50 minutes or until knife inserted in pie center comes out clean. Cool a minimum of 2 hours before serving.

Source: This is a Karo Syrup recipe.

Perfect Pumpkin Pie (Eagle Brand)

Ingredients:

1 (15 ounce) can pumpkin
1 (14 ounce) can EAGLE BRAND®
Sweetened Condensed Milk
2 large eggs
1 teaspoon ground cinnamon1/2 teaspoon ground ginger
1/2 teaspoon ground nutmeg
1/2 teaspoon salt
1 (9 inch) unbaked pie crust

Directions:

Preheat oven to 425 degrees F. Whisk pumpkin, sweetened condensed milk, eggs, spices and salt in medium bowl until smooth. Pour into crust. Bake 15 minutes.

Reduce oven temperature to 350 degrees F and continue baking 35 to 40 minutes or until knife inserted 1 inch from crust comes out clean. Cool. Garnish as desired. Store leftovers covered in refrigerator.

Source: This is an Eagle sweetened condensed milk recipe.

Famous Pumpkin Pie (Libby’s)

Ingredients:

3/4 cup granulated sugar
1 teaspoon ground cinnamon
1/2 teaspoon salt
1/2 teaspoon ground ginger
1/4 teaspoon ground cloves
2 large eggs
1 can (15 oz.) LIBBY'S® 100% Pure Pumpkin
1 can (12 fl. oz.) NESTLÉ® CARNATION® Evaporated Milk
1 unbaked 9-inch (4-cup volume) deep-dish pie shell
Whipped cream (optional)

Directions:

Mix sugar, cinnamon, salt, ginger and cloves in small bowl. Beat eggs in large bowl. Stir in pumpkin and sugar-spice mixture. Gradually stir in evaporated milk.

Pour into pie shell.

Bake in preheated 425° F oven for 15 minutes. Reduce temperature to 350° F; bake for 40 to 50 minutes or until knife inserted near center comes out clean. Cool on wire rack for 2 hours. Serve immediately or refrigerate. Top with whipped cream before serving.

NOTES:

1 3/4 teaspoons pumpkin spice may be substituted for the cinnamon, ginger and cloves; however, the taste will be slightly different. Do not freeze, as this will cause the crust to separate from the filling.

FOR 2 SHALLOW PIES: substitute two 9-inch (2-cup volume) pie shells. Bake in preheated 425° F. oven for 15 minutes. Reduce temperature to 350° F.; bake for 20 to 30 minutes or until pies test done.

FOR HIGH ALTITUDE BAKING (3,500 to 6,000 ft.):Deep-dish pie- extend second bake time to 55 to 60 minutes. Shallow pies- no change.

Source: This is a Libby's recipe.

Lite 'n Easy Crustless Pumpkin Pie

Ingredients:

Nonstick cooking spray
2 tablespoons water
2 envelopes (7 grams each) unflavored gelatin
2 1/4 cups NESTLÉ® CARNATION® Evaporated Lowfat 2% Milk, divided
1 can (15 oz.) LIBBY'S® 100% Pure Pumpkin
1/2 cup packed dark brown sugar or low calorie sweetener equivalent
2 teaspoons pumpkin pie spice
1 teaspoon vanilla extract
Light whipped topping (optional)
Fresh raspberries (optional)

Directions:

Coat a 9-inch deep-dish pie plate with nonstick cooking spray.

Place water in medium bowl; sprinkle gelatin over water. Let stand for 5 to 10 minutes or until softened. Mixture may be firm. Bring 1 cup evaporated milk just to a boil in small saucepan. Slowly stir hot evaporated milk into gelatin. Stir in remainingevaporated milk, pumpkin, sugar, pumpkin pie spice and vanilla extract.

Pour mixture into prepared pie plate. Refrigerate for 2 hours or until set. Garnish with whipped topping and raspberries, if desired.

Source: This is a Libby's recipe.

Raspberry Swirl Cheesecake Pie

Ingredients:

8 oz. cream cheese, softened
1 can 14 oz. sweetened, condensed milk
¼ c. lemon juice divided
1 egg
1 Keebler chocolate or graham cracker pie crust
½ c. seedless raspberry preserves

Directions:

In small mixing bowl beat cream cheese on medium speed of electric mixer until fluffy. Gradually beat in sweetened condensed milk and 3 tablespoons of lemon juice. Add egg, beating until just combined. Pour half of cream cheese mixture into crust. In small bowl combine preserves and remaining lemon juice. Spoon half of preserves mixture over cream cheese mixture in crust. Top with remaining cream cheese mixture and remaining preserves mixture. Use knife or narrow spatula to swirl preserves into cream cheese mixture. Bake at 300 for 50 to 55 minutes or until center is almost set. Cool on wire rack for 1 hour. Refrigerate for at least 3 hours.

Source: Mom will have to provide it. I don't know!

Classic Pecan Pie

To pack lots of pecans in the filling, we kept the fat in this easy piecrust to a minimum, resulting in a biscuit-like crust.

Crust:

1 cup all-purpose flour
2 tablespoons granulated sugar
1/2 teaspoon baking powder
1/4 teaspoon salt
1/4 cup fat-free milk
1 tablespoon butter or stick margarine, melted
Cooking spray

Filling:

1 large egg
4 large egg whites
1 cup light or dark-colored corn syrup
2/3 cup packed dark brown sugar
1/4 teaspoon salt
1 cup pecan halves
1 teaspoon vanilla extract

Directions:

To prepare crust, lightly spoon flour into a dry measuring cup; level with a knife. Combine flour, granulated sugar, baking powder, and 1/4 teaspoon salt in a bowl. Add milk and butter; toss with a fork until moist.

Press mixture gently into a 4-inch circle on heavy-duty plastic wrap; cover with additional plastic wrap. Roll dough, still covered, to an 11-inch circle. Freeze 10 minutes or until plastic wrap can be easily removed.

Remove 1 sheet of plastic wrap; fit dough into a 9-inch pie plate coated with cooking spray. Remove top sheet of plastic wrap. Fold edges under; flute.

Preheat oven to 350°.

To prepare the filling, beat the egg and the next 4 ingredients (egg through 1/4 teaspoon salt) at medium speed of a mixer until well-blended. Stir in the pecan halves and the vanilla extract. Pour the mixture into the prepared crust. Bake the pie at 350° for 20 minutes, then cover with foil. Bake the pie an additional 20 minutes or until a knife inserted 1 inch from the edge comes out clean. Do not overbake. Cool pie on a wire rack.

Yield: 10 servings (serving size: 1 wedge)

Nutrition Information: CALORIES 288 (29% from fat); FAT 9.2g (sat 1.5g,mono 5.1g,poly 2g); IRON 1.1mg; CHOLESTEROL 25mg; CALCIUM 52mg; CARBOHYDRATE 48.1g; SODIUM 253mg; PROTEIN 4.3g; FIBER 1g

Source: Cooking Light, NOVEMBER 1999

Notes: You can also use a frozen pumpkin pie crust or the Enrichment night pie crust recipe found above.

Pecan-Chocolate Chip Pie

Ingredients:

1 ½ cups pecan halves
1 store-bought or homemade pie crust in a deep dish 9-inch pie plate
½ cup semisweet chocolate chips
1 tablespoon all-purpose flour, plus more for coating chocolate chips
3 large eggs, lightly beaten
1 cup packed light-brown sugar
1 cup light corn syrup
½ teaspoon pure vanilla extract
¼ cup (1/2 stick) salted butter, melted

Directions:

Preheat oven to 375 degrees. Spread pecans in crust. In a small bowl, toss chocolate chips in a little flour to coat, then scatter evenly over pecans. In a medium bowl, stir together vanilla, butter, and flour until well combined. Pour filling over pecans and chocolate chips.

Bake until filling is set and crust is browned, about 70 minutes. (If pie browns too quickly, loosely tend with foil.) Let cool on a wire rack at least 1 hour. Serve warm or at room temperature.

Nutrition information: 8 servings. 586 calories, 32 g fat, 5.7 g protein, 76.7 g carbs, 3 g fiber.

Source: Everyday Food Magazine published by Martha Stewart. Recipe by Emeril Lagasse.

Caramel-Pecan Pie

Create this rich gooey caramel pecan piefor your family and friends. It is a perfect special occasion pie.

Prep: 20 min., Bake: 38 min., Cook: 7 min.

Yield: Makes 8 servings

Ingredients:

1/2 (15-ounce) package refrigerated piecrusts
28 caramels
1/4 cup butter
1/4 cup water
3/4 cup sugar
2 large eggs
1/2 teaspoon vanilla extract
1/4 teaspoon salt
1 cup coarsely chopped pecans, toasted
Chocolate-Dipped Pecans (optional, see below)

Directions:

Fit piecrust into a 9-inch pie plate according to package directions; fold edges under, and crimp. Prick bottom and sides of piecrust with a fork.

Bake piecrust at 400° for 6 to 8 minutes or until lightly browned; cool on wire rack.

Combine caramels, butter, and 1/4 cup water in large saucepan over medium heat. Cook, stirring constantly, 5 to 7 minutes or until caramels and butter are melted; remove from heat.

Stir together sugar and next 3 ingredients. Stir into caramel mixture until thoroughly combined. Stir in pecans. Pour into prepared crust.

Bake pie at 400° for 10 minutes. Reduce heat to 350°, and bake 20 more minutes, shielding edges of crust with aluminum foil to prevent excessive browning. Remove pie to a wire rack to cool. Top with Chocolate-Dipped Pecans, if desired.

Southern Living, NOVEMBER 2005

Chocolate-Dipped Pecans

Prep: 20 min.
This recipe goes with Caramel-Pecan Pie
Yield: Makes 20 pecans

1 (6-ounce) package semisweet chocolate morsels
20 pecan halves, toasted

Microwave chocolate morsels in a microwave-safe bowl on HIGH for 1 to 1 1/2 minutes or until melted, stirring at 30-second intervals.

Dip half of each pecan in melted chocolate; place on a wax paper-lined baking sheet. Let cool completely. Store in a single layer in an airtight container for up to 2 days.

Source: Southern Living, NOVEMBER 2005


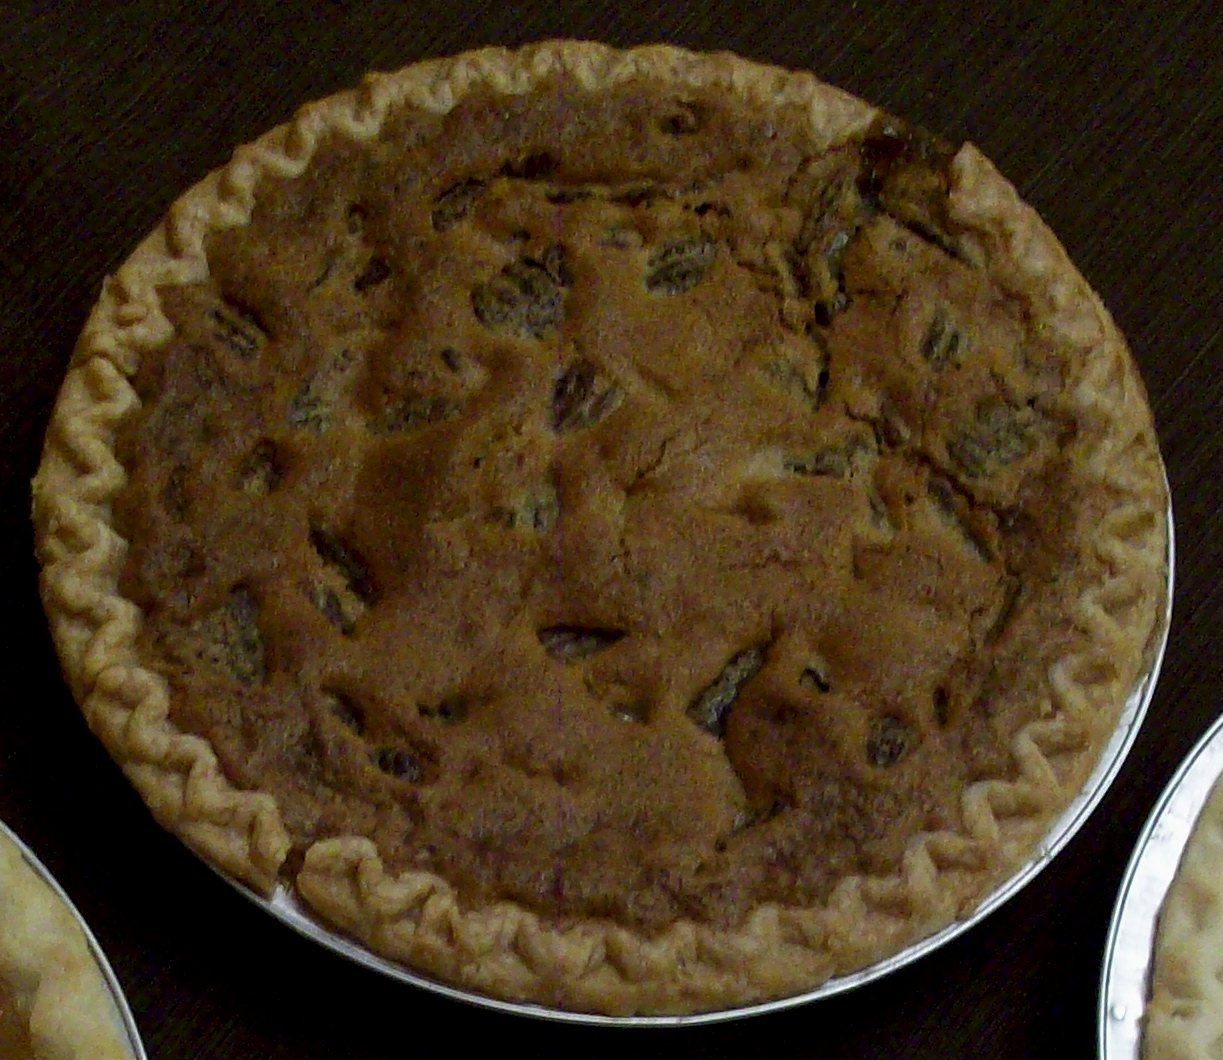
Above: Dear Abby's Pecan Pie. The pecans didn't rise to the top like they do in most pecan pies, but it was super easy and it tasted fantastic.

Dear Abby's Pecan Pie

Serves: 8

Ingredients:

1 cup sugar
1 cup brown sugar
3 eggs
1 teaspoon salt
1/3 cup butter
1 teaspoon vanilla
1 cup pecans

Directions:

Beat the eggs. Add the remaining ingredients, in the order given; work in the nuts. Pour into a 9 inch unbaked pie shell. Bake at 300 degrees for 40-45 minutes.

Source: http://www.cdkitchen.com/recipes/recs/198/DearAbbysPecanPie65027.shtml

Notes: This recipe by Abigail Van Buren (aka Pauline Phillips) is published from time to time in her "Dear Abby" column. Jeanne Phillips, the original Abby's daughter, and the current "Dear Abby" adds this tip: The original recipe stated that the pie should be baked 45-50 minutes in a preheated 350 degree gas oven. If an electric oven is used, it may be necessary to add 15-20 minutes to the baking time. (Begin testing the pie with a toothpick after 45 minutes.)

Key Lime Pie

Key-lime pie takes its name from the type of lime it is made with, the Key lime, which grows in the Florida Keys. The Key lime has a mild, delicate fragrance, and the flavor is sweeter and more tart than that of the commonly found dark green, seedless Persian lime. Condensed milk and a graham-cracker crust are also common to the Key-lime pie, which has remained essentially unchanged over the years.

Look for brightly colored, smooth-skinned limes that are heavy for their size. Small brown areas on the skin won't affect flavor or succulence, but a hard or shriveled skin will. You'll know the pie is done when the center is set but still quivers when the pan is nudged. Before serving, chill the pie in the freezer for 10 minutes; this will make slicing easier.

Ingredients:

Makes 1 pie.

1 1/2 cups graham-cracker crumbs
6 tablespoons unsalted butter, melted and cooled
5 tablespoons sugar
1 (14 ounces) can sweetened condensed milk
4 large egg yolks
1/2 cup freshly squeezed key-lime juice
1 tablespoon grated key-lime zest, plus more for garnish
1 1/2 cups heavy cream, chilled

Directions:

Heat oven to 375 degrees. Combine graham-cracker crumbs, butter, and 3 tablespoons sugar in a medium bowl; mix well. Press into a 9-inch pie plate, and bake until lightly browned, about 12 minutes. Remove from oven, and transfer to a wire rack until completely cooled.

Lower oven to 325 degrees. In a medium bowl, gently whisk together condensed milk, egg yolks, key-lime juice, and zest. Pour into the prepared, cooled crust.

Return pie to oven, and bake until the center is set but still quivers when the pan is nudged, 15 to 17 minutes. Let cool completely on a wire rack.

Shortly before serving, combine cream and remaining 2 tablespoons sugar in the bowl of an electric mixer fitted with a whisk attachment. Whisk on medium speed until soft peaks form, 2 to 3 minutes. Spoon over cooled pie; garnish with zest. Serve immediately.

Source: Martha Stewart website.

Coconut-Key Lime Pie

A classic Key lime pie gets upgraded for the holidays with coconut milk in the filling. If that wasn't enough, the dessert is gilded with toasted shredded coconut sprinkled on top of a billowy whipped cream topping.

Ingredients:

1 can (14 ounces) sweetened condensed milk
1 can (13.5 ounces) unsweetened coconut milk
1/3 cup fresh or bottled Key lime juice
7 large egg yolks
1 Easy Press-In Pie Crust, made with graham crackers
2 cups cold heavy cream
2 tablespoons confectioners' sugar
3 tablespoons sweetened shredded coconut, toasted

Directions:

Preheat oven to 325 degrees. In a medium bowl, whisk together condensed milk, coconut milk, lime juice, and egg yolks until smooth. Pour into crust and bake until set but still slightly wobbly in center, 40 minutes. Let cool on a wire rack, 1 1/2 to 2 hours, then refrigerate 3 hours (or up to 1 day).

In a large bowl, using an electric mixer, beat cream and sugar on high until stiff peaks form, about 3 minutes. To serve, top pie with whipped cream and sprinkle with toasted coconut.

Source: Martha Stewart website.

Easy Press-In Pie Crust

With store-bought cookies, some butter, and a bit of salt and sugar, you can make an irresistible homemade pie crust -- no rolling required. Ideal for icebox pies, press-in crusts are a Thanksgiving shortcut: Bake the crust a day or two ahead, fill it the night before, then add a topping before serving. Whether you use graham crackers or chocolate or vanilla wafers, our simple recipe will turn out a perfect crust every time.

Ingredients:

Makes one 9-inch pie crust.
6 ounces cookies (about 12 graham crackers, 46 vanilla wafers, or 30 chocolate wafers, such as Famous)
3 tablespoons sugar
1/4 teaspoon coarse salt
5 tablespoons unsalted butter, melted

Directions:

Preheat oven to 350 degrees. In a food processor, pulse cookies until finely ground (you should have about 1 1/2 cups). Add sugar, salt, and butter and pulse until combined.

Firmly press crumb mixture into bottom and up sides of a 9-inch pie plate. (If using a springform pan, press crumbs halfway up sides.) Bake until crust is dry and set, about 12 minutes. Let cool completely in plate on a wire rack before filling.

Source: Martha Stewart website.

White Chocolate-Key Lime Pie

Yield: Makes 1 (9-inch) pie

Ingredients:

1 cup whipping cream
1 (11-ounce) package white chocolate morsels
1 tablespoon sour cream
1 teaspoon grated lime rind
1/3 cup fresh Key lime or lime juice
1 (9-inch) ready-made graham cracker crust or your favorite prepared recipe
Garnish: lime slices

Directions:

Combine cream and white chocolate morsels in a medium saucepan over low heat. Cook 5 minutes or until morsels melt, stirring constantly. Remove from heat. Add sour cream, lime rind, and juice; stir well. Pour into crust. Cover and chill at least 8 hours. Garnish, if desired.

Source: Coastal Living, MARCH 2004

Key Lime Pie

Ingredients:

2 large eggs
2 large egg whites
1/2 cup Key lime juice (such as Nellie and Joe's Famous Key West Lime Juice)
1 teaspoon grated lime rind
1 (14-ounce) can fat-free sweetened condensed milk
1 (6-ounce) reduced-fat graham cracker crust
1 1/2 cups frozen reduced-calorie whipped topping, thawed

Directions:

Preheat oven to 350°.

Beat eggs and egg whites at medium speed of a mixer until well-blended. Gradually add juice, rind, and milk to egg mixture, beating until well-blended. Spoon mixture into crust, and bake at 350° for 20 minutes or until almost set (the center will not be firm but will set up as it chills). Cool pie on a wire rack. Cover loosely, and chill 4 hours. Spread whipped topping evenly over filling.

Yield: 8 servings (serving size: 1 wedge)

Nutrition Information: CALORIES 288 (18% from fat); FAT 5.9g (sat 3g,mono 1.5g,poly 1.1g); IRON 0.6mg; CHOLESTEROL 56mg; CALCIUM 141mg; CARBOHYDRATE 49.2g; SODIUM 198mg; PROTEIN 7.6g; FIBER 0.8g

Source: Cooking Light, JUNE 1999