Showing posts with label Sources: Martha Stewart.. Show all posts

Thursday, February 2, 2017

It's a Good Night for Soup!


Half-Hour Chicken Gumbo

Ingredients:

3 tablespoons vegetable oil
1/3 cup all-purpose flour
2 red bell peppers (ribs and seeds removed), chopped
1 medium onion, chopped
4 garlic cloves, chopped
1 teaspoon dried oregano
Coarse sald and ground pepper
1 package (10 ounces) frozen, cut okra
8 ounces smoked (precooked) andouille sausage, halved lengthwise and sliced 1 inch thick
1 rotisserie chicken (about 2 1/2 pounds), skin and bones removed, meat shredded (about 4 cups)
Store-bought or homemade cornbread, for serving (optional)
Rice, for serving (optional)

Directions:

In a 5-quart Dutch oven or heavy-bottomed pot, heat oil over medium. Add flour, and cook, whisking constantly, until pale golden, 5 to 7 minutes. Stir in bell peppers, onion, garlic, and oregano; season with salt and pepper. Cook, stirring occasionally, until vegetables are crisp-tender, 10 to 12 minutes.

Add 4 cups water; stir in okra and sausage. Bring to a boil. Stir in shredded chicken, and warm through, 1 to 2 minutes. Season with salt and pepper. If desired, serve with cornbread and/or poured on top of rice.

Recipe Note: Rotisserie chicken shaves many minutes from the total cooking time, and its slow-roasted goodness bring just as much to the mix as if you'd cooked your own.

Source: Martha Stewart. You can find it here.

Notes: We couldn't find the frozen okra, so we just skipped it. We also opted to serve it over rice (kind of like a soup mix-in). This was really good and it definitely hits the spot during this cold weather!

Monday, August 15, 2016

Good Enough for Guests, but Quick and Easy Too


Here is a main dish that is a great weeknight meal because it is so fast and easy to throw together, but it is fancy and delicious enough that you could also serve it for guests. I've posted this one before here, but it's so good, it deserves a post of its own.

Apricot-Glazed Pork Tenderloin

Serves 4

Ingredients:

2 pork tenderloins (about 12 ounces each), trimmed of excess fat
1 tbsp olive oil
Coarse salt and ground pepper
1 jar (10-12 ounces) apricot jam, (about 1 cup)
1/4 cup spicy brown mustard

Directions:

Heat broiler; set rack 4 inches from heat. Line a rimmed baking sheet with foil. Rub pork with oil; season with salt and pepper. broil 10 minutes.

Meanwhile, in a small saucepan, whisk together jam and mustard. Cook over medium heat until jam melts, 3-4 minutes; remove from heat. Transfer half to a small bowl for brushing. Cover pan to keep remaining sauce warm.

Remove pork from broiler; brush with reserved sauce. Continue broiling until pork is blackened in spots and registers 150 degrees on an instant-read thermometer, 5-10 minutes more.

Cover pork loosely with foil; let rest 5 minutes before slicing. Serve drizzled with warm sauce.

Source: Martha Stewart Everyday Food recipe. You can find it here.

Notes: This took more than 10 minutes per side for me to broil. I would just broil it until it starts to brown, turn it over, and then broil that side until it starts to brown. Check it with a thermometer, or cut into it to see if it is cooked throughout and no longer pink on the inside. After I sliced the pork, I brushed each piece with the apricot mustard glaze. Seriously, this is such a good and easy main dish. We served it with green beans on the side, but have served it with asparagus in the past too.

Thursday, August 11, 2016

Simple Fruit Salad


This is a very simple fruit salad that will brighten up any meal for your family this summer.


Blackberry-Cantaloupe Salad

Ingredients:

2 cups blackberries
1/2 cantaloupe, cut into 1-inch pieces
1 tablespoon sugar
1 teaspoon grated peeled fresh ginger
1/2 teaspoon grated lime zest plus 1 tablespoon juice
2 tablespoons thinly sliced fresh mint leaves

Directions:

In a large bowl, combine all ingredients except mint. Cover and let stand 30 minutes (or refrigerate up to 2 days). Stir in mint just before serving.

Source: Martha Stewart. You can find it here.

Notes: This is just a simple, delicious, refreshing summer fruit salad.


Sunday, August 7, 2016

Breakfast For Dinner!

Well, we do this a lot, but we had another "Breakfast for Dinner" night, and as always, it was a huge success. The only drawback being that no one wanted dessert after eating this feast--especially since we had sweet breakfast choices to balance out the savory ones.


Amish Breakfast Casserole

Ingredients:

1 pound sliced bacon, diced
1 medium sweet onion, chopped
6 eggs, lightly beaten
4 cups frozen shredded hash brown potatoes, thawed
2 cups (8 ounces) shredded cheddar cheese
1 1/2 cups (12 ounces) 4% cottage cheese
1 1/4 cups shredded Swiss cheese

Directions:

Preheat oven to 350 degrees F. In a large skillet, cook bacon and onion over medium heat until bacon is crisp; drain. In a large bowl, combine remaining ingredients; stir in bacon mixture. Transfer to a greased 13x9-inch baking dish.

Bake, uncovered, 35-40 minutes, or until a knife inserted near the center comes out clean. Let stand 10 minutes before cutting. Yield: 12 servings.

Nutrition information: 1 piece equals 273 calories, 18 g fat, 153 mg cholesterol, 477 mg sodium, 8 g carbohydrate, 18 g protein.

Source: Taste of Home. You can find it here.

Notes: I really liked the taste that the flavor that the Swiss cheese gave this casserole. Yummy stuff!


Overnight Country Sausage and Hash Brown Casserole

Ingredients:

1 package (16 oz) bulk hot pork sausage
10 eggs
1 1/2 cups milk
2 teaspoons Dijon mustard
1/4 teaspoon ground pepper
1 bag (20 oz) refrigerated O'Brien hash browns (about 4 1/2 cups)
1 1/2 cups shredded sharp Cheddar cheese (6 oz)

Directions:

Spray 13x9-inch (3-quart) baking dish with cooking spray. In 8-inch skillet, cook sausage over medium heat 5 to 7 minutes or until no longer pink; drain.

In large bowl, beat eggs, milk, Dijon mustard and pepper with whisk until mixed well. Stir in hash browns, 1 cup of the cheese and the cooked sausage. Pour mixture in baking dish; cover and refrigerate at least 8 hours, but no longer than 12 hours.

Heat oven to 350 degrees F. Remove dish from refrigerator, uncover and top with remaining 1/2 cup cheese. Bake 45 to 55 minutes or until center is just set. Cool 10 minutes before serving.

Source: Pillsbury. You can find it here.

Notes: Another great and easy breakfast casserole that will really hit the spot.


Blintz Brunch Bake

Ingredients:

2 pkg. (8 oz each) Neufchatel cheese, softened
1 container (15 oz) part skim ricotta cheese
5 eggs, divided
3/4 cup sugar, divided
2 tsp zest and 3 tbsp. juice from 1 lemon
1 cup flour
3/4 cup butter or margarine, melted
1/4 cup milk
1 tbsp. baking powder

Directions:

Heat oven to 325 degrees F.

Beat Neufchatel, ricotta, 2 eggs, 1/4 cup sugar, lemon zest, and juice in large bowl with mixer until blended.

Whisk remaining eggs, sugar, flour, butter, milk, and baking powder in separate bowl until blended. Spread 1/3 of the batter onto bottom of 13x9-inch baking dish sprayed with cooking spray; cover with Neufchatel mixture, then remaining batter.

Bake 45 minutes, or until center is set.

Recipe notes: If baking in a 13x9-inch metal baking pan, increase the oven temperature to 350 degrees F. Sprinkle with powdered sugar just before serving, if desired.

Makes 12-16 servings (depending on how large you would like to cut the pieces).

Source: Kraft recipes. You can find it here. We also originally posted this recipe on our blog here.

Notes: As I mentioned above, I initially served this warm and that was all wrong for this dish. I also mentioned that the original recipe doesn't specify what temperature to serve it at, but it is much better at room temperature or chilled. Be sure to have a group to serve this for because you don't want to feel guilty after eating the whole pan by yourself!

This time, we served it with sliced strawberries on top as well as the powdered sugar. Delicious!


Dutch Baby Pancake
Ingredients:
3 tablespoons unsalted butter, room temperature
3 large eggs
3/4 cup whole milk
1/2 cup all-purpose flour (spooned and leveled)
1/4 teaspoon salt
1/2 teaspoon pure vanilla extract
1/4 cup, plus 1 tablespoon sugar
1 tablespoon fresh lemon juice
Directions:
Preheat oven to 425 degrees. In a medium cast-iron or ovenproof nonstick skillet, melt 2 tablespoons butter over medium heat; set aside.
In a blender, combine eggs, milk, flour, salt, vanilla, and 1/4 cup sugar. Blend until foamy, about 1 minute. pour batter into skillet; bake until pancake is puffed and lightly browned, about 20 minutes.
Working quickly, dot pancake with 1 tablespoon butter, and sprinkle with 1 tablespoon sugar and lemon juice. Slice into wedges, and serve immediately.
Source: Martha Stewart Everyday Food, March 2009. You can find it here. We love this one so much that we have also already posted it on our blog here and here.
Notes: This is really similar to a German pancake. However, this one has sugar inside and on top of it, so you can serve it as-is. No need to add syrup or any other toppings (or you still can, if you like!).

Yeasty Waffles

Ingredients:

1 3/4 cup(s) whole milk (at room temperature)
1/2 cup(s) unsalted butter (melted, plus more melted butter for the waffle iron)
2 1/2 cup(s) sifted all-purpose flour
1 tablespoon(s) (from 2 envelopes) active dry yeast (at room temperature)
2 large eggs
2 teaspoon(s) agave nectar or honey
1 teaspoon salt
Syrup, for serving

Directions:

In a large bowl, combine the milk, 1/2 cup melted butter, flour, yeast, eggs, agave, and salt, and whisk until smooth. Cover with plastic wrap and let stand until the batter is very puffy, about 2 hours at room temperature.

Preheat the oven to 250 degrees F. Preheat a waffle iron and brush it with melted butter. Gently stir the batter to deflate it. For each batch, fill the waffle iron about two-thirds full (the batter will spread and rise); brush the waffle iron with melted butter as needed.

Cook the waffles until golden and crisp. Transfer the waffles immediately from the iron to plates, or keep them warm in the oven. Serve the waffles with syrup, fresh fruit, and softened butter.

Source: Food and Wine. You can find it here.

Notes: Regrettably, I did not get a picture of these! What a pity! I will have to make them again soon and add a picture. These were fantastic. So tasty and such an amazing texture.

Sunday, April 17, 2016

Food That Jiggles


I'm not going to lie, I'm not a huge fan of gelatin when it is plain and on its own. Gelatin can be used in some pretty fun and amazing ways in recipes, but made just according to the package directions...it's not really my favorite thing. However, when it is condensed in jiggler form, I can make an exception.


Fruit Jellies

Ingredients:

1 1/3 cups fruit juice (any flavor) or water
4 packets powdered gelatin (1 ounce total)
2 1/2 cups sugar
2 cups fruit preserves or jam

Directions:

Place 2/3 cup juice in a small bowl or measuring cup and sprinkle with gelatin. Let sit 5 minutes. Meanwhile, in a medium saucepan, combine remaining 2/3 cup juice and 1 1/2 cups of the sugar. Bring to a boil over medium-high and cook, stirring, until sugar dissolves, 5 minutes. Add preserves and whick to combine. Return to a boil and cook until thick and syrupy, 2 minutes. Add gelatin mixture and whisk until gelatin dissolves. Pour through a fine-mesh sieve into an 8-inch square baking dish. Refrigerate until set, 3 hours (or up to 2 weeks).

Place remaining 1 cup sugar in a pie plate or shallow bowl. Cut fruit jelly into 1-inch squares. Toss in sugar to coat just before serving.

Source: Martha Stewart. You can find it here.

Notes: These were really good. If you don't plan to eat them all at once (for instance, you aren't serving them at a large gathering, you are just planning to snack on them at home), don't coat the whole batch in sugar all at once. Once they sit for awhile, they will absorb the sugar and become sticky. If you are having just a few here and there, toss them in sugar right before eating.

I made this batch with white grape juice.


Fruit Juice Knox Blox

Ingredients:

4 pounches Knox Unflavored Gelatin
1 cup cold fruit juice
3 cups fruit juice, heated to boiling
2 tbsp. sugar or honey, if desired

Directions:

Sprinkle unflavored gelatin over 1 cup cold fruit juice in large bowl; let stand 1 minute. Add 3 cups fruit juice that has been heated to boiling.Stir until gelatin is completely dissolved, about 5 minutes. Sweeten to taste with sugar or honey, if desired (though not necessary).

Pour into a 13x9-inch glass pan. Chill until firm, about 3 hours.

Cut into 1-inch squares to serve.

Source: I got this recipe off the back of a box of Knox gelatin. You can also find it online here. You can also find it here.

Notes: I really love these. I love using fruit juice and unflavored gelatin as opposed to a flavored gelatin. I used apple juice for this batch. I love the taste, texture, and look of these. These seriously look so cool!


Jell-O Jigglers

Ingredients:

2 1/2 cups boiling water (Do not add cold water)
2 pkgs. (8-serving size each) Jell-O Gelatin, any flavor

Directions:

Stir boiling water into dry gelatin mix in large bowl at least 3 minutes until completely dissolved. Pour into 13x9-inch pan.

Refrigerate at least 3 hours or until firm.

Dip bottom of pan in warm water 15 seconds. Cut into 1-inch squares, or cut into decorative shapes using cookie cutters. Be careful to cut all the way through the gelatin to bottom of pan. Lift Jigglers from pan with a metal spatula. Store in tightly covered container in refrigerator.

Source: Kraft Recipe. You can find it here.

Notes: Honestly, this is the only way I ever make Jell-O for my kids and if they have Jell-O served to them in any other way, they kind of look at you like, "Wait, I can't pick this up with my hands?"

I used strawberry Jell-O for this batch.

Friday, February 12, 2016

Another Version


One thing you may have learned about us is that one version is never enough. We don't just have one brownie recipe on this blog...we have at least 10. So, it's no surprise that although we have this lovely version of lemon bars already on our blog, we are now posting this one as well.


Creamy Lemon Squares

Ingredients:

1/2 cup (1 stick) unsalted butter, room temperature, plus more for pan
1/2 cup confectioners' sugar, plus more for dusting
1/4 teaspoon salt
1 cup all-purpose flour, (spooned and leveled)
4 large egg yolks
1 can (14 ounces) sweetened condensed milk
3/4 cup fresh lemon juice (from about 3 lemons)

Directions:

Preheat oven to 350 degrees. Butter an 8-inch square baking pan. Line bottom with parchment paper, leaving an overhang on two sides; butter paper.

Make crust: using an electric mixer, beat butter, sugar, and salt until light and fluffy. Add flour, and mix on low just until combined. Press dough into the bottom and 1/2 inch up sides of prepared pan; prick all over with a fork. Bake until lightly golden, 15 to 20 minutes.

Make filling: In a large bowl, whisk together yolks, condensed milk, and lemon juice until smooth. Pour over hot crust in pan; return to oven, and bake until filling is set, 25 to 30 minutes. Cool completely in pan.

Refrigerate until filling is firm, about 2 hours or up to 3 days. Using paper overhang, lift cake onto a work surface; cut into 16 squares, and dust with confectioners sugar.

Source: Martha Stewart. You can find it here.

Notes: Don't sprinkle these with powdered sugar until just before serving. If you try to do it too long beforehand, the powdered sugar will be absorbed by the lemon bars. These have kind of a custard texture to them. There's a bit of a key lime pie feel to this dessert. They are really good, but they are not your classic lemon bar.

Friday, December 11, 2015

They Won't Turn This Down


My boys can be picky eaters, but (so far) this is one of those dinners that they eat every time I make it. In fact, the first time I made it, I didn't think they would even try it...and the whole thing got gobbled up and they asked for more...so I made it again about a week later. I always double this recipe now! I am going to share the recipe with my changes and a link to the original recipe. I increase the bacon and double most of the rest of the ingredients.


Baked Tortellini with Bacon

Ingredients:

1 pkg. sliced bacon (12 or 16 oz pkg., depending on how much bacon you want)
1 medium yellow or white onion, diced medium or 2 tbsp. dried minced onion
2 garlic cloves, minced
Coarse salt and ground pepper, to taste
3 tbsp. all-purpose flour
4 cups whole milk
2 (19 oz) packages frozen cheese tortellini
1 cup grated Parmesan

Directions:

Cook tortellini according to package directions. Drain and set aside.

Cook bacon. (I like to cook my bacon in the oven at about 400 degrees F for 15-20 minutes, or until crispy. Or you can slice the bacon beforehand and cook over medium heat in a pan on the stove top until brown and crisp, about 10 minutes, stirring frequently.) Drain bacon on paper towels, reserving bacon fat.

Saute onion and garlic in 2-3 tablespoons of the reserved bacon fat in a pan over medium heat and season generously with salt and pepper. Cook, stirring occasionally, until onion is soft, about 8 minutes. Add flour and cook, stirring, 30 seconds.

Slowly add milk, whisking constantly. Bring to a boil over medium-high, stirring occasionally. Reduce to a simmer; cook, stirring often, until liquid has thickened, about 4 minutes. Remove from heat; stir in tortellini, half the bacon, and 1/2 cup Parmesan. Transfer to a broiler-proof baking dish and top with remaining bacon followed by 1/2 cup Parmesan. Broil until cheese is melted and top is lightly browned, 1-3 minutes.

Source: Martha Stewart. You can find it here.

Notes: As mentioned before, I made some changes. I increased the bacon because my boys love it. Four strips of bacon in the original recipe was not nearly enough. The first time I made this, I used dried minced onion because I had just used my last fresh onion the day before. The dried minced onion gives it such a punch of flavor. I wouldn't use more than 2 tbsp. though because that stuff is really potent! A little goes a long way. I have made this with fresh diced onion too...and I almost preferred the dried minced onion. The dried minced onion makes this dish so flavorful. It works great both ways, but the dried minced onion is just so easy. However, what I like best is a combination of one fresh diced onion and a sprinkle, to taste, of the dried minced onion. I simply doubled everything else.


Above: Here's the first batch I made. Delicious, but not enough! 


Above: Here's a nice doubled big batch of tortellini. Enough for my boys to have all they want and still have leftovers the next day.

Thursday, December 10, 2015

I Love Using Just One Pot!


I love that there are so many recipes floating around these days that require only one pot. It makes things so much easier. Plus, these dinners are usually so fast! I'm a big fan. Here's another great one that I found.


One-Pot Pasta

Ingredients:

1 (16 oz.) pkg. penne pasta
2 stalks broccoli, cut into florets
2-3 minced garlic cloves, or 1-2 teaspoons bottled minced garlic
1/4 cup olive oil
1-3 lemons
Salt and pepper, to taste
Shredded Parmesan cheese, to taste

Directions:

Boil penne 6 minutes less than al dente; add broccoli florets, and cook until penne is al dente.

In measuring cup with spout, combine garlic cloves, olive oil, zest from one lemon, and juice from 1-3 lemons (depending on how lemony you want the flavor to be), and salt and pepper to taste.

When pasta is done, drain and return to the pot. Toss with the olive oil/lemon juice mixture until well-coated. Stir in some Parmesan and sprinkle additional Parmesan on top of the pasta to serve.

Source: Everyday Food, October 2008. You can find it here.

Notes: I like one-pot dinners so much, we actually have a tag for them so you can look at all of them at once. This was so good. I like things on the lemony side, so I used the zest of one lemon and the juice of three. This tasted so fresh and it really hit the spot. Besides that, it was so quick and easy! (We have another tag for quick and easy recipes too!).

Friday, August 15, 2014

Summer Pies


We decided to mix things up a little with our pie night and do it in the summer instead of the fall. We had a salad bar for dinner and then a bunch of pies for dessert. Here are the ones we tried this time.


Marshmallow Crispy Lemon Pie

Ingredients:

1 1/2 tbsp. butter
1/4 cup dry lemon flavor gelative (1/2 of a 3-oz pkg.)
4 cups miniature marshmallows
3 cups rice crispies cereal
1 pkg. (3.4 oz) lemon flavor instant pudding
1 1/2 cups cold milk
5 fresh strawberries, cut in half, optional

Directions:

Microwave butter in large microwaveable bowl on high for 30 seconds, or until melted. Add dry gelatin mix and marshmallows; toss to coat. Microwave 1 min. or until marshmallows are completely melted and mixture is blended, stirring after 45 seconds. Add cereal; mix well.

Press cereal mixture onto bottom and up side of 9-inch pie plate sprayed with cooking spray.

Beat pudding mix and milk with whisk 2 minutes; pour into crust. Refrigerate 2 hours or until firm. Garnish with strawberries, if desired.

Recipe notes: You can prepare using vanilla flavor instant pudding and your favorite flavor of gelatin. You can also substitute raspberries for the halved strawberries.

How to use remaining gelatin: Add 1/4 cup boiling water to remaining dry gelatin mix in small bowl; stir 2 minutes, until dissolved. Stir in 2 tbsp. cold water. Refrigerate 1 hour until firm.

Yield: 10 servings.

Source: Kraft Recipes. You can find it here.


Notes: This was a fun change from using pie crust. Very kid friendly. Plus, I am always a sucker for lemon.


Macadamia Key Lime Pie

Ingredients:

1 cup crushed shortbread cookies
1/2 cup finely chopped macadamia nuts
1/4 cup sugar
1/3 cup butter, melted

Filling:

1 package (8 ounces) cream cheese, softened
1 can (14 ounces) sweetened condensed milk
1/2 cup Key lime juice or lime juice
1 cup heavy whipping cream
1/4 cup coarsely chopped macadamia nuts

Directions:

In a small bowl, mix cookie crumbs, macadamia nuts and sugar; stir in butter. Press onto bottom and up sides of a greased 9-inch. pie plate.

Refrigerate 30 minutes.

In a large bowl, beat cream cheese until smooth. Beat in milk and lime juice until blended. Transfer to crust. Refrigerate, covered, at least 4 hours.

In a small bowl, beat cream until soft peaks form; spoon or pipe onto pie. Top with macadamia nuts.

Yield: 8 servings.

Source: Taste of Home. You can find it here.

Notes: Ooh, this was good. Tart, but not too tart, and very creamy.


Hoosier Pie

Ingredients:

1/2 (14.1-ounce) package refrigerated pie dough
1 cup granulated sugar
5 tablespoons all-purpose flour
1 tablespoon cornstarch
1/4 teaspoon salt
1 cup half-and-half
1 cup whole milk
2 large egg yolks
1 teaspoon vanilla extract
1/4 to 1/2 teaspoon freshly grated nutmeg

Directions:

Preheat oven to 375 degrees F.

Fit dough into a 9-inch pie plate. Fold edges under; flute.

In a large bowl, whisk together sugar, flour, cornstarch, and salt. Add half-and-half, and mix well.

Combine whole milk and egg yolks in a medium bowl, stirring with a whisk; add to sugar mixture, and whisk to combine well. Stir in vanilla.

Pour mixture into prepared crust and sprinkle nutmeg over top. Bake at 375 degrees F. for 1 hour and 15 minutes, until filling is set and lightly browned. Cool completely before serving.

Recipe notes: This simple custard pie originated in the 1800s as a way to use ingredients typically on hand: butter, flour, and sugar or maple syrup. Similar to the Hoosier Pie is the Pennsylvania Chess Pie; both were created, it's believed, by Shaker and Amish cooks.

Source: MyRecipes.com. Oxmoor House, October 2013. You can find it here.

Notes: This was really good. Very basic ingredients and super tasty.


Martha Stewart's Crisp Coconut and Chocolate Pie

Ingredients:

For the crust:

4 tablespoons unsalted butter, softened
11 ounces (about 6 cups) sweetened shredded coconut

For the filling:

1 cup heavy cream
8 ounces bittersweet chocolate (preferably 51 percent cacao), finely chopped

Directions:

Make the crust: Preheat the oven to 350 degrees F. In a food processor, process butter and one-third of the coconut until mixture forms a ball, 1 to 2 minutes. Transfer to a medium bowl. Sprinkle remaining two-thirds coconut over mixture and combine with your fingers.

Place a 9-inch pie plate on a parchment-lined rimmed baking sheet. Press coconut mixture into bottom and up sides of pan to form crust, leaving top edges loose and fluffy. Place a foil ring over edge to prevent burning. Bake until center begins to brown, 10 to 15 minutes; remove foil and bake until edges are browned, 4 to 5 minutes more. Transfer crust to a wire rack to cool completely.

Make the filling: Bring cream just to a boil in a small saucepan; pour over chocolate in a medium heatproof bowl. Let sit 10 minutes, then stir until chocolate is completely melted and mixture is combined. Pour into coconut crust. Refrigerate until filling is set, 1 hour, or up to 1 day.

Makes one 9-inch pie.

Source: I originally found this on the Martha Stewart website, but it doesn't appear to be there anymore. You can find it here.
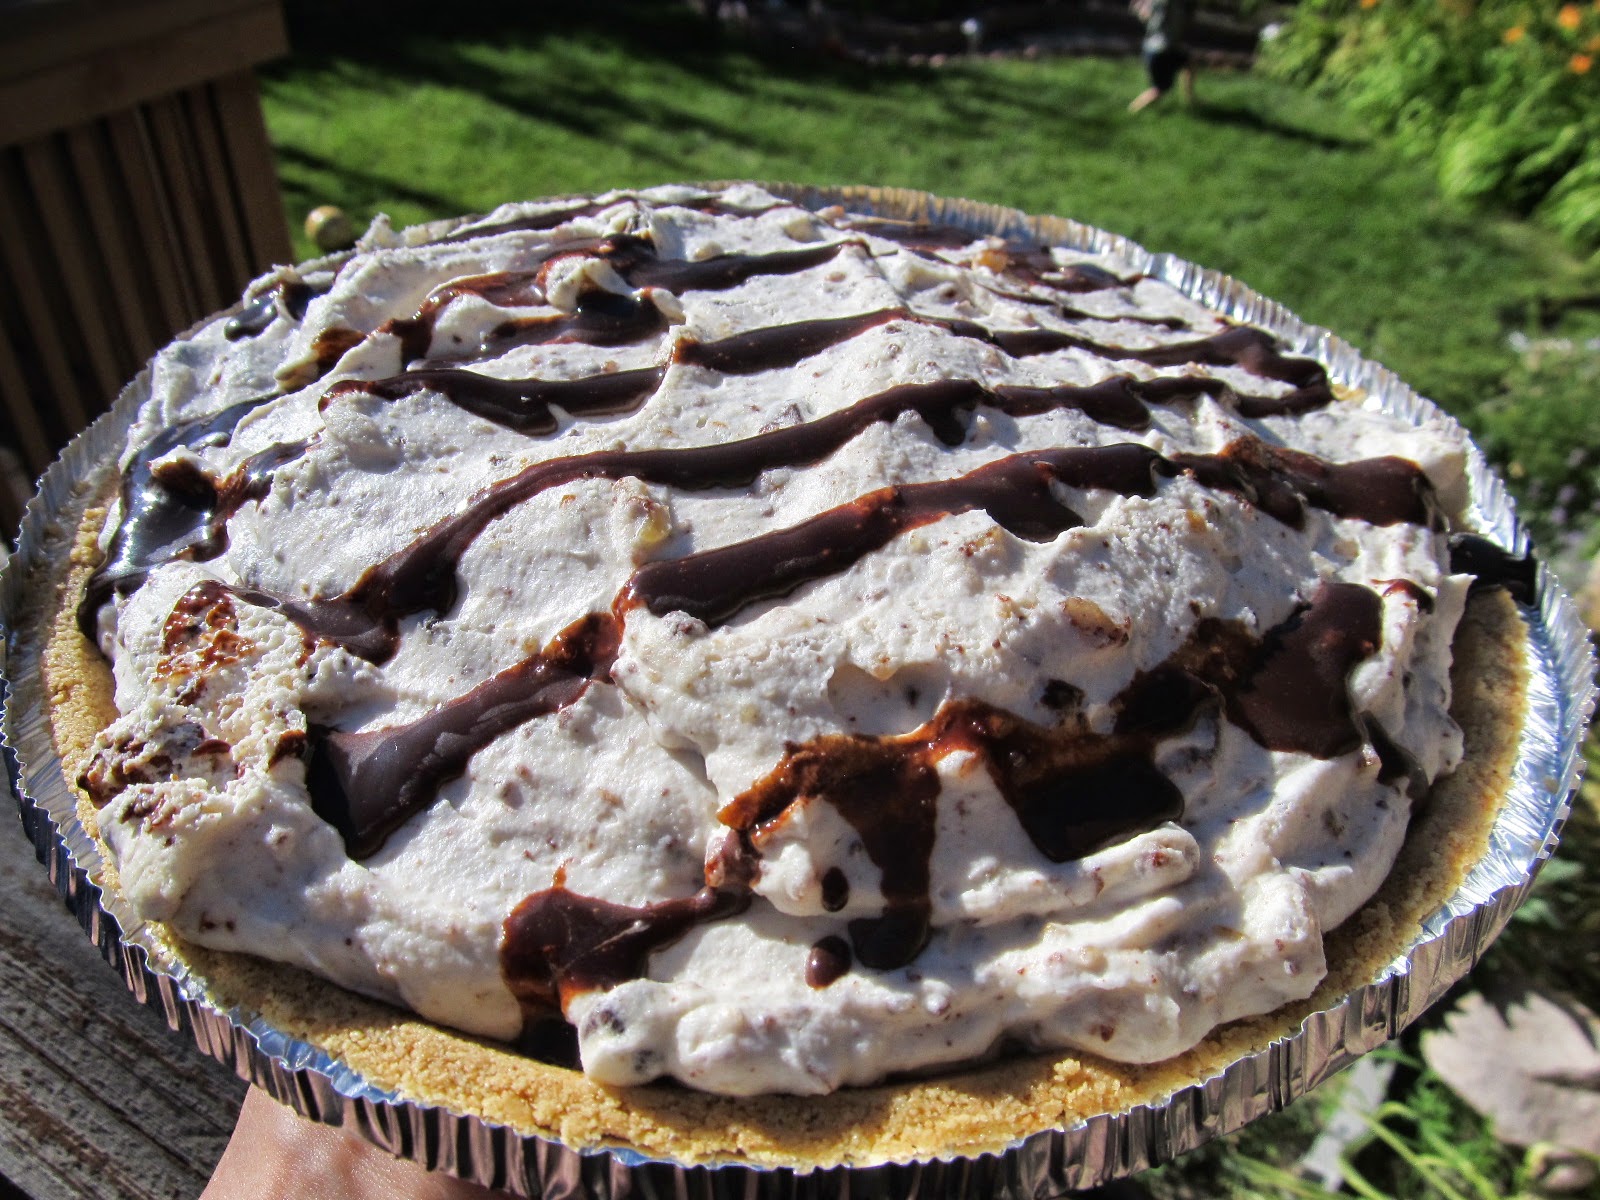


Olive Garden Chocolate Ricotta Pie

Ingredients:

Crust:

1 1/4 cups graham cracker crumbs
1/2 cup melted butter
2 tbsp. granulated sugar

Filling:

1 lb. ricotta cheese
3/4 cup confectioner's sugar
1 tsp. almond extract
1 cup toasted almonds
1/2 cup semisweet chocolate chips
1 1/4 cup heavy cream

Directions:

Preheat oven to 375 degrees F.

Mix graham cracker crumbs, butter, and sugar together in a bowl. Shape inside 9" pie plate. If crust is too crumbly, ad a small amount of butter so crumbs will hold together. Bake at 375 for 8-9 minutes, until lightly browned. Allow to cool.

Combine ricotta, confectioner's sugar, and almond extract in a bowl and set aside.

Combine almonds and chocolate. Chop together in a food processor; do not chop too fine.

Fold together cheese mix and chopped almond and chocolate and chill.

Whip heavy cream until stiff. Fold into ricotta and chocolate mix half at a time.

Spoon into chilled crust and let sit overnight before serving.

Serve with chocolate sauce, if desired.

Source: This is an actual Olive Garden recipe found on their site. You can fine it here. Their recipe site used to be a lot more user friendly than it is now though.

Notes: This was one of my favorites. Very rich, but oh so good.


Mexican Chocolate Cream Pie

Ingredients:

Crust:

1 1/2 cups graham cracker crumbs (about 10 cookie sheets), divided
2 tablespoons sugar
1 teaspoon ground cinnamon
1/8 teaspoon salt
2 tablespoons egg white
2 tablespoons butter, melted
Cooking spray

Filling:

1/2 cup sugar
2 tablespoons cornstarch
1 tablespoon unsweetened cocoa
1/4 taspoon instant espresso powder (we used Postum)
1/8 teaspoon salt
1/8 teaspoon ground red pepper
1 large egg
1 large egg yolk
1 3/4 cups 2% reduced-fat milk
2 ounces dark chocolate, chopped
1 1/2 cups frozen reduced-calorie whipped topping, thawed

Directions:

Preheat oven to 375 degrees F.

To prepare the crust, reserve 1 tablespoon crumbs for topping. Combine the remaining crumbs, 2 tablespoons sugar, cinnamon, and 1/8 teaspoon salt in a bowl, stirring well. Stir in egg white an dbutter. Press crumb mixture into bottom and up sides of a 9-inch pie plate coated with cooking spray. Bake at 375 degrees F for 9 minutes or until lightly toasted; cool completely on a wire rack.

To prepare filling, combine 1/2 cup sugar, and the next 7 ingredients (through egg yolk) in a bowl, stirring well with a whisk. Place the milk in a medium, heavy saucepan over medium-high heat; cook until milk reaches 180 degrees F or until tiny bubbles form around edge (do not boil). Gradually add hot milk to egg mixture, stirring constantly with a whisk. Return milk mixture to pan; cook over medium heat 10 minutes or until thick and bubbly, stirring constantly. Remove from heat. Add chocolate; stir until smooth.

Place pan in a large ice-filled bowl for 10 minutes or until mixture cools, stirring occasionally. Spoon filling into crust, and cover surface of filling with plastic wrap. Chill for 3 hours or until set; remove plastic wrap. Spread the whipped topping over filling; sprinkle with reserved cracker crumbs.

Source: MyRecipes.com. Cooking Light, May 2011. You can find it here.

Notes: This was really good. The cinnamon and the red pepper added some great flavor.


 Streusel Peach Pie

Ingredients:

Pastry for single-crust pie (9 inches)
5 cups sliced peeled fresh or frozen peaches, thawed
1/2 cup sugar
1/4 cup all-purpose flour
Dash ground nutmeg
1 egg
2 tablespoons heavy whipping cream

Topping:

1/2 cup all-purpose flour
1/2 cup packed brown sugar
1 teaspoon ground cinnamon
3 tablespoons cold butter
Whipped cream, optional

Directions:

Line a 9-inch. pie plate with pastry; trim pasty to 1/2 in. beyond edge of plate and flute edges.

In a large bowl, combine the peaches, sugar, flour, and nutmeg. In a small bowl, whisk egg and cream. Pour over peaches; toss to combine. Place in crust. Bake at 375 degrees F for 35 minutes.

For topping, in a small bowl, combine the flour, brown sugar, and cinnamon. Cut in butter until crumbly. Sprinkle topping over outer edges of pie, leaving center uncovered.

Bake for 15-20 minutes or until golden brown, covering edges with foil to prevent overbrowning, if necessary. Cool on a wire rack. Serve with whipped cream, if desired.

Yield: 8 servings.

Source: Taste of Home. You can find it here.

Notes: Really good, classic peach pie.


Cool and Creamy Watermelon Pie

Ingredients:

1 package (3 ounces) watermelon gelatin
1/4 cup boiling water
1 carton (12 ounces) frozen whipped topping, thawed
2 cups cubed seeded watermelon
1 graham cracker crust (9 inches)

Directions:

In a large bowl, dissolve gelatin in boiling water. Cool to room temperature. Whisk in whipped topping; fold in watermelon. Spoon into crust. Refrigerate for 2 hours, or until set.

Yield: 6-8 servings.

Source: Taste of Home. You can find it here.


Notes: This was our kid friendly pie choice. The kids all gravitated towards it.


Above: Did we make enough pies?

Saturday, August 2, 2014

Repeat!


I made this one awhile back, but I just made it again this week (because I didn't know what I wanted to make for dinner, and I happened to have all of the ingredients for this on hand) and it was just so good that I thought I would post it again (especially since I took new pictures and remembered the parsley this time).


Creamy Pasta with Crispy Salami

Ingredients:

3 eggs
1 cup grated Parmesan
4 ounces salami
Olive oil
3 crushed garlic cloves
3/4 pound spaghetti
Salt and pepper
Chopped parsley

Directions:

Whisk together eggs and Parmesan in a large bowl.  Cut salami into 1/2 inch strips.  Heat a skillet over medium-high, then coat with olive oil.  Cook salami and garlic until salami is crisp.  Cook spaghetti, before draining, reserve 1 cup pasta water.  Add hot pasta to egg mixture, along with garlic and half the salami.  Toss, adding enough pasta water to coat pasta in a creamy sauce.  Season with salt and pepper, if needed.  Serve topped with a sprinkle of parsley and remaining salami.

Source: Martha Stewart, Everyday Food. You can find it here.

Notes: This is a fun variation on pasta carbonara.  If you don't have salami, you can go the traditional route and use bacon instead.

Oh, and I must strongly suggest that you use freshly ground pepper in this dish.  It makes all the difference!

I cooked a whole pound of pasta.  Last time, I forgot the parsley. This time, I remembered. :) It just makes it look so much prettier!

Thursday, July 31, 2014

Everything is Rosy


You know, I love roses. We had such a beautiful rose bush at the house that I grew up in. It grew such beautiful long stemmed light pink roses. They were the most heavenly smelling roses I have ever smelled. When we moved, I was so tempted to dig that bush up and bring it with us! It turns out that the new owners pulled the bush out, which broke my heart, and made me REALLY think that I should have just dug it up and taken it with me. I have no idea what specific kind of roses they were either. I'll have to do some research one of these days and see if I can get a bush of my own that is like that one. I remember even making rose syrup with those petals once upon a time when I was in high school, because yes, even the taste of roses is heavenly (they are non-toxic and completely edible, which is why you can put them on wedding cakes).

Here is a recipe that will allow you to appreciate the beauty of roses at any time of the year.


Rose Petal Jelly

Ingredients:

2 cups water
3 cups unsprayed pink rose petals, thicker tissue at the base of petals removed
2 1/2 cups sugar
1/4 cup freshly squeezed lemon juice
3 ounces liquid pectin
1 tablespoon rose water

Directions:

Bring the water to a boil in a medium saucepan; remove from heat. Add petals; cover, and steep for 30 minutes. Strain liquid into clean saucepan. Discard petals.

Add sugar and lemon juice to pan. Bring mixture to a boil, stirring, over medium-high heat. Boil 2 minutes; add pectin, and boil 2 minutes (for firmer jelly, boil up to 2 minutes more). Remove from heat, add rose water. Pour into sterilized jars, and let cool completely. Store in refrigerator up to 6 months.

Source: Martha Stewart. You can find the recipe here.

Notes: Holy cow, this was the easiest thing to make ever! I did boil my jelly an additional 2 minutes (so it would be more firm).

I also did not trim the ends off of my rose petals.

I think rose flavoring is a pretty acquired taste, but I love it. Oh, and do not be tempted to use more than 1 tablespoon of rose water. It is pretty potent stuff. If you use too much, it will taste like perfume.

As is, this was sweet and delicate. Oh, and you can find rose water at middle eastern markets. My mom got me three jars of rose water at a market in Salt Lake! I will have to research some more rose recipes! I will definitely be making some Turkish Delight (which is traditionally rose flavored) in the near future.

Monday, May 26, 2014

Slow Cooker to the Rescue!


Oh, busy days. Why does it seem like you are becoming more frequent? Thank goodness for slow cookers on days like those. Here is a great new recipe I found.


Slow-Cooked Tex-Mex Chicken and Beans

Ingredients:

1 cup dried pinto beans, rinsed
1 jar (11 ounces) mild or medium salsa (1 1/2 cups)
2 tablespoons chopped canned chipotle chiles in adobo sauce
2 tablespoons all-purpose flour
1 cup water
1 1/2 pounds boneless, skinless chicken thighs (about 8) (see notes below)
Coarse salt and ground pepper
1 medium red onion, chopped
1 red bell pepper (ribs and seeds removed), chopped
1/4 cup reduced-fat sour cream, for serving
1/4 cup chopped fresh cilantro, for serving

Directions:

In a 5- to 6-quart slow cooker, stir together beans, salsa, chiles, flour, and 1 cup water. Season chicken with salt and pepper; arrange on top of bean mixture. Scatter onion and bell pepper on top of chicken.

Cover and cook on low heat for 8 hours. (Do not open lid or stir.)

Remove chicken from stew; shred into large pieces and return to stew. Serve topped with sour cream and cilantro.

Oven method: Preheat oven to 350 degrees. Follow step 1, using a 5-quart Dutch oven or large pot, substituting 2 cans (15 ounces each) pinto beans, drained and rinsed, for dried beans, and increasing water to 2 cups. Cover pot and bring to a simmer on top of the stove. Transfer to oven, and cook until chicken is tender, 1 1/2 to 2 hours. Proceed with step 3.

Source: Martha Stewart, Everyday Food, November 2007. You can find the recipe here.

Notes: The dried pinto beans gave this such a good flavor (almost a baked bean, barbecued flavor). I used four boneless, skinless chicken breasts in place of the chicken thighs.

Reimagining a Recipe


You may or may not like tuna noodle casserole in its classic form, but I know I liked this tuna casserole that I made awhile back.

Here is a way of looking at tuna casserole in a different way.


Creamy Shells with Tuna and Spinach

Ingredients:

3 tablespoons extra-virgin olive oil
1 small yellow onion, diced small
1/4 cup all-purpose flour (spooned and leveled)
4 cups whole milk
Coarse salt and ground pepper
1 hamburger bun, torn into large pieces (I used a couple of slices of white bread)
1/4 cup grated Parmesan
1/2 teaspoon Italian seasoning
1/2 teaspoon red-pepper flakes
1 package (10 ounces) frozen chopped spinach, thawed and excess liquid squeezed out
2 cans (6 ounces each) light tuna in water, drained and flaked (see notes below)
6 ounces jumbo pasta shells (about 20), cooked according to package instructions

Directions:

Preheat oven to 375 degrees. In a medium pot, heat oil over medium-high. Add onion and cook until softened, about 6 minutes. Add flour and cook, stirring constantly, 1 minute. Gradually add milk, whicking constantly, and cook until slightly thickened and bubbling, about 3 minutes. Season with salt and pepper and let sauce cool slightly.

In a food processor, combine bun, Parmesan, Italian seasoning, and red-pepper flakes. Process until fine crumbs form. Transfer half the mixture to a large bowl and combine with spinach, tuna, and half the sauce; season with salt and pepper. Fill each shell with 2 heaping tablespoons spinach mixture and place in a 9x13-inch baking dish. Top with remaining sauce and breadcrumb mixture. Bake until sauce is bubbling and breadcrumbs are golden, about 20 minutes.

Recipe Note: Toss together a salad to go along with this. In a large bowl, whisk together 1 tablespoon each red-wine vinegar and extra-virgin olive oil, 1/2 teaspoon sugar, and 1/4 teaspoon Italian seasoning. Season with coarse salt and ground pepper. Add 3/4 head iceberg lettuce, chopped, and 1 tomato, cut into wedges. Toss to combine.

Source: Martha Stewart website. You can find it here.

Notes: I really liked this. In the future, however, I think I might try it with fresh chopped spinach instead of the frozen. Also, if you don't like tuna, you could definitely substitute canned chicken. I really liked the flavor of this. I wish it had a little more sauce though--not enough to double the sauce recipe...just a little bit more. Also, I think I would have put 3/4 of the breadcrumb mixture and mixed it into the tuna spinach mixture and put the remaining 1/4 mixture on top of the shells. I had a ton of breadcrumbs remaining to sprinkle on top. I ended up throwing half of the remaining mixture out because otherwise, the breadcrumbs would have dried up the sauce, whereas they would have added even more flavor and texture to the shell filling. So, I will definitely make this again (and I really want to try it with chicken and fresh spinach), but I would slightly change a few things (as noted) the next time around.

Sunday, May 25, 2014

A Different Kind of Burger


Not only is this a change of pace from your normal burger, but the patties are freezer friendly! So, make some patties ahead of time and pull them out of the freezer whenever you are feeling like having a burger.


Turkey Burgers

Ingredients:

6 slices whole-wheat sandwich bread (see notes below)
1 pound lean ground turkey (7 percent fat)
1/2 cup reducted-fat sour cream
4 tablespoons prepared mango chutney, preferably Major Grey's, finely chopped
2 tablespoons Dijon mustard
1 tablespoon chili powder
Coarse salt
1 cup mesclun lettuce mix
1 medium tomato, sliced

Directions:

In a medium bowl, tear 2 slices bread into small pieces. Add turkey, sour cream, 3 tablespoons chutney, 1 tablespoon mustard, chili powder, and 1 teaspoon coarse salt. Shape into 4 firmly packed 5-inch round patties.

Freeze on a baking sheet until firm, about 30 minutes, then wrap each burger in plastic; place all burgers in a resealable freezer bag, label, and date. Freeze up to 2 months.

To cook: Thaw burgers overnight in the refrigerator. Heat broiler with rack set 4 inches from heat. Place burgers on a rimmed baking sheet; broil until firm and cooked through, 4 to 5 minutes per side.

Lightly toast 4 slices bread. Dividing evenly, top each with lettuce, burger, and tomato. Stir together 1 tablespoon each chutney and mustard, and serve alongside burgers.

Recipe note: When burgers are wrapped separately, you can defrost as few or as many as you need.

Source: Martha Stewart. You can find it here.

Notes: I couldn't find a mesclun lettuce mix, so I used a spring lettuce mix, and I thought it worked great (also, that could be the same thing...). Also, we didn't do these as open faced sandwiches. If you choose to do it that way, you will need two slices of bread for the meat mixture, and two slices of bread per burger (or 8 slices total to make 4 burgers. Also, I got about 6 patties out of this, not 4. I made some smaller ones so they would be kid-sized for my little boys.