Showing posts with label Needs New Picture. Show all posts

Saturday, June 13, 2015

Theme Park Reminiscing


Well, one thing floating around the internet (and Pinterest in particular) is a copycat recipe for Disneyland inspired Dole Whips. Here's one that we tried. The taste comes pretty darn close.


Disneyland Inspired Dole Whip Smoothie

Ingredients:

1 (16 oz) bag of frozen Dole Pineapple Chunks
4 cups vanilla ice cream
Splash of lime juice
Splash of lemon juice
12 ounces pineapple juice

Directions:

Combine all ingredients in a blender. Blend until smooth. Taste and adjust ingredients to suit your tastes (add more pineapple, ice cream, or pineapple juice, if desired). Serve and enjoy.

Source: This was inspired by Six Sisters' Stuff. It contains all the same ingredients as their recipe, but the method is slightly different. You can find that recipe here.

Notes: I was having trouble blending my pineapple, so I figured I would go the smoothie route and add all the pineapple juice instead of pouring some over the Dole Whip at the end. It tasted great (all the flavors you get at Disneyland), was a lot easier, and didn't require the freezer ripening wait time of the original recipe. The texture is different than what you get at Disneyland since it is a smoothie version, but that didn't bother me and it fulfilled my craving.

Disneyland Inspired Dole Whip "Soft Serve"

Ingredients:

1 (16 oz) bag of frozen Dole Pineapple Chunks
4 cups vanilla ice cream
Splash of lime juice
Splash of lemon juice
8-12 ounces pineapple juice

Directions:

Combine all ingredients in a blender, starting out with 8 ounces of pineapple juice and adding more, if necessary, to reach desired consistency.

Put mixture in freezer safe container and ripen in freezer 2-4 hours or until set up and scoop-able, but still soft.

Source: Again, inspired by Six Sixter's Stuff. You can find the link above.

Notes: You can let this freeze completely and then let it soften on the counter for 15 minutes or so before serving for an ice cream/sherbet version.

Tuesday, March 10, 2015

Super Easy Freezer Meal


In my search for easy freezer meals (that can be taken to neighbors in need or used for my own family in a pinch), I came across this meal. It is so easy to throw together! I am going to type the recipe as originally written and then discuss my changes in the notes.


Swiss Cheese Chicken

Ingredients:

4 chicken breasts (or enough to fill a 9x13 pan)
6 slices Swiss cheese
1 can cream of chicken soup
1/4 cup milk
Stove Top Turkey or Chicken Stuffing
1/4 cup butter, melted

Directions:

Cover bottom of pan with chicken.

Lay the Swiss cheese over the chicken.

Mix cream of chicken soup and milk together until creamy. Spread mixture over chicken.

Top with 1/2 bag (or more) of stuffing. Drizzle with melted butter.

Bake at 350 degrees F for 45-60 minutes, or until chicken is done.

Serve over cooked white rice, if desired.

Freezer directions:

To freeze, cover bottom of pan with chicken and top with Swiss cheese and cream of chicken mixture. Freeze. When needed, thaw in fridge overnight and then top with stuffing and melted butter and bake as directed.

Source: I found this on Pinterest. It is on a site called Or So She Says and you can find it here. Great pictures there, by the way. I also found it on this site as well. No pictures on the second site, but the recipe is listed in a much easier to read manner.

Notes: I did not serve my chicken over rice. I figured that with the stuffing on top, I had my carbs and grains covered and I didn't need to add more to it. This is down home comfort food and it is just so easy to make. The only thing I don't like about it when it comes to being a freezer meal is that you can't just simply pop it in the oven as is. You have to thaw it and then do a little more prep before it is ready for the oven. In that case, something like a baked pasta or enchiladas wins because you can just pop those in the oven. However, you can't beat this ease and speed of preparation, that is for sure.


Above: I added the whole box of stuffing. Hey, if I am going to skip the rice, you had better bet I am going to use all the stuffing! Besides, I love stuffing! Since I used all the stuffing, I would increase the melted butter next time to 1/2 cup (or one stick). Yeah, not the healthiest way to go, but there you have it. :)


Copycat


Since my oldest son is allergic to tree nuts--especially cashews--that means going out to a Chinese restaurant is out. If we want to eat Chinese food as a family, it has to be made by me. My family growing up had a tradition of having Chinese food on New Year's. So, I made some Chinese food at home for us to share that night. Here's a new and great recipe I found.


Copycat Panda Express Chow Mein

Ingredients:

1/4 cup soy sauce
1 tbsp. brown sugar
2 cloves garlic, minced
1 tsp. fresh ginger, grated
Ground black pepper, to taste
2-3 tbsp. vegetable oil
3 (5.6 oz) packages refrigerated Yaki Soba noodles, any flavor (found in the produce section of the grocery store)
2/3 cup diagonally chopped celery
1 medium-sized onion, thinly sliced
2 cups chopped cabbage

Directions:

In a small bowl, combine soy sauce, brown sugar, garlic, ginger, and black pepper. Set aside.

Remove Yaki Soba noodles from packages and discard flavor packets. Rinse noodles well, drain, and set aside.

Heat oil in a large wok or skillet. Add celery and onion and saute for about 1-2 minutes, or until onions start to become soft and translucent. Add cabbage and saute until wilted and softened.

Toss Yaki Soba noodles and soy sauce mixture with the vegetables over medium-high heat for an additional 2-3 minutes or until noodles are heated through.

Source: Favorite Family Recipes. You can find it here.

Notes: Holy cow, this was spot on. It tasted just like the chow mein from Panda Express. It makes a ton, but the leftovers were great too.

I had never bought Yaki Soba noodles before, so I was confused in the grocery store when I didn't find plain noodles. They come in different flavors. Just grab any flavor and discard the flavor packets. The noodles are all the same.

Also, excuse the darkness of the pictures. Blasted winter lighting! It is so hard to take a good picture when it is pitch black outside...and when I am by no means a professional photographer!

Sunday, September 21, 2014

Museum Dinners - The Finale


So I serve as a volunteer docent at the Church History Museum on Tuesday nights.  We rotate bringing in dinner and it's been a little bit of a challenge because there are a lot of dietary and tastes to consider.  Some don't like red meat, some don't like mayo based salads, etc.  So Tuesday was my last night to bring in dinner because the museum is closing down for a year and when it opens up again, we won't be rotating dinners anymore.

This was a chicken salad that was a real hit.  It was quite unusual and is billed as being "reminiscent of poppy seed dressing."  In fact, you could add poppy seeds to it to dress it up even more.

Honey-Chicken Salad


Ingredients:

4 cups chopped cooked chicken
3 celery ribs, diced (about 1 1/2 cups)
1 cup sweetened dried cranberries
1/2 cup chopped pecans, toasted
1 1/2 cups mayonnaise
1/3 cup honey
1/4 teaspoon salt
1/4 teaspoon pepper
Garnish:  Chopped pecans

Directions:

Combine first 4 ingredients

Whisk together mayonnaise and next 3 ingredients.  Add to chicken mixture, stirring gently until combined.  Garnish, if desired.

Source: Published by Southern Living June 2006, found on myrecipes.com. You can find it here.

Thursday, July 31, 2014

Serendipitous!


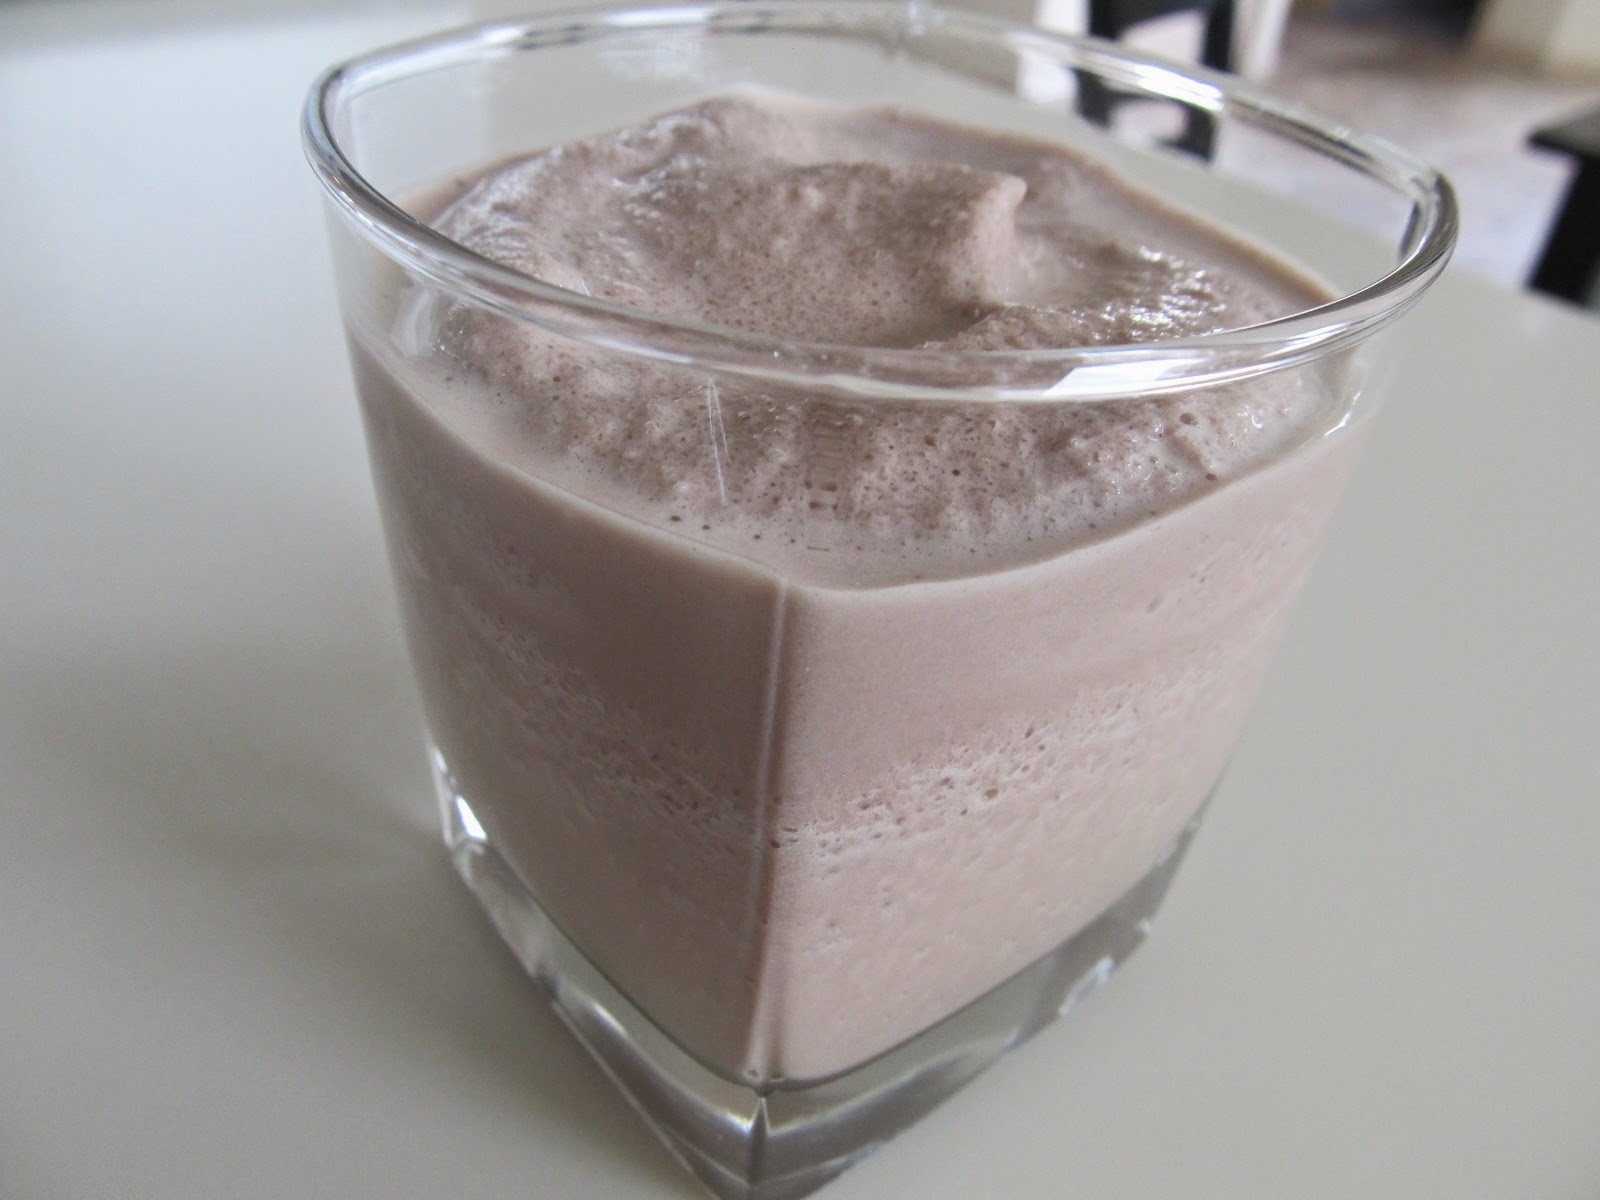
You know how in the movie "Serendipity," they go and have some frozen hot chocolate at a fancy place in New York City? Well you can too...and you can do it at home. It is so easy and absolutely delicious.

Frozen Hot Chocolate

Ingredients:

4 cups ice
5 packets hot chocolate mix (about 0.71 oz each)
1 1/2 cups milk
Whipped cream, optional

Directions:

Fill a blender to the 4 cup mark with ice. Add cocoa mix and milk. Use the "high" or "ice crush" setting to blend for about 30-40 seconds.

Pour into glasses and top with whipped cream, if desired.

Makes 2 large or 4 small servings.

Source: A wonderful website called Jen's Favorite Cookies. You can find the original link here. Be sure to check out her site. First of all, her pictures are way better than mine, and she also has so many amazing recipes there.

Notes: I am amazed at how well this worked. Have you ever tried to mix hot cocoa mix into cold milk? It gets all clumpy and the mix doesn't dissolve all the way. I wondered if this might happen here...but it didn't! The blender kept things smooth.

I opted to skip the whipped cream because I was trying to watch my calories, and this was so rich and satisfying without the whipped cream. I can only imagine that it would be even more decadent (and beautiful) with the whipped cream. I might even throw some grated chocolate on top of the whipped cream for a special touch.

So, if you are in the mood for a hot cocoa flavored smoothie, this is definitely what you need!

Monday, May 26, 2014

Can I Ever Get Enough?


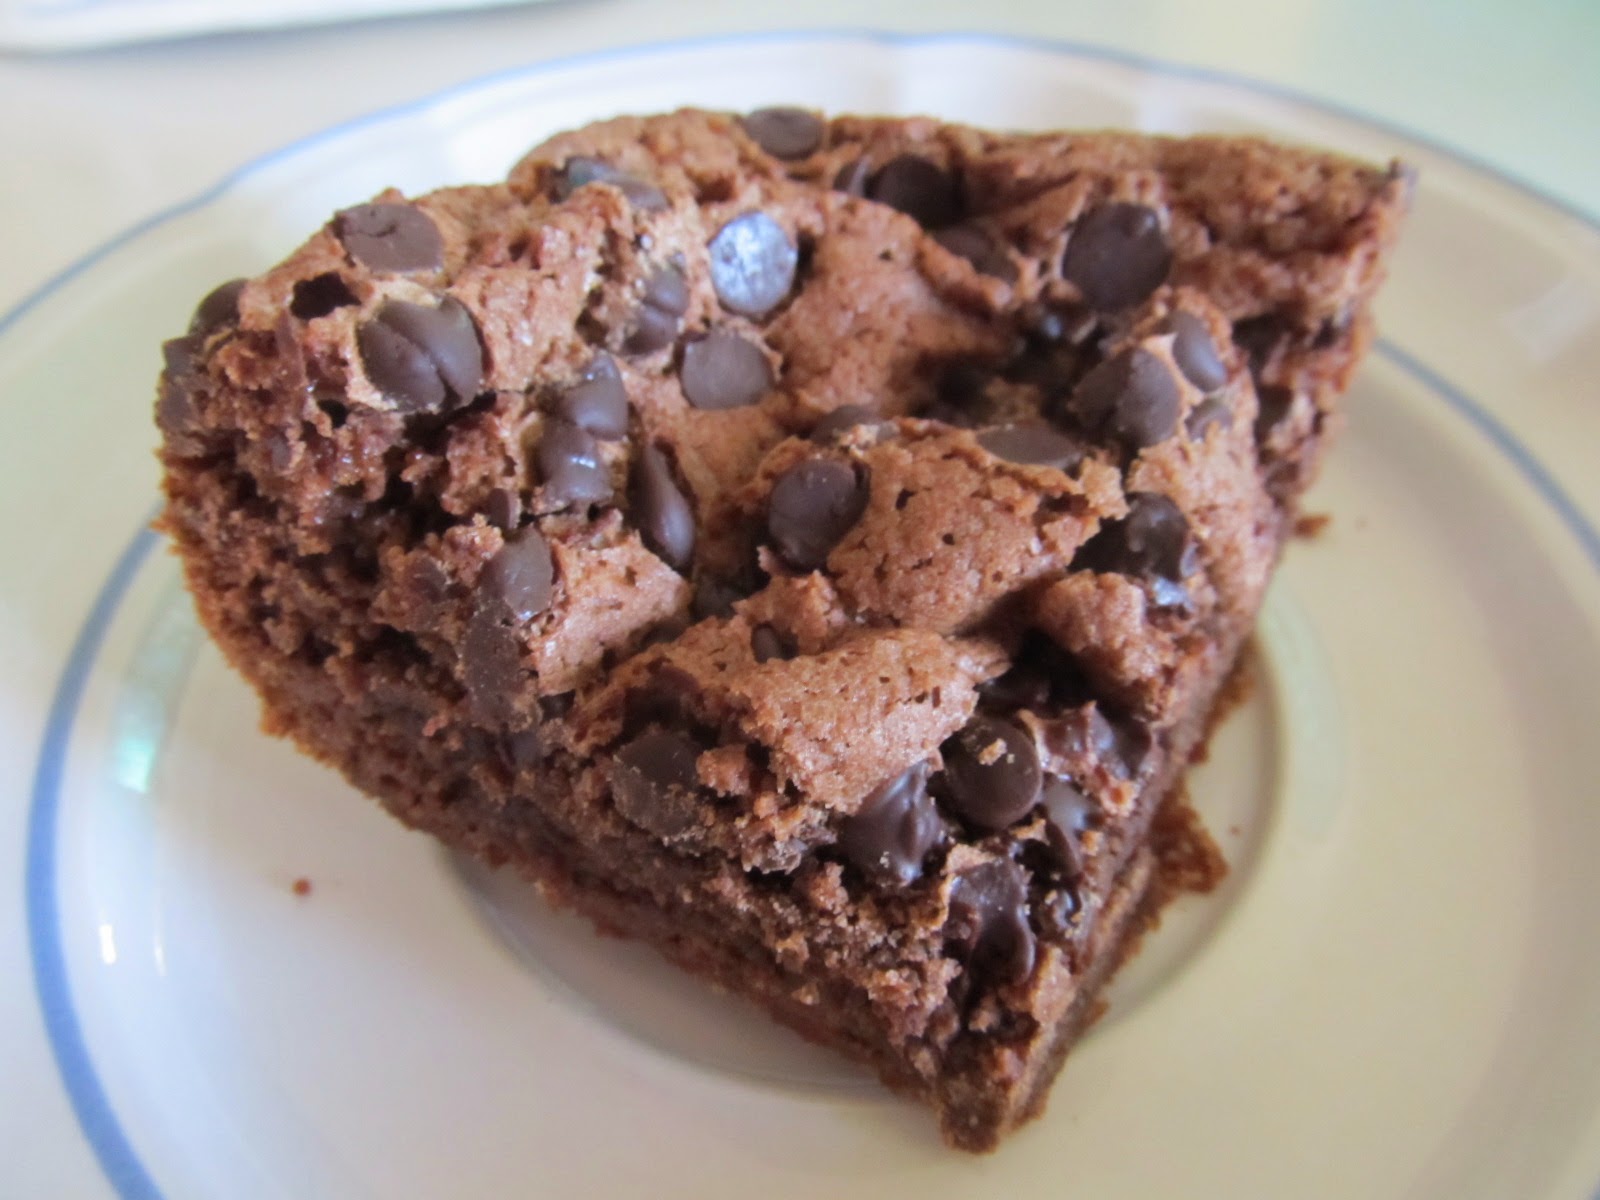
I don't think I can ever get enough of trying new brownie recipes. Even when you find the best brownie recipe ever, there is always the possibility of another brownie recipe that is the best for completely different reasons.

This brownie recipe was indeed speedy and very tasty.


Speedy Brownies

Ingredients:

2 cups sugar
1 3/4 cups all-purpose flour
1/2 cup baking cocoa
1 teaspoon salt
5 eggs
1 cup canola oil
1 teaspoon vanilla extract
1 cup (6 ounces) semisweet chocolate chips

Directions:

In a large bowl, beat the first seven ingredients. Pour into a greased 13 x 9-inch baking pan. Sprinkle with chocolate chips.

Bake at 350 degrees F for 30 minutes or until a toothpick inserted near the center comes out clean. Cool in pan on a wire rack.

Yield: about 3 dozen.

Nutrition information: 1 serving equals 155 calories.

Source: Taste of Home. You can find it here.

Notes: As I said, these were really good. I freaked out a little and over-baked mine because I was worried about them being underdone, but they were still great. Oh, and I always laugh when recipes like this give you a yield of 3 dozen. Seriously? How small do they think I cut my brownies?


Above: I only had one corner piece left when I realized that I hadn't taken any pictures yet. That is why this kind of looks like a chocolatey piece of pie. Yummy stuff though!

Slow Cooker to the Rescue!


Oh, busy days. Why does it seem like you are becoming more frequent? Thank goodness for slow cookers on days like those. Here is a great new recipe I found.


Slow-Cooked Tex-Mex Chicken and Beans

Ingredients:

1 cup dried pinto beans, rinsed
1 jar (11 ounces) mild or medium salsa (1 1/2 cups)
2 tablespoons chopped canned chipotle chiles in adobo sauce
2 tablespoons all-purpose flour
1 cup water
1 1/2 pounds boneless, skinless chicken thighs (about 8) (see notes below)
Coarse salt and ground pepper
1 medium red onion, chopped
1 red bell pepper (ribs and seeds removed), chopped
1/4 cup reduced-fat sour cream, for serving
1/4 cup chopped fresh cilantro, for serving

Directions:

In a 5- to 6-quart slow cooker, stir together beans, salsa, chiles, flour, and 1 cup water. Season chicken with salt and pepper; arrange on top of bean mixture. Scatter onion and bell pepper on top of chicken.

Cover and cook on low heat for 8 hours. (Do not open lid or stir.)

Remove chicken from stew; shred into large pieces and return to stew. Serve topped with sour cream and cilantro.

Oven method: Preheat oven to 350 degrees. Follow step 1, using a 5-quart Dutch oven or large pot, substituting 2 cans (15 ounces each) pinto beans, drained and rinsed, for dried beans, and increasing water to 2 cups. Cover pot and bring to a simmer on top of the stove. Transfer to oven, and cook until chicken is tender, 1 1/2 to 2 hours. Proceed with step 3.

Source: Martha Stewart, Everyday Food, November 2007. You can find the recipe here.

Notes: The dried pinto beans gave this such a good flavor (almost a baked bean, barbecued flavor). I used four boneless, skinless chicken breasts in place of the chicken thighs.

Sunday, May 18, 2014

Easy Salted Peanut Chews

Sometimes I'm shocked, just shocked when I search our blog for a recipe that I think I posted and can't find it.  I can't believe that I didn't post this before.  I've made it so many time and it always, always gets a good response.  Try it.  Promise, you'll get raves.


Easy Salted Peanut Chews

Ingredients:

1 pouch (1 lb 1.5 oz) Betty Crocker peanut butter cookie mix
3 tablespoons vegetable oil
1 tablespoon water
1 egg
3 cups miniature marshmallows
2/3 cups light corn syrup
1/4 cup butter or margarine
2 teaspoons vanilla
1 bag (10 oz) peanut butter chips
2 cups crisp rice cereal
2 cups salted peanuts

Directions:

Heat oven to 350 degrees F. Spray bottom of 13x9-inch pan with cooking spray.

In large bowl, stir cookie mix, oil, water and egg until soft dough forms. Press dough in pan using floured fingers.

Bake 12 to 15 minutes or until set. Immediately sprinkle marshmallows over crust; bake 1 to 2 minutes longer or until marshmallows begin being to puff.

In a 4 quart saucepan, cook corn syrup, butter, vanilla and chips over low heat, stirring constantly until chips are melted. Remove from heat; stir in cereal and nuts. Immediately spoon cereal mixture evenly over the marshmallows. Refrigerate 30 minutes or until firm. For bars, cut into 9 rows by 4 rows.

36 Bars.

Source:  Betty Crocker website. You can find it here. It has a 5 star rating!

BC Recommendations:  For a different flavor, try milk chocolate or semisweet chocolate chips for the peanut butter chips.

Well, It's Not MY Grandma's

But it's somebody's.  My grandmother was from New Mexico.  I only met her twice, but I do remember the wonderful homemade tortillas she made.  My other grandmother died before I was born.  But no matter my lineage, I'm in love with a good homemade biscuit; and this is a really good biscuit.


Grandma's Baking Powder Biscuits

Ingredients:

2 cups all-purpose flour
2 tablespoons white sugar
4 teaspoons baking powder
1/2 teaspoon cream of tartar
1/2 teaspoon salt
1/4 cup vegetable shortening
1 egg
2/3 cup milk

Directions:

Preheat an oven to 450 degrees F (230 degrees C).

Sift flour, sugar, baking powder, cream of tartar, and salt into a bowl. Use a pastry cutter to chop vegetable shortening into the four mixture until it resembles coarse crumbs. Whisk egg and milk together in a separate bowl, and slowly add milk mixture to flour mixture, stirring as you pour, until dough is moistened and well-mixed. Drop dough by spoonfuls onto an ungreased baking sheet.

Bake in the preheated oven until biscuits have risen and are golden brown, 10 to 12 minutes.

Source: Allrecipes.com, submitted by IMACOOKY1. You can find it here.

Notes: These really were so flaky and so easy. A good accompaniment to any of the soups on our blog.

Chowda? Tortellini? Together? Yep.

This soup was so, so good.  I loved the flavors and it was quite easy.  A few unusual ingredients give it a flavor pop.
Tortellini Chowder

Ingredients:

2/3 c chopped onion
1/2 c chopped red bell pepper
1/3 c chopped green chili pepper (not bell)
2 tablespoons minced garlic
1 jalapeno pepper, seeded and diced
1 tablespoon margarine or butter (I always use butter)
3 cups vegetable broth
2 cups peeled and cubed potatoes
1 teaspoon ground cumin
1/2 teaspoon salt
1/8 teaspoon black pepper
1/8 teaspoon ground red pepper (cayenne)
2 cups cheese tortellini
2 tablespoons all-purpose flour
2 tablespoons vegetable oil
1 (15 oz) can whole kernel corn, drained
1 pint half and half cream

Directions:

In a large pot over medium heat, cook onion, bell pepper, chile pepper, garlic and jalapeno in margarine until tender but not brown, 5 minutes.

Stir in broth, potatoes, cumin, salt, pepper and red pepper. Bring to a boil, then reduce heat and simmer about 20 minutes, until potatoes are just tender.

Meanwhile, bring a large pot of lightly salted water to a boil. Add pasta and cook for 8 to 10 minutes or until al dente; drain and set aside.

In a small bowl, stir together flour and vegetable oil. Pour into soup, increase heat to medium, and cook until thickened and bubbly. Stir in corn, half and half and tortellini and heat through. Serve.

Source: Allrecipes.com, submitted by SILVERWOLF. You can find it here.

Notes: This was such a good soup and I loved eating the leftovers. Loved this soup.

Tuesday, December 31, 2013

Is a 33 Year Old Recipe Retro?

One of the reasons that we started this blog was so we would have a central place for those recipes that we had trouble finding.  Finding a recipe doesn't sound that hard unless you saw how many cookbooks I have, totes full of printed recipes, papers floating around, etc.  Well, this recipe is a real keeper.  It was in a church (ward) cookbook that I bought at least 33 years ago while I lived in West Valley.

The whole process of ward/church cookbooks may fall by the wayside with today's technology and that will be a real shame.  There was something wonderful about having a whole book of recipes that were tried and true by your neighbors.  You learned very quickly who were the best cooks and who...shall we say...were a little challenged.

Well, this recipe is a real go-to recipe.  I have used it a few times when it's my turn to take dinner at the museum where I volunteer as a docent.  It has such a fresh taste and is always a favorite.  I took it once to a company pot luck and the president of the company went back for thirds, which was unheard of!!


SPAGHETTI SALAD

Ingredients:

1 small package spaghetti ( 8 - 10 oz.)
4 medium tomatoes, diced
2 medium cucumbers, diced
cubed spam or ham as desired
1 red onion, diced
1 small bottle Italian dressing
1/2 bottle Salad Supreme (found in the spice section)

Directions:

Cook spaghetti according to directions. (You may or may not break into pieces before cooking.)  Drain. Rinse.  Add other ingredients and let set 6 to 8 hours in refrigerator before serving.

Originally submitted by Naomi Telford.

Cook's notes:  Salad supreme is hard to find.  It's not a must.  I've made the salad with or without and it works great either way.  I don't think I have ever used spam, but it would work great.  Now Barelli brand spaghetti has cut spaghetti in a box.  This works great.  You don't need to break up the spaghetti, but the salad is harder to eat.

I can't stress enough how dependable this salad is for pot luck occasions.

We have posted this awhile back. You can find our original post here.

Monday, December 30, 2013

A Departure from Holiday Eating


Ah, the holidays. There is nothing like the richness and decadence of holiday eating. However, when you get too much of it, you really need a change of pace. What could be a better departure from holiday eating than Italian food? Still rich and decadent...just different. Yum!


World's Best Lasagna

Ingredients:

1 pound sweet Italian sausage
3/4 pound lean ground beef
1/2 cup minced onion
2 cloves garlic, crushed
1 (28 ounce) can crushed tomatoes
2 (6 ounce) cans tomato paste
2 (6.5 ounce) cans canned tomato sauce
1/2 cup water
2 tablespoons white sugar
1 1/2 teaspoons dried basil leaves
1/2 teaspoon fennel seeds
1 teaspoon Italian seasoning
1 tablespoon salt
1/4 teaspoon ground black pepper
4 tablespoons chopped fresh parsley
12 lasagna noodles
16 ounces ricotta cheese
1 egg
1/2 teaspoon salt
3/4 pound mozzarella cheese, sliced
3/4 cup grated Parmesan cheese

Directions:

In a Dutch oven, cook sausage, ground beef, onion, and garlic over medium heat until well browned. Stir in crushed tomatoes, tomato paste, tomato sauce, and water. Season with sugar, basil, fennel seeds, Italian seasoning, 1 tablespoon salt, pepper, and 2 tablespoons parsley. Simmer, covered, for about 1 1/2 hours, stirring occasionally.

Bring a large pot of lightly salted water to a boil. Cook lasagna noodles in boiling water for 8 to 10 minutes. Drain noodles, and rinse with cold water. In a mixing bowl, combine ricotta cheese with egg, remaining parsley, and 1/2 teaspoon salt.

Preheat oven to 375 degrees F.

To assemble, spread 1 1/2 cups of meat sauce in the bottom of a 9x13 inch baking dish. Arrange 6 noodles lengthwise over meat sauce. Spread with one half of the ricotta cheese mixture. Top with a third of mozzarella cheese slices. Spoon 1 1/2 cups meat sauce over mozzarella, and sprinkle with 1/4 cup Parmesan cheese. Repeat layers, and top with remaining mozzarella and Parmesan cheese. Cover with foil: to prevent sticking, either spray foil with cooking spray, or make sure the foil does not touch the cheese.

Bake in preheated oven for 25 minutes. Remove foil, and bake an additional 25 minutes. Cool for 15 minutes before serving.

Source: Allrecipes.com, submitted by Johnchandler. You can find the recipe here.


Notes: Good stuff. With over 7,800 reviews and still rated 5 stars, you know it has to be a good one! I didn't get the best picture (I was hungry and in a hurry, so I didn't take the greatest care when serving up my portion of lasagna). So, don't judge this based on the picture. This lasagna is good stuff!


Chicken Parmesan

Ingredients:

4 skinless, boneless chicken breast halves
Salt and freshly ground black pepper, to taste
2 eggs
4 cups panko bread crumbs
1/2 cup grated Parmesan cheese
2 tablespoons all-purpose flour, or more if needed
1 cup olive oil, for frying
1/2 cup prepared tomato sauce
1/4 cup fresh mozzarella, cut into small cubes
1/4 cup chopped fresh basil
1/2 cup grated provolone cheese
1/4 cup grated Parmesan cheese
1 tablespoon olive oil

Directions:

Preheat an oven to 450 degrees F.

Place chicken breasts between two sheets of heavy plastic (resealable freezer bags work well) on a solid, level surface. Firmly pound chicken with the smooth side of a meat mallet to a thickness of 1/2-inch. Season chicken thoroughly with salt and pepper.

Beat eggs in a shallow bowl and set aside.

Mix bread crumbs and 1/2 cup Parmesan in a separate bowl, set aside.

Place flour in a sifter or strainer; sprinkle over chicken breasts, evenly coating both sides.

Dip flour coated chicken breast in beaten eggs. Transfer breast to breadcrumb mixture, pressing the crumbs into both sides. Repeat for each breast. Set aside breaded chicken breasts for about 15 minutes.

Heat 1 cup olive oil in a large skillet on medium-high heat until it begins to shimmer. Cook chicken until golden, about 2 minutes on each side. The chicken will finish cooking in the oven.

Place chicken in a baking dish and top each breast with about 1/3 cup of tomato sauce. Layer each chicken breast with equal amounts of mozzarella cheese, fresh basil, and provolone cheese. Sprinkle 1 to 2 tablespoons of Parmesan cheese on top and drizzle with 1 tablespoon olive oil.

Bake in the preheated oven until cheese is browned and bubbly, and chicken breasts are no longer pink in the center, 15 to 20 minutes. An instant-read thermometer inserted into the center should read at least 165 degrees F.

Source: Allrecipes.com, submitted by Chef John. You can find the recipe here.

Notes: This was really good. Serve this with some spaghetti and your favorite marinara sauce, and a little side salad, and some garlic bread, and you are set!


Parmesan Cheese Straws

Ingredients:

1 egg
1 tablespoon water
1 lb sheet of ready rolled puff pastry
1/2 cup Parmesan cheese, grated
1 teaspoon dried oregano leaves (optional)

Directions:

Preheat the oven to 350 degrees F. Grease a baking sheet.

In a small bowl, whisk together the egg and water and set aside.

Unfold the pastry on a lightly floured surface and roll it out to a 14- by 10-inch rectangle. Cut it in half lengthwise and brush both halves with the egg and water mixture.

Sprinkle the cheese and oregano, if using, over one rectangle and place the other rectangle on top, egg side down. Roll gently with a rolling pin to seal. Cut the pastry crosswise into 26 strips, each about half an inch wide.

Twist the strips and place them 2 inches apart on the baking sheet, pressing down the ends.

Brush with the egg and water mixture and bake in the oven for 10 minutes, or until golden.

Makes 26

Source: I believe my mom got this out of Parade magazine.

Notes: We had served this with our appetizer night. You can eat it on its own, or use it to dip into dips. However, we felt that this would be the perfect side dish to go along with an Italian dinner.

Sunday, November 10, 2013

Easy, Cheesy Weeknight Meal

I'm like Sarah in that pasta never gets old.  I've seen a lot of pasta recipes in the crock pot, but they can easily end up like a big pot of mush.  This one works really well because the tortellini isn't added until right before the end.  I really liked it and ultimate comfort food after a long day a work with just a little effort in the morning.

SLOW COOKER CHEESY ITALIAN TORTELLINI

1/2 lb. lean ground beef (at least 80%)
1/2 lb. bulk Italian sausage
1 15 oz. container refrigerated marinara sauce
1 c. sliced fresh mushrooms
1 14.5 oz can diced tomatoes with Italian herbs, undrained
1 9 oz. package refrigerated cheese-filled tortellini
1 cup shredded mozzarella or pizza cheese blend (4 oz.)

In 10" skillet, cook beef and sausage over medium high heat 5-7 minutes, stirring occasionally, until brown; drain.

Spray inside of a 4 to 5 quart slow cooker with cooking spray (see cook's note).  Mix beef mixture, marinara sauce, mushrooms and tomatoes in cooker.

Cover; cook on Low heat setting 7 to 8 hours.

Stir in tortellini; sprinkle with cheese.  Cover; cook on low heat setting about 15 minutes longer or until tortellini are tender.

4 servings.

Source:  Bettycrocker.com. You can find it here.

Cook's notes:  BC recommends spice Italian Sausages if you like heat.  Also, I never cook anything in my crockpot anymore without using the Reynolds Crock Pot liners.  Yes, they do cost $1.00 each, but it's worth it.  Finally, I didn't use refrigerated marinara sauce.  I had some canned (cheap brand) that we purchased at a case lot sale.  It worked like a charm.  This recipe will definitely be made again!

Nah, Try Just One

I have made these bars twice now.  Be forewarned that they are very, very rich.  Megan said that they tasted like hot fudge in a cookie form.  I really appreciate when I find a good and easy cookie bar recipe.  They are so easy for all of those pot luck functions or when you are asked to bring a treat somewhere.  This would work as a good pantry recipe, too, for impromptu treats to take to a sick neighbor, work sharing, etc.  Oh, you will find a lot of uses for this one.


CAN'T LEAVE ALONE BARS

1 package white cake mix (regular size)
2 eggs
1/3 cup canola oil
1 can (14 oz.) sweetened condensed milk
1 cup (6 oz.) semisweet chocolate chips
1/4 cup butter, cubed

In a large bowl, combine the cake mix, eggs, and oil.  Press two-thirds of the mixture into a greased 13x9 in baking pan.  Set remaining cake mixture aside.

In a microwave safe bowl, combine the milk, chocolate chips and butter.  Microwave, uncovered, until chips and butter are melted; stir until smooth.  Pour over crust.

Drop teaspoonfuls of remaining cake mixture over the top.  Bake at 350 degrees for 20-25 minutes or until lightly browned.  Cool before cutting.  Yield: 3 dozen.

Source:  I found this in a couple of places, but printed it up from Taste of Home. You can find it here.

Cook's notes:  I think I made this once with milk chocolate and it was a little too sweet.  I know, I know that sounds almost impossible.  But try it with the semisweet.  I think you'll like it.

Sunday, October 27, 2013

Labor Intensive

Back in the day, I could have Sunday dinners when I did really gourmet cooking.  Today, our numbers can fluctuate anywhere from 8 to 20 on a normal Sunday.  If we had out-of-state kids, our total number could now be up to 31.  That means I can't pan fry anything and costs always have to be taken into account.

Well, last week we had a weird Sunday and it was just my husband and me.  Time to try something a little gourmet and a little labor intensive.  All of these taste much better than they look since I don't have the camera talents that my daughters do, but here you go.

BALSAMIC MUSHROOMS

1/3 c. olive oil
3 cloves garlic, minced
1 pound fresh mushrooms (recipe called for sliced, the picture showed whole)
3 tablespoons balsamic vinegar
3 tablespoons white wine (cooking)
salt and pepper to taste

Saute the garlic in olive oil for 1 to 2 minutes.  Do not brown the garlic.  Add mushrooms and cook 2 more minutes, stirring occasionally.  Stir in balsamic vinegar and wine, cook another 2 minutes. Season to taste with salt and pepper.

Cook's notes:  These were a good solid side dish.
Source:  Allrecipes.com Submitted by Christy J


GREEN BEANS WITH ORANGE OLIVE OIL

3/4 pound fresh green beans, trimmed and halved
4 1/2 teaspoons extra-virgin olive oil
1 tablespoon orange zest strips
kosher salt to taste
1 teaspoon grated orange zest

Place green beans in a steamer basket over 1 inch of boiling water and cover.  Cook until the beans are tender but still firm, 2 to 4 minutes.  Drain and keep warm.

Meanwhile, stir together olive oil and 1 tablespoon orange zest strips in a large skillet over medium-low heat.  Cook and stir until the olive oil has been infused with the flavor of the orange zest, about 2 minutes.  Discard zest strips.

Toss drained green beans with flavored olive oil and kosher salt over medium heat until the beans are hot and coated with oil.  Place onto a serving dish and sprinkle with remaining 1 teaspoon grated orange zest to garnish.

Cook's Notes:  These were really, really good.  I don't know if it was the oil or the zest that really infused them, but orange & green beans went surprisingly well together.

Source:  Allrecipes.com  submitted by Shakl

FONDANT POTATOES

3 large whole russet potatoes
2 tablespoons high-heat-resistant vegetable oil, such as grapeseed oil
salt and ground pepper to taste
3 tablespoons butter
4 sprigs thyme, plus more for garnish
1/2 cup chicken broth, or more as needed

Preheat oven to 425 degrees F.

Cut off ends of russet potatoes, stand potatoes on end, and peel potatoes from top to bottom with a sharp knife to make each potato into a uniform cylinder.  Cut each cylinder in half crosswise to make 6 potato cylinder in half crosswise to make 6 potato cylinders about 2 inches long.

Place potatoes into a bowl of cold water for about 5 minutes to remove starch from outsides; pat dry with paper towels.

Place a heavy oven-proof skillet (such as a cast iron skillet) over high heat.  Pour in vegetable oil; heat oil until it shimmers slightly.

Place potato cylinders with best looking ends into the hot oil, lower heat to medium high, and pan fry potatoes until well browned, 5 to 6 minutes.  Season with salt and black pepper.

Flip the potatoes onto the opposite ends.  As they cook, use a paper towel held with tongs to carefully blot out the oil from the skillet.  Add butter and thyme sprigs to skillet.

Pick up a thyme sprig with tongs and use it to paint butter over the top of the potatoes.  Cook until butter foams and foam turns from white to a pale tan color.  Season with more salt and pepper.  Pour chicken stock into skillet.

Transfer skillet to preheated oven and cook until potatoes are tender and creamy inside, about 30 minutes.  If potatoes aren't tender, add 1/4 cup more stock and let cook 10 more minutes.

Place potatoes on a serving platter and spoon thyme-scented butter remaining in skillet over potatoes. Garnish with thyme sprigs.  Let cool about 5 minutes before serving.

Cook's Notes:  I used rosemary instead of thyme.  These were really good and interesting.  Niel thought they were bland and I probably should have painted them better.  But they were a most interesting texture...different than steamed and different than baked.

Source:  Allrecipes.com Submitted by Chef John


CHICKEN BREASTS IN CAPER CREAM SAUCE

4 boneless chicken breast halves
1 teaspoon lemon pepper
1 teaspoon salt
1 teaspoon dried dill weed
1 teaspoon garlic powder
3 tablespoons butter
1/2 cup whipping cream
2 tablespoons capers, drained and rinsed

Season chicken breasts with lemon pepper, salt, dill weed, and garlic powder.

Melt butter in large skillet over medium heat.  Place breasts in skillet and increase heat to medium-high. Turn chicken frequently, until brown, about 5 minutes.  Reduce heat to medium, and cook 5 to 7 minutes, until breasts are cooked through.  Remove chicken to a warm serving platter, and cover with foil.

Return skillet to stove, and increase heat to high.  Whisk in whipping cream, whisking continuously until reduced to sauce consistency, about 3 minutes.  Remove from heat.  Stir in capers.  Pour sauce over chicken, and serve.

Cook's notes:  The picture just didn't turn out, but this was really good.  I love capers!

Source:  Allrecipes.com submitted by Mommy To2Boys

Tuesday, August 6, 2013

A Variation on A Theme

One of the things I really like about our smaller world is that when a cook finds a good recipe, it's incumbent upon them to try to improve on it and the cooking world has gotten smaller and smaller.  It's as if each cook share their recipes and their neighbor, like an old friend, says, "Have you tried this?"  And they are off!

There has been a great trend for do-ahead breakfasts.  I, myself, am a fan.  I love breakfast in the morning, breakfast in the evening, breakfast at suppertime.  So when I saw this recipe, I knew I had to try it even though we had posted something similar before.


OVERNIGHT BLUEBERRY FRENCH TOAST

12 slices day-old bread, cut into 1 inch cubes.
2 (8 oz) packages cream cheese, cut into 1 inch cubes
1 cup fresh blueberries
12 eggs, beaten
2 cups milk
1 teaspoon vanilla extract
1/3 cup maple syrup

1 cup white sugar
2 tablespoons cornstarch
1 cup water
1 cup fresh blueberries
1 tablespoon butter

Lightly grease a 9x13 inch baking pan.  Arrange half the bread cubes in the dish, and top with cream cheese cubes.  Sprinkle 1 cup blueberries over the cream cheese and top with remaining bread cubes.

In a large bowl, mix the eggs, milk, vanilla extract, and syrup.  Pour over the bread cubes.  Cover and refrigerate overnight.

Remove the bread cube mixture from the refrigerator about 30 minutes before baking and preheat the oven to 350 degrees F. (175 degrees C)

Cover and bake for 30 minutes.  Uncover and continue baking for 25 to 30 minutes, until center is firm and surface is lightly browned.

In a medium saucepan, mix the sugar, cornstarch, and water.  Bring to a boil stirring constantly, cook 3 to 4 minutes.  Mix in the remaining 1 cup of blueberries.  Reduce heat and simmer for 10 minutes, until the blueberries burst.  Stir in the butter, and pour over the baked French Toast.

Source:  Allrecipes.com  Originally posted by Karan1946

Cook's note:  Unfortunately, I forgot to take a picture with the sauce, which is too bad because it was prettier and made it quite tasty.  We tried this on our own with raspberries and the result wasn't as good.  Perhaps I didn't use enough.  The sauce really helped, too.  This could be replicated with any kind of berry, I think.  Yum.

Sunday, July 28, 2013

After Work Quick Dinner

Here's the story, and I'm stickin' to it.  Sometimes you fall into a handy recipe by accident.  We were grocery shopping and I told my husband to pick up an ingredient.  By mistake, he picked up 3 cans of Crescent rolls.  I don't often use them, so I did a search for recipes using them so they wouldn't go to waste.  I found this one and it's a week night keeper.  Quick, easy after a long day of work and very satisfying.

ITALIAN CRESCENT CASSEROLE


1 lb ground beef, cooked, drained
1 c. basil and garlic tomato pasta sauce (from 16 oz jar)
1 can (8 oz) Pillsbury refrigerated crescent dinner rolls
1 1/2 c shredded Italian cheese blend (6 oz)
1/4 teaspoon dried basil leaves

In 10 inch skillet, mix beef and pasta sauce.  Heat to boiling over medium-high heat, stirring occasionally.

Separate dough into 8 triangles.  Place dough in ungreased 9-inch pie plate in spoke pattern, with narrow tips overlapping rim of plate about 3 inches.  Press dough in side and bottom to form crust; sprinkle with 1 cup of the cheese.  Spoon meat mixture evenly over cheese.  Bring tips of dough over filling to meet in center; do not overlap.  Sprinkle with remaining 1/2 c cheese and the basil.

Bake at 375 degrees 15-20 minutes.

Makes 2 servings.

Source:  bettycrocker.com. You can find it here.

Wednesday, July 17, 2013

You Call This Pesto....Well, Yes, I Do

Usually when one hears the word pesto, basil comes to mind.  But our garden produced a lot of cilantro this year.  Unfortunately, a lot of it went to seed and I don't know how to do the coriander thing, so I decided to make these two recipes that use cilantro instead of basil.


THAI PESTO (The darker one)

1 bunch cilantro
1/4 c. peanut butter
3 cloves garlic, minced
3 tablespoons extra virgin olive oil
2 tablespoons minced fresh ginger
1 1/2 tablespoons fish sauce
1 tablespoon brown sugar
1/2 teaspoon cayenne pepper

Blend cilantro, peanut butter, garlic, olive oil, ginger, fish sauce, brown sugar, and cayenne pepper in a blender until smooth.

Add to noodles, salad, rice or any dish to give it a Thai flavor.

Source:  Allrecipes.com

Cook's note:  This has a good flavor but is quite spicy.  Adjust accordingly.  Also, I used a food processor.

MEXICAN PESTO  (The lighter green)

1/4 c. hulled pumpkin seeds (pepitas)
1 bunch cilantro
1/4 c. grated cotija cheese
4 cloves garlic
1 serrano chili pepper, seeded
1/2 t. salt
6 tablespoons olive oil

Place the pumpkin seeds in a food processor or blender, pulse until coarsely chopped.  Add cilantro, cheese, garlic, chile pepper, salt, and olive oil; cover and process until smooth, scraping the sides of the bowl with a spatula as necessary.

Source:  Allrecipes.com

Cook's note:  I made the mistake of buying roasted pumpkin seeds.  I was too lazy to try to hull them, so I ground them up really fine.  People eat the shells anyway, right?  Well, the cojita cheese is quite salty (much like mizithra) and so the pesto came out really, really salty.  Also, I was getting to the end of my cilantro, so it could have used more.  I'm going to make another batch and leave out the pumpkin seeds altogether.  I don't think it needs it.  But the flavor was very, very promising.

Sunday, July 14, 2013

Pesto, Pesto, Do Your Very Besto


Our garden is full of basil and what do you make when you have a lot of basil?  Well, Pesto, of course!  Oh, wait!  Pesto has pine nuts......except when it doesn't!

I did a search and found these two recipes that don't have nuts (we are nut free due to a sweet little grandson with fatal nut allergies) and can be frozen.  What the ????  Best of both worlds.  If you search our blog, you will see that a lot of our recipes call for pesto.  Why?  Lots of flavor, little punch.  These two recipes were so, so easy.  I'm gonna make and freeze and save myself mucho $$$$ for a long time to come!


SUN DRIED TOMATO PESTO (NO NUTS)

1 c. sun dried tomatoes
1/2 c. fresh basil
2 tablespoons shredded Parmesan cheese
1 tablespoon minced garlic
1 teaspoon salt
3/4 c. olive oil

1.  Place sun dried tomatoes in a small pot and cover with water.  Bring to a boil.  Remove from heat and let tomatoes soften, about 10 minutes.

2.  Blend tomatoes, basil, Parmesan cheese, garlic, and salt in a blender until mixed.  Slowly add olive oil, about 1/4 cup at a time.  Blend until smooth.

Source:  Allrecipes.com

Cooks note:  A blender will work, but a food processor would be easier.  Can be mixed with cooked pasta for a quick weeknight meal.


BASIL PESTO "PISTOU"

3 c. fresh basil leaves
2 - 3 cloves garlic
About 1/4 c. quality parmesan cheese, grated
Splash of fresh lemon juice
About 1/2 c. olive oil
Salt and pepper to taste

1.  In food processor blender, chop up the garlic until it is minced.
2.  Add in the basil and cheese and start to blend.  Slowly drizzle in the olive oil while the machine is running.  Blend until smooth.
3.  Squeeze in a little lemon juice and add salt and pepper to taste.
4.  Taste the sauce and adjust to your liking.
5.  Put in freezer container and freeze, if you wish; or use it right away.

Source:  twopeasandtheirpodrecipes.com. You can find it here.

I found this when I did a search for nut free pesto recipes.

Oh, finally, the title is from an old movie "Houseboat."  Cary Grant & Sophia Loren.  It's a song that gets in your mind and stays there for days.  Except that the song is actually Presto, Presto, Do Your Very Besto.  If you want to blow your mind, check it out here.

http://www.youtube.com/watch?v=I9IvNh4Iba8

Tuesday, July 24, 2012

Everyone Loves Pizza

I'm not sure that I've ever met anybody who doesn't love Pizza.  But it's one of those things that is always better purchased than made at home.  But this recipe is an easy knock off...again using pantry ingredients.


4-Ingredient Pizza Bake

Ingredients:

2 pouches (7.5 oz each) Bisquick Complete buttermilk biscuit mix (See cook's note)
1 c. water
1 jar (14 oz) pizza sauce
1 pkg (8 oz) sliced pepperoni
2 c. shredded Mozzarella cheese

Directions:

Heat oven to 375 degrees.  Spray 13x9 inch (3 qt) glass baking dish with cooking spray.  In medium bowl, stir Bisquick mix and water until soft dough forms.  Drop half of dough by spoonfuls evenly in bottom of baking dish (dough will not completely cover bottom of dish).

Drizzle about 1 c. pizza sauce over dough.  Arrange 1/2 of the pepperoni slices evenly over sauce.  Top with 1 c. of the cheese.  Repeat layers with remaining dough, pizza sauce, pepperoni, and cheese.

Bake 20 to 25 minutes or until golden brown.  Cut into square to serve.

Makes 8 servings

Variation:  To make half or recipe, divide ingredients in half, bake in sprayed 8 inch sq baking dish for 22 to 25 minutes.

Special Touch:  Add your favorite pizza toppings to the layers.  Try cooked sausage crumbles, chopped green pepper, onions, or olives.

Cooks note:  Frankly, I had trouble finding the Bisquick Complete.  I used Marie Callendar biscuit mix that came in pouches.  It worked great.  Source, Betty Crocker, of course.  She's my best friend!