Showing posts with label Gift Ideas. Show all posts

Friday, December 25, 2020

Hot Cocoa Bombs


I think everybody either made or tried hot cocoa bombs this season. It was the "it" holiday sweet. First of all, I apologize for the length of this post. Once you get the hang of these, they aren't too bad to make at all. However, there is a bit of a learning curve to them. But practice makes perfect! Also, even if they aren't perfect, they will still taste fantastic.

I researched a lot of videos on YouTube before attempting these. Speaking of, I made my own video (my first ever for this blog!) because you really have to see how it is done to truly understand how to do it. Watch this 5 minute video (the link is for those viewing the mobile version, or if you are viewing the web version, you can click on the same video below, which for some reason, won't even appear on the mobile version), and then we can talk about what I learned through this process.


One of the videos I first researched insisted that tempered chocolate was a must because it was far superior taste-wise than using melting wafers.

So, I then studied up on tempering chocolate and even bought a spatula with a built in thermometer (you can find that here). I tried the microwave tempering method (where you keep the chocolate under a certain temperature so that it never becomes untempered), and I am not sure if my thermometer wasn't reading the temperature correctly or what, but my chocolate apparently became too hot (even though my thermometer said I was still okay) and therefore my chocolate became untempered. I know this, because it never regained that snap sound that tempered chocolate makes once it hardens again, it was dull rather than shiny, and it was a little soft.

So, then I did the stove top method to temper my chocolate...and it worked! I had beautifully tempered dark chocolate...and as soon as I tried to remove it from the mold, it cracked and shattered (that beautiful snapping sound that proves that you have correctly tempered your chocolate was totally there. Ha ha). Perhaps if I had done a thicker layer of chocolate or a second layer of chocolate, it would have been strong enough to remove from the mold without breaking. I guess I won't know for now, because at that point, I went to plan B (using melting wafers).

In my research, I learned that tempering milk and white chocolate is even harder than tempering semi-sweet or dark chocolate (because the temperatures that you temper at are different. They are lower temperatures than with dark chocolate).

I learned that chocolate melting wafers aren't really considered true chocolate because they don't contain cocoa butter. Candy melts or melting wafers contain added oils to help the chocolate solidify and hold its shape.

I also learned that chocolate chips can't be tempered. They don't have cocoa butter and they are too soft for tempering. In order to temper chocolate, you have to start with tempered chocolate. Tempered chocolate contains cocoa butter. For instance, a chocolate bar that snaps when you break off a square and contains cocoa butter is tempered. A chocolate chip never really snaps. It is soft, even when it holds its shape. A chocolate chip's composition is specifically made the way it is so that they can be soft and chewy at room temperature so you have a soft and chewy chocolate chip cookie instead of a cookie with a chocolate crunch. Tempered chocolates have that snap, shine, solidity, and the ability to hold its shape at room temperature.

You can add vegetable oil to chocolate chips to help it hold its shape at room temperature better, but then that makes them very similar to melting wafers anyway.

So, here's what I learned through a lot of trial and error:

For this particular recipe, tempering is not for me. It might be for you, but it is not for me! I am too much of a chocolate amateur. It just makes this recipe more time consuming and difficult. 

If tempering is for you, and you are a skilled chocolatier, feel free to buy high quality tempered chocolate, chop it up, melt it down, make sure it is tempered again and make your beautiful pure chocolate cocoa bombs.

I, however, wanted something that would not only be delicious, but also faster and easier for me, personally, to assemble and produce on a larger scale.

Straight chocolate chips taste amazing in this recipe, though they melt easily. So, they are hard to handle when you are forming the balls because they will melt in your hands as you are touching them. You can hide a lot of flaws with drizzled chocolate and toppings though. Also, they will retain their shape best if stored in the refrigerator. 

As mentioned above, if you add a little shortening (2 tablespoons shortening for every 2 cups of chocolate chips), you can make your own version of chocolate candy coating that will work better for these cocoa bombs and can be stored at room temperature, rather than in the fridge.

It is easier to make these hot cocoa bombs with bare hands rather than while wearing gloves. You kind of need your bare skin to handle the chocolate. The gloves make things too slippery.

Chocolate chips with or without shortening taste great in this recipe.

Candy melts or melting wafers also taste great in this recipe.

When I made mine, I used melting wafers, straight chocolate chips, and chocolate chips with shortening. I thought all of them were delicious, so I suggest you use what you are most comfortable with.

Finally, you will need a medium size silicone mold. There are bigger ones, but they are way too big for your standard size mug. You can find the one I used here.


Hot Cocoa Bombs

Ingredients:

2 cups chocolate chips or melting wafers
2 tbsp shortening (only if using chocolate chips)
1 scoop hot cocoa (any flavor) per bomb
1 scoop mini vanilla dehydrated marshmallows per bomb
Sprinkles, crushed candy, crushed cookies, etc. for decorative topping, if desired
1 cup steaming hot milk (any kind) per bomb, for serving

Directions:

Melt chocolate chips or melting wafers in a microwave safe container at 30 second intervals, stirring between each, until completely smooth.

Add a spoonful of melted chocolate to each mold indentation. Using the back of the spoon, spread chocolate evenly over each indentation.

Place mold in the freezer for 5 minutes, or until completely set.

Once set, carefully remove the chocolate from the molds.

Gather your hot cocoa and mini marshmallows for easy assembly.

Place a microwave safe glass dish in the microwave. Microwave for 1-2 minutes or until hot.

Carefully place warm dish next to the chocolate shells. Place one shell half, seam side down, on the warm plate to clean up and slightly melt the edges.

Fill that shell half with a scoop of hot cocoa. Top that with a scoop of mini marshmallows.

Place second shell half, seam side down, on the warm plate to clean up and slightly melt the edges.

Carefully place the two shells together, smoothing the seam with your finger and using additional melted chocolate to help seal it together, if necessary.

Repeat until you run out of chocolate and/or you have the desired amount of cocoa bombs.

Let the bombs sit until completely set. 

Using a squeeze bottle or spoon, drizzle completed bombs with additional melted chocolate that has cooled slightly. You don't want to use chocolate that is too hot or it will melt a hole right through your bomb and ruin all of your hard work! (Yes, I am speaking from experience. RIP cocoa bomb that got drizzled with chocolate that was too hot) 

Immediately top with sprinkles, crushed candies, or crushed cookies, if using. If you wait too long, the chocolate drizzle will set and the toppings won't stick to it.

When ready to serve, you can explode your cocoa bomb one of two ways. You can place a cocoa bomb in the bottom of a mug and slowly pour 1 cup of steaming hot milk on top. Or, you can prepare a mug of steaming hot milk and gently place the bomb into your mug of milk.

Source: Holy cow, this is everywhere. All you have to do is Google it to find videos and/or recipe links all over the place. For me, it started when my sister found an ad saying they would be available at Costco. We searched and never found them, so we decided to make our own.

Notes: Please watch the video above, because honestly, these aren't too hard to make once you get the hang of it, but it is a completely visual recipe. You kind of have to see how it is done for it to totally make sense.

I love Ghirardelli melting wafers. That's what I used for the hot cocoa bombs in all but one (the final) picture. Even in that picture, I used the Ghirardelli melting wafers for half of those cocoa bombs. I found them in my local grocery store. If you can't find them locally, you can find them here.

I found dehydrated vanilla mini marshmallows on Amazon, here.

If doing a large batch, a squeeze bottle is easiest for drizzling chocolate. If doing a small batch, a spoon is easier. I used a squeeze bottle similar to these ones here.

The easiest way to steam milk is to put one cup of milk in a microwave safe container and microwave for 1 minute. Stir. After one minute, that is a good temperature for kids. If you like it hotter, microwave for an additional minute.

Also, if you long for the taste of real, tempered, cocoa butter packed chocolate, but can't figure out how to make them work in your molds without them shattering, simply put a couple of squares of high quality chocolate in a mug, add a scoop of hot cocoa, add some mini marshmallows, and then add some steaming hot milk and just enjoy it with the knowledge that you didn't make a huge mess of your kitchen in the process. 

Hot Cocoa Bomb Flavor Combinations:

  • Dark chocolate melting wafers, raspberry hot cocoa, red nonpareil sprinkles
  • Dark chocolate melting wafers, peppermint hot cocoa, crushed peppermint candies
  • Dark chocolate melting wafers, dark chocolate hot cocoa, chocolate sprinkles
  • Dark chocolate melting wafers, mint truffle hot cocoa, green sugar or crushed wint-o-greens candies
  • White chocolate melting wafers, white chocolate hot cocoa, red sugar
  • White chocolate melting wafers, pumpkin spice hot cocoa, cinnamon sugar or a little nutmeg
  • Dark or milk chocolate melting wafers or chocolate chips, salted caramel hot cocoa, finely chopped toffee, butterscotch candies, and/or coarse salt
  • Dark or milk chocolate melting wafers or chocolate chips, toasted coconut hot cocoa, toasted shredded coconut, finely chopped
  • Milk chocolate chips, peanut butter cup hot cocoa, crumbled Nutter Butter or other peanut butter cookies
  • White chocolate melting wafers, cookies and cream hot cocoa, crushed Oreo cookies
  • Dark chocolate melting wafers or milk chocolate chips, cookies and cream hot cocoa, crushed Oreo cookies
  • Milk chocolate chips, English toffee hot cocoa, finely chopped toffee
  • Milk chocolate chips, hazelnut hot cocoa, finely chopped hazelnut chocolate candy bar
  • Milk chocolate chips, mocha or macchiato flavored hot cocoa, chocolate sprinkles
  • Milk chocolate chips, Mexican style hot cocoa, cinnamon sugar
  • Milk chocolate chips, milk chocolate hot cocoa, mini chocolate chips or chopped chocolate 
  • Milk chocolate chips, cherry hot cocoa, red sugar  
  • Wherever your taste buds and your creativity take you! 


Above: This is the only picture that I took of the hot cocoa bombs that I made as gifts for my family. It was honestly such a process, I had so much to learn, and I was so under the gun to get them delivered on time that pictures didn't even occur to me until I was literally about to drop the last gift plate on my sister's porch. So, I grabbed my cell phone and snapped a few quick pics. Ha ha. Do yourself a favor and have a few trial runs to get comfortable with these before planning to make 50 at once to deliver while you are under a deadline to do it. 

The top two are dark chocolate Ghirardelli melting wafers, peppermint hot cocoa mix, mini marshmallows, and topped with crushed peppermint. The two below that are dark chocolate Ghirardelli melting wafers, raspberry hot cocoa mix, mini marshmallows, and topped with red nonpareils. The two  with red sugar are milk chocolate chips, milk chocolate cocoa mix, mini marshmallows, and red sugar sprinkles. 

The final one with green sprinkles is a mini long story. I ordered Ghirardelli milk chocolate melting wafers on my online pickup order, but then they were unavailable. This was the substitute the store made. Dang online order substitutions! Am I right? They looked like melting wafers, but turned out to be more like chocolate chips. They worked, but I didn't add shortening because I thought they were melting wafers. The result was that these were the hardest to assemble because they were so prone to melting. They exploded nicely when milk was poured on them though. So, that was milk chocolate wafers, milk chocolate hot cocoa, mini marshmallows, and green sprinkles.

I then made three more (the ones in all of the rest of the pictures), just so I could take pictures for this blog post. Ha ha! Those are dark chocolate melting wafers, raspberry hot cocoa, and red nonpareils and dark chocolate melting wafers, peppermint or candy cane hot cocoa, and crushed peppermints.

Above: You can also make them UFO-style. Instead of using the hot plate method to fuse the shell halves together, you pipe slightly cooled melted chocolate onto the edges and then put them together. You then roll the bomb in sprinkles, crushed candy, or chopped cookies for decoration. These are milk chocolate chips (without shortening), raspberry hot cocoa, and red sugar. These were my very first attempt at hot cocoa bombs. You can kind of see that when I handled them, the tops became less shiny and dull. These tasted like ambrosia though.

Again, sorry for the long post, but I hope my errors and learning experiences along the way will help you avoid problems in your own hot cocoa bomb journey.

However you decide to make them, I hope you love them as much as we did!

Monday, December 26, 2016

Christmas Treats


We did a cookie exchange for Christmas, but I also made these treats to give to people that I wasn't able to take cookies to. The problem was that we were going to deliver these on Christmas Eve, but everyone was riled up and crazy, so we didn't get a chance to deliver these on Christmas Eve. So, we were going to deliver these on Christmas Day after we visited family...and then my baby came down with the stomach flu and was throwing up all evening...and the next day. So, we ended up eating these all ourselves.


Pretzel M&M Peppermint Kisses

Ingredients:

70 square pretzels
70 Hershey's peppermint kisses, unwrapped
70 red and green M&Ms

Directions:

Preheat oven to 200 degrees. Line a cookie sheet with waxed paper or parchment paper. Place pretzels on the cookie sheet in a single layer and then top each pretzel with one Hershey's peppermint kiss. Bake in preheated oven for 4-5 minutes, or until the chocolate is shiny and soft, but holding its shape and not completely melted.

Remove from oven and carefully place on M&M in the center of each peppermint kiss and press down gently. Place in refrigerator to allow chocolate to set.

Source: I have gotten this from neighbors and friends for years now. It's pretty self-explanatory, but I found a recipe for it through Pinterest. You can find the recipe here.

Notes: Oh, these were good. I made more than 70. I just filled my jelly role pan as much as I could. I didn't keep track of the final count. You can make these at any time of the year. Use pink, red, and white M&Ms for Valentine's Day. Or use regular colors of M&Ms for any time of the year.


Pretzel M&M Rolo Treats

Ingredients:

70 circular or square pretzels
70 Rolos, unwrapped
70 red and green M&Ms

Directions:

Preheat oven to 350 degrees F.

Line a cookie sheet with waxed paper or parchment paper. Place pretzels on the cookie sheet in a single layer and then top each pretzel with a Rolo.

Bake in oven 1-2 minutes, or until Rolos are softened, but not completely melted.

Remove from oven and place one M&M in the center of each Rolo. Place in refrigerator until set.

Source: Again, this is one I have gotten from family and friends for ages, but I found some instructions on Allrecipes.com. You can find it here.

Wednesday, December 23, 2015

Gifts for the Neighbors


This year, I didn't have much time on my hands to go crazy with cookie plates or homemade fudge or candy. However, this recipe was an old favorite of mine and I felt that it would be a quick and easy alternative.


Sweet and Salty Corn Puffs

Ingredients:

1 cup sugar
1/2 pound butter (2 sticks, or 1 cup)
3 tablespoons water
1 tablespoon corn syrup
8 ounces corn puffs

Directions:

Stir first four ingredients together in a saucepan and heat on high heat until mixture reaches 250 degrees.

Meanwhile, pour corn puffs into a large bowl. When the butter/sugar mixture reaches 250 degrees, pour mixture over corn puffs and stir to coat. Spread onto waxed paper to cool.

Source: My mom got this recipe from her friend, Karrie. I found a very similar recipe online here.

Notes: This sweet and salty mixture is so addicting. It is also really quick to make. So, if you need to make neighbor gifts in a hurry, this is the recipe you're looking for.


Above: This is a 3 1/2 ounce bag. It's not a small bag, but those little corn puffs are light! 

Above: Here are two bags poured into my big metal bowl.


Above: For my first batch, I used two 3 1/2 oz. bags, but if you wanted more candy coating on them, you could do one batch of the sugar/butter mixture for each 3 1/2 oz. bag of corn puffs. I tried it both ways, and it is totally up to you depending on how much sugar/butter coating you want on the corn puffs. All in all, if I remember correctly, I used six 3 1/2 ounce bags and ended up with about 12 neighbor treat bags.

Wednesday, January 1, 2014

Yep, Christmas Was For Baking

About every other year, I go on a baking binge at Christmas time. Years ago it was 24 different kinds of cookies. Well, I reigned it in this year and only did five kinds of bread. It satisfies that homey instinct and gives me something reasonably inexpensive to give to neighbors. Finally, my husband gets to taste all of the extras. Everybody wins! Below are the five I made this year.


Coconut Bread

Ingredients:

Bread:

4 eggs
2 cups sugar
1 cup vegetable oil
2 tsp. coconut flavoring
3 cups flour
1/2 tsp. baking powder
1/2 tsp. baking soda
1/2 tsp. salt
1 cup buttermilk
1 cup flaked coconut

Glaze:

1 cup sugar
1/2 cup water
2 Tbsp. butter
1 tsp. coconut flavoring

Directions:

Bread: Beat eggs in large bowl.  Blend in sugar, vegetable oil, and 2 tsp. coconut flavoring.  Sift in flour, baking powder, soda and salt.  Mix.  Blend in buttermilk.  Fold in flaked coconut.  Spoon into greased and floured pans.

Bake at 325 degrees (lower for glass pans) for 1 1/2 hours for 9 x 5 inch loaf (less time for mini loaves). While still hot and in pans, pour glaze over; it will soak in as you pour.  Allow to stand for 4 hours before removing from pans.

Glaze: Mix ingredients (except flavoring) and boil and stir for 5 minutes.  Remove from heat and add 1 teaspoon coconut flavoring.

Source:  This recipe came from a sister-in-law more than 25 years ago, Shannon Hansen.

Notes: I wish I had gotten a better picture but I had already bagged them when I remembered. The bread is a little too fragile to take out again.  But this is a rave recipe and I'm always asked for the recipe every time I give it as a gift. So, Jana Q, this recipe is coming your way.


Strawberry Coconut Bread

Ingredients:

1 1/2 cups all purpose flour
1/2 cup sugar
1/3 cup shredded coconut
2 1/2 teaspoons baking powder
1/2 teaspoon salt
1 egg, lightly beaten
1/2 cup mashed banana (1 large)
1/2 cup milk
1/3 cup coconut oil, heated if needed to become more liquid
1/2 cup sliced fresh strawberries

Directions:

Heat oven to 350".  Grease an 8x4 inch loaf with shortening or cooking spray.

In a large bowl, stir together flour, sugar, coconut, baking powder and salt.  Make a well in the center of the mixture.

In medium bowl, beat egg, mashed banana, milk and oil with whisk until well blended. Add wet mixture to dry ingredients, stirring just until moistened. Stir in half the strawberries. Spoon batter into pan. Scatter remaining strawberries over top.

Bake 45 to 60 minutes or until toothpick inserted in center comes out clean. Cool in pan for 10 minutes. Remove from pan to cooling rack. Cool completely about 1 hour.

Source: Betty Crocker.com. You can find it here.

Cook's notes: This was exceptionally pretty bread. Niel said it was his favorite of them all. Very moist. The coconut oil is kind of funky and looks like lard, but it was worth searching for. Not all stores will carry it.


Hawaiian Banana Bread

Ingredients:

1 1/4 cups sugar
1/2 cup butter of margarine, softened
2 eggs
1 1/2 cup mashed ripe bananas (3 to 4 medium)
1/2 cup buttermilk
1 teaspoon vanilla
2 1/2 cups all purpose flour
1 teaspoon baking soda
1 teaspoon salt
1 jar (3 1/2 ounces) macadamia nuts, chopped and toasted
1/2 cup flaked coconut

Directions:

Move oven rack to lowest position.  Heat oven to 350 degrees f.  Grease bottoms only of 2 loaf pans, 8 1/2x4 1/2 x 2 1/2 inches or loaf pan, 9x5x3 inches.

Stir together sugar and butter in large bowl.  Stir in eggs until well blended.  Add bananas, buttermilk and vanilla.  Beat with wire whisk until smooth.  Stir in flour, baking soda and salt just until moistened.  Stir in nuts and coconut.  Pour into pans.

Bake 8 inch loaves about 1 hour, 9 inch loaves about 1 1/4 hours, or until toothpick inserted in center comes out clean.  Cool 10 minutes.  Loosen sides of loaves from pans; remove from pans and place top side up on wire rack.  Cool completely, about 2 hours, before slicing.  Wrap tightly and store at room temperature up to 4 days, or refrigerate up to 10 days.

Mini loaves:  Grease bottoms only of 10 miniature loaf pans 4 1/2 x 2 3/4 x 1 1/4 inches.  Divide batter among pans (about 1/2 cup each).  Bake 30 to 35 minutes.

Source:  Betty Crocker.com. You can find it here.

Cook's notes: I baked all of these breads in mini loaf pans. You just have to fill the pans no more than 3/4 full and check at about 1/2 the cooking time alotted. Most mini pans come in varying sizes. This recipe was good, but not a favorite. I think it cooked it a tad bit long.


Eggnog Quick Bread

Ingredients:

2 eggs, beaten
1 cup eggnog
2 teaspoons rum flavored extract
1 cup white sugar
1 teaspoon vanilla extract
1/2 cup butter, softened
2 1/4 cups all purpose flour
2 teaspoons baking powder
1/2 teaspoon salt
1/4 teaspoon ground nutmeg

Directions:

Preheat oven to 350 degrees F. Grease bottom only of a 9x5 in loaf pan or 3 3x5 inch loaf pans.

Blend the butter and sugar until creamy. Add eggs one at a time. Add eggnog, and rum and vanilla extracts.

Sift together the flour, baking powder, salt and nutmeg. Add to eggnog mixture and stir by hand just enough to moisten. Pour into prepared pans.

Bake large loaf for 40 to 60 minutes or until toothpick inserted in the center comes out clean. Breads baked in the smaller pans require 35 to 40 minutes. Cool for 10 minutes, and remove from pan. Cook completely. Wrap tightly in plastic wrap or foil and store in refrigerator.

Source:  Allrecipes.com, submitted by Bev. You can find it here.

Cook's notes: I changed up the order of mixing to make it a little more traditional. The original recipe mixed all the wet ingredients together at once and it left funky chunks of butter in the batter.


Butterscotch Bread (Brown Sugar Bread)

Ingredients:

4 cups all purpose flour
2 teaspoons baking powder
1 teaspoon baking soda
1 teaspoon salt
2 cups packed brown sugar
4 eggs, beaten
2 cups buttermilk
4 tablespoons butter, melted

Directions:

Preheat oven to 350 degrees F. Lightly grease two 9x5 loaf pans. In a large bowl, stir together the flour, baking soda, salt and brown sugar. Stir in the eggs, buttermilk and melted butter all at once. Mix just enough to moisten. Pour batter into prepared pans.

Bake in preheated oven for 60 minutes or until golden brown and a toothpick inserted into center of loaf comes out clean.

Source:  Allrecipes.com, submitted by Thomas OReilly. You can find it here.

Cook's notes:  The original name is butterscotch bread, but I don't think that name really fits it. I think it threw off a lot of the commentators on the original post.  The expectation of butterscotch is something really rich and creamy and this bread is actually not very rich.  It's a subtle flavor and it kind of was good to have a switch-out from the oversweet goodies falling down upon us at Christmas time.

Saturday, August 3, 2013

Candy Bread?


Yes. Candy and bread combined make candy bread. Whoohoo! Check it out!

This would make a great Christmas gift bread too.

Gumdrop Bread

Ingredients:

2 1/2 cups all-purpose flour
1/2 cup granulated sugar
1/2 cup packed brown sugar
1/4 cup shortening
1 1/4 cups buttermilk
3 teaspoons baking powder
1 teaspoon salt
1 teaspoon vanilla
1/2 teaspoon baking soda
2 eggs
1 cup small gumdrops, cut in half (see notes)
1/2 cup chopped nuts, if desired

Directions:

Heat oven to 350 degrees F. Grease bottom only of loaf pan (9x5x3 inches).

Beat all ingredients except gumdrops and nuts in large bowl with electric mixer on low speed 15 seconds. Beat on medium speed 30 seconds, scraping bowl constantly. Stir in gumdrops and nuts. Pour into pan.

Bake 60 to 65 minutes or until toothpick inserted in center comes out clean. Loosen sides of loaf from pan; remove from pan to wire rack. Cool completely about 2 hours, before slicing. For best results, wrap and refrigerate at least 8 hours before slicing.

Recipe notes: Hold the nuts! Some kids have serious nut allergies, so check with parents before sharing this gumdrop goodie.

Squeeze those gumdrops in the store. Look for soft and moist candies for best bread results.

Source: Betty Crocker recipe. You can find it here.

Notes: The bread itself isn't overly sweet. At first, I felt it could be a little sweeter...but after having a few more slices, I decided it was good that it wasn't too sweet because you get a lot of sweetness from the gumdrops.

I would also suggest tossing the gumdrops in some flour before mixing it into the batter. It will keep the gumdrops from sinking to the bottom. That way, the candy will be interspersed throughout the bread.

As I was eating this bread, I thought of some good possibilities. Our grocery store has some awesome Juju fish that are just the right consistency and softness. Some of those chopped up would be absolutely delicious in this bread.

I also think Swedish Fish might work well in this recipe. They might be a little too firm though. I'll have to try it out and report back as to how successful that is. However, if it is a success, can you imagine anything better than Swedish Fish bread?!


Above: I found this recipe, but thanks to my mom for trying it out and sharing it with us! It was yummy!

Saturday, January 19, 2013

Goody, Goody Gumdrops!


This is a recipe that I found before Christmas and I knew I just had to try it. They were fun to make, delicious, and my boys loved them!


Homemade Gumdrops

Ingredients:

2 1/2 cups sugar, divided
1 1/3 cups applesauce
2 packages (3 oz. each) red, or green gelatin
2 envelopes unflavored gelatin
1 teaspoon lemon juice

Directions:

In a large saucepan, combine 2 cups sugar, applesauce, red or green gelatin, unflavored gelatin, and lemon juice; let stand for one minute. Bring to a boil over medium heat, stirring constantly. Boil for 1 minute. Immediately pour into cold 11x7-inch baking dish coated with cooking spray. Refrigerate for 3 hours or until firm.

With a spatula, loosen gelatin from sides of pan. To remove, invert onto waxed paper. Using kitchen shears or small cookie cutters dipped in hot water, cut into 1-inch squares or shapes.

Place on waxed paper. Dry at room temperature for about 8 hours or until slightly sticky. Roll in remaining sugar. Store in an airtight container.

Yield: About 1 3/4 pounds. Makes 70 servings.

Nutrition information: 1 piece (out of 70) is 35 calories, trace fat, 0 cholesterol, 3 mg sodium, 9 g carbohydrate, trace fiber, trace protein.

Source: I found this on the Taste of Home website. You can find it here.

Notes: It was a lot of fun to make (my older son loved dipping the gummies into the sugar). I would definitely suggest NOT using cookie cutters for these. First of all, you would need really little cookie cutters, and if you had them, it would take approximately 12 billion years to cut out the shapes--and then you would have leftover pieces that would just go to waste. The squares were a lot easier to cut with kitchen shears--though these would look cute in heart shapes for Valentine's day. Since I cut these into squares, I ended up with a LOT more than just 70 pieces. My boys were also impatient and wanted to dip the pieces in sugar right after I cut them--instead of waiting 8 hours for them to dry. So, we dipped some in sugar right away and waited on the rest. Honestly, I didn't see the difference. If anything, they were a little more sticky (and therefore the sugar stuck to them easier) right after I had cut them. If you are impatient, just go ahead and dip them in sugar right after you cut them up.

I thought I had two 3 oz boxes of strawberry gelatin...but it turned out I didn't. One of the strawberry gelatin boxes was only .3 oz. I happened to have a 3 oz box of cherry...so I mixed cherry and strawberry and it still tasted great. You don't have to limit this to just red or green gelatin. Any kind would work.


It Can't Be True


 When considering titles for this blog post, the following options came to mind:
  1. Too Good To Be True
  2. No Way!
  3. I Can't Believe It
  4. Dangerous Knowledge
  5. Uh-Oh
  6. Using a Microwave?
  7. I'm In Trouble
The reason for this is because when you see this recipe, you will think to yourself, "No way. This is too good to be true. I can't believe it and I won't believe it."

Then, after you have tried this recipe, you will think to yourself, "Uh-oh. This is dangerous knowledge to have. I can't believe you can make this with a microwave. If I don't find someone to share this with, I am going to be in trouble."

The recipe I am going to share is for homemade microwave caramels. These are unbelievably just as good as the homemade caramels that you make using a pot and a candy thermometer. Only this time, no pot or candy thermometer is necessary.

The one and only time I tried to make caramel before this was a failure. I watched that candy thermometer like a hawk and I stuck to that recipe like glue (two cliches in one sentence. Are you proud of me?). It looked good...but then it hardened...and hardened. It wasn't delicious, soft, melt-in-your mouth caramel. It still turned out to be delicious (after all, it had cream, sugar, and butter in it...how can you go wrong?). However, it turned out to be hard candy. So, I ended up melting the whole thing in the microwave so that it was pourable again, and I poured it into sucker molds and made caramel suckers. Still lovely and deliciously edible, but not what I had been hoping for. I have been reluctant to try my hand at candy-making ever since (candy making definitely doesn't come naturally to me).

I think it is impossible to fail with this recipe, if you follow it. This caramel was soft, chewy, and delicious. Find someone that you need to give a thank you gift to, because otherwise you will gain 5 pounds eating this stuff in two or three days! I gave a third to a next-door neighbor, a third of it I sent to work with my husband to share with his co-workers, and we kept a third of it to eat at home. Delicious!


Microwave Caramels

Ingredients:

1/2 cup butter (1 stick)
1 cup white granulated sugar
1 cup light brown sugar
1 cup light corn syrup (such as Karo Syrup)
1 can (14 oz) sweetened condensed milk

Directions:

Spray an 8x8-inch glass baking dish with nonstick cooking spray.

Combine all ingredients in a large microwave-safe bowl. Cook in 2 minute increments, stirring after each, for a total of 12 minutes.

Pour caramel into 8x8-inch baking dish and allow to cool completely. Cut caramels into desired sized pieces and wrap each individual caramel in waxed paper.

Store in an airtight container, or in the refrigerator.

Source: I originally found the idea on Pinterest. It can be found on at least a dozen different blogs and websites. Here are the two sites that I got the recipe from (the first site includes a halved version of the recipe--I think it is the original source. The second site includes the recipe as shared above.) Halved version from Food.com found here. Recipe as shown above found here.

Notes: I kept a tally on a piece of paper as to how many minutes the caramel had been in the microwave because I knew that I would lose track of it otherwise. One of the versions of the recipe that I found off of Pinterest also included 1 teaspoon of vanilla. If you decide to add this, I would suggest adding it in while you are stirring the caramel mixture before you cook it for the last two minutes. I originally cut my caramel into 40 pieces (ten cuts across and four cuts down). However, I realized that because this made for pretty thick caramels that I could cut each of those pieces into three or four pieces each. So, I would say that, depending on how small or big you want your caramels to be, you could get anywhere from 40 large to 120 smaller pieces of caramel out of one batch.


Above: I started out with the plan to cut 40 pieces of caramel.


Above: After awhile, I started cutting the original pieces of caramel into thirds. They were still good-sized pieces of caramel. If I had started doing it that way, I would have ended up with 120 pieces total. If you want them in-between these two sizes, I would suggest cutting them into 80 pieces (7 cuts down the pan, 10 cuts across the pan).

Yum! I could have eaten them all! (Don't worry...I didn't eat them all...but I ate way more than I should have!)

Sunday, December 18, 2011

Peppermint!


As we talked about last month, certain months have certain flavors that are associated with them. I definitely crave pumpkin in November...and when December hits, I just can't get enough peppermint! So, this post is devoted entirely to peppermint goodies. These make fun desserts or beautiful gift ideas for the Christmas season. Just make sure you give some of it away, because if you keep all of these goodies at home, you're going to eat too much...and you're going to gain a little more Christmas spirit (or body) than you were planning on.

These recipes are all a lot of fun to make too--whether by yourself or with friends. So, enjoy one of the best flavors of the season and have fun making these treats too!


Peppermint Ice Cream

Ingredients:

2 1/2 cups 2% reduced-fat milk, divided
2 large egg yolks
2 teaspoons vanilla extract
1 (14 ounce) can fat-free sweetened condensed milk
2/3 cup crushed peppermint candies (about 25 candies)

Directions:

Combine 1 1/4 cups 2% milk and egg yolks in a heavy saucepan over medium heat. Cook until mixture is slightly thick and coats the back of a spoon (about 8 minutes), stirring constantly (do not boil). Cool egg mixture slightly.

Combine egg mixture, 1 1/4 cups 2% milk, vanilla, and condensed milk in a large bowl. Cover and chill completely. Stir in crushed candies. Pour mixture into the freezer can of an ice-cream freezer; freeze according to manufacturer's instructions. Spoon the ice cream into a freezer-safe container; cover and freeze 1 hour or until firm.

Source: Cooking Light, December 2001. You can find it here.

Makes 8 servings (1/2 cup per serving)

Nutrition information: 268 calories, 2.9 g fat, 7.6 g protein, 52.2g carbohydrate, 0.0 g fiber, 62 mg cholesterol, 0.3 mg iron, 99 mg sodium, 238 mg calcium.


Above: It is great in the summer too!

Notes: I doubled this recipe, but I think in the future, I would at least triple it...because I usually make this for a crowd. One year, I quadrupled it and it made plenty (with some nice leftovers as well). this is a very soft ice cream. The peppermint keeps the ice cream softer and makes it take a little longer to set up. So, definitely plan on some time for the ice cream to ripen in the freezer. The recipe suggests an hour, but I would say that it should stay in the freezer overnight or longer. If it gets too hard, you can always let it thaw a little. But if you don't freeze it long enough and it's too soft, there's not a lot you can do to fix it--except drink it through a straw!


Candy Cane Cake

Ingredients:

Cake:

1 box Betty Crocker SuperMoist white cake mix
Water, vegetable oil, and egg whites called for on cake mix box
1/2 teaspoon red food color
1/2 teaspoon peppermint extract

White Icing:

1 cup powdered sugar
1 tablespoon milk or water
1/2 teaspoon vanilla, if desired

Decoration:

Crushed candy canes or crushed hard peppermint candies, if desired

Directions:

Heat oven to 350 degrees (325 for dark or nonstick pan). Generously grease and flour 12-cup fluted tube cake pan. Make cake batter as directed on box. Pour about 2 cups batter into pan. In small bowl, pour about 3/ cup batter; stir in food color and peppermint extract. Carefully pour pink batter over white batter in pan. Carefully pour remaining white batter over pink batter.

Bake and cool cake as directed on box.

In small bowl, mix white icing ingredients. If necessary, stir in additional milk, 1 teaspoon at a time, until smooth and spreadable. Spread over cake. Sprinkle crushed candy on top. Store loosely covered.

Makes 12 servings

Source: Betty Crocker website. You can find it here.

Nutrition information: 240 calories, 8 g fat, 0 mg cholesterol, 280 mg sodium, 41 g carbohydrate, 0 g fiber, 2 g protein.


Notes: I used about 1 cup for the red portion of the cake. I was super skeptical about how it would work out. It just didn't make sense how pouring a different color of cake batter in layers could make for such a cool design in the finished cake. But it definitely worked and it was a super easy cake to make!


Peppermint Cake

Ingredients:

1 angel food cake (homemade or store-bought)
2 cups whipping cream (or whipped topping)
1/2 cup sugar (not necessary if you use whipped topping)
2 tsp vanilla (not necessary if you use whipped topping)
1 cup crushed peppermint

Directions:

Whip the cream and add the sugar and vanilla as it begins to thicken. Frost the cake and sprinkle with crushed candy canes.

Hint: Sprinkle crushed peppermint just before serving. If it sits too long, the peppermint will begin to dissolve.

Source: I have now seen this in two different places. First, a cookbook entitled "The Gathering of Friends: Volume One" by Michelle Hustable and Alyse Christensen. ISBN: 978-0-9816986-0-1. The above recipe is taken from that book (with my changes in parenthesis).

Or, you can find it on MyRecipes.com here. They call theirs "Candy Cane Cake."

The two recipes are very similar. The MyRecipes (Sunset) recipe includes a recipe for a homemade angel food cake if you would like to make one from scratch. That recipe also uses almond extract instead of the vanilla (which I'm sure would be fantastic).

To make my cake, I opted for much, much easier and much, much lighter. So, I used a store-bought cake and fat-free whipped topping. That way, it makes for a very light and fluffy dessert. Very refreshing at this time of the year when one is often eating very heavy and calorie-laden foods.


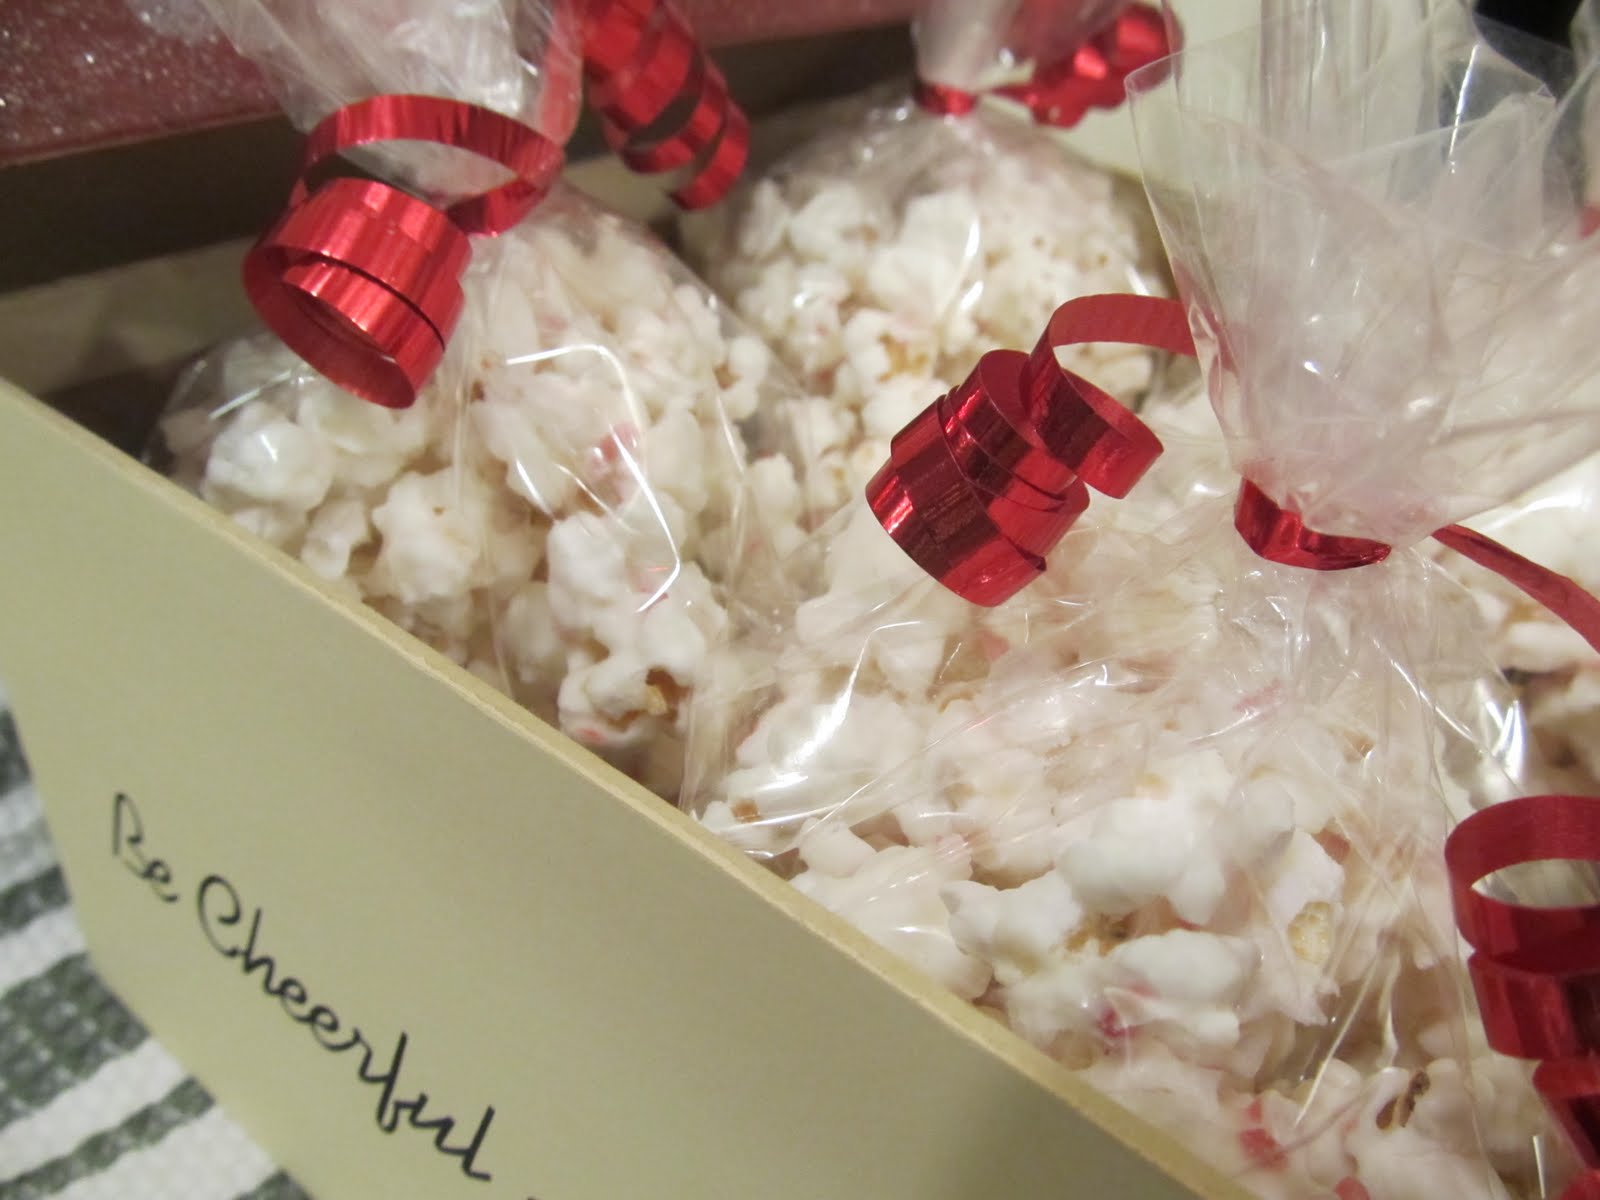
White Chocolate Popcorn with Peppermint

Ingredients:

10 cups popped and buttered popcorn (I prefer my popcorn plain and un-buttered for this recipe)
24 oz white chocolate chips (or white chocolate candy coating)
1 dash of salt
2 candy canes, crushed (or to taste)

Directions:

Pour already popped popcorn into a large bowl. Add a dash of salt and set aside. Melt white chocolate slowly in the microwave stirring every 30 seconds until smooth (a minut to a minute and a half). Spread popcorn out on a cookie sheet. Drizzle warm chocolate over popcorn until evenly coated. Add crushed candy cane; let cool.

Source: "The Gathering of Friends: Volume One" by Michelle Hustable and Alyse Christensen. ISBN: 978-0-9816986-0-1.

Notes: I first tried this recipe at one of my jobs. A co-worker's wife made it for him to bring in for the office. I was pregnant at the time and simply couldn't get enough of it. I saw this recipe and decided to try it. I've made changes to it to fit it to my tastes. I prefer to use white chocolate candy coating. Let me tell you why.

First, unless you temper the chocolate, melted chocolate chips tend to get soft and melty again unless you keep it in the refrigerator. Candy coating stays hard at room temperature. Plus, I like the color of the candy coating better. White chocolate chips are kind of off-white in color. Whereas, white chocolate candy coating is pure white. Finally, I kind of prefer the taste of the candy coating in this recipe.


Oh, and I used a lot more peppermint than just two candy canes' worth.


Peppermint Bark and Variations


Ingredients:

1 (12 oz) bag semi-sweet chocolate chips (about 2 cups)
1 (12 oz) bag white chocolate chips (about 2 cups)
1 cup crushed peppermint (or to taste)

Directions:

Line a jelly roll pan with heavy duty aluminum foil.

Melt semi-sweet chocolate chips. I prefer to do this in a microwave-safe bowl in the microwave at 30 second intervals (stirring between each interval). It takes about a minute to a minute and a half to melt the chocolate.

Spread melted semi-sweet chocolate onto the jelly roll pan covered in foil. Spread chocolate over the pan to create an even layer. Place pan into a refrigerator or freezer to allow the chocolate to set.

Melt white chocolate chips. Stir until smooth. Remove hardened semi-sweet chocolate and spread the melted white chocolate chips over the first layer. Be careful when you spread the white chocolate. The warm white chocolate can melt the semi-sweet chocolate and can create swirls (instead of a pristine white layer). Once the white chocolate has been spread in an even layer over the semi-sweet chocolate, sprinkle immediately with crushed peppermint. Press the peppermint into the white chocolate layer (this just helps make sure that the peppermint sticks to the bark once it is set).

Put the pan back into the refrigerator or freezer until the bark is completely set.

Once the bark is set, use the foil as a barrier between the bark and your hands while you break the bark into bite size pieces with your hands. Using the foil keeps things less messy. If you try to break the bark with your hands (without the foil), the warmth of your hands might melt the chocolate a little. Not only will your hands be a chocolatey mess, but it might make your bark look messy as well.

Store in the refrigerator (otherwise, it will become soft and melty).

Source: You can find recipes for peppermint bark just about everywhere. But I really like the step-by-step instructions found on About.com. You can find it here. She also includes instructions for how to temper your chocolate, which you can find here.


Notes: The process of tempering chocolate is a pretty lengthy one (one which I don't currently have time for). If you don't have time to temper your chocolate, here are your two options: first, melt chocolate chips in the microwave and store the finished candy product in the refrigerator to avoid melting or; second, use candy coating instead. Candy coating is formulated to stay hard at room temperature after being melted, so you don't have to temper it and you don't have to keep it in the refrigerator either.


Peppermint Bark Variations:
  • Use milk chocolate in place of the semi-sweet chocolate.
  • Skip the milk/semi-sweet chocolate altogether and only use white chocolate.
  • Use two or three parts of candy coating. You can have fun with colors. You can use food coloring to dye one or two parts of the candy coating. So, you could have peppermint bark that is white on the bottom and green on the top. Or, white on the bottom and red on the top. Or, white on the bottom, green in the middle, and red on the top. The color possibilities and combinations are endless. This actually looks super cute. You can find a picture of this example here. This version is absolutely adorable. It looks so cute having the white layer, the green layer and then the red and white peppermint on top. Very Christmas-y.
  • If you don't like it layered, stir the peppermint into the melted chocolate and spread it out and let it set up. Then break into pieces like normal. You would only use one type of chocolate for this version. So, either you would have dark or milk chocolate with peppermint spread throughout or white chocolate with peppermint spread throughout. This one is the fastest version (though it isn't as pretty as the other versions). It's only one layer, so you save yourself the time of waiting for the first layer to set up, etc. If you want to make this version a little prettier, you can sprinkle some additional crushed peppermint on top of the chocolate before it hardens.

Frozen Peppermint Cheesecake
Ingredients:
2 cups chocolate wafer cookie or sandwich cookie crumbs
1/4 cup granulated sugar
1/4 cup butter or margarine, melted
1 (8 ounce) package cream cheese, softened
1 (14 ounce) can EAGLE BRAND® Sweetened Condensed Milk
2 teaspoons peppermint extract
2 cups whipping cream, whipped
Red food coloring (optional)
Smucker's® Chocolate Fudge Spoonable Ice Cream Topping, if desired

Directions:

Combine cookie crumbs and sugar. Add butter; mix well. Line 9-inch round cake or springform pan with foil. Press 2 cups crumbs firmly on bottom and part way up sides in prepared pan. Chill.

In large bowl, beat cream cheese until fluffy. Gradually add sweetened condensed milk until smooth. stir in extract and food colorings, (optional); mix well. Fold in whipped cream. Pour filling into pan. Cover; freeze 6 hours or until firm. Garnish with topping. Store leftovers covered in freezer.

Source: Eagle Brand recipe. You can find it here.


Notes: The only change I made to this recipe was to add one more 8 oz package of cream cheese (for 16 oz total instead of just 8 oz). I just wanted it to have a little more body to it and more cream cheese flavor. I also added crushed peppermint candies to the top as a garnish. I forgot to add the chocolate ice cream topping. It tasted great without the chocolate ice cream topping, but it would be yummy with the topping too.


White Chocolate Peppermint Pretzels

Ingredients:

White chocolate (or white candy coating)
Pretzels (I like to use the twists, but you could use any shape)
Crushed peppermint

Directions:

Line a cookie sheet or jelly roll pan with aluminum foil.

Melt the white chocolate (or white candy coating) in the microwave at thirty second intervals (stirring between each interval).

Dip each individual pretzel into the melted chocolate, turning to coat. Lift out of the chocolate with a fork and shake or tap slightly to allow the excess chocolate to drip off. Set the chocolate coated pretzel onto the foil-lined jelly roll pan. Repeat with additional pretzels. Top with crushed peppermint before the chocolate has hardened (otherwise the peppermint won't stick). You'll have to do this in batches because you won't be able to dip all of the pretzels before topping them with peppermint--they would harden before you got to the peppermint step.

Place cookie sheet or jelly roll pan into the refrigerator and allow the chocolate to set up. Using your fingers or a spatula, gently remove the pretzels from the foil. Store in a zip-top bag.

If using melted white chocolate, store in the refrigerator.

Source: Again, too many sources to cite. I just made up this recipe to match a store-bought version I had been craving.