Happy Halloween everyone!
This is going to be a collaborative blog post. Over the next few days, we will all be adding our fun Halloween discoveries and recipes for this year. So, check back for changes!
I hope you have a fun and spooky Halloween!

No-Bake Spiderweb Cheesecake
Ingredients:
For the Crust:
Vegetable oil, cooking spray
18 ounces chocolate wafers (about 90), finely ground (4 1/2 cups)
1/4 cup plus 2 tablespoons sugar
6 ounces ( 1 1/2 sticks) unsalted butter, melted
1 teaspoon coarse salt
For the Ganache:
4 ounces bittersweet chocolate (preferable 61 percent), finely chopped
1/2 cup heavy cream
For the Filling:
32 ounces cream cheese, softened
1 1/2 cups sugar
1/4 teaspoon coarse salt
3 tablespoons fresh lemon juice
1 1/2 cups heavy cream, cold
Candy or plastic spiders, optional
Directions:
Make the crust: Coat a 10-inch springform pan with cooking spray. Mix wafers, sugar, butter, and salt in a medium bowl. Pat mixture into pan, pressing firmly into bottom and all the way up sides. Cover, and refrigerate until ready to fill.
Make the ganache: Place chocolate in a food processor. Bring cream to a simmer in a small saucepan, then pour over chocolate. When chocolate begins to melt, process until smooth. Reserve 2 tablespoons ganache for decorating, and spread the remainder evenly on bottom and all the way up sides of crust. Cover, and refrigerate until ready to fill.
Make the filling: Beat cream cheese with a mixer on medium speed until fluffy, about 3 minutes. Reduce speed to low, and slowly add sugar and salt. Raise speed to medium-high, and beat until very fluffy, about 3 minutes. Beat in lemon juice.
Whisk cream until medium-stiff peaks form. Whisk 1/4 of the whipped cream into cream cheese mixture, then fold in remaining whipped cream. Pour filling into crust, and spread evenly. Gently tap bottom of pan on counter to release air bubbles.
Transfer reserved ganache to a pastry bag fitted with a 1/4-inch round tip. Starting in the center of the cheesecake, pipe a spiral, spacing lines about 1/2 inch apart. Pull the tip of a pairing knife in a gently curved line from the center of the spiral to outer edge. Wipe knife clean, and repeat ever inch or so to form a web.
Cover, and freeze for at least 1 hour or overnight. Unmold cheesecake, garnish with candy or plastic spiders if desired, and serve immediately.
Source: Martha Stewart website. The original recipe is found
here.
Notes: To put it simply, this was fantastic. Everyone loved it. Plus, it was a lot of fun to make.
We did find the chocolate wafers this time around. Harmon's had them (Smith's/Kroger did not). They made for a wonderful crust. If you can't find them, however, chocolate graham cracker crumbs will work just fine.
As for the ganache, I didn't follow the instructions as written. I used semi-sweet chocolate chips and melted them at 30 second intervals (it only took about two 30 second intervals--or a minute total, to melt the chocolate). Stir after each 30 second interval. Once the chocolate was melted and smooth, I mixed cold heavy whipping cream directly into the chocolate vigorously stirring with a spoon until completely incorporated, smooth, and thickened.
I used 1 teaspoon of vanilla flavoring in place of the lemon juice. Mostly just because I was in the thick of making the cheesecake when I realized I was out of lemon juice upstairs. I had some downstairs, but didn't really want to go down to get it. I had read online about another reviewer who had made the recipe and substituted vanilla for the lemon juice, so I decided to go for it.
Finally, rather than make candy spiders myself, I looked for candy spiders, but no such luck. I opted instead to simply use a plastic spider. But, if you would like to make your own candy spider, you can find instructions
here.
 Roasted Pumpkin Seeds:
Ingredients:
1 quart water
2 tablespoons salt
2 cups pumpkin seeds
1 tablespoon unsalted butter
Directions:
Preheat oven to 350 degrees. Bring water and salt to a boil. Add the seeds and boil for 10 minutes (or for 15 minutes if they are large seeds). Drain well. Combine seeds and butter in a roasting pan or dish and toss until the butter is melted and the seeds evenly coated. Roast on a cookie sheet or jelly roll pan for 25-30 minutes, or until the seeds are crisp and golden. Stir and toss seeds often. Cool. Pack in airtight containers.
You can add additional salt during the roasting process, if you would like. You can also mix it up and add favorite spices or flavors for different variations. Mix with nuts for an interesting change of pace.
Source: This is an old family favorite. I don't know where my Mom got the recipe.
Notes: I like them just as the recipe states, but my husband said he would have liked a little salt sprinkled on them. Use this recipe as a base and add your favorite spices to customize it to your tastes.
 Mummy Mini Pizzas
Makes 2 mini pizzas
Ingredients:
1 English muffin
1-2 tablespoons pizza sauce (from a jar)
1 string cheese/mozzarella stick
4 black olive slices
Directions:
Split English muffin in half. Spread each half with pizza sauce. Place 2 olive slices on each English muffin half for mummy eyes. Break string cheese apart into strings to look like mummy bandages and place on English muffin.
Toast in a toaster oven or in the oven (at about 350 degrees) for a few minutes until the muffins are toasted to your preference and the cheese is melted (but not too melted...otherwise you will lose the "bandage" effect).
Source: I've seen this recipe idea in a number of places, but most recently, I noticed it on the Kraft website. They used bagels...so their mummies looked like they had gaping mouths (where the hole of the bagel was).
Notes: My son LOVES olives...all he wanted to eat for lunch that day were mummy eyes! After eating a ton of olives, he did eat the cheese off of the pizza too. Maybe someday he'll eat the whole thing all at once!
 The Creepiest Salad Bar
Ingredients:
Salad Dressing Options:
Monster Slime Dressing (Green Goddess Dressing, bottled or homemade)
Swamp Sludge Dressing (Cilantro Ranch Dressing, bottled or homemade)
Vampire Blood Dressing (French Dressing, Catalina Dressing, any other bottled or homemade red salad dressing, or 1 cup of Italian dressing mixed with 1/4 cup ketchup)

Creepiest Salad Stuff:
8 cups spring mix lettuce blend (labeled "weeds and grass")
1 cup green bell pepper strips (labeled "goblin fingers")
1/2 cup shelled sunflower seeds (labeled "witch's teeth")
1 cup cherry tomatoes (labeled "vampire eyeballs")
1 cup sliced mushrooms (labeled "sliced toadstools")
1 cup shredded mozzarella cheese (labeled "mummy's bandages")
1 cup broccoli florets (labeled "ogre curls")
Directions:
Place dressings and salad ingredients in individual bowls to create a salad bar. Make labels so that your goblins know what is in each bowl. Let your guests serve themselves.
Source: This is a General Mills idea that I got off of one of my email newsletters, but now for the life of me, I can't remember what website this specifically came from.
Notes: I loved the combination of vegetables. We made labels for each ingredient...the newsletter placed each bowl on top of a paper disposable tablecloth and they wrote the spooky names of each ingredient directly on the tablecloth next to the bowl it represented.
You could easily add other toppings and get creative by giving them spooky names. For instance, cucumbers, sliced and then cut in half could be "troll ears." Add your favorite salad toppings and have fun giving them spooky names.
 Pumpkin-Shaped Cheese Slices (as a topper for soups or chilis)
Ingredients:
Pre-sliced cheddar cheese
Tools:
Pumpkin shaped cookie cutter (or round cookie cutter)
Knife
Directions:
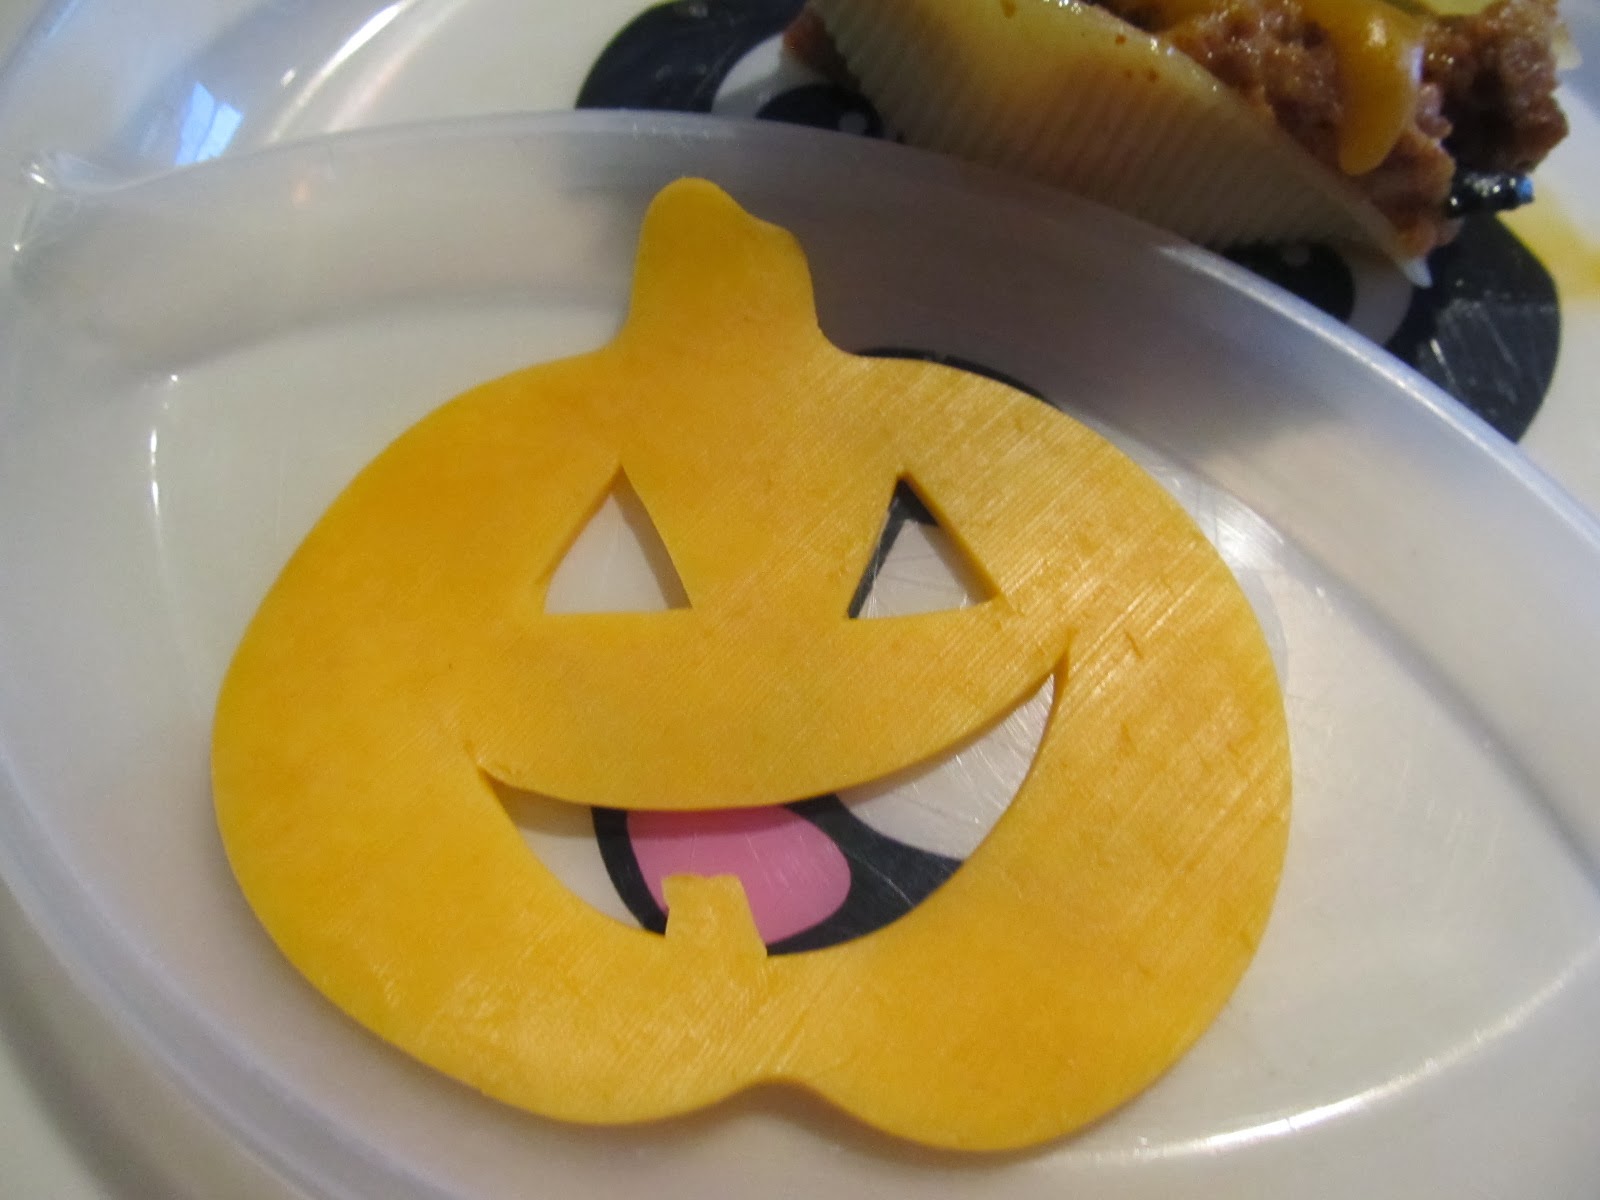
Using a cookie cutter, cut cheese slices into pumpkin shapes. Using a knife, "carve" a face into each cheese slice. Use cheese slices to top your favorite soup or chili.
Source: I found this Halloween idea on the Pillsbury website.
Notes: This was so cute and an easy way to add some Halloween spirit to your dinner. It's hard to find Halloween-themed main dishes. This is a great way to make your favorite soup, stew, or chili into a Halloween inspired dinner. The Pillsbury website used American cheese slices, but I don't really like American cheese, so we went for Cheddar cheese slices instead. Either way, it works great.
 Snake Calzones
Ingredients:
Frozen bread dough (such as Rhodes Dough), thawed and risen (or you can use refrigerated pizza dough, such as Pillsbury)
Cheese (mozzarella or cheddar)
Bottled pizza sauce (or barbecue sauce)
Fillings of your choice (pepperoni, Canadian bacon, pineapple tidbits, olive slices, etc.)
Directions:
Preheat your oven to 375 degrees.
Spray the foil with cooking spray. Roll or stretch out pizza dough onto a foil-lined cookie sheet or jelly roll pan. You want the dough to be in the shape of a long, somewhat thin rectangle (that tapers off at the bottom a little). Fill with cheese, fillings, and sauce. Fold over the two sides to meet together in the middle and pinch to close. Roll the calzone over so that the seam is on the bottom. Position the calzone so that it is curved like a snake. Form the top to look like a head and make the bottom longer and skinnier for the end of the tail. Make two slits in the head for the eyes and put two green olives into the slits. You can make a tongue out of a pepperoni slice, if you like.
Bake for 20-30 minutes or until the dough is nicely browned.
Source: I saw this idea on a number of sites this year, but most prominently on the Kraft website.
Notes: I had to feed a good-sized crowd tonight. So, I made four snake calzones. I made two pepperoni calzones, one barbecue chicken calzone, and one Hawaiian (Canadian bacon and pineapple) cazone. They were all super yummy!
 Ants on a Log
Ingredients:
Celery sticks
Peanut butter
Raisins
Directions:
Spread peanut butter onto the hollow in the celery sticks and place the desired amount of raisins on top.
Source: Does this recipe even have a source? It's such an old favorite, but it deserves a little Halloween spotlight. It's so easy to forget about this snack. But it's such a healthy snack that it deserves a jog to the memory!
 A Note on Decorating with Pumpkins:
This year was so much fun. My soon to be 3-year-old son instructed me on what kinds of faces to carve on our pumpkins. He wanted two happy faced pumpkins, one silly faced pumpkin, and one spooky angry mad faced pumpkin. I love to carve pumpkins while watching Halloween movies. It has been a yearly tradition and I look forward to continuing this yearly tradition with my family.
I will have to hunt down my own picture in the next day (I will post them as soon as I find the pictures), but here are some of my other favorite ways to decorate with pumpkins:
Pumpkin faces using the stem as a nose. I think these work best with sugar pumpkins (or pumpkins smaller than most carving pumpkins). They look more impish that way. You can find pictures online
here.

Glitter pumpkins. This is one of my absolute favorites. The great thing about these pumpkins is that they last forever. I tested it one year and it seriously lasted until December. You don't carve these pumpkins, so they don't go bad as quickly. You brush the pumpkins with regular white glue and then you spoon glitter onto the glue. Then you paint the stems. They look awesome. And depending on the color of glitter you use, they can be used as Thanksgiving/fall decorations too. These pumpkins look great in all shades of orange, white, black, purple, gold, and silver. I LOVE these pumpkins and I'll post a picture of some of mine soon. You can find a picture and instructions online
here.
 Here are some pumpkin ideas I want to try another year:
Zombie pumpkins. I couldn't find the eyeballs for these ones. Nor could I find white pumpkins. I didn't really have the time to search that much though. But these pumpkins look awesome and if I ever get the chance, I'm going to totally make them. Check 'em out! You can see them online
here.
Fanged pumpkins. This is an idea that looks super cute and would be incredibly easy to make. I simply waited too long and by the time I decided to make them, I couldn't find plastic fangs in the store. It would also work with wax candy fangs too. You can see the picture and instructions
here.
Non-pumpkin craft:
You can make the cutest witches' brooms (as a treat bag or table decoration) out of sticks and simple brown sandwich bags. Again, I'll have to hunt down my picture of them and post it soon. But you can find the picture and instructions online
here.