Showing posts with label Sarah's Recipes. Show all posts

Friday, September 19, 2014

Don't Forget the Sauce!


Fish sticks without tartar sauce are just pointless! However, with the sauce, they are addicting. Also, dress up your fish sticks by making them into fish tacos! Just add a flour tortilla and your favorite taco fixings, along with this tartar sauce, of course.


Tartar Sauce

Ingredients:

1 cup mayonnaise
1 tsp. Dijon mustard
1 tsp. bottled minced garlic
2 tbsp. lemon juice
1-2 tsp. dill pickle relish
1/2 tsp. onion salt
1 green onion chopped, green parts only

Directions:

Mix all ingredients together. Serve. Refrigerate leftovers.

Source: I made this one up because I like my tartar sauce with a lot of kick and a lot of flavor. Get creative. You can also add some ground red pepper, or a few drops of Tabasco sauce too.


Above: This sauce is so good.


Above: Yummy fish tacos!


No Recipe Required Fish Tacos

Ingredients:

Fish sticks (3 to 4 fish sticks per taco)
Flour tortillas
Lettuce
Chopped tomato
Shredded cheese
Tartar sauce

Directions:

Top tortillas with lettuce followed by fish sticks, tomatoes, shredded cheese and tartar sauce. Enjoy!

Source: I just came up with this when I was thinking of a way to use up the fish sticks in our freezer. Now I need to buy more fish sticks because I am craving these again!

Notes: The crunch from the fish sticks in these tacos is so good.

Saturday, August 2, 2014

Summer is Ice Cream Time: Part 3


I saw this recipe on Allrecipes.com and it immediately inspired me. I had an experience similar to Dr. Emmett Brown discovering what would make time travel possible in "Back to the Future."

To quote Back to the Future, "Here's a red-letter date in the history of science: November 5, 1955. Yes! Of course! November 5, 1955! That was the day I invented time-travel. I remember it vividly. I was standing on the edge of my toilet hanging a clock, the porcelain was wet, I slipped, hit my head on the sink, and when I came to, I had a revelation! A vision! A picture in my head! A picture of this! This is what makes time travel possible: the flux capacitor!"

Anyway, when I saw that recipe, I thought, "That looks good." Then I thought, "Why didn't they add sugar?" After that I thought, "Also, it would have been better to toast the coconut." Also, "They should have combined the coconut and chocolate together." Then, "Why not make mini chocolate coated coconut haystacks instead of having the chocolate and coconut separate?" Finally, "It would probably work better with cream."

At any rate, it reminded me of one of my favorite childhood sweets that my grandpa used to make for us: Chocolate Coconut Haystacks.

After looking at the original ice cream recipe, I came to and had a revelation! A vision! A picture in my head! A pictures of this:


Chocolate Coconut Haystack Ice Cream

Ingredients:

6 cups heavy whipping cream
4 cups half-and-half
2 1/4 cups sugar
1 tablespoon coconut extract or flavoring
1 (7 oz) bag sweetened flake coconut (2 1/2 cups)
1 (12 oz) bag milk chocolate chips (2 cups)

Directions:

Place coconut in a microwave safe bowl or dish. Microwave in 1 minute increments, stirring after each time until toasted a light to medium brown. Set aside.

In another microwave safe bowl, microwave milk chocolate chips. Microwave for 1 minute and then stir. Microwave for another 30 minutes and stir again. If necessary, microwave for another 30 seconds and stir until completely smooth.

Mix chocolate and coconut until coconut is evenly coated.

Spread chocolate coconut mixture in one very thin layer on a foil lined jelly roll pan. Place in refrigerator or freezer until set up.

While waiting for the coconut chocolate bark to set up, mix heavy whipping cream, half-and-half, sugar, and coconut extract and freeze in a 4-quart ice cream maker according to manufacturer's instructions.

While the ice cream is mixing, break the chocolate coconut bark into small pieces. I used a knife to break it into small pieces (if you use your hands, it will begin to melt, and you will get really messy).

Once the ice cream is set up, gently fold in the chocolate coconut pieces. Ripen in a freezer for at least 4 hours before serving.


Source: As I said before, this one is my own creation that was inspired by the recipe that you can find in the link above.

Notes: I am not going to lie, it was good that I had the ice cream vision that I had. It was very, very good. This is one of the best ice creams I have ever had. Everyone loved it. Good, good stuff.

You can make additional chocolate coconut bark to use as a garnish when serving, if desired.


Above: This gives you an idea of how thin I spread the chocolate coconut bark.


Above: Half-way done! I would say that each little chocolate coconut haystack nugget was about the size of a small blueberry...or a little smaller than a dime...or the size of a fingernail...sheesh, I'm having a hard time coming up with size comparisons. Just break the bark into bite size pieces.


Above: You will end up with about 4 cups of chocolate coconut haystack bite size pieces.


Above: Here is the ice cream before folding in the chocolate coconut haystack pieces.


Above: Here is the ice cream with the chocolate coconut haystack pieces mixed in. This was so good, we made it twice this summer!

Summer is Ice Cream Time: Part 2


Did we go overboard on ice cream? Yes. We always do! However, it is the dessert that keeps on giving. Pop the leftovers back in the freezer, and they are just as good a week later for your next family dinner! (Or even three months later!)


Dulce de Leche Ice Cream

Ingredients:

6 cups heavy whipping cream
4 cups half-and-half
2 1/4 cups sugar
1 can (13.4 oz) Dulce de Leche (such as Nestle La Lechera)
1 small can/bottle caramel ice cream syrup

Directions:

Whisk 2 cups heavy whipping cream and can of Dulce de Leche until smooth. Continue to add remaining whipping cream and half-and-half, whisking as you go, until completely smooth. Add sugar and stir until combined.

Freeze in a 4-quart ice cream maker according to manufacturer's instructions.

When transferring to a freezer safe container, layer the ice cream with the caramel ice cream syrup and swirl as you go.

Ripen in the freezer for at least 4 hours before serving.


Source: I used the base vanilla recipe from my ice cream maker and added the caramel to it. This recipe came about simply because I had extra ingredients left over after making a different batch of ice cream, so I thought, "What the heck. Why not?"

Notes: This was so rich, and so addicting. It was hard to stop going back for more!


Peppermint Ice Cream

Ingredients:

7 1/2 cups 2% reduced-fat milk, divided
6 large egg yolks
2 tablespoons vanilla extract
3 (14 ounce) cans fat-free sweetened condensed milk
2 1/3 cups crushed peppermint candies (about 75 candies)

Directions:

Combine 1 1/4 cups 2% milk and egg yolks in a heavy saucepan over medium heat. Cook until mixture is slightly thick and coats the back of a spoon (about 8 minutes), stirring constantly (do not boil). Cool egg mixture slightly.

Combine egg mixture, 1 1/4 cups 2% milk, vanilla, and condensed milk in a large bowl. Cover and chill completely. Stir in crushed candies. Pour mixture into the freezer can of an ice-cream freezer; freeze according to manufacturer's instructions. Spoon the ice cream into a freezer-safe container; cover and freeze 1 hour or until firm.

Makes 24 servings (1/2 cup per serving)

Nutrition information: 268 calories, 2.9 g fat, 7.6 g protein, 52.2g carbohydrate, 0.0 g fiber, 62 mg cholesterol, 0.3 mg iron, 99 mg sodium, 238 mg calcium.

Source: Cooking Light, December 2001. You can find it here.


Notes: I tripled this recipe from the original one. The original recipe is more suited to a 2 quart ice cream maker. This is an old favorite recipe of mine and I have made it quite a few time before. One of my favorites. Such a nice flavor and texture. We had previously posted it on the blog here.

Sunday, April 14, 2013

Holy Stromboli!


Here is a stromboli recipe I created to enter into a recipe contest (just for the heck of it, and no, I didn't get chosen as a finalist...sniff, sniff). It was the first recipe contest I ever entered. I don't really tend to make up my own recipes very often, but it is probably a good talent to learn, and it's kind of fun to enter contests. So, I thought I would give it a go.


Salami Stromboli

Ingredients:

1 can (13.8 oz) refrigerated pizza dough
1 (10 oz) package chopped spinach, thawed
12 thin slices salami
6-8 slices provolone cheese
2-4 tbsp. pesto (to your taste)

1/4 tsp. salt
1/4 tsp. pepper
2 tbsp. Parmesan cheese
Cooking spray

Directions:

Preheat oven to 400 degrees F.

Open can of pizza dough and lay out on work surface.

Squeeze excess liquid out of spinach and put spinach in a medium size mixing bowl. Stir in pesto, salt, and pepper until well-combined.

Place salami on top of pizza dough (leaving about 2 inches on each side). Top with a layer of provolone cheese slices.

Spread spinach mixture on top of provolone cheese. Fold edges of pizza dough over mixture to seal. Turn stromboli over.

Spray stromboli with cooking spray and sprinkle with shredded Parmesan cheese.

Bake for 20-25 minutes or until nicely browned. Slice into six portions.

Source: My creation.


Notes: I used Classico's pesto. They have a pesto that is made with soy instead of using walnuts, pine nuts, cashews, etc. (all of which my son is severely allergic to). Feel free to change the ingredient amounts to suit your needs. Need more meat, add more. Want less cheese? Don't use as many slices. I liked having 4 tbsp. pesto, but for some people, that might be too much. You know yourself and your family. Make this to suit your own tastes.

Thursday, May 10, 2012

Cinco de Mayo Celebrations!


I've mentioned this before, but I'll say it again.  My two favorite ethnic foods to make at home are Mexican and Italian dishes.  They are the easiest to recreate authentically.  Sure, it's still possible to recreate Chinese, Thai, and Indian food, but they are often very ingredient heavy (thus, the many layers of flavor that are evident)...and how often do you happen to have fresh lemon grass on hand?  Besides that, now that my oldest son is also allergic to coconuts, that pretty much cuts out most homemade Thai food for me.  I'll have to get my coconut and nut fix on date nights (when there's actually time for that...ha!).

So, in anticipation of Cinco de Mayo, I planned many Mexican dinners.  I will tell you this, there is nothing better than a dinner that you have high hopes for that turns out even better than expected.  And there's nothing worse than dinner that is bland when you thought it was going to be bursting with flavor.  I tried a chicken tortilla soup recipe that I have literally been meaning to try for at least three years now.  For one reason or another, it just kept being pushed onto the back burner.  This time around, I was going to make sure that it happened no matter what.  For how simple the recipe sounded, it was surprisingly time-consuming.  It was a Martha Stewart recipe.

Martha Stewart has rarely failed me, but there have been 3 or 4 instances where I have been less than impressed.  It was a recipe that was light on the spices, but often, I have been surprised by how simple recipes and ingredients allow the basic flavors of the dish to shine through.  I thought it was going to be like that.  But it was bland.  Bland, bland, bland, bland, bland.  So, I was disappointed with that one because I was hoping for more.  But the idea is a good one.  It was a basic broth with chicken.  That was it...but to that, you added whatever soup toppings you wanted.  I mean, it was the soup version of a potato bar or salad bar.  Take a crowd pleaser and allow your diners to dress it up to please their individual tastes.  Perfect idea for a dinner party!  Well, I'm glad I tried it before presenting it to guests at a dinner party--because it wasn't guest-worthy.  But I still like the idea.  So, I'm going to have to tinker with the idea and dress up the broth so that it is more flavorful.  If you have a good base, the toppings will shine through even better.  So, that's my chicken tortilla soup assignment.  I'm going to create a great broth/base so that I can realize my dream of a successful and delicious tortilla soup bar.  :)  Coming soon to a blog near you.  (Also coming soon, some Mexican-style bread recipes that work wonderfully as sides for your favorite Mexican foods--expect that blog in the next few days).

Luckily though, the soup was the only true dud--though I did have one other partial dud.  Though I intended to, I will not be including any Mexican dessert recipes this time.  I made some flan.  It tasted fantastic...but I screwed up on the caramelized sugar, so it didn't come out of the ramekin very smoothly, and as a result, it turned out ugly.  I don't think it was an error in the recipe--rather, it was an operator error (yes, I make mistakes).  So, I'm going to have to try to perfect my flan-making skills and see if that's the best recipe or if there's one that works a little better before I commit it to our blog.  I don't want to share mediocre recipes here or pretend that something was fantastic and flawless when it was not!

But let's move past my failures!  I made a number of other delicious and delightful Mexican dinners and accompaniments which I am going to share with you today.  Oh, and not to toot my own horn or anything, but I created my very own recipe for chicken enchiladas and I'm not going to lie...it was GOOD.  I was so proud of myself!  I kept trying to find a recipe that would match what I wanted to accomplish, and I really couldn't find it...so I combined some ideas and made up my own recipe.  I used a green enchilada sauce recipe from Our Best Bites, but the rest was all my idea.  It was sooo delicious!  I will be making that one for years to come.  So, enjoy some lovely enchiladas among many other yummy Mexican selections below!


Green Chile Chicken Enchiladas

Ingredients:

12 tortillas (8-10 inch tortillas--I used the uncooked tortillas that you cook yourself over the stovetop)
1 can cream of chicken soup
1 cup sour cream (I used light sour cream)
1 1/2-2 lbs. shredded or cubed cooked chicken breasts
2 cups salsa verde
2 teaspoons ground cumin
1 1/2-2 cups shredded Monterey Jack cheese
3-4 cups green enchilada sauce, canned or homemade (recipe below)

Directions:

Poach chicken and shred or cube it. 

Mix together cream of chicken soup, sour cream, chicken, salsa verde, ground cumin, and 3/4-1 cup of Monterey Jack cheese.

If using uncooked tortillas, cook them in a pan over the stovetop.  Otherwise, wrap the tortillas in a slightly damp paper towel and microwave them for 30 seconds to a minute (or until they are warm and pliable).

Preheat oven to 350 degrees.

Spread about 1 cup of green enchilada sauce on the bottom of a 9x13 inch baking dish. 

Fill each tortilla with 3-4 tbsp of the chicken mixture.  Roll up and place in the baking dish.

If you have any of the chicken mixture left over after filling the tortillas (I did), spread it evenly over the top of all of the enchiladas.  Then spread 2-3 cups of green enchilada sauce evenly over the top of your enchiladas.

Sprinkle with remaining Monterey Jack cheese and bake for 45-60 minutes or until the cheese is nicely melted and the enchiladas are warm and bubbly.

Makes 12 servings.

Source: Again, this one came from my own mind.

Notes: As mentioned above, I used a homemade recipe for the green enchilada sauce which I found on Our Best Bites (an awesome food blog).  This enchilada sauce recipe makes a TON!  Probably double what you will need for my recipe.  But it freezes well and can be used as a dip for tortilla chips, or a sauce for tacos, burritos, or tostadas in addition to enchiladas.


Green Enchilada Sauce (Kate's Knockoff Cafe Rio Recipe)

Ingredients:

2-3 tbsp extra-virgin olive oil
1 large onion, minced
5-6 cloves garlic, minced or pressed
2 green peppers, chopped
1-2 jalapenos, seeded and membranes removed for less heat, if desired
1 1/2 lb. tomatillos, husked and quartered or halved
1/2 bunch cilantro, coarsely chopped
1 1/2 tsp salt
1/4 tsp black pepper
1 1/2 tsp cumin
4 cups chicken broth
2-3 tbsp sugar (optional and to taste)

Directions:

in a large saucepan or stock pot, heat olive oil over medium heat.  Saute onions and garlic until tender and fragrant.

While onions are sauteeing, combine tomatillos, green peppers, jalapeno peppers, and cilantro in your blender.  Process until smooth; you may have to do it in batches and/or add some chicken broth to make things blendable.

Pour the tomatillo mixture over the onions and garlic and add chicken broth, salt, pepper, and cumin.  Simmer 15 minutes-1 hour, depending on the consistency you want.  You can increase the heat to high and boil it uncovered to speed up the process.  Or, you can simmer the sauce in a slow cooker all day, if you prefer that method.

Source: Our Best Bites

Notes: This was fantastic.  It makes a ton, so be prepared to freeze some of it.  It is super easy to make because you pretty much just throw everything in a blender and then let it cook on the stove.  You can also decide how chunky or smooth you want your sauce to be and blend it accordingly.  I kept mine a little chunkier.


Above: I made these again in 2013, but I used canned green enchilada sauce. While I prefer the homemade sauce, these still tasted great. If you use the canned enchilada sauce, you can add a little sugar, to taste so that it is more similar to the homemade green enchilada sauce. If not, it will be saltier and spicier. Just do whatever is your preference!


Mexican-Style Shredded Beef

Ingredients:

1 boneless beef chuck shoulder roast (about 3 pounds)
1 tablespoon ground cumin
1 tablespoon ground coriander
1 tablespoon chili powder
1 teaspoon salt
1/2 teaspoon ground red pepper
1 cup salsa or picante sauce
2 tablespoons water
1 tablespoon cornstarch
Taco shells

Directions:

Place roast in slow cooker.  Combine cumin, coriander, chili powder, salt, and red pepper in a small bowl.  Place beef in slow cooker.  Pour spices over beef and top with salsa.

Cover; cook on low 8-10 hours or until meat is tender.

Remove beef from slow cooker.  Trim and discard excess fat from beef.  Shred meat with two forks.

Let cooking liquid stand 5 minutes to allow fat to rise.  Skim off fat.  Blend water and cornstarch until smooth.  whisk into liquid in slow cooker.  Cook, uncovered, 15 minutes on High until thickened.  Return beef to slow cooker.  Cover; cook 15-30 minutes or until hot.  Adjust seasonings.

Serve as meat filling for tacos, fajitas, enchiladas, quesadillas, or burritos.  Leftover beef may be refrigerated up to 3 days or frozen up to 3 months.

Source: This recipe came from a cookbook called "Simple 1-2-3 One Dish" ISBN-13: 978-1-4127-2323-7

Notes: This had such a great flavor.  It was really flavorful, but not too spicy.  I used it as a burrito filling.  I filled the burritos with this beef, some rice, beans, and corn.  Yum!


Above: This is how I served it for my little ones.  :)


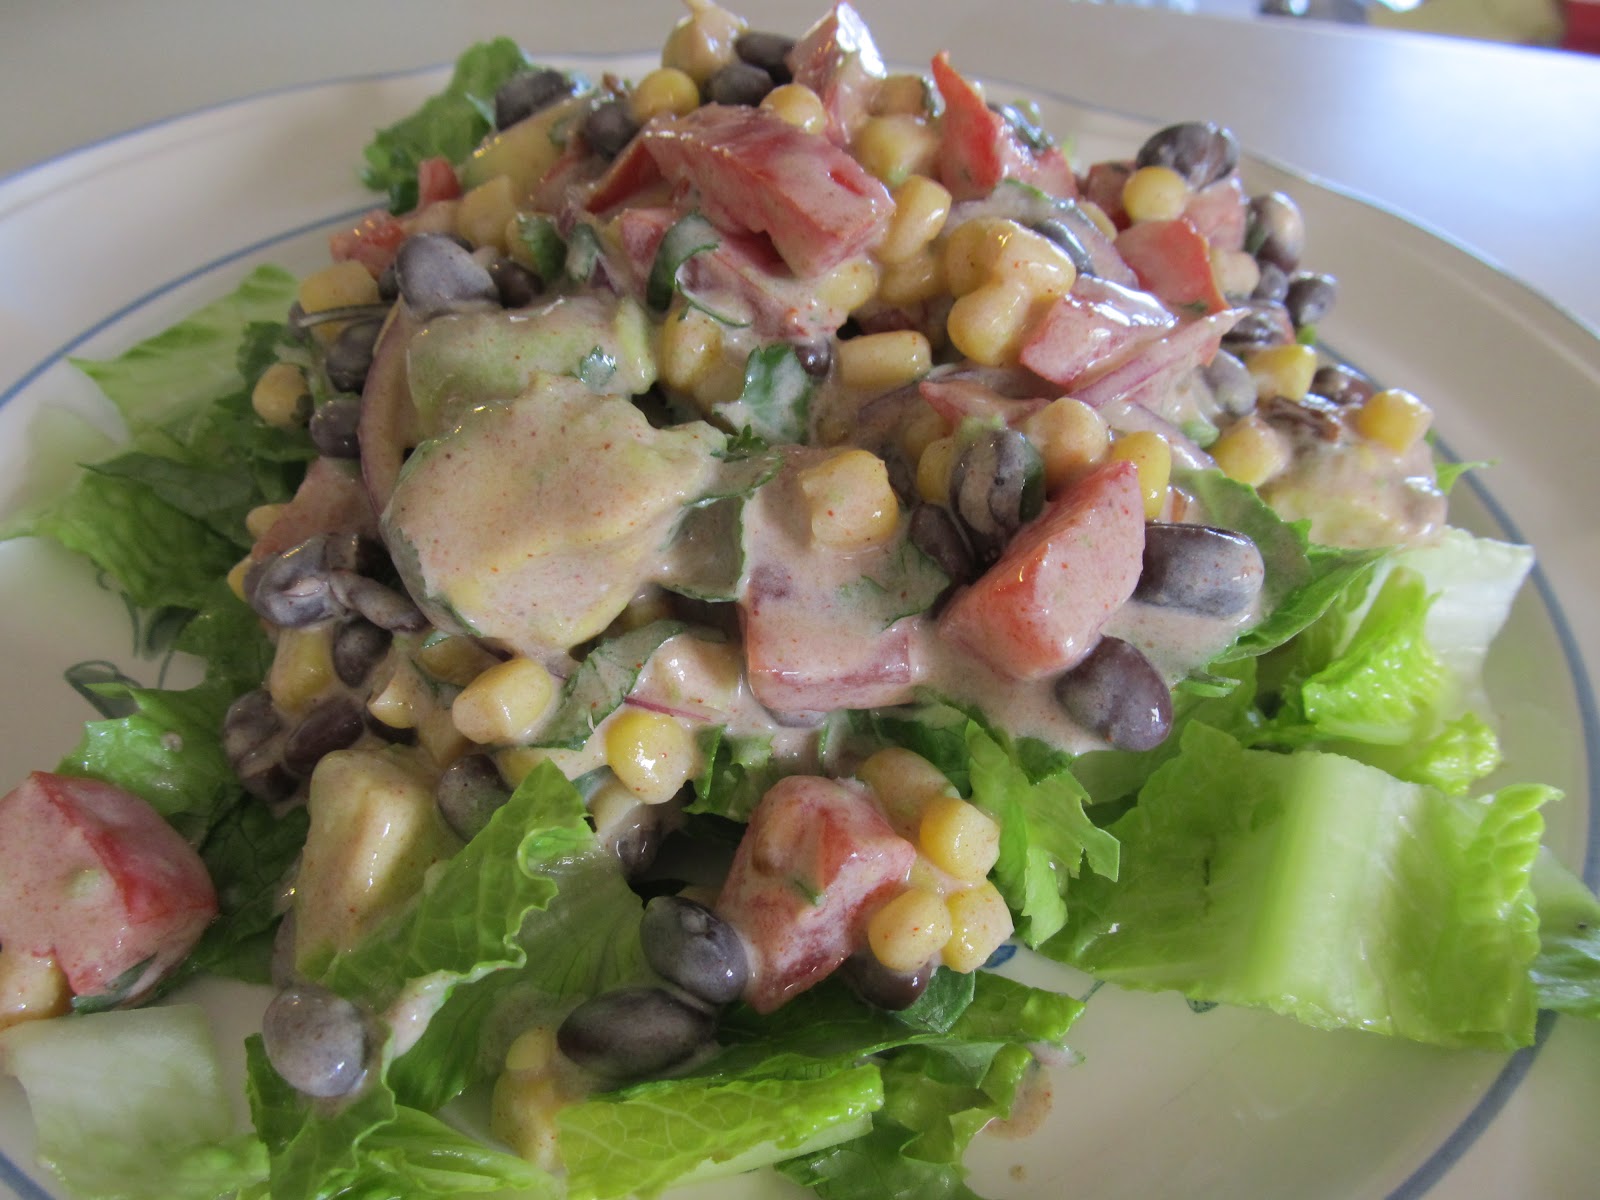
Chipotle Chicken Taco Salad

Ingredients:

Dressing:

1/3 cup chopped fresh cilantro
2/3 cup light sour cream
1 tablespoon minced chipotle chile, canned in adobo sauce
1 teaspoon ground cumin
1 teaspoon chili powder
4 teaspoons fresh lime juice
1/4 teaspoon salt

Salad:

4 cups shredded romaine lettuce
2 cups chopped roasted skinless, boneless chicken breasts (about 2 breasts)
1 cup cherry tomatoes, halved
1/2 cup diced peeled avocado
1/3 cup thinly vertically sliced red onion
1 (15 ounce) can black beans, rinsed and drained
1 (8 3/4 ounce) can no-salt-added whole-kernel corn, rinsed and drained

Directions:

To prepare dressing, combine first 7 ingredients, stirring well.

To prepare salad, combine lettuce and remaining ingredients in a large bowl.  Drizzle dressing over salad; toss gently to coat.  Serve immediately.

Tip: Add a spoonful of adobo sauce for a spicier salad.  Kidney or pinto beans also taste great in this dish.

4 servings (serving size: 2 1/2 cups)

Nutrition information: 249 calories, 8.2 g fat, 23.3 g protein, 25.1 g carbohydrate, 7 g fiber, 50 mg choelsterol, 2.2 mg iron, 650 mg sodium, 106 mg calcium.

Source: Cooking Light, August 2006 (and available on MyRecipes.com)

Notes: I've made this recipe as written a few times before.  It is wonderful.  This time around (as pictured), I made the recipe without chicken and with diced tomatoes instead of the grape tomatoes.  I wanted to lighten it up even more (since I'd already blown my calories for the day!) and I had accidentally used the last of my grape tomatoes the day before.

If you are going to eat the entire salad within the day of preparation, I would suggest tossing the dressing mixture with the lettuce.  However, if you aren't going to eat it within the same day (as my family wasn't able to), I would suggest topping the lettuce with the dressing mixture.  If you toss it, the moisture in the dressing mixture will wilt the lettuce and the entire salad will be no good the next day.  But if you add the dressing mixture to the lettuce each time you eat, it can last 2-4 days.


Santa Fe Chicken

Ingredients:

2 cups instant white rice, uncooked
1 can (15 oz.) black beans, rinsed
1 yellow pepper, chopped
1 can (10 1/2 oz) condensed cream of chicken soup
2 cups water
1/4 cup chopped fresh cilantro
4 small boneless skinless chicken breast halves (1 lb.)
1/2 cup Taco Bell Home Originals Thick 'N Chunky Salsa
1 container Philadelphia Cooking Creme Santa Fe blend (my addition--see notes for substitution)
1 cup Kraft Mexican Style Finely Shredded Four Cheese

Directions:

Heat oven to 400 degrees F.

Combine rice, beans, and peppers in 13x9-inch baking dish.  Mix soup, water, and cilantro; pour over rice mixture.

Top with chicken, salsa, and Santa Fe Cooking Creme.

Bake 45 minutes or until chicken is done (165 degrees F), topping with cheese for the last 10 minutes.

Recipe Tip: Save 50 calories and 6 g of fat, including 3 g of saturated fat, per serving by preparing with 98% fat-free reduced-sodium condensed cream of chicken soup and Kraft Mexican Style 2% Milk Finely Shredded Four Cheese.  If you don't have fresh cilantro, use 1 tsp ground coriander instead.

4 servings.

Nutrition information: 640 calories, 17 g fat, 100 mg cholesterol, 1090 mg sodium, 78 g carbohydrate, 10 g fiber, 3 g sugar, 45 g protein.

Source: Kraftrecipes.com

Notes: I LOVED the rice mixture in this recipe.  It was so flavorful and creamy.  It was perfect.  I didn't have a yellow pepper, I had a red pepper, so I used that instead.  I also added a drained can of corn to the rice mixture.  I also had some chicken tenderloins that I wanted to use up, so I used that in place of the chicken breasts.  I would also say that this recipe can serve 6-8 people.  It makes a ton of rice.  So, if you top it with chicken tenderloins, it could feed a lot more people.  If you are serving 6 people, this decreases the calories to around 400 per serving.

However, I thought that the chicken could have been more flavorful.  I would definitely sprinkle it with some spices next time around (such as cumin, a light dusting of chili powder, or a Mexican spice blend).

I added some Santa Fe Cooking Creme.  I had bought it because I wanted to give it a try, but then I couldn't figure out what I wanted to use it in.  When I found this recipe (especially since it had "Santa Fe" in the title), I thought it would be the perfect addition.  If you want to still add this element but don't have the cooking creme, I would suggest the following mixture: 1 cup sour cream, 1/2 cup milk, 2 tablespoons (or to taste) taco seasoning well blended.


I was so in love with this rice mixture, that I made it again--without the chicken--to serve as a side dish (I actually made it to go along with the Mexican-Style shredded beef recipe found above for the burrito filling).  However, here is my word of caution: when you make this recipe as is (with the chicken), the chicken keeps the rice moist and creamy.  It also takes longer to cook this way.  If you are cooking the rice mixture alone to serve as a side dish, decrease the oven temperature to 350 degrees and bake only until the rice is cooked and the moisture has been absorbed (30-45 minutes).


Slow Cooker Chalupa Bowl

Ingredients:

1 pound dried pinto beans
1 (3 1/2 pound) bone-in pork loin roast
2 (4 ounce) cans chopped green chiles
2 garlic cloves, chopped
1 tablespoon chili powder
2 teaspoons salt
1 teaspoon dried oregano
1 teaspoon ground cumin
1 (32 ounce) box chicken broth
1 (10 ounce) can diced tomatoes and green chiles with lime juice and cilantro
8 taco salad shells
1 small head iceberg lettuce, shredded
Toppings: shredded Monterey Jack cheese, pickled jalapeno slices, halved grape tomatoes, sour cream, chopped avocado, cilantro, etc.

Directions:

Rinse and sort beans according to package directions.

Place pinto beans in a 6-quart slow cooker; add roast and next 6 ingredients.  Pour chicken broth evenly over top of roast.

Cover and cook on high 1 hour; reduce to low, and cook 9 hours.  Or, cover and cook on high 6 hours.  remove bones and fat from roast; pull roast into large pieces with two forks.  Stir in diced tomatoes and green chiles.  Cook uncovered, on high 1 more hour or until liquid is slightly thickened.

Heat taco salad shells according to package directions; place shredded lettuce evenly into shells.  Spoon about 1 cup pork-and-bean mixture into each shell using a slotted spoon.  Serve with desired toppings.

8 servings

Source: Southern Living, October 2005

Notes: I assembled this the night before and put my slow cooker pot in the fridge so that I could simply put it in the warmer and turn it on the next morning.  I wasn't going to get up at six in the morning to get dinner ready!

One of the reasons I wanted to try this recipe was because I had a bag of dried pinto beans in my pantry that I have had no idea what to do with.  I prefer canned beans because I have always had a hard time getting dried beans to turn out tender--no matter how much I have soaked the beans or how long I have boiled them, I always end up with tough beans!  I figured that if the beans turned out tough in this recipe, I could remove them completely when I removed the pork to shred it.  But luckily, the beans were tender and delicious!  I think this recipe would work just as well with canned pinto beans--you would just decrease the cooking time because the lengthy cooking time in this recipe is due to the use of dried beans--not because the pork needs that amount of time to cook.

I added the can of tomatoes at the beginning of the cooking time rather than at the end.

The flavor was wonderful.  It wasn't overwhelming (meaning, it was good for my kids too), but it was just fulfilling.

I meant to put some canned jalapeno slices on top, but in the hectic rush to get my family fed, I totally forgot.  It would have been yummy though!  I'll have to remember to do that with our leftovers.

I used uncooked flour tortillas rather than taco salad shells, simply because that's what I had on hand.  This meat/bean mixture would work great as a taco filling, in taco salads, burritos, tostadas, quesadillas, and even enchiladas.


Cilantro-Lime Rice

Ingredients

1 cup long-grain white rice
Coarse salt
1/2 cup fresh cilantro
2 tablespoons fresh lime juice
1 tablespoon olive oil
1 garlic clove

Directions:

In a medium saucepan, bring 1 1/2 cups water to a boil.  Add rice and 1/ teaspoon salt; cover, and reduce to a simmer.  Cook until water is absorbed and rice is just tender, 16-18 minutes.

Meanwhile, in a blender, combine cilantro, lime juice, oil, garlic, and 2 tablespoons water; blend until smooth.  Stir into cooked rice, and fluff with a fork.

Source: Everyday Food, April 2008. You can find it here.

Notes: Holy cow!  I can't believe how good this tasted for how easy it was!  This is going to be my go-to Mexican rice recipe from now on!  Yum!

Tuesday, October 12, 2010

Cake and Ice Cream...Yum!


There are an awful lot of cake recipes on our blog! Especially since our blog has only been up and running for 7 months!

But I promise you, each and every one of these cake recipes are worth it!

As for ice cream, isn't it the perfect compliment to cake?

I got this fantastic cake recipe from a co-worker. She would make it to celebrate everyone's birthday in the office. It was too hard to resist (I'm sure it added to my pregnancy weight gain!). It is honestly the best carrot cake I have ever had. My husband's favorite kind of cake is carrot cake, so this was a natural for his birthday celebration. Before I found this recipe, I tried a number of different carrot cakes (store-bought and homemade) to find just the right one. I just wasn't pleased. They were either too spice-cakey or too crumbly. This carrot cake is moist and hard to resist.

As for the ice cream, I dreamed up this recipe myself (one of my pregnant food craving dreams!). I had been craving the flavor of hazelnut. In order to satiate my craving, I got some hazelnut coffee creamer to flavor my glasses of milk and later, I got some chocolate hazelnut spread as well. I think the combination of milk, hazelnut coffee creamer, and chocolate hazelnut spread just sort of evolved into an ice cream recipe during my REM cycle!

While I would never pair these two recipes to serve together (the ice cream and cake are too rich to go together and the flavors don't match), I find that it is fitting to pair them together here since I craved the carrot cake during my first pregnancy and I dreamed up the ice cream during my second pregnancy!

Oh, and I must apologize for the pictures. Each time, we had already dug in and it only occurred to me afterward that I needed to take a picture. So, the pictures are definite afterthoughts and they don't do these recipes the justice they deserve. They really are awful pictures. Sorry! (Notice how the carrot cake is placed on one of my son's baby plates because I was pressed for time and besides paper plates, it was the only thing I had nearby!)

Above: You can simply frost the layers and let the frosting overhang a little, or...

Above: You can frost the whole thing and bask in the wonderful cream cheese frosting/carrot cake combination. It's up to you!

10/21/10 Amendment: In order to class up this blog post (because my pictures were so lousy and Laurie's are so fantastic), I am adding one of my sister's posts from her personal blog with two of her ice cream recipes. These fantastic recipes came straight from her own brain!


Heather's Carrot Pineapple Cake


Cake:

1 1/2 cup flour
1 cup sugar
1 teaspoon baking powder
1 teaspoon baking soda
1 teaspoon cinnamon
1/2 teaspoon salt
2/3 cup salad oil
2 eggs
1 teaspoon vanilla
carrots, roughly sliced or chopped (enough to make 1 cup shredded)
1 cup crushed pineapple with juice (or half cup, if preferred)

Frosting:

1 package cream cheese
2 Tbsp. butter
4 cups confectioners sugar
1 tsp. vanilla

Sift together first six ingredients (flour through salt).

Blend together next 4 ingredients (salad oil through shredded carrots) in a blender.

Combine dry and wet ingredients. Then add crushed pineapple with juice.

Pour batter into 3 greased baking pans. Bake at 350 degrees for 25-30 minutes.

For the frosting, whip together the final four ingredients (cream cheese through vanilla) and frost on top of cooled cake.

Source: My wonderful former co-worker, Heather Bowen.

Notes: I like a lot of frosting, so I would suggest doubling the frosting recipe. Also, I highly suggest using three cake pans instead of two. It is necessary for the consistency of the cake. If you do try to use two cake pans, you might have to cook the cake a little longer. Check the cake using the toothpick method to ensure that it is cooked completely, otherwise it might be too crumbly.


Hazelnut Chocolate Ice Cream

Makes 4 quarts

Ingredients:

8 cups heavy cream (see note below)
1 1/2 cups sugar
Pinch of salt
4 cups hazelnut flavored coffee creamer
1 1/4-1 1/2 cups toasted, chopped hazelnuts
1 container chocolate hazelnut spread (such as Nutella)

Directions:

In a large bowl, whisk together cream, sugar, salt, and coffee creamer. Refrigerate until you are able to add the cooled nuts. Toast hazelnuts and allow to cool. Stir cooled hazelnuts into the cream mixture. Transfer mixture to an ice cream maker, and freeze according to manufacturer's instructions.

You will want to swirl the chocolate hazelnut spread into the ice cream mixture before you ripen it in your freezer. The best way to do this is to spoon a layer of the ice cream into a freezer safe container and swirl a layer of chocolate hazelnut spread on top. Top with another layer of ice cream followed by another layer of chocolate hazelnut spread. Repeat until all of the ice cream and chocolate hazelnut spread has been combined. Be careful not to leave large clumps of chocolate hazelnut spread. You will want the swirls to be fine. When the spread freezes, it freezes very hard and if you have large swirls or clumps within the ice cream, it makes scooping the ice cream very difficult.

Allow ice cream to fully ripen in the freezer before serving (at least 2 hours). Store in an airtight, freezer safe container.

Source: The crazy craving dreams of a pregnant woman...me!

Notes: If you want to lighten this recipe and make it a little less rich, you can use 4 cups of heavy cream and 4 cups of half and half. I've tried it both ways. It is still great with the half and half. It is just a little lighter, not quite as rich, and a little less creamy.

Also, I must repeat that it is so important not to create large or thick pieces/swirls of chocolate hazelnut spread. It is so much tastier and easier to serve if you have fine, string-like swirls. The first time I made this, the swirls were very fine and I thought I would try it again with twice as much chocolate hazelnut spread and in much thicker swirls. The problem with this is that the chocolate hazelnut spread hardens as soon as it makes contact with the cold ice cream (it's kind of like the chocolate shells you can get on your soft serve ice cream cone). The result was that I had thick and impenetrable layers of chocolate hazelnut spread and I practically had to use a knife to serve the ice cream! The dainty, fine layers of chocolate hazelnut spread are far preferable for this recipe. If you want more chocolate hazelnut spread, I would suggest drizzling some more on top of your ice cream just prior to serving.

Garden + Ice Cream Maker = True Love


My roommates gave me an ice cream maker for my wedding and ever since then I have been making ice cream non-stop. I lay in bed thinking of new ideas for flavor combinations and I get so excited! The first kind I made was using the fresh mint in our back yard and it was delicious! Mint is of course one of my favorite things. After the mint, I decided to be more creative and I was inspired by my favorite ice cream shop, Jeni's (They always have very creative, gourmet and absolutely delicious flavors). So I made Cucumber Coconut Sorbet and Butternut Squash Ice Cream with Caramel & Candied Pecans. And they were both a success! hooray!!!

Cucumber Coconut Sorbet

I love how cool and refreshing cucumber is. People don't give cucumber enough opportunities as a dessert flavor, but I'm telling you this one is delish! It's light and tasty, with a smooth texture. Yum!

Ingredients:

2 large cucumbers
1 tablespoon honey
1 can light coconut milk
Juice from 1 lime
3/4 cup simple syrup, (recipe below)

Directions:

Blend the cucumbers and honey together in a blender or food processor until the cucumber is almost pureed, but still has some chunks. Refrigerate for 6-24 hours. The honey will draw out the moisture in the cucumbers. Then blend again until smooth, and pour into a fine strainer, pushing out juices and discarding pulp & peel.

Combine the juices with a can of coconut milk, the lime juice, and the simple syrup

Freeze in Ice cream maker for 20-30 minutes or until thick and creamy. YUM!!!

Simple Syrup

Ingredients:

1/2 cup sugar
1/4 cup light corn syrup
1/4 cup water

Directions:

In a small saucepan, combine the sugar, corn syrup and water and bring to a boil. Cook over moderate heat until the sugar dissolves, about 2 minutes. Remove from the heat. Let stand until cool, 30 minutes.

Butternut Squash Ice Cream

The squash has a richer flavor and is more decadent with the caramel and pecans. We had friends over for dinner last night and they were shocked that the secret ingredient was squash. It tastes a little like pumpkin pie, only more mild.

Ingredients:

One medium-sized butternut squash
1 tsp. vanilla
One recipe of your favorite vanilla ice cream
1 tsp. cinnamon
1/4 tsp. nutmeg
2-4 tbsp. brown sugar
One recipe of your favorite candied pecans (or toast pecans in a pan on the stove top while adding enough brown sugar to evenly coat the nuts, remove from heat and cool completely)

Directions:

Start by peeling and cubing one medium sized butternut squash. Boil for 5-10 minutes with a little vanilla in the water.

Using your favorite basic vanilla ice cream recipe, add cinnamon, nutmeg, and brown sugar.

Add a cup of the cream mixture in a blender with the butternut squash and puree until smooth. Pour into fine strainer to remove pulp. I would probably strain this twice. I only did it once and the texture was a little too grainy. Mix with remaining ice cream mixture.

Then pour into ice cream machine! and freeze!

Yummy yummy yummy.

Next up, I'm thinking Basil Lime.... I love my garden!

Monday, May 31, 2010

I Scream, You Scream, We All Scream for Ice Cream!


Above: Vanilla Ice Milk, Burnt Almond Fudge Ice Cream, Pralines and Caramel Ice Cream, Blackberry Ice Cream, and finally, Toasted Coconut and Almond Ice Cream.

Nothing compares to homemade ice cream. Even the very best store bought ice creams can't hold a candle to what you can make at home. Sadly though, due to the expense (both money-wise and calorie-wise) homemade ice cream is only something you should make once in awhile. We decided to make some for Memorial Day.

In addition to the flavors pictured here, we also made Cake Batter Ice Cream and Blueberry Ice Cream.

I hope you like them...but pace yourself! You could gain 10 lbs in a day if you go overboard on this stuff!

Vanilla Ice Milk

Ingredients:

3 cups skim milk
1 3/4 cups sugar
1/4 teaspoon salt
9 cups whole milk
1 1/2 teaspoon vanilla

Directions:

Thoroughly combine all ingredients. Cover and refrigerate 30 minutes. Freeze as directed. Stir after freezing to blend any unfrozen skim milk into frozen mixture.

Makes: This recipe is designed for a 4 quart-size ice cream maker.

Source: Rival Ice Cream and Frozen Yogurt Maker user's manual.

Burnt Almond Fudge Ice Cream

Ingredients:

1 cup toasted, chopped almonds
3 cups sugar
3/4 cup cocoa
6 beaten eggs
2 cups canned milk
6 cups half 'n' half
4 cups whipping cream
3/4 teaspoon almond extract

Directions:

Toast chopped almonds in a 300 degree oven for 15 minutes, stirring occasionally. Blend sugar and cocoa together and add 6 beaten eggs, 2 cups canned milk, and 4 cups half 'n' half. Stir and heat until almost boiling. Cool; then add remaining 2 cups half 'n' half, 4 cups whipping cream, and 3/4 teaspoon almond extract. Add nuts just before freezing. Pour in 6-quart ice cream freezer container and freeze according to manufacturer's directions.

Each 1/2 cup serving contains: 195 calories, 14 g fat, 16 g carb, 40 mg sodium, 68 mg cholesterol.

Source: Deseret News, submitted by Diane C. Anderson, of Fruit Heights, Utah. May 21, 2002.

Note: I was actually able to fit this into my 4 quart ice cream maker. It took a little longer to freeze and I had to ripen it in my freezer (in a freezer safe container) a little longer before it was ready, but it still worked. It would definitely have frozen faster in a 6 quart ice cream maker, however.

Old Fashioned Vanilla Ice Cream

Makes 2 quarts

Ingredients:

4 cups heavy cream
1 1/2 cups sugar
Pinch of salt
2 tablespoons pure vanilla extract
2 cups milk, or half-and-half

Directions:

In a large bowl, whisk together all ingredients. Transfer to an ice cream maker, and freeze following manufacturer's instructions. Store in an airtight, freezer safe container.

Source: Martha Stewart website, Copyright 2010.

Pralines

Ingredients:

Butter
3/4 cup firmly packed light brown sugar
3/4 cup sugar
3/4 cup half-and-half
3 tablespoons butter or margarine
1 1/4 cups coarsely chopped pecans
1/2 teaspoon vanilla extract

Directions:

Butter bottom of a heavy 3 quart saucepan. Cook brown sugar and next 3 ingredients in saucepan over low heat, stirring constantly, until sugars dissolve; stir in pecans. Bring to a boil over medium heat; cook, stirring occasionally, 6-8 minutes or until a candy thermometer registers 238 degrees (soft ball stage). Remove from heat.

Stir in vanilla; let stand 3 minutes. Beat with a wooden spoon 3 minutes or until mixture begins to thicken. Working rapidly, drop by tablespoonfuls onto wax paper. Let stand until firm.

Source: Southern Living, November 1999.

Note: I used a full package of pecans--which measures 2 cups (instead of 1 1/4 cups). I didn't have a candy thermometer, so as soon as the mixture started boiling, I timed it at exactly eight minutes. I also let the mixture cool a little over 5 minutes. This made it so that when I started stirring it, it crumbled into individual caramel covered nuts. I spread the individual nuts onto a wax paper covered jelly roll pan and let them cool completely.

Pralines and Caramel Ice Cream

Ingredients:

2 recipes Old Fashioned Vanilla Ice Cream (see recipe above)
1 recipe Pralines
1 jar caramel ice cream topping

Directions:

Prepare Old Fashioned Vanilla Ice Cream and freeze in a 4 quart ice cream maker according to manufacturer's instructions. During the last five minutes of mixing time, add pralines.

When you are transferring your ice cream to a freezer safe container, do it in layers. Ice cream, caramel ice cream topping, ice cream, caramel ice cream topping, etc. Lightly swirl the caramel topping before putting ice cream on top of it.

Makes 4 quarts.

Source: Pretty much from my own brain, but it is a compilation recipe. Ice cream recipe from Martha Stewart, pralines from Southern Living. I just love pralines and caramel ice cream and shakes and I had never found a great recipe for it before, so I figured I would have to come up with it myself. This was to die for! Mission accomplished.

Blackberry, Blueberry, Raspberry, Strawberry, or Mixed Berry Ice Cream
(see notes below for more options)

Ingredients:

2 recipes Old Fashioned Vanilla Ice Cream (see recipe above)
3-4 cups berries of your choice (see note below)

Directions:

Depending on how you want the consistency of your ice cream, you can either keep the berries whole, blend all of your berries in a blender, crush them with a fork, or blend half of the berries and put the rest of the berries into the ice cream mixture whole.

Prepare Old Fashioned Vanilla Ice Cream and stir in berries. Freeze in a 4 quart ice cream maker according to manufacturer's instructions.

Source: Martha Stewart and your own creativity!

Notes: Be creative. If you don't like berries, use this vanilla ice cream recipe and mix in crushed Oreos, crumbled cookie dough, crumbled brownies, your favorite candies, etc. To make cake batter ice cream, simply mix in a box of dry cake mix into the vanilla ice cream recipe of your choice.

Cake Batter Ice Cream

Ingredients:

1 cup milk
1/2 cup white sugar
2 egg yolks, beaten
1 teaspoon vanilla extract
2 cups heavy whipping cream
3/4 cup white cake mix, sifted
Sprinkles, optional

Directions:

Whisk together milk, sugar, egg yolks, vanilla, cream, and cake mix in a saucepan until well blended. Cook over medium-low heat until mixture reaches 160 degrees F, stirring frequently. Remove from heat and place in the refrigerator or freezer until liquid is cold.

Pour the chilled mixture into a 2 quart ice cream maker and freeze according to manufacturer's directions until it reaches "soft-serve" consistency. Transfer ice cream to a one or two quart lidded plastic container; cover surface with plastic wrap and seal. For best results, ice cream should ripen in the freezer for at least 2 hours or overnight.

Note: If you would like sprinkles in your ice cream, you can add them to the ice cream mixture during the last 5 minutes of mixing, or you can fold them into the ice cream as you transfer it to a freezer safe container.

Source: Allrecipes.com, submitted by Ekho

Toasted Coconut and Almond Ice Cream

Ingredients:

1 1/2 teaspoons unflavored gelatin
1 tablespoon water
3 cups low-fat milk (divided)
3 large egg yolks
1 can (14 ounces) nonfat sweetened condensed milk
1 vanilla bean (or 1 tsp vanilla extract)
1/2 cup toasted coconut flakes
1/2 cup chopped toasted almonds

Directions:

Sprinkle gelatin over water in a small bowl; let stand, stirring once or twice, while you make the base for the ice cream.

Pour 1 1/2 cups milk into a large saucepan. Cut vanilla bean in half lengthwise; scrape the seeds into the milk and add the pod.

Heat the milk mixture over medium heat until steaming. Whisk egg yolks and condensed milk in a medium bowl. Gradually pour in the hot milk, whisking until blended. Return the mixture to the pan and cook over medium heat, stirring with a wooden spoon, until the back of the spoon is lightly coated, 3-5 minutes. Do not bring to a boil or the custard will curdle.

Strain the custard through a fine-mesh sieve into a clean large bowl. Add the softened gelatin and whisk until melted. Whisk in the remaining 1 1/2 cups milk. Cover and refrigerate until chilled, at least 2 hours.

Whisk the ice cream mixture and pour into the canister of a 2 quart ice cream maker. Freeze according to manufacturer's directions. During the last 5 minutes of freezing, add coconut flakes and almonds to the ice cream maker. If necessary, place the ice cream in the freezer to firm up before serving.

Serves 8 (Yields 1 quart, 8 1/2 cup servings).

Tip: To toast chopped dry nuts, cook in a small, dry skillet over medium-low heat, stirring constantly, until fragrant and lightly browned, 2-4 minutes. Cool toasted nuts completely before adding them to the ice cream maker.

Nutrition Information: 276 calories, 9 g fat, 91 mg cholesterol, 105 mg sodium, 38 g carbohydrate, 1 g fiber, 10 g protein.

Source: Delish.com

Vanilla Ice Cream

Ingredients:

2 1/2 cups milk
1/2 teaspoon salt
1 1/2 tablespoons vanilla extract
2 1/2 cups sugar
2 1/2 cups half and half
5 cups whipping cream

Directions:

Scald milk until bubbles form around edge of pan. Remove from heat. Add sugar and salt. Stir until dissolved. Stir in half and half, vanilla extract and whipping cream. Cover and refrigerate 30 minutes. Freeze as directed.

Strawberry: Add 5 cups pureed strawberries to chilled mixture before freezing.

Banana: Add 3 1/2 cups mashed bananas to chilled mixture before freezing.

Peach: Add 5 cups pureed peaches to chilled mixture before freezing.

Mint Chip: Omit vanilla and substitute pure peppermint extract (to taste). Chop your favorite bittersweet or semi-sweet chocolate bar into tiny uneven pieces. Add the chopped chocolate during the last 5 minutes of mixing.

Source: Rival Ice Cream Maker user's guide.

Notes: I thought you might appreciate having another version of vanilla ice cream. The Martha Stewart recipe is amazing, but if you're looking for a less decadent version of vanilla ice cream, this one is for you.