Showing posts with label Holidays. Show all posts

Friday, December 18, 2020

Choose Your Flavor


My mom has mentioned a number of times that her mom used to make candy cane cookies that had anise and almond flavoring. However, her mom never passed on a recipe to them. I decided to try my hand with the internet and see if I can find a recipe that was close to what her mom used to make. She said this one came pretty darn close and brought back a lot of memories.

Now, you can have a lot of fun with the flavorings on these cookies. I found a lot of different options online. Some recipes used 1 1/2 teaspoons almond extract for the red dough and 1 teaspoon almond extract for the white dough. Some recipes used 1 teaspoon peppermint extract for the red dough and 1 teaspoon vanilla extract for the white dough. The version my mom always had used 1 teaspoon anise extract for the red dough and 1 1/2 teaspoons almond extract for the white dough.

I made these cookies two ways. I made one batch using the anise extract for the red dough and almond extract for the white dough. Then I made another batch where I used peppermint extract for the red dough and vanilla extract for the white dough. It was fantastic both ways. These are light, soft, and chewy butter cookies. I think you will love them. Besides being delicious, they were also adorable.

Christmas Candy Cane Cookies

Ingredients:

1/2 cup shortening
1/2 cup butter, softened
1 cup confectioners' sugar
1 large egg, room temperature
2 1/2 cups all-purpose flour
1/2 teaspoon salt
1/2 teaspoon red food coloring (or more, to get your desired color)
1/2 cup peppermint candy, crushed, optional
1/2 cup sugar, optional

Flavorings:


1 1/2 teaspoons almond extract
1 teaspoon vanilla

Or:

1 teaspoon peppermint extract
1 teaspoon vanilla extract

Or:

1 teaspoon anise extract
1 1/2 teaspoons almond extract

Directions:

In a large bowl, cream the shortening, butter, and confectioners' sugar until light and fluffy, 5-7 minutes. Beat in egg. Combine flour and salt; gradually add to the creamed mixture. Divide dough in half; mix the food coloring into 1 portion. Then mix in the extracts: almond, peppermint, or anise into the red dough and vanilla or almond into the white dough.  

Cover each portion of dough separately and refrigerate for 2 hours or until easy to handle. I put each into a separate zip top bag.

Just before removing dough from the refrigerator, mix crushed peppermint candy and sugar together, if using.

Shape 1 teaspoon plain dough into a 4-inch rope. Shape 1 teaspoon red dough into a 4-inch rope. Place ropes side by side; pres together lightly and twist carefully. Be gentle to avoid breaking or cracking the dough. Place on an ungreased baking sheet; curve top of cookie down to form handle of cane. Repeat with remaining plain and red dough, placing cookies 2 inches apart on baking sheets. I kept the dough I wasn't currently working with in the refrigerator to keep it chilled.

Bake at 375 for 8-9 minutes or until set. Sprinkle the candy mixture lightly on top of the warm cookies. Remove to wire racks to cool completely.

Nutrition information: 1 cookie: 86 calories, 4 g fat, 48 mg sodium, 11 g carbohydrate (6 g sugars, 0 g fiber), 1 g protein.


Source: I found variations of this cookie recipe all over the internet. I followed this one from Taste of Home. you can find it here. However, here are some more versions of the recipe. Another Taste of Home version, here. This Taste of Home version is cinnamon flavored with crushed red hots! You can find it here. Don't feel like making dough? This version, here, uses refrigerated sugar cookie dough. This was the only one I found that used anise flavoring. You can find it here. I am not sure why it was so poorly reviewed. Probably someone who doesn't like anise flavoring. But I love it! A cute three color candy cane with red, green, and white, here. Version one from Allrecipes.com, here. Version two from Allrecipes.com, here. Version three from Allrecipes.com, here.


 Above: I could have spaced them a little more and fit nine cookies to a pan, all facing the same direction, but this is how I did mine this time.
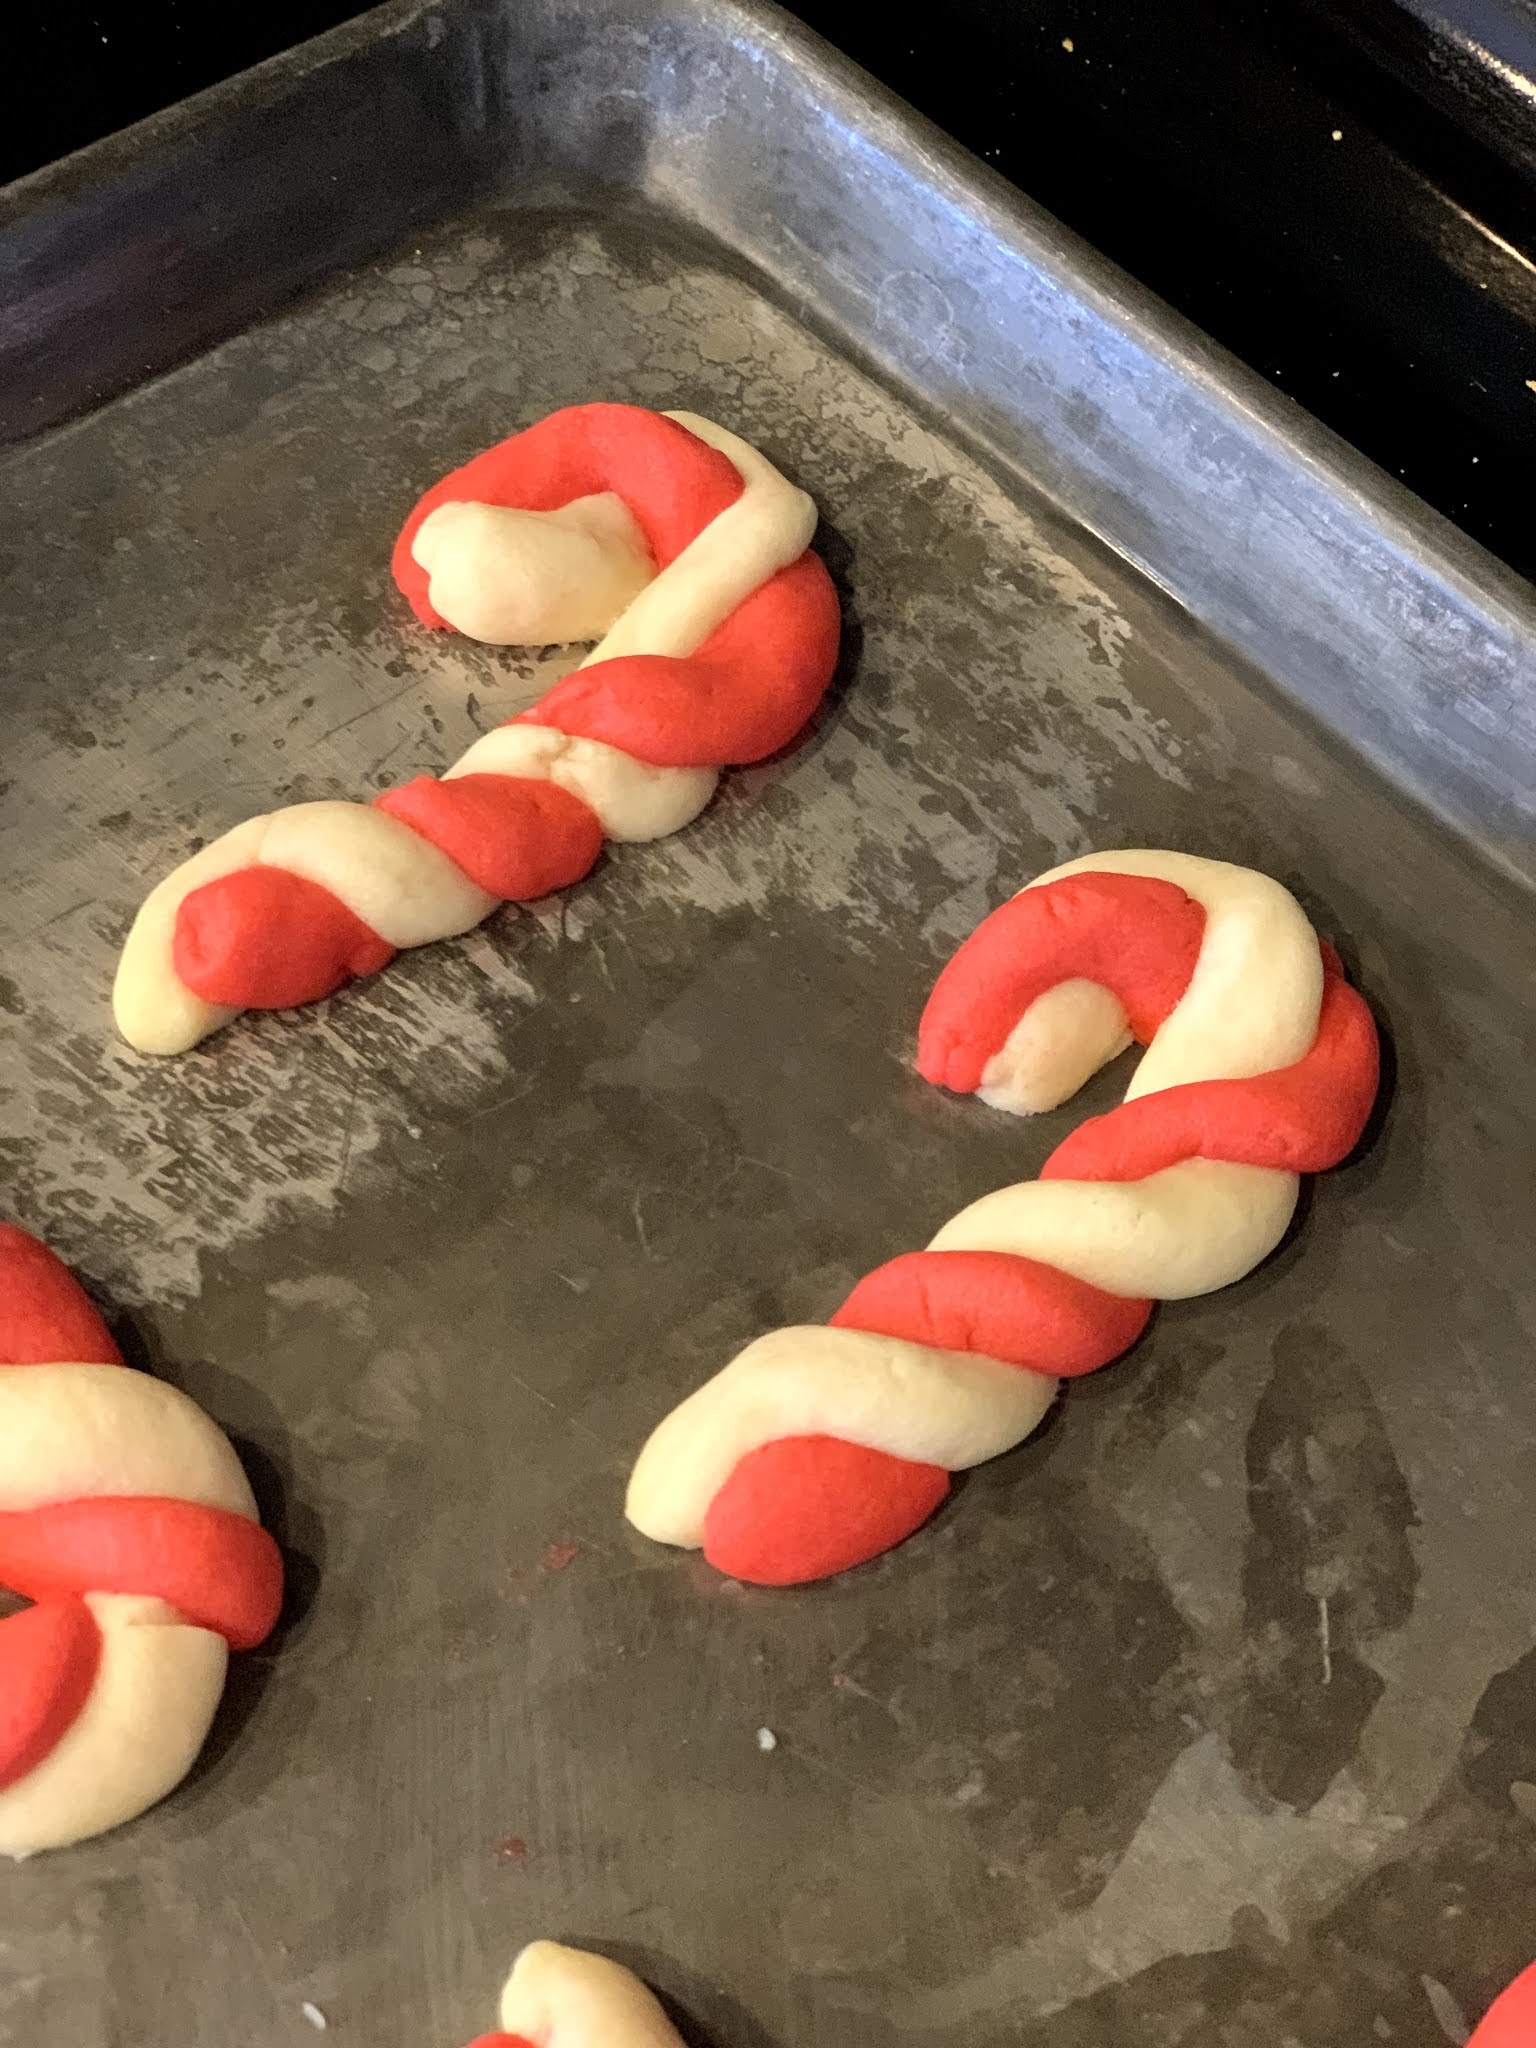
 

Notes: I LOVED the anise and almond flavor combination. The anise flavoring was not overpowering. This is not eating a black jellybean cookie, I promise. It is subtle and just such a lovely flavor combination. It was so good. I also loved the peppermint flavored cookies as well. Though the almond and vanilla flavor combination might be the most kid friendly. As you can see from all the versions I found, you can experiment with what works best for you! Also, definitely check out the tricolor candy canes (red, green, and white). Those were really fun and cute too!

Saturday, December 26, 2015

An Old Family Christmas Tradition


We used to make this dessert most Christmases and sometimes we would make it on the holidays. It just has that holiday feeling to it and brings back good memories. It's tasty stuff to boot! Oh, and while the name of the recipe may say otherwise, this is no salad.


Pretzel Layered Salad

Ingredients:

2 cups pretzels, crushed
1 cup sugar
3/4 cup melted butter
8 oz. cream cheese, softened
1 cup sugar
12 oz. Cool Whip
6 oz. raspberry Jell-O
3 cups boiling water
8 1/4 oz. crushed pineapple, well drained
1 pkg. frozen raspberries, unthawed

Directions:

Mix pretzels, sugar, and butter. Press into 9x13 pan. Bake 400 degrees F. for 5 minutes. Cool. Mix cream cheese, sugar, and Cool Whip. Fold in pineapple. Spread mixture on crust. Dissolve Jell-O in boiling water. Add frozen berries. Let set until syrupy. Pour over cream cheese mix. Refrigerate until set.

Source: Who knows? I've seen this just about everywhere. So many people have some version or another of this recipe. Most recipes use frozen strawberries and strawberry Jell-O, but we prefer raspberries in this recipe.

Notes: This is just so good. It is best the very first day. It's still good the second day, but after that, the pretzel crust starts to get soggy and it goes downhill fast...but it's good while it lasts!

Wednesday, December 23, 2015

Gifts for the Neighbors


This year, I didn't have much time on my hands to go crazy with cookie plates or homemade fudge or candy. However, this recipe was an old favorite of mine and I felt that it would be a quick and easy alternative.


Sweet and Salty Corn Puffs

Ingredients:

1 cup sugar
1/2 pound butter (2 sticks, or 1 cup)
3 tablespoons water
1 tablespoon corn syrup
8 ounces corn puffs

Directions:

Stir first four ingredients together in a saucepan and heat on high heat until mixture reaches 250 degrees.

Meanwhile, pour corn puffs into a large bowl. When the butter/sugar mixture reaches 250 degrees, pour mixture over corn puffs and stir to coat. Spread onto waxed paper to cool.

Source: My mom got this recipe from her friend, Karrie. I found a very similar recipe online here.

Notes: This sweet and salty mixture is so addicting. It is also really quick to make. So, if you need to make neighbor gifts in a hurry, this is the recipe you're looking for.


Above: This is a 3 1/2 ounce bag. It's not a small bag, but those little corn puffs are light! 


Above: Here are two bags poured into my big metal bowl.


Above: For my first batch, I used two 3 1/2 oz. bags, but if you wanted more candy coating on them, you could do one batch of the sugar/butter mixture for each 3 1/2 oz. bag of corn puffs. I tried it both ways, and it is totally up to you depending on how much sugar/butter coating you want on the corn puffs. All in all, if I remember correctly, I used six 3 1/2 ounce bags and ended up with about 12 neighbor treat bags.

Thursday, December 10, 2015

It's Different Living Up On a Mountain


My sister-in-law has the most fantastic sugar cookie recipe that we have nicknamed "Cugar Shookies" (because my mom kept mispronouncing it one particular day). We originally posted it here. However, I live up on a mountain and whenever I make these cookies, they come out of the oven fluffy and puffy...and then they deflate. Darn altitude!

This recipe, on the other hand, works up here on my mountain. It is also a fantastic sugar cookie recipe which was originally shared on the same post as the Cugar Shookies. I'm sharing it again here because it is officially the only kind of cookies I have made this Christmas. I'm trying to lose my baby weight and having all sorts of Christmas cookies lying around won't help me in that endeavor.

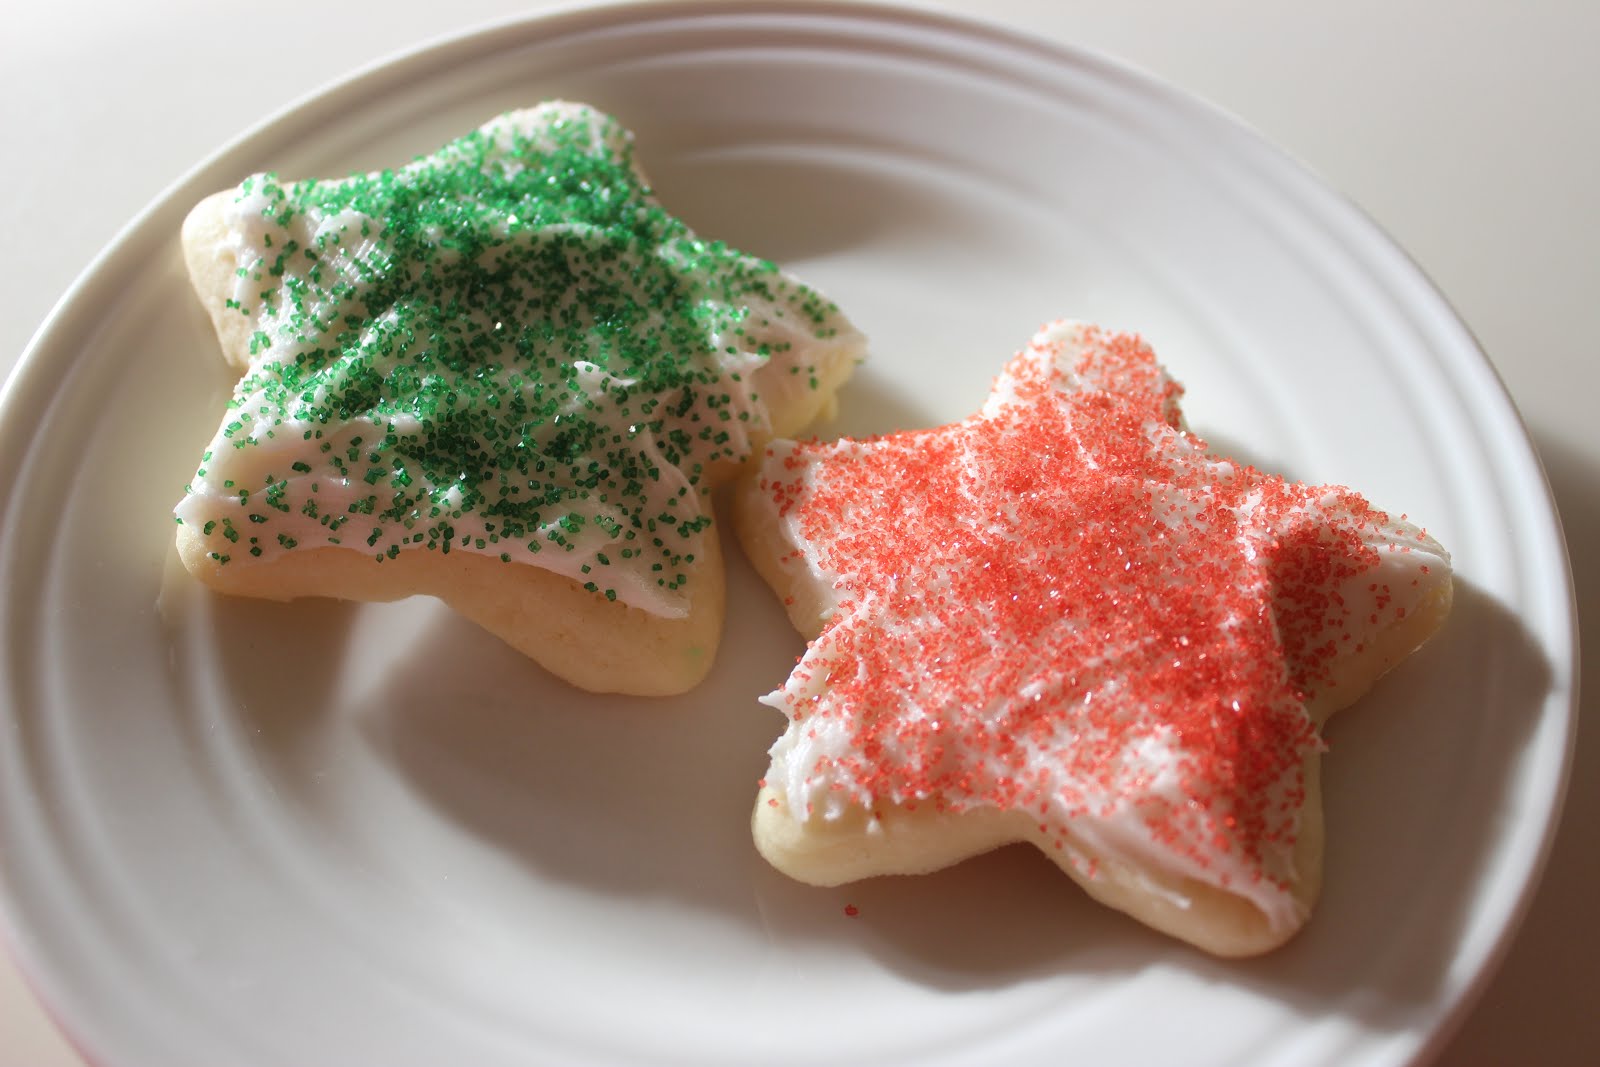
Besides, we've had a lot of holiday fun this Christmas just decorating these sugar cookies with all sorts of fun sprinkles and candies. This recipe makes a LOT of cookies, so you will have plenty for your own family as well as plenty to give to others.


Karrie's Sugar Cookies

Ingredients:

2 cups sugar
2 cups butter or margarine, softened
6 eggs
2 tsp vanilla (or almond flavoring)
1 pinch salt
7 cups flour
3 tsp baking powder

Directions:

Cream sugar and butter. Add eggs and vanilla. Add flour mixed with baking powder and salt. Roll out the sugar cookie dough and cut out cookies.

Bake at 350 degrees for 8-10 minutes. Do not overbake (in fact, you don't even want these cookies to start to brown).

Source: My Mom's friend, Karrie. When we got the recipe from her, she called them "John's Sugar Cookies." I don't know who John is, but he knows how to make a good sugar cookie.

Notes: Who doesn't love sugar cookies? These are awesome.


Sugar Cookie Frosting

Ingredients:

4 cups confectioners' sugar
1/2 cup shortening
5 tablespoons milk
1 teaspoon vanilla extract (or you can substitute almond extract)
Food coloring, optional

Directions:

In a large bowl, cream together the confectioners' sugar and shortening until smooth. Gradually mix in the milk and vanilla with an electric mixer until smooth and stiff, about 5 minutes. Color with food coloring, if desired.

Source: Allrecipes.com, submitted by Kathy Brandt. You can find it here 

Notes: I like my frosting to be creamy, smooth, and easily spreadable, so depending on the consistency, I sometimes add a little more than 5 tablespoons milk. I start with 5 tablespoons and add additional milk, if necessary, a tablespoon at a time until I reach the consistency I want. This is my go-to sugar cookie frosting recipe. It's perfect.

Friday, November 27, 2015

We're Not the Only Good Cooks


My family is full of good cooks. We know good food when we taste it. However, of course we aren't the only good cooks out there! It's so fun to try traditional foods from other families too. Plus, it's so fun to share these recipes. My sister-in-law's family is full of awesome cooks. Here is one of their recipes that I tried and loved years ago and finally got a copy of this year.


Steadman Family Cheese Ball

Ingredients:

2 (8 oz) pkg. cream cheese, softened
4 green onions
1 jar of dried beef
Pecans

To decorate like a turkey:

1 Slim Jim (jerky stick)
1 spaghetti noodle soaked in red food coloring
Green and yellow food coloring
Pretzel sticks

Directions:

Chop green onions, dried beef and pecans.

Mix cream cheese, green onions, and dried beef togeteher. Roll into a ball and then roll in the pecans.

For turkey:

Put the Slim Jim in the cheese ball for the turkey's neck and head.

Color a little bit of the cream cheese green and yellow. Use cream cheese to create two green eyes and the beak on the Slim Jim.

Put pretzel sticks into the cheese ball for the turkey's tail feathers.

Source: This is a Steadman family recipe. It was recently shared here.

Notes: I rolled my cheese ball in chopped almonds since my son is allergic to pecans. It turned out great. Also, life is crazy with a new baby and I didn't have time to shape my cheese ball like a turkey, but be sure to check out the link above because it looks really cute as a turkey. This is really delicious. It makes for a great appetizer to satiate those pre-Thanksgiving dinner appetites!

Sunday, April 5, 2015

Easter Feast


Here are a few tasty discoveries we made this Easter. Delicious stuff!


Honey Glazed Ham

Ingredients:

1 (5 pound) ready-to-eat ham
1/4 cup whole cloves
1/4 cup dark corn syrup
2 cups honey
2/3 cup butter

Directions:

Preheat oven to 325 degrees F.

Score ham, and stud with the whole cloves. Place ham in foil lined pan.

In the top half of a double boiler, heat the corn syrup, honey, and butter. Keep glaze warm while baking ham.

Brush glaze over ham, and bake for 1 hour and 15 minutes in the preheated oven. Baste ham every 10 to 15 minutes with the honey glaze. During the last 4 to 5 minutes of baking, turn on broiler to caramelize the glaze. Remove from oven, and let sit a few minutes before serving.

Source: Allrecipes.com, submitted by Colleen. You can find it here.

Notes: We bought a spiral sliced ham and used that instead of scoring our ham. Then we served it with three different ham glazes for everyone to use as dipping sauces instead.


Easy Peach-Jalapeno Ham Glaze

Ingredients:

1/2 cup peach jam
2 tablespoons finely chopped jalapeno chiles

Directions:

In small bowl, stir together jam and jalapeno chiles. Brush over ham the last 45 minutes of baking.

Source: Betty Crocker. You can find it here.

Notes: As mentioned above in the notes for the ham recipe, we didn't use this as a glaze. Rather, we used it as a dipping sauce for the ham. It was very tasty!


Easy Blueberry-Chipotle Glaze

Ingredients:

1/3 cup blueberry preserves
2 tablespoons finely chopped chipotle chiles in adobo sauce (from 7-oz can)
2 tablespoons packed dark brown sugar

Directions:

In small bowl, mix all ingredients with whisk until well blended.

Brush glaze over ham during last 45 minutes of baking.

Source: Betty Crocker. You can find it here.

Notes: Ditto in the notes above. We didn't use this as a glaze. We used it as a dipping sauce and it was fantastic!


Easy Cherry-Lime-Ginger Ham Glaze

Ingredients:

1/2 cup cherry jam
2 tablespoons packed brown sugar
1 teaspoon grated lime peel
1 tablespoon lime juice
1/2 teaspoon ground ginger

Directions:

In small bowl, beat all ingredients with whisk. Brush over ham the last 45 minutes of baking.

Source: Betty Crocker. You can find it here.

Notes: Again, we didn't use this as a glaze this time around, we used it as a dipping sauce for our ham. Super delicious!


Bacon Cheddar Deviled Eggs

Ingredients:

12 eggs
1/2 cup mayonnaise
4 slices bacon
2 tablespoons finely shredded Cheddar cheese
1 tablespoon mustard

Directions:

Place eggs in a saucepan, and cover with cold water. Bring water to a boil and immediately remove from heat. Cover, and let eggs stand in hot water for 10 to 12 minutes. Remove from hot water, and cool. To cool more quickly, rinse eggs under cold running water.

Meanwhile, place bacon in a large, deep skillet. Cook over medium-high heat until evenly brown. Alternatively, wrap bacon in paper towels and cook in the microwave for about 1 minute per slice. Crumble and set aside.

Peel the hard-cooked eggs, and cut in half lengthwise. Remove yolks to a small bowl. Mash egg yolks with mayonnaise, crumbled bacon, and cheese. Stir in mustard. Fill egg white halves with the yolk mixture and refrigerate until ready to serve.

Source: Allrecipes.com, submitted by USEREMILY3260. You can find it here.

Notes: Holy cow, bacon just makes everything better, doesn't it? These were fantastic.


Peeps Easter Garden Cake

Ingredients:

1 box Betty Crocker SuperMoist devil's food cake mix
Water, oil, and eggs as called for on package
1 container Betty Crocker Rich & Creamy chocolate frosting
1 cup chocolate cookie crumbs
1 can (6.4 ounces) Betty Crocker green decorating cake icing
8-12 Peeps marshmallow bunnies
1 can (6.5 ounces) Betty Crocker orange decorating cake icing

Directions:

Preheat oven to 350 degrees. Spray a 9x13-inch pan with cooking spray. Make cake as directed on box. Cool the cake in the pan on cooling rack until completely cooled, 30-60 minutes.

Spread chocolate frosting on top of cake. Sprinkle frosting with chocolate cookie crumbs. Use green icing to make garden rows. 

Insert a toothpick halfway into the base of each Peeps marshmallow bunny. Insert the bunnies, tootpick side down, into the cake.

Use the orange and green icing to make carrots on the cake.

Source: Betty Crocker. You can find it here.

Notes: This was so cute and the kids loved it. We also added some Cadbury chocolate eggs so that the Peeps Easter bunnies could have an Easter egg hunt in the garden as well.

Tuesday, March 17, 2015

St. Patrick's Day Leftovers


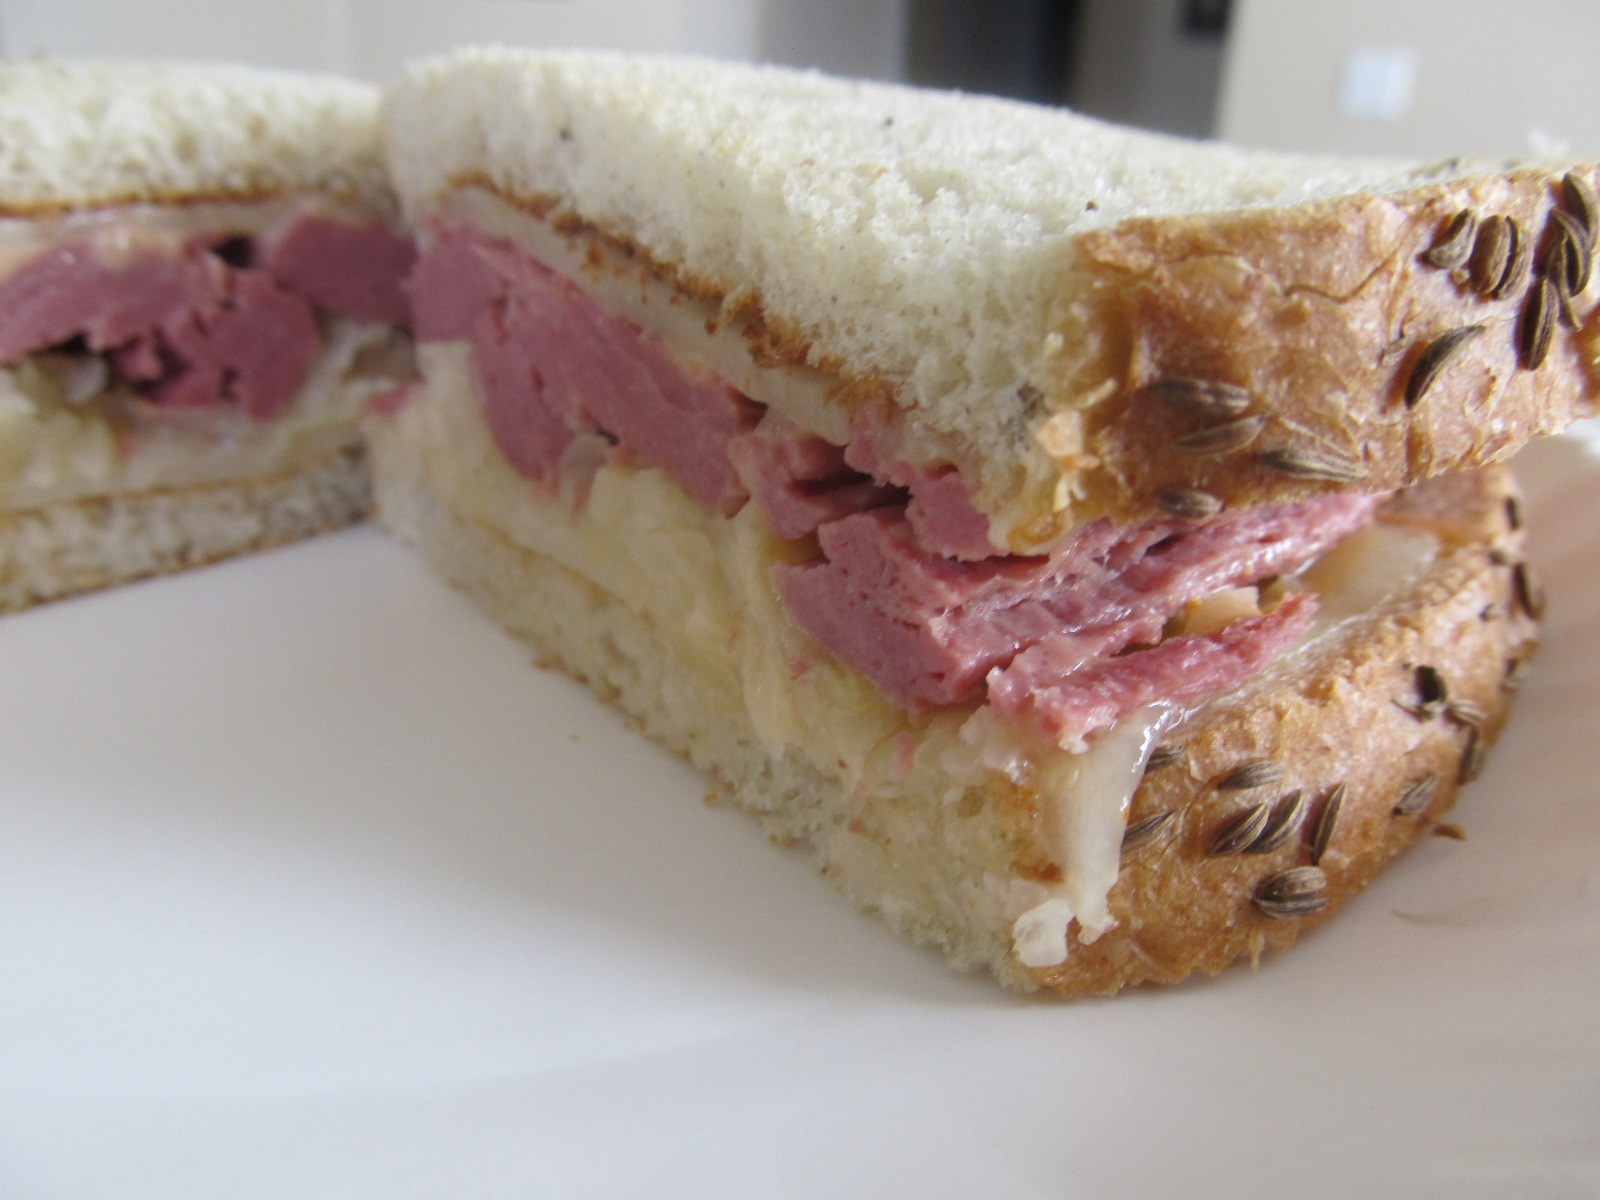
I made extra corned beef this year so that we could have Reuben sandwiches. I usually use deli corned beef, or pastrami (which I actually prefer over deli corned beef). However, using leftover corned beef made for such fantastic Reuben sandwiches.

I usually broil my sandwiches, but this time I opted for a shortcut and used the microwave. I don't think it would have worked as well with deli meat, but with the leftover corned beef, it totally worked.


Reuben Sandwiches

Ingredients:

Sliced rye bread
Sliced Swiss cheese
Thousand island dressing
Sauerkraut, drained
Corned beef

Directions:

Toast the slices of rye bread. Place the slices of rye bread on a microwave safe plate.

Top the toasted rye bread with Swiss cheese (one slice per piece of bread, or half a slice of Swiss cheese per piece of bread if you want a lighter sandwich). Spread the Swiss cheese with desired amount of thousand island dressing.

Heat the corned beef in the microwave.

Place desired amount of sauerkraut on one slice of rye. Place desired amount of corned beef on the other slice of rye. Carefully put the two halves of the sandwich together. Slice sandwich in half and serve.

Source: Reuben sandwiches have been around for about 100 years, but the origin isn't really known. It either came from Omaha, Nebraska or from New York City. Read about it here and then decide for yourself.

Notes: These were so good and so easy. It made for a perfect and easy dinner to follow after the more time consuming St. Patrick's Day dinner that we had.

St. Patrick's Day Find


I usually make this Irish soda bread, but I found this recipe and just had to try it. Now I will have to make both kinds of Irish soda bread each year!


Easy Irish Soda Bread

Ingredients:

3 1/2 cups all-purpose flour
1/2 cup sugar
2 tablespoons caraway seeds
2 teaspoons baking powder
1 teaspoon salt
1/2 teaspoon baking soda
2 eggs
2 cups (16 ounces) sour cream
3/4 cup raisins

Directions:

In a large bowl, combine the flour, sugar, caraway seeds, baking powder, salt, and baking soda. In a small bowl, whisk eggs and sour cream. Stir into dry ingredients just until moistened. Fold in raisins.

Spoon into a greased 9-in. springform pan. Bake at 350 degrees F for 40-45 minutes or until a toothpick inserted near the center comes out clean. Cool on a wire rack for 10 minutes before removing sides of pan. Cut into wedges; serve warm.

Yield: 1 loaf (12 wedges)

Source: Taste of Home. You can find it here.

Notes: If you only cut this into 12 wedges, they are very generous in size. I think you can get a lot more than 12 wedges out of this. This was just so good. Moist, flavorful, and so easy to make.

Saturday, March 14, 2015

Holiday Goodies: Strawberry Cream Cookies


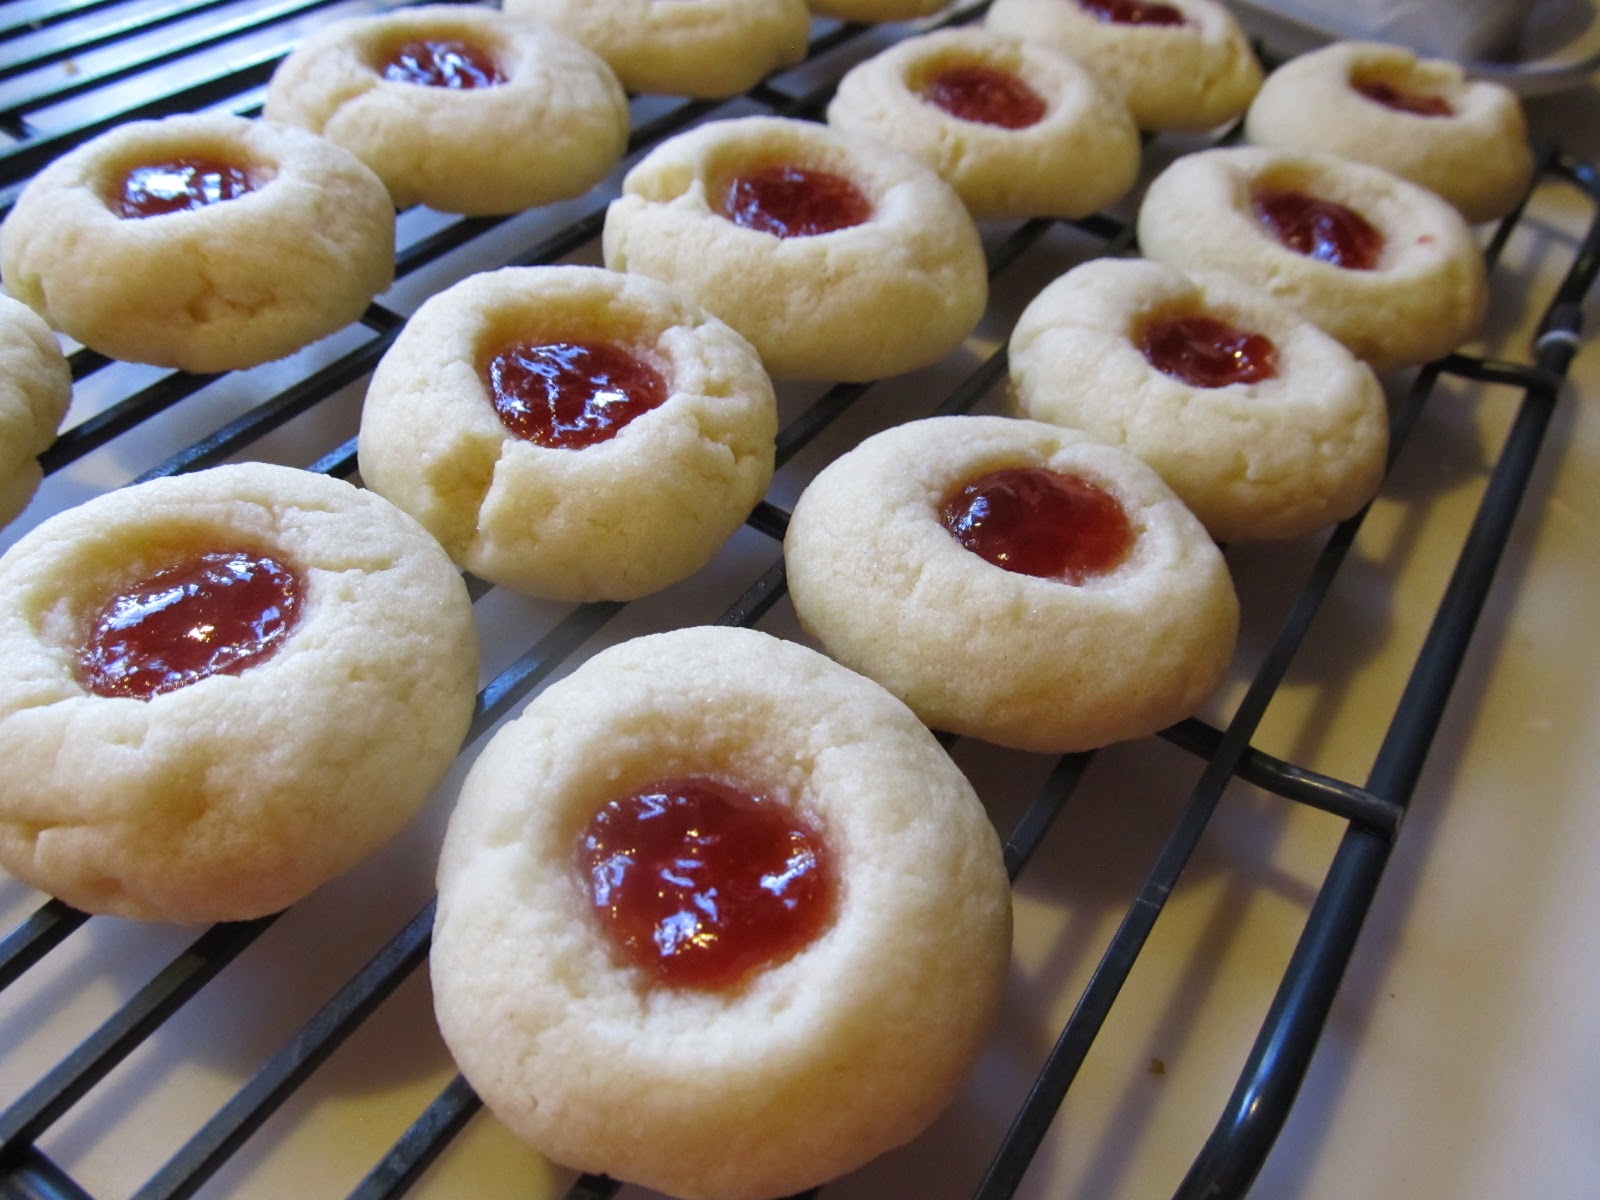
These were soft, not-too-sweet, beautiful little cookies. A very nice addition to your holiday cookie plate.


Strawberry Cream Cookies

Ingredients:

1 cup butter, softened
1 package (3 ounces) cream cheese, softened
1 cup sugar
1 egg yolk
3 teaspoons vanilla extract
2 1/2 cups all-purpose flour
Seedless strawberry jam

Directions:

In a large mixing bowl, cream the butter, cream cheese and sugar until light and fluffy. Beat in egg yolk and vanilla. Add flour and mix well. Cover and refrigerate for 1 hour or until easy to handle.

Shape dough into 1-in. balls. Place 2 in. apart on ungreased baking sheets. Using the end of a wooden spoon handle, make a 1/2-in.-deep indentation in the center of each ball; fill with about 1/4 teaspoon jam. Bake at 350 degrees F. for 10-12 minutes or until set. Remove to wire racks to cook.

Yield: 5 dozen.

Source: Taste of Home's Best & Loved Cookies & Bars. It is currently unavailable, as you can see here, so aren't you glad the recipe is online too? You can find it online here.

Notes: These were soft and satisfying. Really good and quite pretty.


Holiday Goodies: Peppermint Swirl Fudge


I loved this recipe because it is so versatile...and because you can't screw it up. I am really good at screwing up fudge...but you can't screw up this fudge recipe. I promise. Be sure to check out the recipe notes to see how you can make other variations of this. Oh, and those are Sweetened Condensed Cookies in the background. If you want to try those out, check the recipe out here. I made one batch of those with mini M&Ms and one batch with red and green mini M&Ms.


Peppermint Swirl Fudge

Ingredients:

1 teaspoon butter
1 package (10-12 ounces) white baking chips
1 can (16 ounces) vanilla frosting
1/2 teaspoon peppermint extract
8 drops red food coloring
2 tablespoons crushed peppermint candies

Directions:

Line a 9-in.-square pan with foil and grease the foil with butter; set aside.

In a small saucepan, melt chips; stir until smooth. Remove from the heat. Stir in frosting and extract. Spread into prepared pan. Randomly place drops of food coloring over fudge; cut through fudge with a knife to swirl. Sprinkle with candies. Refrigerate for 1 hour or until set.

Using foil, lift fudge out of pan. Gently peel off foil; cut fudge into 1-in. squares. Store in an airtight container.

Yield: about 1 1/2 pounds.

Source: Taste of Home. You can find it here.


Notes: I made this three separate ways. The white chocolate version as you see here, and a semi-sweet and milk chocolate version. For the semi-sweet, I used semi-sweet chocolate chips and chocolate fudge frosting. I then did a milk chocolate version where I used milk chocolate chips and chocolate fudge frosting. For both of those versions, I skipped the red food coloring (because you wouldn't really be able to see it swirled anyway...and it wouldn't have been as pretty). I'll have to add pictures of those ones later.

This was to die for delicious all three ways. You can't go wrong with this easy recipe.

Holiday Goodies: Raspberry Ribbon Cookies


Christmas has come and gone, but as I have mentioned before, I am playing some major catch up with this blog. I have a ton of recipes that I need to post (I'm almost caught up though!). So, here goes!

  
Raspberry Ribbons

Ingredients:

1 cup butter, softened
1/2 cup sugar
1 egg
1 teaspoon vanilla extract
2 1/4 cups all-purpose flour
1/2 teaspoon baking powder
1/4 teaspoon salt
1/2 cup raspberry jam

Glaze:

1 cup confectioners' sugar
2 tablespoons evaporated milk
1/2 teaspoon vanilla extract

Directions:

In a large bowl, cream butter and sugar until light and fluffy. Beat in egg and vanilla. Combine the flour, baking powder, and salt; gradually add to creamed mixture and mix well.

Divide dough into four portions; shape each into a 10-in. x 2-1/2-in. log. Place 4 in. apart on greased or foil-lined baking sheets. 1/2-in. depression down the center of each log. Bake at 350 degrees F. for 10 minutes.

Fill depressions with jam. Bake 10-15 minutes longer or until lightly browned. Cool for 2 minutes. Remove to a cutting board; cut into 3/4-in. slices. Place on wire racks.

In a small bowl, combine glaze ingredients. Drizzle over warm cookies. Cool completely.

Yield: About 5 dozen cookies.

Source: Taste of Home. You can find it here.

Notes: These are rated 5 stars for a reason. They are the most wonderful, soft, melt-in-your-mouth bites of Christmas/holiday goodness you could ever hope for.

My only warning would be that I misunderstood the recipe slightly and I formed these into rectangles on the cookie sheet instead of logs. Definitely keep it as a log. As a result of what I did, mine were a little thinner, and therefore, they were more fragile. They looked and tasted great, but there wasn't enough cookie in the raspberry center and a lot of them broke in half down the middle.

These are going to become a holiday Christmas cookie tradition for years to come. These were amazing.


Above: Oooh, I wish I had a batch of these in the kitchen right about now.

Keep in Mind for Thanksgiving


It's hard to think about Thanksgiving when spring is only a week away, but keep these cranberry sauce recipes in mind for your next Thanksgiving dinner. It's only 8 months away! Here are two great cranberry sauce recipes to keep on hand for the future.

Apple and Cranberry Sauce with Orange and Crystallized Ginger

Ingredients:

4 medium Gala apples, peeled, cored, quartered, and sliced
1 (12 oz) package fresh cranberries
5 tbsp. brown sugar (or more to taste)
1 tsp. grated orange zest
1/4 cup fresh orange juice
1/4 cup chopped crystallized ginger

Directions:

Place all of the apple pieces and cranberries in a large bowl and stir in brown sugar and orange zest.

Pour orange juice into the bottom of a large slow cooker and add the apple mixture.

Cover and turn on the slow cooker. Cook on low heat setting for about 8 hours, stirring occasionally, and breaking up the apple slices and cranberries with a wooden spoon as they soften.

Stir in crystallized ginger. Taste and add an additional brown sugar, if you find the sauce to be too tart.

Serve warm or at room temperature.

Source: Cookin Canuck. You can find it here.

Notes: Tasty stuff...and it always adds a nice touch to have homemade cranberry sauce instead of canned.

Slow Cooker Cranberry Sauce

Ingredients:

1/2 cup brown sugar
1/2 cup white sugar
1/4 tsp. cinanmon
1/2 cup orange juice
1/2 cup water
Ground ginger, to taste, optional
Fresh cranberries (12 oz)

Directions:

Combine all ingredients except the cranberries in a slow cooker. Stir well.

Add cranberries and stir to evenly coat.

Heat in the slow cooker on high heat setting for 3 hours, stirring the cranberries every hour.

After three hours on high, mash the cranberries. Continue to heat on high with the lid off for another 45 minutes.

Let cool and transfer to serving dish.

Recipe Notes: You can make this the day before Thanksgiving. It also makes the house smell amazing.

Saturday, January 25, 2014

The Last of the Eggnog...or Is It?


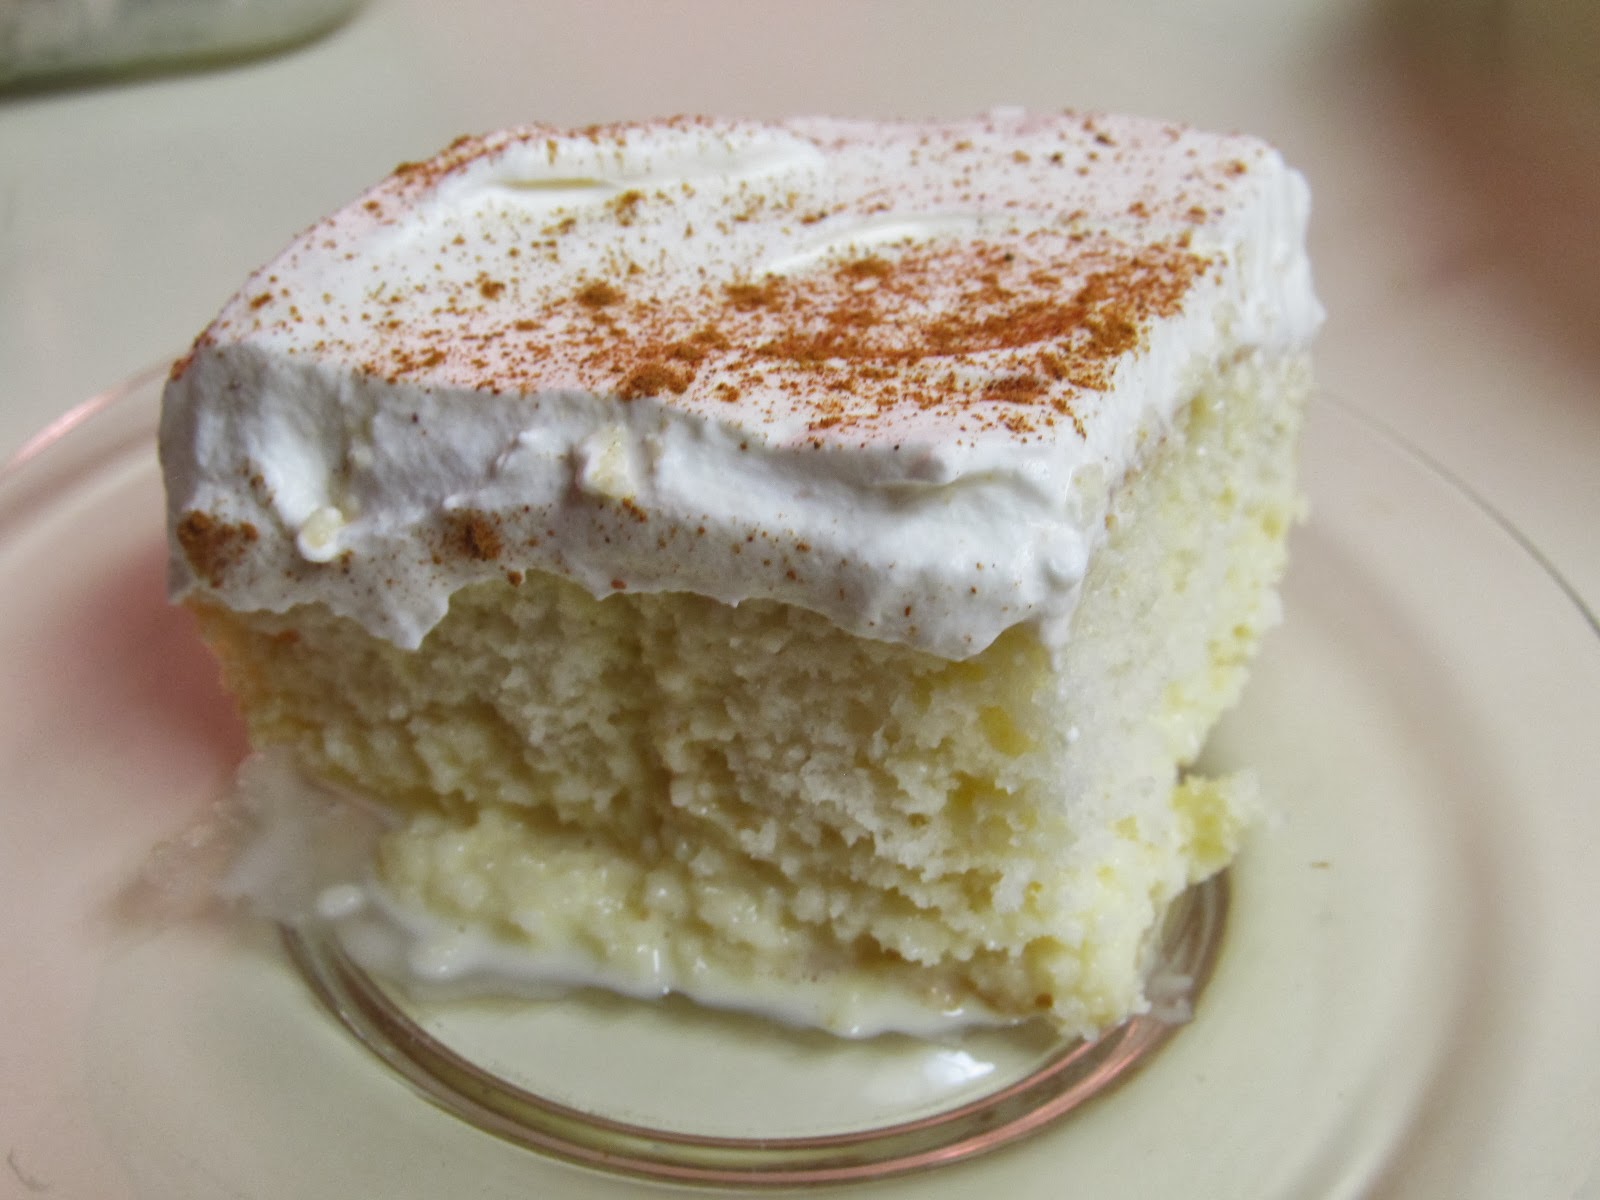
Ahhh, eggnog. Why are you only available a few months of the year? I will share a great recipe that uses store-bought eggnog. Then, I will show you how you can make a very easy version at home if you are craving eggnog in January...or July!


Eggnog Tres Leches Cake

Ingredients:

1 package white cake mix (regular size)
1 1/3 cups water
2 tablespoons canola oil
3 egg whites
2 cups eggnog
1 can (14 ounces) sweetened condensed milk
1/2 cup 2 percent milk
1 1/2 cups heavy whipping cream
1/4 cup sugar
1/8 teaspoon ground cinnamon
1/8 teaspoon ground nutmeg

Directions:

In a large bowl, combine the cake mix, water, oil, and egg whites; beat on low speed for 30 seconds. Beat on medium for 2 minutes. Pour into a greased and floured 13x9-inch baking pan.

Bake at 350 degrees F for 25 to 30 minutes or until a toothpick inserted near the center comes out clean. Cool on a wire rack. Using a skewer, poke holes in cake 1-inch apart.

In a large bowl, combine the eggnog, sweetened condensed milk, and 2 percent milk. Pour a scant 3/4 cup mixture over cake; let stand for 20-30 minutes or until liquid is absorbed. Repeat four times. Cover and refrigerate for 8 hours or overnight.

In a large bowl, beat cream until it begins to thicken. Add sugar; beat until soft peaks form. Spread over cake. Sprinkle with cinnamon and nutmeg. Refrigerate leftovers.

Yield: 15 servings.


Nutritional information: 1 piece equals 394 calories, 19 g fat, 62 mg cholesterol, 309 mg sodium, 51 g carbohydrate, trace fiber, 6 g protein.

Source: Taste of Home. You can find it here.


Ice Cream Eggnog

Ingredients:

Vanilla ice cream (amount depends on the number of servings you wish to make)
Milk, to achieve desired thickness
Rum extract, to taste
Nutmeg, to taste
Yellow food coloring, optional

Directions:

Place vanilla ice cream and milk in a blender (the amounts you use are dependent on how many servings you wish to make, and how thick you would like your eggnog to be). Flavor with rum extract and nutmeg to your taste.

Sprinkle with additional nutmeg, if desired.

Serve immediately.

Source: I was inspired by this recipe that I found in an Everyday Food magazine.

Notes: The ice cream helps you achieve a texture similar to that of store-bought eggnog. You can use any kind of milk you would like (skim, whole, half-and-half, etc.). You can make it thick (using less milk) if you want more of an eggnog shake. Or you can use more milk to achieve more of an eggnog thickness.

I would suggest starting out with about 1 teaspoon of rum flavoring, and 1/4 teaspoon of nutmeg and then adjusting this to your taste. I used more than 1 teaspoon of rum flavoring.

You can use yellow food coloring to make your eggnog look more like the store-bought variety, or you can keep it white. It's up to you!


Above: Ice cream eggnog (without yellow food coloring)

Above: Ice cream eggnog with a little yellow food coloring.

This really tastes just like store-bought eggnog. If you have a serious craving for eggnog when none can be found in the store, this easy recipe is for you.