Our family loves to cook. We're always trying new recipes. The only problem is that when you try so many recipes, it's hard to keep track of them all! So, we're going to post and share our recipe favorites here--both old and new.
There are an awful lot of cake recipes on our blog! Especially since our blog has only been up and running for 7 months!
But I promise you, each and every one of these cake recipes are worth it!
As for ice cream, isn't it the perfect compliment to cake?
I got this fantastic cake recipe from a co-worker. She would make it to celebrate everyone's birthday in the office. It was too hard to resist (I'm sure it added to my pregnancy weight gain!). It is honestly the best carrot cake I have ever had. My husband's favorite kind of cake is carrot cake, so this was a natural for his birthday celebration. Before I found this recipe, I tried a number of different carrot cakes (store-bought and homemade) to find just the right one. I just wasn't pleased. They were either too spice-cakey or too crumbly. This carrot cake is moist and hard to resist.
As for the ice cream, I dreamed up this recipe myself (one of my pregnant food craving dreams!). I had been craving the flavor of hazelnut. In order to satiate my craving, I got some hazelnut coffee creamer to flavor my glasses of milk and later, I got some chocolate hazelnut spread as well. I think the combination of milk, hazelnut coffee creamer, and chocolate hazelnut spread just sort of evolved into an ice cream recipe during my REM cycle!
While I would never pair these two recipes to serve together (the ice cream and cake are too rich to go together and the flavors don't match), I find that it is fitting to pair them together here since I craved the carrot cake during my first pregnancy and I dreamed up the ice cream during my second pregnancy!
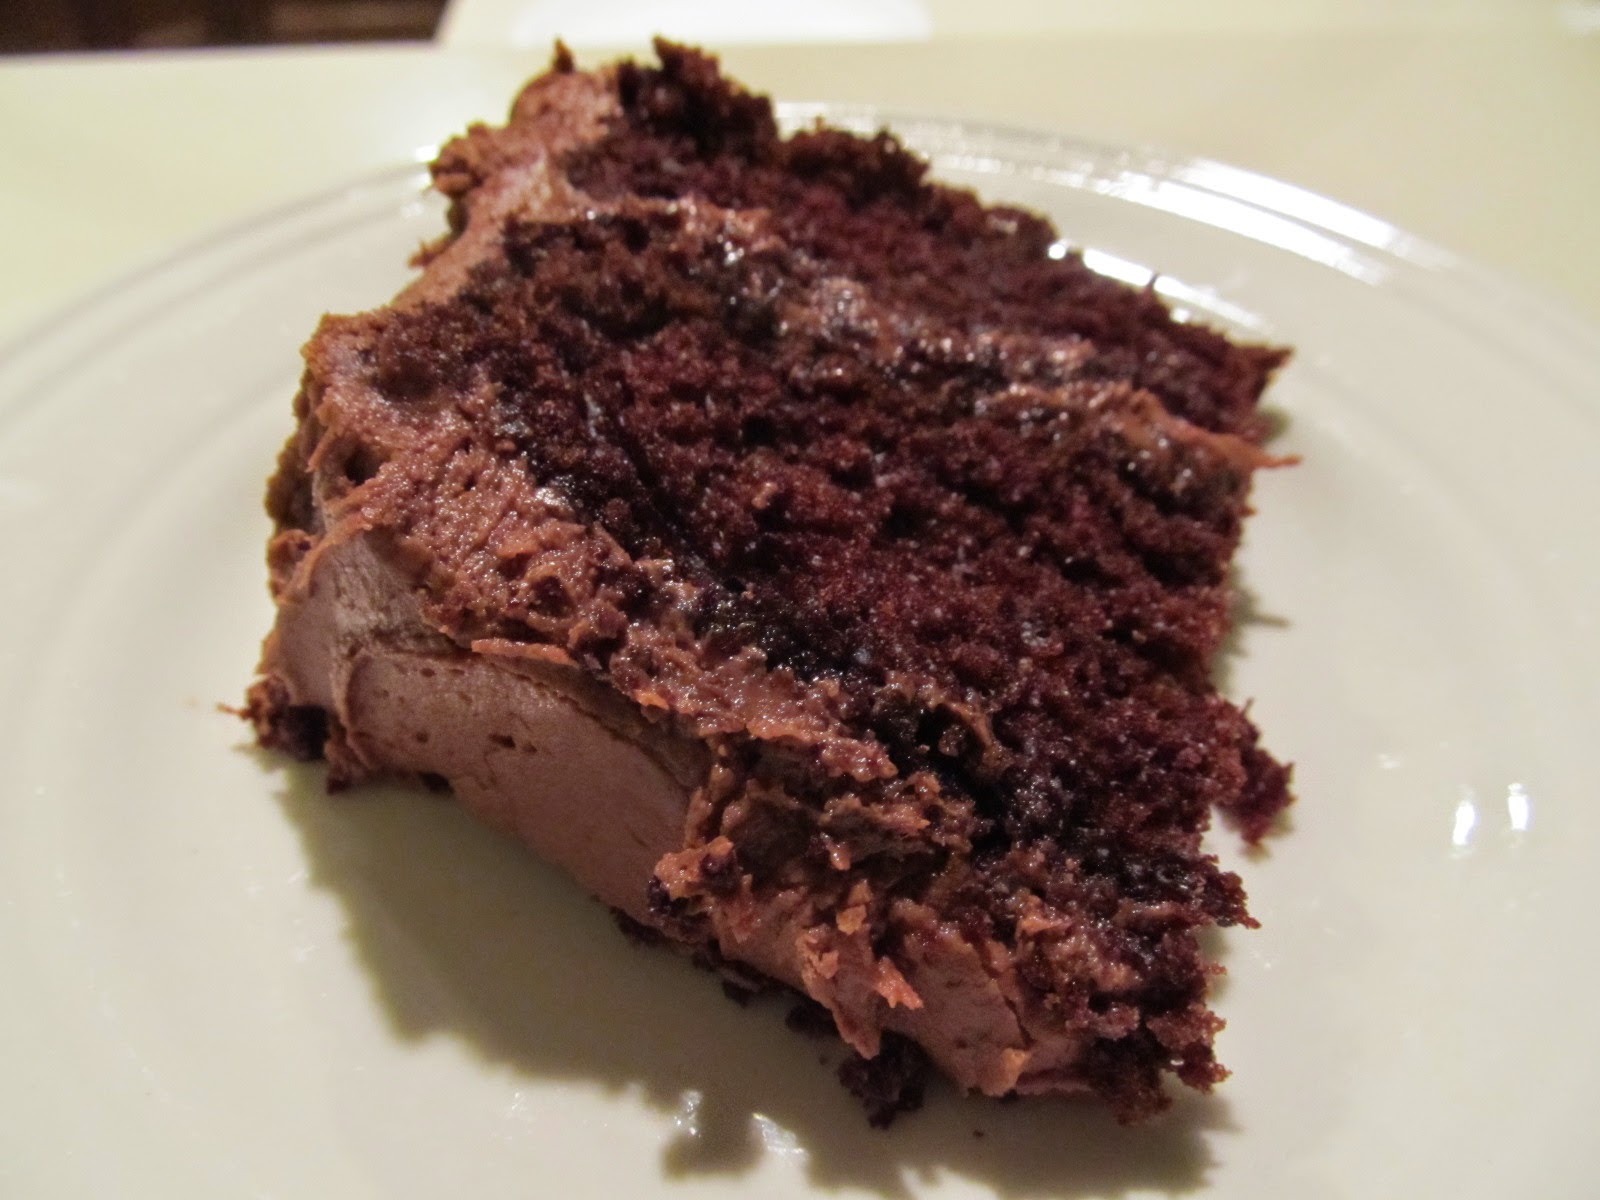
Oh, and I must apologize for the pictures. Each time, we had already dug in and it only occurred to me afterward that I needed to take a picture. So, the pictures are definite afterthoughts and they don't do these recipes the justice they deserve. They really are awful pictures. Sorry! (Notice how the carrot cake is placed on one of my son's baby plates because I was pressed for time and besides paper plates, it was the only thing I had nearby!)
Above: You can simply frost the layers and let the frosting overhang a little, or...
Above: You can frost the whole thing and bask in the wonderful cream cheese frosting/carrot cake combination. It's up to you!
10/21/10 Amendment: In order to class up this blog post (because my pictures were so lousy and Laurie's are so fantastic), I am adding one of my sister's posts from her personal blog with two of her ice cream recipes. These fantastic recipes came straight from her own brain!
Heather's Carrot Pineapple Cake
Cake:
1 1/2 cup flour
1 cup sugar
1 teaspoon baking powder
1 teaspoon baking soda
1 teaspoon cinnamon
1/2 teaspoon salt
2/3 cup salad oil
2 eggs
1 teaspoon vanilla
carrots, roughly sliced or chopped (enough to make 1 cup shredded)
1 cup crushed pineapple with juice (or half cup, if preferred)
Sift together first six ingredients (flour through salt).
Blend together next 4 ingredients (salad oil through shredded carrots) in a blender.
Combine dry and wet ingredients. Then add crushed pineapple with juice.
Pour batter into 3 greased baking pans. Bake at 350 degrees for 25-30 minutes.
For the frosting, whip together the final four ingredients (cream cheese through vanilla) and frost on top of cooled cake.
Source: My wonderful former co-worker, Heather Bowen.
Notes: I like a lot of frosting, so I would suggest doubling the frosting recipe. Also, I highly suggest using three cake pans instead of two. It is necessary for the consistency of the cake. If you do try to use two cake pans, you might have to cook the cake a little longer. Check the cake using the toothpick method to ensure that it is cooked completely, otherwise it might be too crumbly.
Hazelnut Chocolate Ice Cream
Makes 4 quarts
Ingredients:
8 cups heavy cream (see note below)
1 1/2 cups sugar
Pinch of salt
4 cups hazelnut flavored coffee creamer
1 1/4-1 1/2 cups toasted, chopped hazelnuts
1 container chocolate hazelnut spread (such as Nutella)
Directions:
In a large bowl, whisk together cream, sugar, salt, and coffee creamer. Refrigerate until you are able to add the cooled nuts. Toast hazelnuts and allow to cool. Stir cooled hazelnuts into the cream mixture. Transfer mixture to an ice cream maker, and freeze according to manufacturer's instructions.
You will want to swirl the chocolate hazelnut spread into the ice cream mixture before you ripen it in your freezer. The best way to do this is to spoon a layer of the ice cream into a freezer safe container and swirl a layer of chocolate hazelnut spread on top. Top with another layer of ice cream followed by another layer of chocolate hazelnut spread. Repeat until all of the ice cream and chocolate hazelnut spread has been combined. Be careful not to leave large clumps of chocolate hazelnut spread. You will want the swirls to be fine. When the spread freezes, it freezes very hard and if you have large swirls or clumps within the ice cream, it makes scooping the ice cream very difficult.
Allow ice cream to fully ripen in the freezer before serving (at least 2 hours). Store in an airtight, freezer safe container.
Source: The crazy craving dreams of a pregnant woman...me!
Notes: If you want to lighten this recipe and make it a little less rich, you can use 4 cups of heavy cream and 4 cups of half and half. I've tried it both ways. It is still great with the half and half. It is just a little lighter, not quite as rich, and a little less creamy.
Also, I must repeat that it is so important not to create large or thick pieces/swirls of chocolate hazelnut spread. It is so much tastier and easier to serve if you have fine, string-like swirls. The first time I made this, the swirls were very fine and I thought I would try it again with twice as much chocolate hazelnut spread and in much thicker swirls. The problem with this is that the chocolate hazelnut spread hardens as soon as it makes contact with the cold ice cream (it's kind of like the chocolate shells you can get on your soft serve ice cream cone). The result was that I had thick and impenetrable layers of chocolate hazelnut spread and I practically had to use a knife to serve the ice cream! The dainty, fine layers of chocolate hazelnut spread are far preferable for this recipe. If you want more chocolate hazelnut spread, I would suggest drizzling some more on top of your ice cream just prior to serving.
My roommates gave me an ice cream maker for my wedding and ever since then I have been making ice cream non-stop. I lay in bed thinking of new ideas for flavor combinations and I get so excited! The first kind I made was using the fresh mint in our back yard and it was delicious! Mint is of course one of my favorite things. After the mint, I decided to be more creative and I was inspired by my favorite ice cream shop, Jeni's (They always have very creative, gourmet and absolutely delicious flavors). So I made Cucumber Coconut Sorbet and Butternut Squash Ice Cream with Caramel & Candied Pecans. And they were both a success! hooray!!!
Cucumber Coconut Sorbet
I love how cool and refreshing cucumber is. People don't give cucumber enough opportunities as a dessert flavor, but I'm telling you this one is delish! It's light and tasty, with a smooth texture. Yum!
Ingredients:
2 large cucumbers
1 tablespoon honey
1 can light coconut milk
Juice from 1 lime
3/4 cup simple syrup, (recipe below)
Directions:
Blend the cucumbers and honey together in a blender or food processor until the cucumber is almost pureed, but still has some chunks. Refrigerate for 6-24 hours. The honey will draw out the moisture in the cucumbers. Then blend again until smooth, and pour into a fine strainer, pushing out juices and discarding pulp & peel.
Combine the juices with a can of coconut milk, the lime juice, and the simple syrup
Freeze in Ice cream maker for 20-30 minutes or until thick and creamy. YUM!!!
Simple Syrup
Ingredients:
1/2 cup sugar
1/4 cup light corn syrup
1/4 cup water
Directions:
In a small saucepan, combine the sugar, corn syrup and water and bring to a boil. Cook over moderate heat until the sugar dissolves, about 2 minutes. Remove from the heat. Let stand until cool, 30 minutes.
Butternut Squash Ice Cream
The squash has a richer flavor and is more decadent with the caramel and pecans. We had friends over for dinner last night and they were shocked that the secret ingredient was squash. It tastes a little like pumpkin pie, only more mild.
Ingredients:
One medium-sized butternut squash
1 tsp. vanilla
One recipe of your favorite vanilla ice cream
1 tsp. cinnamon
1/4 tsp. nutmeg
2-4 tbsp. brown sugar
One recipe of your favorite candied pecans (or toast pecans in a pan on the stove top while adding enough brown sugar to evenly coat the nuts, remove from heat and cool completely)
Directions:
Start by peeling and cubing one medium sized butternut squash. Boil for 5-10 minutes with a little vanilla in the water.
Using your favorite basic vanilla ice cream recipe, add cinnamon, nutmeg, and brown sugar.
Add a cup of the cream mixture in a blender with the butternut squash and puree until smooth. Pour into fine strainer to remove pulp. I would probably strain this twice. I only did it once and the texture was a little too grainy. Mix with remaining ice cream mixture.
Then pour into ice cream machine! and freeze!
Yummy yummy yummy.
Next up, I'm thinking Basil Lime.... I love my garden!
On June 30, 2009, my sister got married and we did cupcakes for her reception. It was a hit. My mom went completely overboard and made something like 45 dozen cupcakes (at least 30 different kinds of cupcakes).
I didn't go quite that crazy. I only did 6 kinds of cupcakes for a grand total of 12 dozen.
How did we make so many cupcakes without them spoiling, you ask? Most baked goods are extremely freezer friendly. We baked the cupcakes, labeled them, and froze them in plastic containers. Then, we defrosted them and topped them with the appropriate frostings/toppings the night before.
I meant to post the recipes on June 30th this year...but the date got away from me!
I would like to share 5 of the 6 cupcake recipes that I made (the sixth was a snickerdoodle cupcake that was quite tasty, but nowhere near the same tasty ballpark as the other five cupcakes).
Beware though, unless you have a lot of people to share these with, you are going to eat way more than you should. We had plenty of cupcakes to feed everyone at the wedding...and to spare. We were having cupcakes for Sunday desserts for weeks afterward!
The winning cupcakes were German Chocolate Cupcakes, Red Velvet Cupcakes, Key Lime Pie Cupcakes, White on White Cupcakes, and Chocolate Cupcakes with Penuche Frosting.
-->
German Chocolate Cupcakes
Ingredients:
24 paper liners for cupcake pans (2 1/2 inch size)
1 bar (4 ounces) German's sweet chocolate (I used a bar of Dove chocolate)
1 package (18.25 ounces) plain German chocolate cake mix
Place a rack in the center of the oven and preheat the oven to 350 degrees. Line 24 cupcake cups with paper liners. Set the pans aside.
To grate the chocolate, break the bar into pieces and drop them, one at a time, through the feed tube of a food processor while it is running (I simply chopped them up or you could use a blender). Or, carefully rub the chocolate bar with a hand-held coarse cheese grater, such as a Microplane (I tried that, and it took forever, hence the chopping). Set the grated chocolate aside.
Place the cake mix, pudding mix, sour cream, water, oil, eggs, and the grated chocolate in a large mixing bowl. Blend with an electric mixer on low speed for 30 seconds. Stop the machine and scrape down the sides of the bowl with a rubber spatula. Increase the mixer speed to medium and beat 2 minutes more, scrapin down the sides again, if needed. The batter should look thick and well combined. Spoon or scoop 1/3 cup batter into each lined cup, filling it three quarters of the way full. (You will get between 22 and 24 cupcakes; remove the empty liners, if any.) Place the pans in the oven.
Bake the cupcakes until they spring back when lightly pressed with your finger, 19-22 minutes. Remove the pans from the oven and place them on wire racks to cool for 5 minutes. Run a dinner knife around the edges of the cupcake liners, lift the cupcakes up from the bottoms of the cups using the end of a knife and allow them to finish cooling on a wire rack for 15 minutes before frosting.
Prepare the Coconut Pecan Frosting (recipe below).
Place a heaping tablespoon of frosting on each cupcake and spread it out with a short metal spatula or a spoon, taking care to cover the tops completely. The cupcakes are ready to serve.
Note: Store these cupcakes, in a cake saver or under a glass dome, at room temperature for up to 3 days or in the refrigerator for up to 1 week. Or freeze them, unwrapped in aluminum foil or in a cake saver; for up to 6 months. Thaw the cupcakes overnight in the refrigerator before serving.
Place the evaporated milk, sugar, butter, egg yolks, and vanilla in a large saucepan over medium heat. Cook, stirring constantly with a wooden spoon, until thickened and golden brown in color, 10-12 minutes. Remove from the heat. Stir in the coconut and pecans. Cool the frosting to room temperature before spreading, 20 minutes.
Notes: I didn't get to personally try these because they got gobbled up at the reception, but I overheard someone say that they were the best German chocolate cupcakes they had ever had.
Source: From the book entitled Cupcakes! From the Cake Mix Doctor by Anne Byrn, 2005
Red Velvet Cupcakes
Ingredients:
24 paper liners for cupcake pans (2 1/2 inch size)
White Chocolate Cream Cheese Frosting (recipe below)
Directions:
Place a rack in the center of the oven and preheat the oven to 350 degrees. Line 24 cupcake cups with paper liners. Set the pans aside.
Place the cake mix, pudding mix, sour cream, water, oil, food coloring, and eggs in a large mixing bowl. Blend with an electric mixer on low speed for 30 seconds. Stop the machine and scrape down the sides of the bowl with a rubber spatula. Increase the mixer speed to medium and beat 2 minutes more, scraping down the sides again, if needed. The batter should look thick and well combined. Fold in the chocolate chips. Spoon or scoop 1/3 cup batter into each lined cupcake cup, filling it three quarters of the way full. (You will get between 22 and 24 cupcakes; remove the empty liners, if any.) Place the pans in the oven.
Bake the cupcakes until they spring back when lightly pressed with your finger, 18-20 minutes. Remove the pans from the oven and place them on wire racks to cool for 5 minutes. Run a dinner knife around the edges of the cupcake liners, lift the cupcakes up from the bottoms of the cups using the end of the knife. Place them on a wire rack to cool for 15 minutes before frosting.
Meanwhile, prepare the White Chocolate Peppermint Cream Cheese Frosting (recipe below).
Place a heaping tablespoon of frosting on each cupcake and swirl to spread with a short metal spatula or a spoon, taking care to cover the tops completely (I piped mine on with a frosting bag and a large frosting tip). Place these cupcakes, uncovered or in a cake server, in the refrigerator until the frosting sets, 20 minutes. The cupcakes are ready to serve.
White Chocolate Cream Cheese Frosting
Ingredients:
6 ounces white chocolate, coarsely chopped (or white chocolate chips)
4 ounces (half an 8 ounce package) reduced-fat cream cheese, at room temperature
4 tablespoons (1/2 stick) butter, at room temperature
1 teaspoon vanilla or peppermint extract
2-2 1/2 cups confectioners' sugar, sifted
Directions:
Place the white chocolate in a small glass bowl in the microwave oven on high power for 1 minute. Remove the bowl from the oven and stir with a wooden spoon or rubber spatula until it is smooth. Set the chocolate aside to cool.
Place the cream cheese and butter in a large mixing bowl. Beat with an electric mixer on low speed until well combined, 30 seconds. Stop the machine. Add the melted white chocolate and blend on low speed until just combined, 30 seconds. Add the vanilla and 2 cups of the confectioners' sugar and blend on low speed until the sugar is incorporated, 30 seconds more. Increase the mixer speed to medium and beat until the frosting is fluffy, 1 minute more, adding up to 1/2 cup more sugar if needed to make a spreadable consistency.
Notes: For the frosting, make it the consistency that you would like. If it is too stiff, add 1-2 tablespoons of milk (or more, if needed). If it is too runny, add more powdered sugar (as much as you feel is needed to make it the right consistency). Also, I opted to use vanilla instead of peppermint flavoring for these cupcakes and they were fantastic.
Source: From the book entitled Cupcakes! From the Cake Mix Doctor by Anne Byrn, 2005
Key Lime Pie Cupcakes
Ingredients:
Cupcakes:
1 large lime, scrubbed (for 1 teaspoon zest and 2 tablespoons juice)
Place a rack in the center of the oven and preheat the oven to 350 degrees. Line 24 cupcacke cups with paper liners. Set the pans aside.
Prepare the cupcake batter. With a citrus zester or fine grater, zest the lime and reserve 1 teaspoon. Cut the lime in half and squeeze the juice over a strainer into a small bowl; you should have 2 tabspoons. Set aside. Separate 3 of the eggs, place the whites in a large clean mixing bowl and the yolks in another mixing bowl.
Add the remaining egg, cake mix, pudding mix, water, oil, coconut flavoring and lime zest and juice to the yolks. Blend with an electric mixer on low speed for 30 seconds. Stop the machine and scrape down the sides of the bowl with a rubber spatula. Increase the mixer speed to medium and beat 2 minutes more, scraping down the sides again if needed. The batter should look well blended. Spoon or scoop 1/4 cup batter into each lined cupcake cup, filling it two thirds of the way full. Place the pans in the oven.
Bake the cupcakes until they are lightly golden and spring back when lightly pressed with your finger, 18-22 minutes. Remove the pans from the oven and place them on wire racks to cool for 5 minutes. Increase the oven heat to 450 degrees.
Run a dinner knife around the edges of the cupcake liners, lift the cupcakes up from the bottoms of the cups using the end of the knife, and pick them out of the cups carefully with your fingertips. Place them on a wire rack to cool for 15 minutes before filling.
Meanwhile, prepare filling; Place the sweetened condensed milk and Key lime juice in a small bowl and stir to combine. Spoon the mixture into a pastry bag fitted with a medium tip. Press the tip 1/4 inch into the top center of each cooked cupcake and squeeze the bag to release about 1 tablespoon filling into the cupcake. Scrape off any excess filling with a rubber spatula. Place the cooled cupcakes nearly side by side on a baking sheet.
Prepare the frosting. The original recipe called for meringue, but I stink at making meringue, so I improvised a marshmallow frosting. The recipe is below. If you're good at meringue follow these instructions. Prepare the meringue: Add the cream of tartar to the reserved egg whites and beat with an electric mixer on high speed until frothy, 45 seconds. Add the coconut flavoring and 1 tablespoon of the sugar. Continue beating on high, adding 1 tablespoon sugar at a time, until the whites form stiff peaks (if you pull the beaters from the meringue, the meringue should extend from the beaters in straight stiff peaks). Spoon 2 tablespoons meringue onto the top of each cupcake and swirl to spread it just to the edges with a short metal spatula or spoon. Place the pan in the oven. Bake until the meringue is light nutty brown in color, 5-6 minutes. Run a dinner knife around the edges of the cupcake liners, lift the cupcakes up from the bottoms of the cups using the end of a knife, and pick them out of the cups carefully with your fingers. Serve at once, or allow the cupcakes to cool 10 minutes, then serve.
Note: Store these cupcakes in a cake saver at room temperature for up to 3 days (or longer if you use the marshmallow frosting. If you use the marshmallow frosting, they can be frozen as well).
Marshmallow Frosting
Ingredients:
1/4 cup (1/2 stick) butter, softened
1 jar (7 oz) Jet Puffed Marshmallow Creme
1 tsp. vanilla
1 pkg. (16 oz) powdered sugar
1-2 Tbsp. milk, divided
See note below (to make the frosting with a Key Lime Pie taste)
Directions:
Place butter, marshmallow creme and vanilla in a small bowl; beat on medium speed until well-blended. Gradually add sugar, beating after each addition until well blended.
Blend in 1 Tbsp. of the milk. Add remaining 1 Tbsp. if necessary for desired spreading consistency.
This recipe makes enough to fill and frost a 2 layer cake.
Notes: I had leftover cupcake filling (the sweetened condensed milk and Key lime juice mixture), so I added it to the frosting and added more powdered sugar to make sure it was the right consistency. It added just the perfect Key Lime Pie kick to the cupcakes. I wouldn't skip that step because it made the frosting sooooo yummy.
Source: From the book entitled Cupcakes! From the Cake Mix Doctor by Anne Byrn, 2005
White on White Cupcakes
Ingredients:
24 paper liners for cupcake pans (2 1/2 inch size)
1 cup (6 ounces) white chocolate chips
1 package (18.25 ounces) plain white cake mix
1 cup whole milk
1/3 cup vegetable oil
1 large egg
3 large egg whites
1 teaspoon pure vanilla extract
Buttercream Frosting (recipe below)
White chocolate curls
Directions:
Place a rack in the center of the oven and preheat the oven to 350 degrees. Line 24 cupcake cups with paper liners. Set the pans aside.
Place the white chocolate chips in a medium-size glass mixing bowl in the microwave oven on high power for 50 seconds to 1 minute. Remove the bowl from the oven and stir with a small rubber spatula until it is smooth. Set it aside to cool slightly.
Place the cake mix, milk, oil, egg, egg whites, vanilla, and melted white chocolate in a large mixing bowl. Blend with an electric mixer on low speed for 30 seconds. Stop the machine and scrape down the sides of the bowl with a rubber spatula. Increase the mixer speed to medium and beat 2 minutes more, scraping down the sides again if needed. Spoon or scoop 1/4 cup batter into each lined cupcake cup, filling it two thirds of the way full. (You will get between 22-24 cupcakes; remove the empty liners, if any.) Place the pans in the oven.
Bake the cupcakes until they are lightly golden and spring back when lightly pressed with your finger, 17-20 minutes. Remove the pans from the oven and place them on wire racks to cool for 5 minutes. Run a dinner knife around the edges of the cupcake liners, lift the cupcakes up from the bottoms of the cups using the end of the knife, and pick them out of the cups carefully with your fingertips. Place them on a wire rack to cool for 15 minutes before frosting.
Meanwhile, prepare the Buttercream Frosting (recipe below).
Place a heaping tablespoon of frosting on each cupcake and swirl to spread it out with a short metal spatula or a spoon, taking care to cover the tops completely. Garnish with a white chocolate curl. The cupcakes are ready to serve.
Note: Store these cupcakes, in a cake saver or under a glass dome, at room temperature for up to 3 days or in the refrigerator for up to 1 week. Or freeze them, wrapped in aluminum foil or in a cake saver, for up to 6 months. Thaw the cupcakes overnight in the refrigerator before serving.
White Chocolate Curls:
It's easy to make white chocolate curls if you have a 6-8 ounce bar of white chocolate and a sharp vegetable peeler. Place the white chocolate on a counter at room temperature for 1 hour to soften slightly and let it sit flat side up (the side that has no impressed designs or the name of the chocolate on it). Drag the vegetable peeler across the top of the chocolate bar (I find it easier to pull toward me). The softer the chocolate and the longer you drag the peeler, the bigger the curl. If you work with cool chocolate, you will make white chocolate shavings, which look beautiful mounded up in the center of this cupcake. Curls or shavings--it's a win-win situation.
Buttercream Frosting:
Ingredients:
8 tablespoons (1 stick) butter, at room temperature
3 cups confectioners' sugar, sifted
3-4 tablespoons milk
1 teaspoon pure vanilla extract (if you want to make different flavors of buttercream, you can substitute 1 teaspoon almond extract or 1-2 teaspoons coconut flavoring)
Directions:
Place the butter in a large mixing bowl. Blend with an electric mixer on low speed until fluffy, 30 seconds. Stop the machine and add the confectioners' sugar, 3 tablespoons of the milk and the vanilla. Blend with the mixer on low speed until the sugar is incorporated, 1 minute. Increase the speed to medium and beat until light and fluffy, 1 minute more. Add up to 1 tablespoon more milk if the frosting seems too stiff.
Notes: I didn't do the white chocolate curls since I didn't have time. Also, I like a LOT of frosting on my cupcakes and I felt like this recipe didn't make enough frosting for my tastes. I would definitely double the frosting recipe for these cupcakes. Just look at the picture and you will see that there wasn't enough frosting for these. I tried to get creative with having less frosting than desired, but I don't think my efforts were very successful!
Source: From the book entitled Cupcakes! From the Cake Mix Doctor by Anne Byrn, 2005
Chocolate Cupcakes with Penuche Filling
A layer of penuche creates frosted chocolate cupcakes reminiscent of a delicious mini layered cake.
1 oz grated semisweet baking chocolate, if desired
Directions:
Heat oven to 350 degrees for shiny metal pans (or 325 degrees for dark or nonstick pans). Spray bottoms only of 24 regular-size muffin cups with baking spray with flour.
In large bowl, beat cake mix, water, oil, eggs, and vanilla with electric mixer on low speed 30 seconds. Beat on medium speed 2 minutes, scraping bowl occasionally. Divide batter evenly among muffin cups.
Bake 18-24 minutes or until toothpick inserted into center of cupcake comes out clean. Cool 15 minutes. Remove from pan to cooling rack. Cool completely, about 30 minutes.
Meanwhile, in 2 quart saucepan, melt butter over medium heat. Stir in brown sugar. Heat to boiling, stirring constantly; reduce heat to low. Boil and stir 2 minutes. Stir in milk. Heat to boiling; remove from heat. Pour mixture into medium bowl; refrigerate 30 minutes or more until almost completely cool and the consistency of thick caramel ice cream topping.
Beat powdered sugar into cooled brown sugar mixture on low speed until smooth. If frosting becomes too stiff, stir in more milk (a tablespoon at a time).
Using serrated knife, cut each cupcake horizontally, being careful not to break either half. Place heaping tablespoon of filling onto each cupcake base. Replace rounded cupcake tops. Pipe or spoon remaining frosting onto cupcake tops. Garnish with grated chocolate, if desired. Store in airtight container at room temperature.
Notes: I didn't cut the cupcakes in half. I just put all of the frosting on top. I figured it would just be an unnecessary and messy step. If the brown sugar mixture isn't set up enough before you beat in the powdered sugar, you will end up with more of a glaze...unless you add a whole lot more powdered sugar than the recipe calls for to stiffen it up.
Yesterday I shared two new favorite cake recipes I discovered.
Today, I'm going to share two old favorites.
One of the nice things about these two cakes is that if you don't have two cake pans, you don't have to worry because the first cake uses a bundt pan and the second cake uses a 13x9 inch pan--and most people have one of those.
The first recipe is a chocolate and caramel concoction that is really rich, but it is to die for. I discovered the second recipe when I was looking for a birthday cake to make for my brother-in-law's birthday last year. I chose this recipe because I had a jar of marshmallow creme that I wanted to use up. The marshmallow creme is used in the frosting and you won't be able to stop eating it! Besides, doesn't marshmallow creme make EVERYTHING better? Okay, well maybe marshmallow creme wouldn't do mashed potatoes and gravy any favors, but in a dessert, marshmallow creme is a welcome ingredient!
Vegetable oil spray for misting the pan
Flour for dusting the pan
1 package (18.25 oz) plain devil's food cake mix
1 package (6 oz.; 1 cup) semisweet chocolate chips
3/4 cup chopped pecans
1 package (3.9 oz.) chocolate instant pudding mix
1 cup sour cream
1/2 cup vegetable oil, such as canola, corn, safflower, soybean or sunflower
1/4 cup water
4 large eggs
1 teaspoon pure vanilla extract
Penuche Frosting (see below)
Instructions:
Place a rack in the center of the oven and preheat the oven to 350 degrees F. Lightly mist a 10 inch tube pan with vegetable oil spray, then dust with flour. Shake out the excess flour. Set the pan aside.
Place 2 tablespoons of the cake mix, the chocolate chips, and the pecans in a small bowl. stir and set aside.
Place the remaining cake mix, along with the chocolate pudding mix, sour cream, oil, water, eggs and vanilla in a large mixing bowl. Blend with an electric mixer on low speed for 1 minute. Stop the machine and scrape down the sides of the bowl with a rubber spatula. increase the mixer speed to medium and beat 2 to 3 minutes more, scraping the sides down again, if needed. The batter should be thick and well blended. Fold in the chocolate chip and pecan mixture until it is well distributed. pour the batter into the prepared pan, smoothing the top with the rubber spatula. Place the pan in the oven.
Bake the cake until it springs back when lightly pressed with your finger and just starts to pull away from the sides of the pan, 50-55 minutes. Remove the pan from the oven and let it cool on a wire rack for 15 minutes. Run a long, sharp knife around the edge of the cake and invert the cake onto a cooling rack, then invert it again onto a serving platter to finish cooling, 20 minutes more.
Prepare the Penuche Frosting. Spread the top and sides of the cooled cake with the warm frosting, using clean, smooth strokes. Let the cake stand 30 minutes before slicing and serving.
Store this cake, covered in aluminum foil, at room temperature for up to 1 week or freeze it, wrapped in foil, for up to 6 months. Thaw overnight in the refrigerator before serving.
Penuche Frosting
Makes 3 cups, enough to frost a 2 or 3 layer cake or a bundt or tube cake.
Preparation time: 10 minutes
Ingredients:
1 cup packed light brown sugar
8 tablespoons (1 stick) butter
1/4 cup whole milk
2 cups confectioners' sugar, sifted
Instructions:
Place the brown sugar and butter in a medium-size heavy saucepan over medium heat. Simmer, stirring constantly, until well combined, 2 minutes. Carefully pour in the milk, stirring and bring the mixture to a boil. Remove the pan from the heat and cool slightly.
Place the confectioners' sugar in a large mixing bowl. Pour the hot brown sugar mixture over the confectioners' sugar. Beat with an electric mixer on low speed until the frosting is smooth and creamy, 2-3 minutes.
Use immediately (while still warm) to frost the cake of your choice or the frosting will harden. If it does harden while you are frosting the cake, simply place the pan back over low heat and stir until the frosting softens up.
Notes: If you don't like nuts or don't have them on hand, you can omit them. But don't skip the chocolate chips! The frosting is like a glaze that sets up after you pour it on the cake. Don't even try to use a knife to cover parts of the cake you may have missed. This frosting sets up so fast that if you try to do that, your cake will just look messy. Just let the frosting fall where it may and enjoy!
Source: The Cake Mix Doctor cookbook
Above: Mississippi Mud Cake with such luscious, gooey frosting that it overflows!
Mississippi Mud Cake
Ingredients:
Vegetable oil spray for misting the pan
1 package (18.25 oz) plain devil's cake mix
8 tablespoons (1 stick) butter or margarine, melted
1 1/2 cups buttermilk
2 large eggs
1 teaspoon pure vanilla extract
1 jar (7 oz) marshmallow creme
Chocolate pan frosting (recipe below)
1 cup chopped toasted pecans (optional)
Directions:
Place a rack in the center of the oven and preheat the oven to 350 degrees. Lightly mist a 13 x 9 inch baking pan with vegetable oil spray. Set the pan aside.
Place the cake mix, melted butter, buttermilk, eggs and vanilla in a large mixing bowl. Blend with an electric mixer on low speed for 1 minute. Stop the machine and scrape down the sides of the bowl with a rubber spatula. Increase the mixer speed to medium and beat 2 minutes more, scraping the sides down again if needed. The batter should look well blended. Pour the batter into the prepared pan, smoothing it out with the rubber spatula. Place the pan in the oven.
Bake the cake until it springs back when lightly pressed with your finger, 40-42 minutes. Remove the pan from the oven and place it on a wire rack to cool. Spread the warm cake with the marshmallow creme.
Prepare the Chocolate Pan Frosting.
Pour the hot frosting on top of the marshmallow creme and spread it out with a spatula so that the frosting reaches the edges of the cake. Scatter the top with the toasted pecans. Cool the cake for 20 minutes before serving.
*Store this cake, covered in aluminum foil, at room temperature for up to 1 week. Or freeze it, wrapped in foil, for up to 6 months. Thaw the cake overnight on the counter before serving.
Place the butter in a medium saucepan and melt over low heat, 2-3 minutes. Stir in the cocoa powder and milk. Let the mixture come just to a boil, stirring and then remove the pan from the heat. Stir in the confectioners' sugar until the frosting is thickened and smooth.
Pour the warm frosting over the top of a cooled cake of your choice, spreading it with a spatula so that it reaches all sides of the cake. Work quickly because this frosting goes on best while still warm.
Notes: Again, if you don't like nuts or don't have any on hand, you can omit them and the cake is just as good. I also swirled the frosting into the marshmallow creme to create a marbled effect.
It's birthday season in my family (on my husband's side, we have 4 birthdays between April-July and on my side, we have 4 birthdays between April-May).
But even when it isn't birthday season, who wouldn't go for a piece of cake?
I have found great success with the cakes found in The Cake Doctor cookbook (I LOVE those books--I have all of them--there are three cake doctor books, one cupcake doctor book, a dinner doctor book, and a potluck/what should we bring doctor book--and I hope there are many more to come!).
I am going to share two great cake recipes that I just recently tried (one last month and one we just had yesterday). I might have to do another cake post tomorrow to post two of my old favorites from this book that I have been making for a few years now.
These two cakes are similar, yet opposite. They both have chocolate frosting, but one is white chocolate and one is regular chocolate.
They are fantastic. Pair them with a glass of cold milk or a scoop of your favorite ice cream and you will have a dessert that is to die for!
Deeply Chocolate Almond Cake with Chocolate Cream Cheese Frosting
Ingredients:
Solid vegetable shortening for greasing the pans
Flour for dusting the pans
1 ounce unsweetened chocolate, coarsely chopped (see notes below)
1/3 cup water
1 package (18.25 ounces) plain devil's food cake mix
1 cup buttermilk
1/2 cup vegetable oil, such as canola, corn, safflower, soybean, or sunflower
3 large eggs
1 teaspoon pure almond extract
Chocolate Cream Cheese Frosting (recipe below), made with pure almond extract
Directions:
Place a rack in the center of the oven and preheat oven to 350 degrees F. Generously grease two 9-inch round cake pans with solid vegetable shortening, then dust with flour (or you can use cocoa powder if you want to make it even richer). Shake out the excess flour. Set the pans aside.
Heat the chopped chocolate and water in a small saucepan over low heat until melted, stirring constantly. Set the pan aside to cool for 10 minutes.
Place the cake mix, buttermilk, oil, eggs, almond extract, and melted chocolate mixture in a large mixing bowl. Blend with an electric mixer on low speed for 1 minute. Stop the machine and scrape down the sides of the bowl with a rubber spatula. Increase the mixer speed to medium and beat 2 minutes more; scraping the sides down again if needed. The batter should look thick and combined. Divide the batter between the prepared pans, smoothing it out with the rubber spatula. Place the pans in the oven side by side.
Bake the cakes until they spring back when lightly pressed with your finger and just start to pull away from the sides of the pan, 28-30 minutes. Remove the pans from the oven and place them on wire racks to cool for 5 minutes. Run a dinner knife around the edge of each layer and invert each onto a rack, then invert them again onto another rack so that the cakes are right side up. Cool completely, 30 minutes.
Meanwhile, prepare the Chocolate Cream Cheese Frosting.
Place one cake layer, right side up, on a serving platter. Spread the top with frosting. Place the second layer, right side up, on top of the first layer and frost the top and sides of the cake with clean, smooth strokes.
Chocolate Cream Cheese Frosting
Ingredients:
1 package (8 ounces) cream cheese, at room temperature
8 tablespoons (1 stick) butter, at room temperature
1/2 cup unsweetened cocoa powder
1 teaspoon pure almond extract (or pure vanilla extract--see notes below)
4 cups confectioners' sugar, sifted
Directions:
Place the cream cheese and butter in a large mixing bowl. Blend with an electric mixer on low speed until combined, 30 seconds. Stop the machine. Add the cocoa powder, extract, and confectioners' sugar and blend with the mixer on low speed until the ingredients are moistened, 30 seconds. Increase the speed to medium and beat until the frosting is fluffy, 2 minutes more.
Use at once to frost the top and sides of the cake of your choice.
Note: If you don't like almond flavoring, or if you simply want a good old fashioned chocolate cake instead of almond chocolate, substitute vanilla extract for the almond extract in both the cake and the frosting. Also, if you want to save some time, use Pam for Baking rather than greasing the pans with shortening. It works just as well and it is a lot less messy! Finally, I melted the chocolate in the microwave rather than in a pan on the stove (checking and stirring at 30 second intervals).
Source: The Cake Mix Doctor cookbook
Bride's Cake with Raspberry Filling and White Chocolate Frosting
Ingredients:
Solid vegetable shortening for greasing the pans
Flour for dusting the pans
1 package (18.25 ounces) plain white cake mix
1 cup whole milk
8 tablespoons (1 stick) butter, melted
3 large eggs
2 teaspoons pure vanilla extract
White Chocolate Frosting (recipe below)
1/4 cup seedless raspberry jam (see notes below)
1 cup fresh raspberries, rinsed and drained (see notes below)
Directions:
Place a rack in the center of the oven and preheat the oven to 350 degrees F. Generously grease two 9-inch round cake pans with solid vegetable shortening, then dust with flour. Shake out the excess flour. Set the pans aside.
Place the cake mix, milk, melted butter, eggs, and vanilla in a large mixing bowl. Blend with an electric mixer on low speed for 1 minute. Stop the machine and scrape down the sides of the bowl with a rubber spatula. Increase the mixer speed to medium and beat 2 minutes more, scraping the sides down again if needed. The batter should look well blended. Divide the batter evenly into the prepared pans, smoothing it out with the rubber spatula. Place the pans in the oven side by side.
Bake the cakes until they are light brown and spring back when lightly pressed with your finger, 27-29 minutes. Remove the pans from the oven and place them on wire racks to cool for 10 minutes. Run a dinner knife around the edge of the cakes and invert each onto a rack, then invert them again onto another rack so that the cakes are right side up. Allow to cool completely, 30 minutes more.
Meanwhile, prepare the White Chocolate Frosting.
Place one cake layer, right side up, on a serving platter. Spread the top with a thin layer of the White Chocolate Frosting, then spread with the raspberry jam, spreading the jam with a spatula up to 1 inch from the cake edge. Place the second layer, right side up, on top of the jam. Spread frosting on the top and sides of the cake with clean, smooth strokes.
Garnish the cake with the fresh raspberries. Slice and serve.
White Chocolate Frosting
Ingredients:
6 ounces white chocolate, coarsely chopped (see notes below)
1 package (8 ounces) cream cheese, at room temperature
4 tablespoons (1/2 stick) butter, at room temperature
1 teaspoon pure vanilla extract
2 1/2 cups confectioners' sugar, sifted (see notes below)
Directions:
Place the white chocolate in a small saucepan and melt over low heat, 4 minutes, stirring constantly. Remove the pan from the heat and let the chocolate cool.
Place the cream cheese and butter in a large mixing bowl. Beat with an electric mixer on low speed until well combined, 30 seconds. Stop the machine. Add the melted white chocolate and blend on low for 30 seconds. Add the vanilla and confectioners' sugar and blend on low speed for 30 seconds more. Increase the mixer speed to medium and beat until the frosting is fluffy, 1 minute more.
Use to frost the top and sides of the cake of your choice. Refrigerate the frosted cake until serving time.
Notes: I made this cake for my mother's birthday. She just wanted a white on white cake and declined the raspberries. Having now tasted this cake, I can say that it was fabulous without the raspberry jam and fresh raspberries, but I am sure that it would be fantastic with the raspberries as well (not to mention a very pretty and decorative addition). Also, I melted my chocolate in the microwave (checking it at 30 second intervals and stirring until it was melted to avoid burning). It was just faster that way and I'd rather get a bowl dirty than a pan. The last change I made was that I added much more powdered sugar to the frosting than the recipe called for. The frosting looked great as followed by the recipe, but it was a little wet for my tastes. I kept adding powdered sugar until the frosting was fluffy and creamy--I probably added about 6 cups of powdered sugar (I eyeballed it). The frosting was still moist and delicious--there was just more of it and it was a little fluffier than the original frosting.


 Above: You can simply frost the layers and let the frosting overhang a little, or...
 Above: You can frost the whole thing and bask in the wonderful cream cheese frosting/carrot cake combination. It's up to you!


