Showing posts with label Beverages. Show all posts

Friday, December 25, 2020

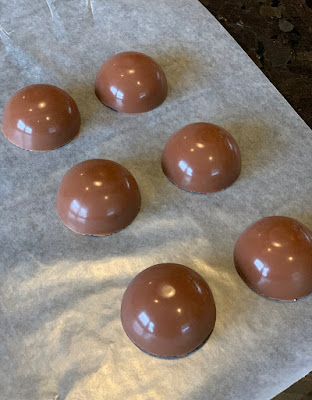
Hot Cocoa Bombs


I think everybody either made or tried hot cocoa bombs this season. It was the "it" holiday sweet. First of all, I apologize for the length of this post. Once you get the hang of these, they aren't too bad to make at all. However, there is a bit of a learning curve to them. But practice makes perfect! Also, even if they aren't perfect, they will still taste fantastic.

I researched a lot of videos on YouTube before attempting these. Speaking of, I made my own video (my first ever for this blog!) because you really have to see how it is done to truly understand how to do it. Watch this 5 minute video (the link is for those viewing the mobile version, or if you are viewing the web version, you can click on the same video below, which for some reason, won't even appear on the mobile version), and then we can talk about what I learned through this process.


One of the videos I first researched insisted that tempered chocolate was a must because it was far superior taste-wise than using melting wafers.

So, I then studied up on tempering chocolate and even bought a spatula with a built in thermometer (you can find that here). I tried the microwave tempering method (where you keep the chocolate under a certain temperature so that it never becomes untempered), and I am not sure if my thermometer wasn't reading the temperature correctly or what, but my chocolate apparently became too hot (even though my thermometer said I was still okay) and therefore my chocolate became untempered. I know this, because it never regained that snap sound that tempered chocolate makes once it hardens again, it was dull rather than shiny, and it was a little soft.

So, then I did the stove top method to temper my chocolate...and it worked! I had beautifully tempered dark chocolate...and as soon as I tried to remove it from the mold, it cracked and shattered (that beautiful snapping sound that proves that you have correctly tempered your chocolate was totally there. Ha ha). Perhaps if I had done a thicker layer of chocolate or a second layer of chocolate, it would have been strong enough to remove from the mold without breaking. I guess I won't know for now, because at that point, I went to plan B (using melting wafers).

In my research, I learned that tempering milk and white chocolate is even harder than tempering semi-sweet or dark chocolate (because the temperatures that you temper at are different. They are lower temperatures than with dark chocolate).

I learned that chocolate melting wafers aren't really considered true chocolate because they don't contain cocoa butter. Candy melts or melting wafers contain added oils to help the chocolate solidify and hold its shape.

I also learned that chocolate chips can't be tempered. They don't have cocoa butter and they are too soft for tempering. In order to temper chocolate, you have to start with tempered chocolate. Tempered chocolate contains cocoa butter. For instance, a chocolate bar that snaps when you break off a square and contains cocoa butter is tempered. A chocolate chip never really snaps. It is soft, even when it holds its shape. A chocolate chip's composition is specifically made the way it is so that they can be soft and chewy at room temperature so you have a soft and chewy chocolate chip cookie instead of a cookie with a chocolate crunch. Tempered chocolates have that snap, shine, solidity, and the ability to hold its shape at room temperature.

You can add vegetable oil to chocolate chips to help it hold its shape at room temperature better, but then that makes them very similar to melting wafers anyway.

So, here's what I learned through a lot of trial and error:

For this particular recipe, tempering is not for me. It might be for you, but it is not for me! I am too much of a chocolate amateur. It just makes this recipe more time consuming and difficult. 

If tempering is for you, and you are a skilled chocolatier, feel free to buy high quality tempered chocolate, chop it up, melt it down, make sure it is tempered again and make your beautiful pure chocolate cocoa bombs.

I, however, wanted something that would not only be delicious, but also faster and easier for me, personally, to assemble and produce on a larger scale.

Straight chocolate chips taste amazing in this recipe, though they melt easily. So, they are hard to handle when you are forming the balls because they will melt in your hands as you are touching them. You can hide a lot of flaws with drizzled chocolate and toppings though. Also, they will retain their shape best if stored in the refrigerator. 

As mentioned above, if you add a little shortening (2 tablespoons shortening for every 2 cups of chocolate chips), you can make your own version of chocolate candy coating that will work better for these cocoa bombs and can be stored at room temperature, rather than in the fridge.

It is easier to make these hot cocoa bombs with bare hands rather than while wearing gloves. You kind of need your bare skin to handle the chocolate. The gloves make things too slippery.

Chocolate chips with or without shortening taste great in this recipe.

Candy melts or melting wafers also taste great in this recipe.

When I made mine, I used melting wafers, straight chocolate chips, and chocolate chips with shortening. I thought all of them were delicious, so I suggest you use what you are most comfortable with.

Finally, you will need a medium size silicone mold. There are bigger ones, but they are way too big for your standard size mug. You can find the one I used here.


Hot Cocoa Bombs

Ingredients:

2 cups chocolate chips or melting wafers
2 tbsp shortening (only if using chocolate chips)
1 scoop hot cocoa (any flavor) per bomb
1 scoop mini vanilla dehydrated marshmallows per bomb
Sprinkles, crushed candy, crushed cookies, etc. for decorative topping, if desired
1 cup steaming hot milk (any kind) per bomb, for serving

Directions:

Melt chocolate chips or melting wafers in a microwave safe container at 30 second intervals, stirring between each, until completely smooth.

Add a spoonful of melted chocolate to each mold indentation. Using the back of the spoon, spread chocolate evenly over each indentation.

Place mold in the freezer for 5 minutes, or until completely set.

Once set, carefully remove the chocolate from the molds.

Gather your hot cocoa and mini marshmallows for easy assembly.

Place a microwave safe glass dish in the microwave. Microwave for 1-2 minutes or until hot.

Carefully place warm dish next to the chocolate shells. Place one shell half, seam side down, on the warm plate to clean up and slightly melt the edges.

Fill that shell half with a scoop of hot cocoa. Top that with a scoop of mini marshmallows.

Place second shell half, seam side down, on the warm plate to clean up and slightly melt the edges.

Carefully place the two shells together, smoothing the seam with your finger and using additional melted chocolate to help seal it together, if necessary.

Repeat until you run out of chocolate and/or you have the desired amount of cocoa bombs.

Let the bombs sit until completely set. 

Using a squeeze bottle or spoon, drizzle completed bombs with additional melted chocolate that has cooled slightly. You don't want to use chocolate that is too hot or it will melt a hole right through your bomb and ruin all of your hard work! (Yes, I am speaking from experience. RIP cocoa bomb that got drizzled with chocolate that was too hot) 

Immediately top with sprinkles, crushed candies, or crushed cookies, if using. If you wait too long, the chocolate drizzle will set and the toppings won't stick to it.

When ready to serve, you can explode your cocoa bomb one of two ways. You can place a cocoa bomb in the bottom of a mug and slowly pour 1 cup of steaming hot milk on top. Or, you can prepare a mug of steaming hot milk and gently place the bomb into your mug of milk.

Source: Holy cow, this is everywhere. All you have to do is Google it to find videos and/or recipe links all over the place. For me, it started when my sister found an ad saying they would be available at Costco. We searched and never found them, so we decided to make our own.

Notes: Please watch the video above, because honestly, these aren't too hard to make once you get the hang of it, but it is a completely visual recipe. You kind of have to see how it is done for it to totally make sense.

I love Ghirardelli melting wafers. That's what I used for the hot cocoa bombs in all but one (the final) picture. Even in that picture, I used the Ghirardelli melting wafers for half of those cocoa bombs. I found them in my local grocery store. If you can't find them locally, you can find them here.

I found dehydrated vanilla mini marshmallows on Amazon, here.

If doing a large batch, a squeeze bottle is easiest for drizzling chocolate. If doing a small batch, a spoon is easier. I used a squeeze bottle similar to these ones here.

The easiest way to steam milk is to put one cup of milk in a microwave safe container and microwave for 1 minute. Stir. After one minute, that is a good temperature for kids. If you like it hotter, microwave for an additional minute.

Also, if you long for the taste of real, tempered, cocoa butter packed chocolate, but can't figure out how to make them work in your molds without them shattering, simply put a couple of squares of high quality chocolate in a mug, add a scoop of hot cocoa, add some mini marshmallows, and then add some steaming hot milk and just enjoy it with the knowledge that you didn't make a huge mess of your kitchen in the process. 

Hot Cocoa Bomb Flavor Combinations:

  • Dark chocolate melting wafers, raspberry hot cocoa, red nonpareil sprinkles
  • Dark chocolate melting wafers, peppermint hot cocoa, crushed peppermint candies
  • Dark chocolate melting wafers, dark chocolate hot cocoa, chocolate sprinkles
  • Dark chocolate melting wafers, mint truffle hot cocoa, green sugar or crushed wint-o-greens candies
  • White chocolate melting wafers, white chocolate hot cocoa, red sugar
  • White chocolate melting wafers, pumpkin spice hot cocoa, cinnamon sugar or a little nutmeg
  • Dark or milk chocolate melting wafers or chocolate chips, salted caramel hot cocoa, finely chopped toffee, butterscotch candies, and/or coarse salt
  • Dark or milk chocolate melting wafers or chocolate chips, toasted coconut hot cocoa, toasted shredded coconut, finely chopped
  • Milk chocolate chips, peanut butter cup hot cocoa, crumbled Nutter Butter or other peanut butter cookies
  • White chocolate melting wafers, cookies and cream hot cocoa, crushed Oreo cookies
  • Dark chocolate melting wafers or milk chocolate chips, cookies and cream hot cocoa, crushed Oreo cookies
  • Milk chocolate chips, English toffee hot cocoa, finely chopped toffee
  • Milk chocolate chips, hazelnut hot cocoa, finely chopped hazelnut chocolate candy bar
  • Milk chocolate chips, mocha or macchiato flavored hot cocoa, chocolate sprinkles
  • Milk chocolate chips, Mexican style hot cocoa, cinnamon sugar
  • Milk chocolate chips, milk chocolate hot cocoa, mini chocolate chips or chopped chocolate 
  • Milk chocolate chips, cherry hot cocoa, red sugar  
  • Wherever your taste buds and your creativity take you! 


Above: This is the only picture that I took of the hot cocoa bombs that I made as gifts for my family. It was honestly such a process, I had so much to learn, and I was so under the gun to get them delivered on time that pictures didn't even occur to me until I was literally about to drop the last gift plate on my sister's porch. So, I grabbed my cell phone and snapped a few quick pics. Ha ha. Do yourself a favor and have a few trial runs to get comfortable with these before planning to make 50 at once to deliver while you are under a deadline to do it. 

The top two are dark chocolate Ghirardelli melting wafers, peppermint hot cocoa mix, mini marshmallows, and topped with crushed peppermint. The two below that are dark chocolate Ghirardelli melting wafers, raspberry hot cocoa mix, mini marshmallows, and topped with red nonpareils. The two  with red sugar are milk chocolate chips, milk chocolate cocoa mix, mini marshmallows, and red sugar sprinkles. 

The final one with green sprinkles is a mini long story. I ordered Ghirardelli milk chocolate melting wafers on my online pickup order, but then they were unavailable. This was the substitute the store made. Dang online order substitutions! Am I right? They looked like melting wafers, but turned out to be more like chocolate chips. They worked, but I didn't add shortening because I thought they were melting wafers. The result was that these were the hardest to assemble because they were so prone to melting. They exploded nicely when milk was poured on them though. So, that was milk chocolate wafers, milk chocolate hot cocoa, mini marshmallows, and green sprinkles.

I then made three more (the ones in all of the rest of the pictures), just so I could take pictures for this blog post. Ha ha! Those are dark chocolate melting wafers, raspberry hot cocoa, and red nonpareils and dark chocolate melting wafers, peppermint or candy cane hot cocoa, and crushed peppermints.

Above: You can also make them UFO-style. Instead of using the hot plate method to fuse the shell halves together, you pipe slightly cooled melted chocolate onto the edges and then put them together. You then roll the bomb in sprinkles, crushed candy, or chopped cookies for decoration. These are milk chocolate chips (without shortening), raspberry hot cocoa, and red sugar. These were my very first attempt at hot cocoa bombs. You can kind of see that when I handled them, the tops became less shiny and dull. These tasted like ambrosia though.

Again, sorry for the long post, but I hope my errors and learning experiences along the way will help you avoid problems in your own hot cocoa bomb journey.

However you decide to make them, I hope you love them as much as we did!

Sunday, July 31, 2016

Wet Your Whistle


Summer is the perfect time to serve fun drinks at your family dinners. Here are a few we found this summer.


Copycat Hawaiian Punch

Ingredients:

1 cup water
2 cups strawberries, sliced
3 cups pineapple juice
1/2 cup lemon juice
2 cups Dixie Crystals Extra Fine Granulated Sugar
1 cup raspberries
2 cups orange juice
1/2 cup lime juice

Directions:

Add water, sugar, and berries to a medium saucepan. Bring to a boil over medium heat. Cook for 3 minutes. Remove from heat and let cool completely. Press berry syrup through a fine mesh sieve into a beverage container or punch bowl. Discard berry pulp.

To the berry syrup, add pineapple juice, orange juice, lemon juice, and lime juice to a beverage container or punch bowl.

Pour punch into a glass. Top with sparkling water or ginger ale, if desired.

Source: Dixie Crystals website. You can find it here.

Notes: This stuff is really potent. You won't be diluting the flavor by adding sparkling water or ginger ale. In fact, I would highly suggest it.


Copycat Sonic Cherry Limeade

For one drink:

1 can of 7 Up or Sprite
2 maraschino cherries
1/2 lime wedge
Ice
2 tbsp. Maraschino Syrup (Grenadine Syrup)

Directions:

Place 2 cherries and 1/4 lime in the bottom of your drink.

Add ice and then your soda.

Add 2 tbsp. maraschino/grenadine syrup and juice from 1/4 lime.

Source: Lil' Luna. You can find it here.

Notes: We skipped the cherries and made this in a beverage container. We added lime juice (with pulp) and grenadine syrup to taste.

Berry Lemonade

Ingredients:

8 cups cold water
2 cups sugar
3 cups fresh lemon juice (from 15-16 medium lemons)
3 strips lemon peel (3 inches by 1 inch each)
1 cup raspberries
1 cup blackberries
Ice cubes
Seltzer or club soda

Directions:

Prepare sugar syrup: In 4-quart saucepan, heat 4 cups water with sugar and lemon peel to boiling over high heat, stirring occasionally. Cover saucepan and boil 3 minutes. Remove saucepan from heat.

Meanwhile, in food processor, pulse berries until pureed. Pour into medium-mesh sieve set over large bowl and press berry mixture with back of spoon to remove seeds; discard seeds.

Remove peel from syrup; stir syrup into berry puree with lemon juice and remaining 4 cups water.

Makes 13 cups (about 12 servings). Pour into large pitcher with tight-fitting lid.

Cover and refrigerate until cold, at least 3 hours or up to 2 days. Serve over ice. Add seltzer to taste; garnish with berries and lemon slices.

Source: Good Housekeeping. You can find it here.

Notes: This was good and refreshing...but I forgot to take a picture of it! Darn it!

Friday, December 11, 2015

It's Getting Thick Real Quick


Above: Look at how thick that is! This smoothie really holds up under pressure.

So, my husband LOVES The Fast and the Furious...me...not so much. However, "It's getting thick real quick" is a quote from one of the many Fast and Furious movies that we like to quote a lot. Here's a thick smoothie that will keep you full for breakfast.


Above: This is a great on-the-go breakfast. 

Strawberry-Orange Smoothie

Ingredients:

2 cups orange juice
1 pkg. (16 oz) frozen whole strawberries
1 pkg. (3.4 oz) Jell-O Vanilla Flavor Instant Pudding

Directions:

Blend ingredients in blender until smooth.

Serve immediately.

Recipe variations:

Strawberry-Orange Sherbet: Prepare as directed; freeze until firm. Scoop into dessert dishes to serve.

Creamy: For a creamier smoothie, substitute milk for the orange juice. (I tried this, and personally, it wasn't my favorite combination. Without the orange juice, the pudding has a different aftertaste in the smoothie)

Not as thick: If you don't like things so thick, change it from a three ingredient recipe to a two ingredient recipe and omit the pudding. Frozen strawberries simply mixed with some orange juice makes for a super tasty breakfast too!

Source: Kraft. You can find it here.

Notes: The pudding really thickened this smoothie up nicely. In fact, it thickened it to the point of being spoon worthy. I would suggest adding additional orange juice in order to be able to drink it through a straw! I loved the flavor of the strawberries and orange juice together. I also loved simply blending strawberries and orange juice. I haven't tried the sherbet variation yet, but it would be delicious!


Above: Two ingredient smoothie version. Honestly, this was my favorite. Omit the pudding and just blend frozen strawberries and orange juice together. 

Saturday, March 14, 2015

Something Spicy to...Drink?


Why not add a little kick to your drink and mix things up? If you like things spicy, you will like this drink.


Cilantro Lime Jalapeno Lemonade

Ingredients:

6 tablespoons sugar
1/2 cup cilantro springs
4 cups water
1/2 cup fresh lemon juice
Slices of lime
Slices of jalapeno

Directions:

Combine sugar and cilantro in a mortar and grind leaves with pestle. (Or you can put them in a blender and blend until smooth).

Combine cilantro mixture, water, and lemon juice in a pitcher, stirring until the sugar dissolves.

Add slices of lime and jalapeno to taste. Let stand for 30 minutes before serving.

Source: Jen's Favorite Cookies. You can find it here.

Notes: This was definitely polarizing. Some people really liked it (me), others hated it. So, give everyone a heads up and let the adventurous people try it. :) Also, we made a lot more of this, but I'm not sure if my mom doubled, tripled, or quadrupled this recipe.

If you don't like things hot, this probably isn't the drink for you, but if you absolutely want to try a more mellow version of this, you can replace the jalapenos with peeled, sliced cucumbers.

Friday, October 31, 2014

Happy Halloween!


I love Halloween. It is such a fun holiday. I love dressing up in costumes, and especially seeing all of the kids in their costumes. I love the fall weather. Oh, and I love getting creative with my food.


Above: String cheese witch's fingers. All you need is string cheese, spreadable cream cheese, and sliced almonds. Make some little slices in your cheese with a knife (you won't be simply making cut marks. You will have to take out tiny slits, otherwise the marks won't be visible). Then put a small dab of cream cheese on the end and place a sliced almond on top. We found this on Our Best Bites here.


Above: Our skeleton veggie man (thanks for the idea, Facebook!).

Skeleton Veggie Man with Dip

Ingredients:

Favorite dip (we used a packet of Ranch dressing mixed in with a container of sour cream)
Kale or lettuce for the hair
Sliced olives for the eyes
Celery for bones
Sliced cucumber for the backbone
Baby carrots for bones
Sliced red bell pepper for ribs
Sliced mushrooms for pelvis
Cauliflower florets for hands and joints
Broccoli florets for feet
Cherry tomatoes for feet (I forgot to use these)
Sugar snap peas for bones (we didn't use these, but they were used on the Facebook skeleton in place of the second piece of celery for the leg bones)

Directions:

Make dip. Refrigerate until ready to use.

Form skeleton body as shown in the picture. Create a second veggie plate with all of the extra/leftover veggies that you don't use in the skeleton.

Place dip in a round bowl and place kale/lettuce in the dip to resemble hair. Place olives in dip to resemble eyes. Loosely cover and refrigerate separately, until ready to serve.

Refrigerate vegetables until ready to serve. Just before serving, position dip and serve.

Source: We found this on Facebook. It came from a blog called Feeding Four Little Monkeys. You can find the original post here.


Above: I saw this in a Kraft recipe book years ago (they served the octopus on top of Kraft Macaroni and Cheese). You simply cut the bottom of the hot dog to form 8 tentacles, and then you pop it in a pot of boiling water. Cook it for a few minutes; until the tentacles begin to curl.


Above: Worms. Similar to the octopus above, slice your hot dogs into thin strips, pop them into some boiling water for a few minutes; until they curl. You can even stir in some heated barbecue sauce to turn these into slimy worms. We decided not to because we didn't want the kids to get super messy.

  
Mummy Dogs

Ingredients:

Hot dogs
Crescent dough (the refrigerated tubes of seamless crescent dough sheets worked really well)
Mustard
Condiments, for serving

Directions:

You can cut the hot dogs in half or leave them whole. I cut mine in half. Cut crescent dough sheets into strips (about 1/4" wide). Wrap the tops and bottoms of the hot dogs. Place on an ungreased cookie sheet or jelly roll pan. Bake in a 350 degree F oven until crescent dough is nicely browned; 15-25 minutes.

Using a small bowl of mustard and a toothpick, place two dabs of mustard on each hot dog to resemble eyes.

Serve with additional mustard and ketchup, if desired.


Source: We found this on Our Best Bites here.

Notes: These were a hit with both the kids and the adults.


Black Halloween Punch

Ingredients:

1 (.13 ounce) envelope unsweetened grape soft drink mix
1 (.13 ounce) envelope unsweetened orange soft drink mix
2 cups white sugar
3 quarts cold water
1 liter ginger ale

Directions:

To make a frozen hand, wash a disposable glove, fill with water, seal with a rubber band, and freeze.

Stir together grape soft drink mix, orange soft drink mix, sugar and water until solids are dissolved. Combine with chilled ginger ale just before serving. Dip the frozen hand briefly in warm water, then peel off the glove. Float the prepared hand in the punch bowl for a ghastly effect.

Source: Allrecipes.com, submitted by Kathleen. You can find it here.

Notes: This was really good. Just be sure to add the water, because otherwise, it will be way too sweet!


Above: Chili topped with cheese slices that we cut into pumpkin shapes with a cookie cutter. We also served our chili with cornbread. We originally posted this chili recipe here, but it is also below, for your convenience.

Natalie Holbrook's Slow-Burn Chipotle Chili

Ingredients:

1 pound ground beef
1 pound ground sausage
1 cup diced onion
1 cup diced green pepper
1 cup diced celery
1 (15 oz) can black beans, drained
1 (15 oz) can kidney beans, with liquid
1 (15 oz) can pinto beans, drained
1 (14 oz) can diced tomatoes, with juice
1 (6 oz) can tomato paste
1 cup tomato sauce
2 tablespoons chili powder
1 teaspoon chipotle chili powder
1 teaspoon chipotle-flavored Tabasco sauce, or more to taste
Salt, to taste
Brown sugar, to taste
Water, optional
Favorite toppings such as shredded cheese, sour cream, and chopped cilantro

Directions:

Brown the ground beef and Italian sausage together. Drain.

Place all ingredients in slow cooker and cook on low for 8-12 hours. Adjust seasoning, sweetness, and thickness as desired with salt, brown sugar, and water.

Source: This came from my friend, Natalie Holbrook, who lives in my ward and neighborhood. She submitted this to our ward chili cook-off. She and her friends also have a food blog of their own. You should check it out! You can find more of her yummy recipes on her blog: Cookbook Junkies.

Notes: This is good stuff! Definitely crave-worthy! Probably one of the best chili recipes I have ever, ever tried. Oh, I could go for a bowl of this right now. I added 1/2 cup of brown sugar. You can add up to 1 cup of water; just add water until you reach your desired thickness (or skip the water altogether if you want your chili on the thick side).


Sugar Cookie Bars

Ingredients:

1 pouch (1 lb 1.5 oz) Betty Crocker sugar cookie mix
1/2 cup unsalted butter, room temperature
1 egg

Frosting:

3 cups powdered sugar, sifted
1/2 cup unsalted butter, room temperature
1/4 cup heavy whipping cream
1 teaspoon vanilla
Food color, if desired
Candy sprinkles, if desired

Directions:

Heat oven to 375 degrees F. Line 9-inch square pan with cooking parchment paper or spray with cooking spray.

In large bowl, beat cookie mix, 1/2 cup butter, and the egg with electric mixer on medium speed until a soft dough forms. Press dough in bottom of pan.

Bake 25-30 minutes or until golden brown. Cool completely, about 30 minutes.

In medium bowl, beat powdered sugar, 1/2 cup butter, the whipping cream and vanilla with electric mixer on medium speed until smooth and creamy. Stir in food color, if using, until well blended. Spread frosting over baked cookie bars. Top with candy sprinkles. Cut into 4 rows by 4 rows.


Sources: Betty Crocker website. You can find it here.

Notes: I would suggest using the parchment paper, because these were really hard to get out of the pan. Once we got them out though, they were fantastic! Be careful not to overcook them. You want these to be soft and chewy, not crunchy.

No Bake Cookies and Cream Bars

Ingredients:

One 16 oz package Oreo Cookies
5 cups large marshmallows
4 tablespoons butter

Directions:

Butter an 8x8-inch baking pan. Line the baking pan with parchment paper, letting the paper extend up two sides of the pan, and overhang slightly on both ends. Butter paper; set pan aside.

In the bowl of a food processor fitted with the metal blade, process Oreos into fine crumbs; set aside.

In large saucepan, melt butter over low heat. Add marshmallows and stir until completely melted. Remove from heat. Stir in ground Oreo Cookies until combined. Transfer to prepared baking pan. Using a piece of waxed paper, press mixture evenly into prepared pan. Cool. Cut into squares. Best if served the same day.

Source: Picky Palate. You can find it here. Also found on Sweet Pea's Kitchen here.


Dirt 'n' Worms Chex Mix

Ingredients:

4 cups Chocolate Chex cereal
1/4 cup butter
2 tablespoons chocolate instant pudding and pie filling mix
8 chocolate sandwich cookies, coarsely chopped
2 cups gummy worm candies

Directions:

In large microwavable bowl, place cereal.

In 2-cup microwavable measuring cup, microwave butter uncovered on High 1 minute. Stir in pudding mix. Pour over cereal, stirring until evenly coated.

Microwave uncovered on High 2 minutes. Stir in sandwich cookies and candies. Spread on waxed paper to cool. Store in airtight container.

Makes 12 servings (1/2 cup each)

Source: Betty Crocker. You can find it here.

Sunday, September 21, 2014

A Surprising Mix of Flavors


Cucumbers are a revelation.  Seriously who knew that such a fresh, unique flavor could liven up so many things?  I only know that growing up a cucumber was good for only two things...to throw into a salad or turn into a pickle.  Well, here's a new use that you might not have thought of and it was so easy.  This would be wonderfully refreshing at a bridal shower.

Cucumber Lemonade

Ingredients:


1 cucumber, thinly sliced
1 (12 oz) can frozen lemonade concentrate
1 (2 liter) bottle lemon-lime flavored carbonated beverage

Directions:

Place the cucumber slices into a large pitcher.  Pour the lemonade concentrate over the cucumber and let stand 10 minutes.  Pour in the lemon-lime soda and pour into glasses to serve.

Source:  Allrecipes.com  Submitted by Lori. You can find it here.

Thursday, July 31, 2014

Serendipitous!


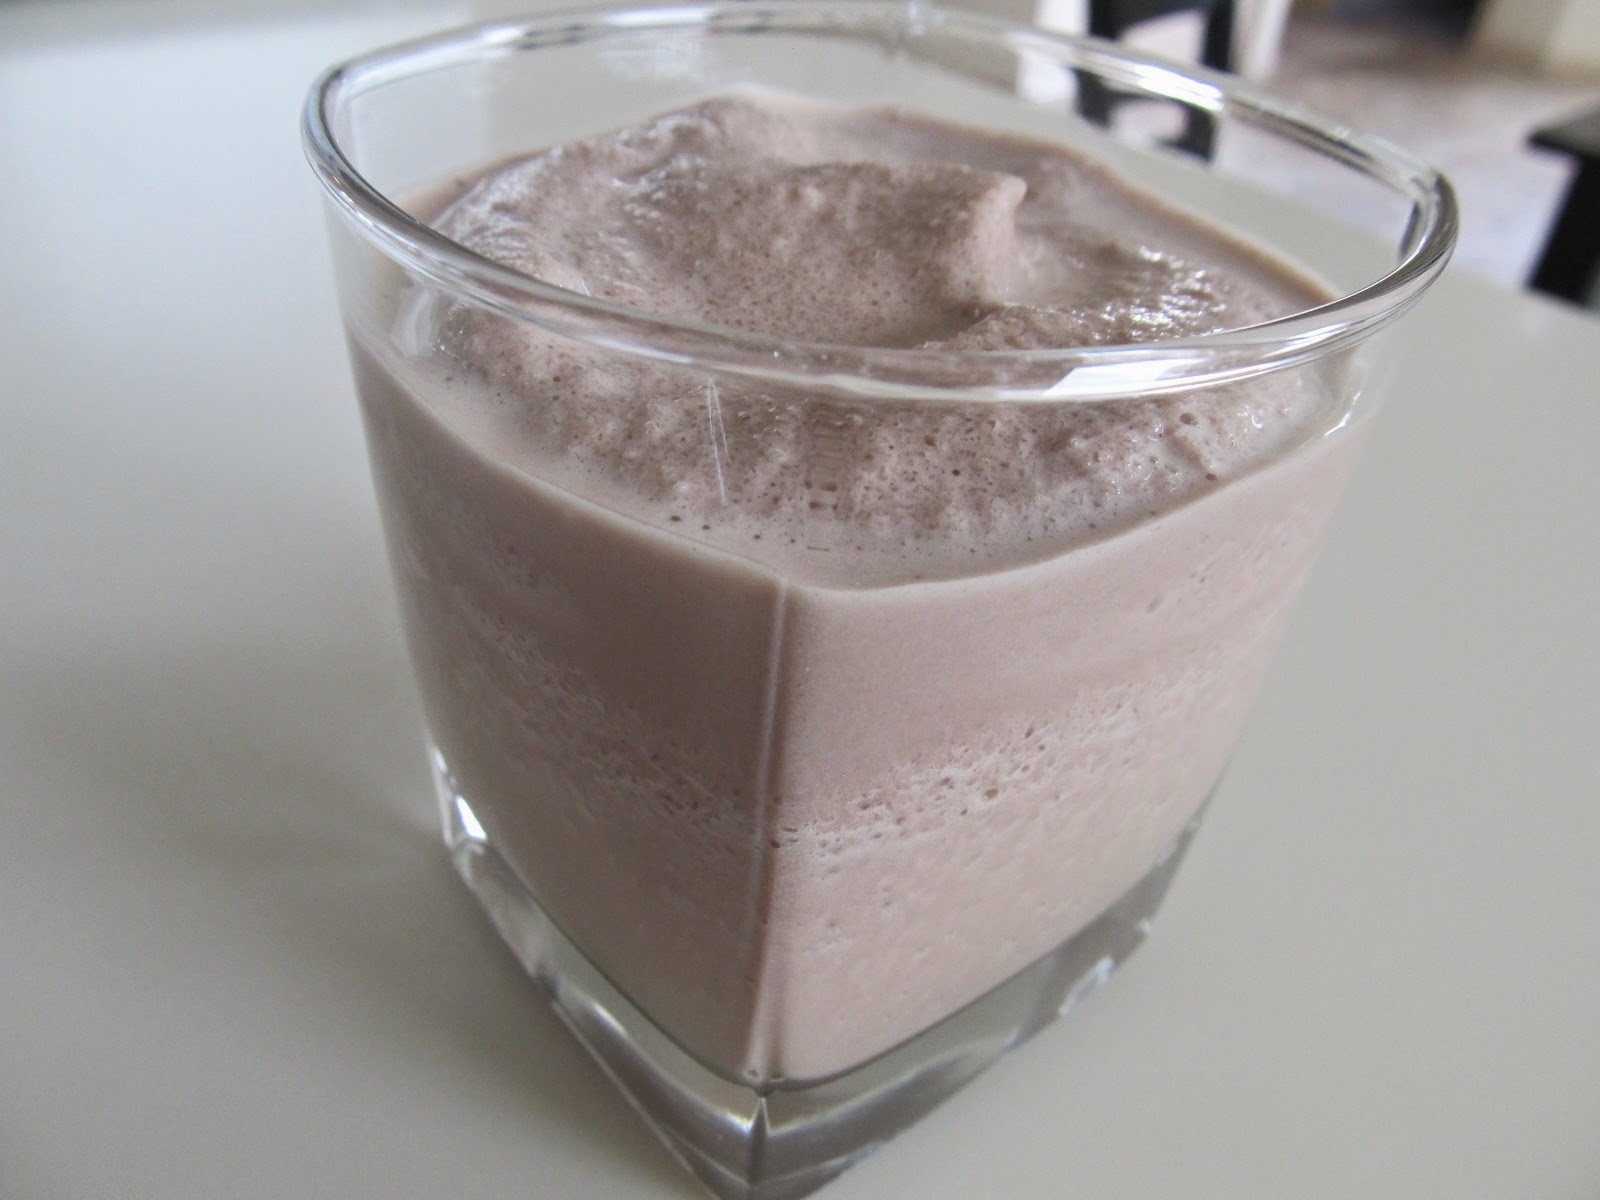
You know how in the movie "Serendipity," they go and have some frozen hot chocolate at a fancy place in New York City? Well you can too...and you can do it at home. It is so easy and absolutely delicious.

Frozen Hot Chocolate

Ingredients:

4 cups ice
5 packets hot chocolate mix (about 0.71 oz each)
1 1/2 cups milk
Whipped cream, optional

Directions:

Fill a blender to the 4 cup mark with ice. Add cocoa mix and milk. Use the "high" or "ice crush" setting to blend for about 30-40 seconds.

Pour into glasses and top with whipped cream, if desired.

Makes 2 large or 4 small servings.

Source: A wonderful website called Jen's Favorite Cookies. You can find the original link here. Be sure to check out her site. First of all, her pictures are way better than mine, and she also has so many amazing recipes there.

Notes: I am amazed at how well this worked. Have you ever tried to mix hot cocoa mix into cold milk? It gets all clumpy and the mix doesn't dissolve all the way. I wondered if this might happen here...but it didn't! The blender kept things smooth.

I opted to skip the whipped cream because I was trying to watch my calories, and this was so rich and satisfying without the whipped cream. I can only imagine that it would be even more decadent (and beautiful) with the whipped cream. I might even throw some grated chocolate on top of the whipped cream for a special touch.

So, if you are in the mood for a hot cocoa flavored smoothie, this is definitely what you need!

Thursday, March 20, 2014

Bottoms Up!


Water is pretty much my favorite drink. Add some ice and I am in heaven. I do realize though that not everyone shares my love of water. So, it is nice to mix it up and have some fun drinks every now and then (and I am talking about something a little more than just Kool-Aid). Here's a fun and easy drink we found recently.

Cherry Bombs (Similar to a Shirley Temple)

Ingredients:

2 cups water
1 cup grenadine
1 liter clear citrus soda or seltzer
18 maraschino cherries

Directions:

Place 2 cups water in a medium saucepan, and bring to a boil over medium-high heat. Add grenadine; stir to combine. Pour mixture into two ice-cube trays. Freeze until solid, 2 hours or overnight.

Fill six glasses with grenadine ice cubes. Top with soda. Garnish with cherries, and serve.

Source: Delish. You can find it here.

Notes: Yummy, easy, fun, and refreshing. What more could you want in a fun drink?

Saturday, January 25, 2014

The Last of the Eggnog...or Is It?


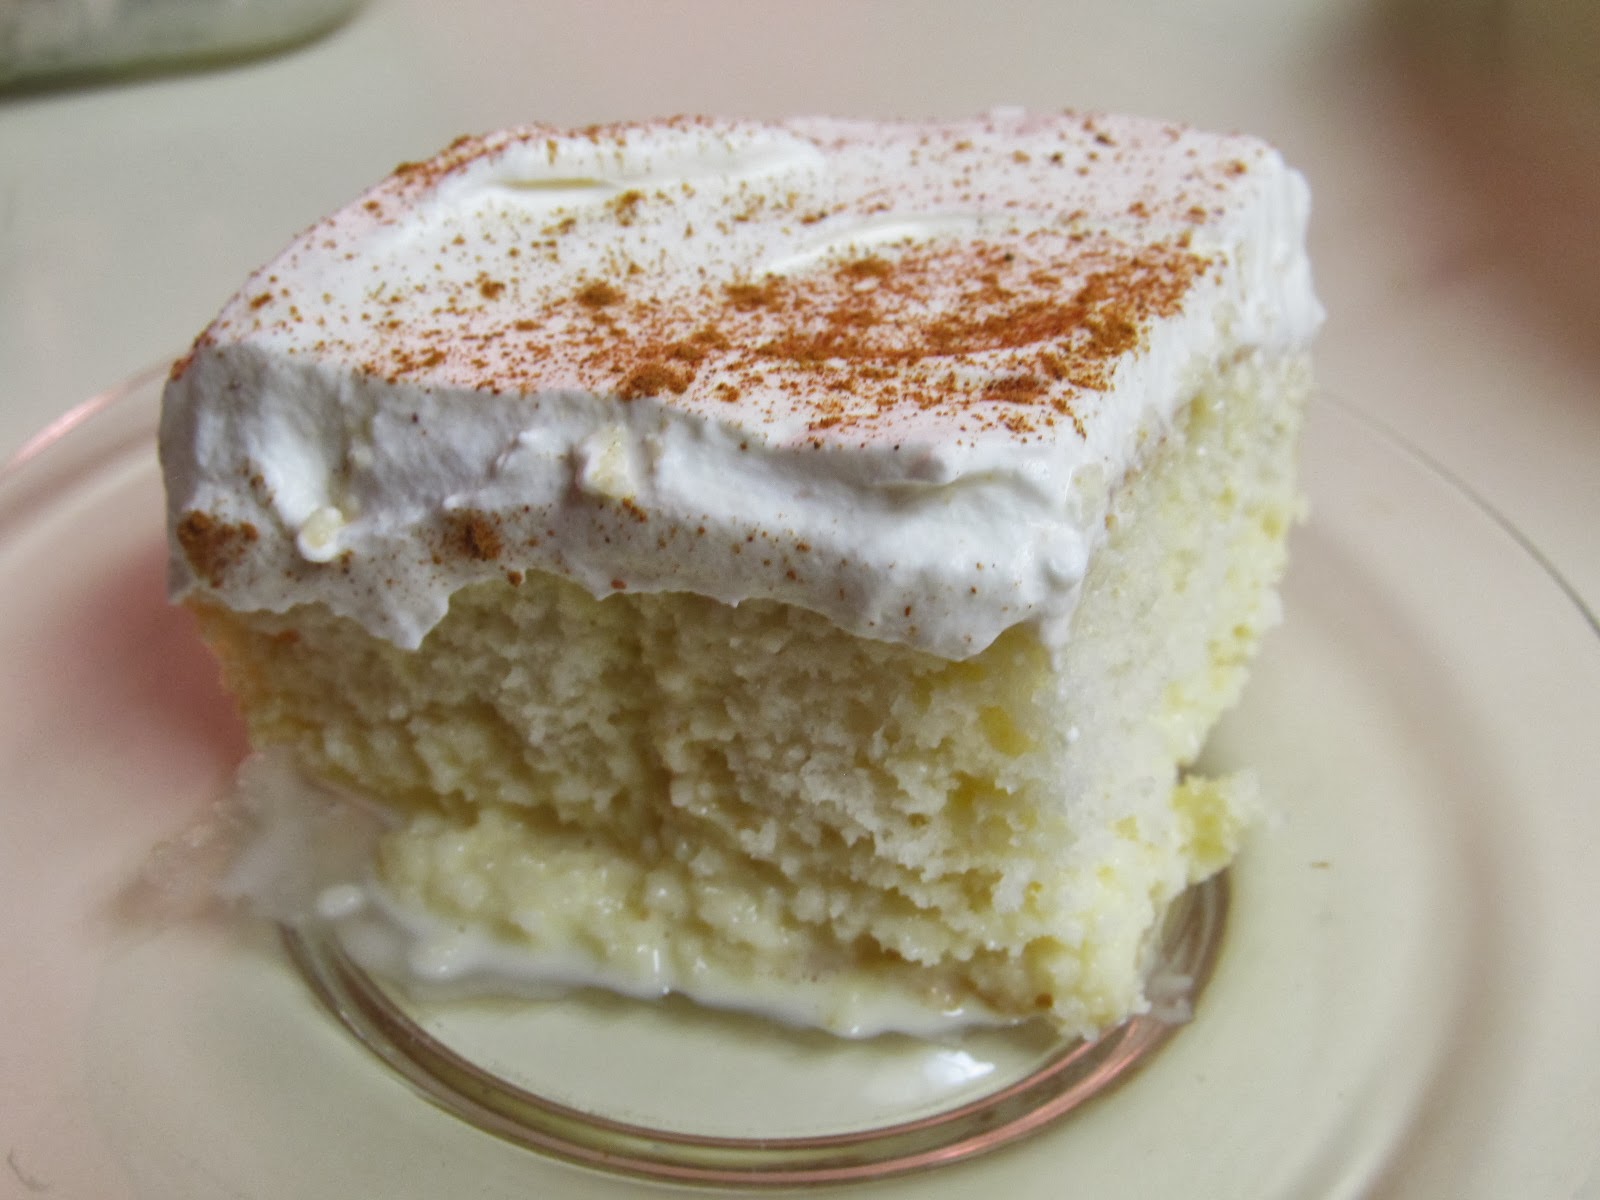
Ahhh, eggnog. Why are you only available a few months of the year? I will share a great recipe that uses store-bought eggnog. Then, I will show you how you can make a very easy version at home if you are craving eggnog in January...or July!


Eggnog Tres Leches Cake

Ingredients:

1 package white cake mix (regular size)
1 1/3 cups water
2 tablespoons canola oil
3 egg whites
2 cups eggnog
1 can (14 ounces) sweetened condensed milk
1/2 cup 2 percent milk
1 1/2 cups heavy whipping cream
1/4 cup sugar
1/8 teaspoon ground cinnamon
1/8 teaspoon ground nutmeg

Directions:

In a large bowl, combine the cake mix, water, oil, and egg whites; beat on low speed for 30 seconds. Beat on medium for 2 minutes. Pour into a greased and floured 13x9-inch baking pan.

Bake at 350 degrees F for 25 to 30 minutes or until a toothpick inserted near the center comes out clean. Cool on a wire rack. Using a skewer, poke holes in cake 1-inch apart.

In a large bowl, combine the eggnog, sweetened condensed milk, and 2 percent milk. Pour a scant 3/4 cup mixture over cake; let stand for 20-30 minutes or until liquid is absorbed. Repeat four times. Cover and refrigerate for 8 hours or overnight.

In a large bowl, beat cream until it begins to thicken. Add sugar; beat until soft peaks form. Spread over cake. Sprinkle with cinnamon and nutmeg. Refrigerate leftovers.

Yield: 15 servings.


Nutritional information: 1 piece equals 394 calories, 19 g fat, 62 mg cholesterol, 309 mg sodium, 51 g carbohydrate, trace fiber, 6 g protein.

Source: Taste of Home. You can find it here.


Ice Cream Eggnog

Ingredients:

Vanilla ice cream (amount depends on the number of servings you wish to make)
Milk, to achieve desired thickness
Rum extract, to taste
Nutmeg, to taste
Yellow food coloring, optional

Directions:

Place vanilla ice cream and milk in a blender (the amounts you use are dependent on how many servings you wish to make, and how thick you would like your eggnog to be). Flavor with rum extract and nutmeg to your taste.

Sprinkle with additional nutmeg, if desired.

Serve immediately.

Source: I was inspired by this recipe that I found in an Everyday Food magazine.

Notes: The ice cream helps you achieve a texture similar to that of store-bought eggnog. You can use any kind of milk you would like (skim, whole, half-and-half, etc.). You can make it thick (using less milk) if you want more of an eggnog shake. Or you can use more milk to achieve more of an eggnog thickness.

I would suggest starting out with about 1 teaspoon of rum flavoring, and 1/4 teaspoon of nutmeg and then adjusting this to your taste. I used more than 1 teaspoon of rum flavoring.

You can use yellow food coloring to make your eggnog look more like the store-bought variety, or you can keep it white. It's up to you!


Above: Ice cream eggnog (without yellow food coloring)

Above: Ice cream eggnog with a little yellow food coloring.

This really tastes just like store-bought eggnog. If you have a serious craving for eggnog when none can be found in the store, this easy recipe is for you.

Saturday, November 30, 2013

Goodbye to Fall


It's always hard to say goodbye to fall and to see the winter set in. Below are two great recipes featuring fall flavors.


Pumpkin Cheesecake with Sour Cream Topping

Ingredients:

1 1/2 cups graham cracker crumbs
1/4 cup sugar
1/3 cup butter, melted

Filling:
3 packages (8 ounces each) cream cheese, softened
1 cup packed brown sugar
1 can (15 ounces) solid-pack pumpkin
1 can (5 ounces) evaporated milk
2 tablespoons cornstarch
1 1/4 teaspoons ground cinnamon
1/2 teaspoon ground nutmeg
2 eggs, lightly beaten

Topping:
2 cups (16 ounces) sour cream
1/3 cup sugar
1 teaspoon vanilla extract
Additional ground cinnamon, optional

Directions:

In a small bowl, combine crumbs and sugar; stir in butter. Press onto the bottom and 1 1/2 inches up the sides of a greased 9-inch springform pan. Bake at 350 degrees F. for 5-7 minutes or until set. Cool for 10 minutes.

In a large bowl, beat cream cheese and brown sugar until smooth. Beat in the pumpkin, milk, cornstarch, cinnamon, and nutmeg. Add eggs; beat on low speed just until combined. Pour into crust.

Place pan on a baking sheet. Bake at 350 degrees F. for 55-60 minutes or until center is almost set.

In a small bowl, combine the sour cream, sugar, and vanilla; spread over filling. Bake 5 minutes longer. Cool on a wire rack for 10 minutes. Carefully run a knife around edge of pan to loosen; cool 1 hour longer. Chill overnight.

Remove sides of pan. Let stand at room temperature 30 minutes before slicing. Sprinkle with additional cinnamon, if desired.

Yield: 12-14 servings.

Source: Taste of Home recipe originally published October/November 2001. You can find it here.

Notes: I baked my cheesecake a few minutes longer than stated in the recipe due to my altitude. Also due to my altitude, my cheesecake fell slightly in the middle. However, it was smooth and creamy and it tasted fantastic. One warning though, this dessert is really rich! A little goes a long way.


Autumn Brew (Wassail)

Ingredients:

1 gallon apple juice
1 cup orange juice
2 cinnamon sticks
5 whole cloves
4 to 5 orange slices, without seeds

Directions:

Pour apple and orange juices into 4 1/2 to 6 quart slow cooker. Place cinnamon sticks, cloves, and orange slices into slow cooker. Cover and cook on high heat 3-4 hours. Turn on low heat to keep warm. Remove cinnamon sticks, orange slices, and cloves before serving.

Makes 16 servings.

Source: This is from a cookbook called 101 More Things to do with a Slow Cooker by Stephanie Ashcraft. You can find more information on that cookbook here.

Notes: This was so easy. My only warning is that it was literally boiling hot even after I turned it onto low heat. Perhaps my slow cooker is hotter than some. If your slow cooker is anything like mine, I would suggest unplugging it about 15-20 minutes prior to serving. It will still be plenty warm, it just won't burn anyone's tongue that way.

When I made this, it was an uncharacteristically warm day, so I had some leftovers. I refrigerated them and rather than heating up the leftovers, I just drank it cold. It was fantastic that way too! This drink has such a subtle, yet defined flavor. Good stuff!

Friday, July 26, 2013

A Taste of Paradise


For our second luau, we made our old favorites, which you can find here, we went bananas (see here), and discovered a few new keepers, which you will find below.

Island Kielbasa in a Slow Cooker

Ingredients:

2 pounds kielbasa sausage, sliced into 1/2 inch pieces
2 cups ketchup
2 cups brown sugar
1 (15 ounce) can pineapple chunks, undrained

Directions:

Place the sausage, ketchup, sugar, and pineapple in the slow cooker and mix together.

Cover and cook on low setting for 5 to 6 hours, until sausage is cooked through.

Source: Allrecipes.com, submitted by Denise. You can find it here.

Notes: We really liked this a lot. You could also use crushed pineapple or pineapple tidbits in place of the pineapple chunks, if you would like.


Tropical Punch

Ingredients:

1 (12-ounce) can frozen pineapple juice concentrate
5 cups seltzer
5 cups ginger ale
4 cups cranberry juice
2 cups orange juice
1 lemon
2 limes

Directions:

Place 1 12-oz. can frozen pineapple juice concentrate (thawed) in a large pitcher; pour in 5 cups seltzer and 5 cups ginger ale. Stir vigorously until well blended. Stir in 4 cups cranberry juice and 2 cups orange juice; mix well. Scrub 1 lemon and 2 limes, then thinly slice. Just before serving, add sliced lemon and limes to pitcher and pour punch over ice.

Source: All You, July 2008, found on MyRecipes.com. You can find the recipe here.

Saturday, January 12, 2013

Why Haven't I Made This in Awhile?


There used to be this little cafe by my Mom's house. It might still be there, but knowing my luck, it is probably closed down--because every restaurant I have ever loved has closed. Even if it is a chain restaurant that isn't in danger of closing, if there is a menu item that I come to love, they will discontinue it! It just seems to be my luck. Anyway, this little cafe used to sell Italian sodas, hot cocoa, and steamed milk, etc. I went there repeatedly for their steamed milk. Then I discovered that I could easily make it at home. Let me tell you how.

Steamed Milk (1 serving)

Ingredients:

1 cup milk (whole, 2%, 1%, and Skim all work)
Flavoring, to taste (for example, your favorite extract, caramel ice cream topping, flavored coffee creamers, or Italian soda syrup work well)
Sugar, to taste (if you use Italian soda syrup, you probably won't need to add anymore sugar)

Directions:

Microwave:

Pour milk, flavoring, and sugar into a microwave-safe mug. Stir to mix. Microwave for 1 minute. Check temperature. If it is not warm enough, microwave for an additional 30 seconds and check again. Repeat until your steamed milk is the right temperature for you.

Stovetop:

Pour milk, flavoring, and sugar into a small saucepan. Heat milk on medium until small bubbles form around the edges of the pan and the milk starts to look frothy. Pour into a mug and enjoy!

If you want to be a little more decadent, you can even top this with whipped cream. However, it isn't necessary because it is delicious on its own!

Source: My Mom? Me? I don't remember.

Notes: The mug of steamed milk pictured here has 1 cup of milk, 1/2 teaspoon of almond extract, and about 2 teaspoons of sugar. I microwaved it for a minute and a half. It was perfect! So satisfying! It can give you the warmth and comfort that you get from hot chocolate, but it can be a lot lighter (especially if you use skim milk). Good stuff!

I tend to make my steamed milk in the microwave if it is just for me, but if I am making it for a crowd, I double, triple, or quadruple it and make it using the saucepan method.

Coconut, caramel, vanilla, and almond are some of my favorites flavors of steamed milk.


Tuesday, January 1, 2013

I Propose a Toast!


Now, I don't drink alcohol. However, that doesn't mean that the holidays aren't a fun time for fun beverages!

Here are a few family and kid-friendly holiday drinks you might enjoy.


Noel Spritzer

Ingredients:

2 cups apple juice, or sparkling non-alcoholic apple juice (such as Martinelli's)
1 cup chilled cranberry-apple juice drink
1 cup chilled sparkling water
Apple slices, if desired
Fresh mint, if desired

Directions:

Mix apple juice, cranberry-apple juice drink, and sparkling water.

Serve over ice. Garnish with apple slices and mint.

Makes 6 servings.

Nutrition information: 1 servings equals 80 calories, 0 g fat, 0 mg cholesterol, 5 mg sodium, 8 g carbohydrate, 1 g fiber, 0 g protein.

Source: Betty Crocker. You can find the recipe here.

Notes: The drink that I took the picture of wasn't measured out...I eyeballed it and as a result, it had a little more cranberry-apple juice than it normally does...so while it still tasted fantastic, it also turned out a little more red in color than normal. However, this is a great and easy drink recipe. It tastes just like those fancy sparkling non-alcoholic juices that you can buy around the holidays, but it is cheaper and there is enough for a crowd.

I usually triple this (at least) and serve it in a punch bowl.


Sparkling Apple Cider and Variations

Ingredients:

2 (64 oz) bottles of 100% apple cider (or 2 cans frozen apple juice concentrate)
1 (2 liter) bottle of Sprite, 7-Up, or Club Soda

Directions:

Mix well in a punch bowl and serve.

Variations:

You can make a Sparkling White Grape Spritzer by using white grape juice/frozen white grape juice concentrate in place of the apple cider/frozen apple juice concentrate.

You can make a Red "Wine" Spritzer by using Concord grape juice/frozen concord grape juice concentrate.

Really, the sky is the limit. You could do this using pretty much any flavor of juice/frozen juice concentrate.

Source: We have done things like this since I was a child...but if you need more ideas, there are a ton floating around Pinterest.

Pineapple Limeade

Ingredients:

1 cup sugar
6 cups pineapple juice, chilled
1 cup lime juice
2 liters sparkling water (Club Soda), or lemon-lime soda
Lime slices, for garnish

Directions:

Mix sugar and juices in large plastic or glass pitcher. Pour 1/2 into another pitcher.

Just before serving, stir sparkling water into juice mixture. Serve over ice. Garnish with lime.

Makes 2 pitchers.

Source: My Mom has made this one since we were kids. I don't know where she got it from.


Orange Julius or Fruit Whip

Ingredients:

6 oz. frozen juice concentrate (orange for Orange Julius, or pineapple, raspberry, etc. for Fruit Whip)
1 cup milk
1 cup ice water
1/2 cup sugar
1/2 tsp vanilla
10-12 ice cubes

Directions:

Place all ingredients in a blender. Blend until smooth.

Makes 6 cups.

Source: I'm not sure where we got this recipe from...but honestly doesn't everyone have one of these recipes  floating around somewhere? 

Notes: Who doesn't love Orange Julius?

Family Friendly Sangria

Ingredients:

1 quart grape juice
1 quart carbonated lemon-lime beverage (such as Sprite or 7-Up)
3 cups orange juice
1 orange, thinly sliced
1 lime, thinly sliced
1 lemon, thinly sliced

Directions:

Mix juices and carbonated drink together in a large pitcher or punch bowl. Float slices of orange, lime, and lemon on top. Add ice.

Makes 16 servings (5 1/2 oz. each serving)

Delicious served with Mexican or Spanish food.

Source: I don't remember where I got this one from.


Shirley Temple Punch

Ingredients:

5 cups ginger ale
2 cups orange juice
1/2 cup grenadine

Directions:

Mix ginger ale, orange juice, and grenadine together in a punch bowl.

Garnish with sliced oranges and maraschino cherries.

Serve over ice.

Source: Food Network. Found in their list "50 Holiday Drinks." It is #25. I love these Food Network lists. Seriously, do a search for "50" on Food Network and check out some of these lists. They are awesome! You can find this holiday drink list here.


Non-Alcoholic Firewhiskey

Ingredients:

1 (2-liter) bottle ginger ale
1 (2-inch) piece fresh ginger root, peeled and sliced
1/2 cup cinnamon red hot candies
2 cinnamon sticks, or more, to taste
2 habanero peppers, cut into 6 pieces (wear gloves while handling)
1 (12 fluid ounce) can grapefruit-flavored soda (such as Squirt), or more to taste (optional)
1 drop red food coloring, or enough to make desired color (optional)

Directions:

Combine the ginger ale, ginger, red hot candies, and cinnamon sticks in a large container. Refrigerate until the candies dissolve completely, 8 hours, or overnight.

Add the habanero peppers to the ginger ale mixture for 4 hours, or desired time (depending on your desired taste and heat preference). Remove and discard peppers and ginger root. Add Squirt. Serve over ice in small glasses (shot glasses for fun).

Source: Allrecipes.com submitted by vicimgd. You can find the recipe here. Here is what the recipe creator had to say "A while back I had to make drinks for a Harry Potter Club meeting, but all the recipes I found for firewhiskey involved either hot sauce, alcohol, or both. We were all underage, and carbonated Tabasco doesn't appeal to me, so I created this. We Muggles enjoyed it immensely, and I hope you will too. This goes great with any other Harry Potter-themed food. I made 'Cockroach Clusters,' 'Pumpkin Pasties,' and vegetable wands. Good for cold days as well."

Notes: This was a really fun drink. Sweet and spicy...but not overwhelmingly spicy.