Showing posts with label Sources: Other Blogs. Show all posts

Monday, September 25, 2017

Theme Night: Mexican Edition


So, if you haven't realized this yet, we like to do a lot of theme nights. Here are some great finds from our Mexican theme night that we had recently.


Carnitas

Ingredients:

1 (3-1/2 to 4 lb.) pork shoulder, boneless and well-marbled
1 (12 oz.) bottle or can of beer or beef broth
Water, as needed
2 tsp. salt
1/2 tsp. ground cumin
2 tbsp. lard or vegetable shortening
Corn tortillas, for serving
Favorite toppings, for serving (salsa verde, diced onions, shredded cabbage or lettuce, pico de gallo, sliced radishes, fresh cilantro, guacamole, shredded cheese or crumbled cotija cheese, etc.)

Directions:

Slice the pork into 2-inch chunks and arrange in a Dutch oven or roasting pan.

Add the beer (or beef broth) and enough water to barely cover the meat. Stir in the salt and the cumin. On the stove top, over medium-high heat, bring the mixture to a boil.

When ready to cook, start the Traeger grill on Smoke with the lid open until the fire is established (4 to 5 minutes). Set the temperature to 300 degrees F. and preheat, lid closed, for 10 to 15 minutes.

Carefully transfer the pan with the meat to the grill grate. Roast the pork, uncovered until the meat is very tender, 2 1/2 to 3 hours, stirring occasionally. Add a bit more water to the pan if most of the liquid has evaporated.

When the pork is tender, drain off any remaining cooking liquid and discard. Break the meat into bite-size chunks with a fork. (The recipe can be prepared to this point up to three days ahead. Let cool and refrigerate.)

Add the lard to the pan and return the pan to the grill grate. Increase the temperature of the Traeger to 400 degrees F.

Let the meat "fry" in the lard until it is browned and some bits are slightly crisp, about 15 to 20 minutes, stirring frequently. Serve with the suggested accompaniments. Enjoy!

Source: Traeger Grills website. You can find the recipe here.

Notes: If you don't have a Traeger Grill, you could always slow cook the meat...but the flavor and texture of the meat won't be the same, of course.


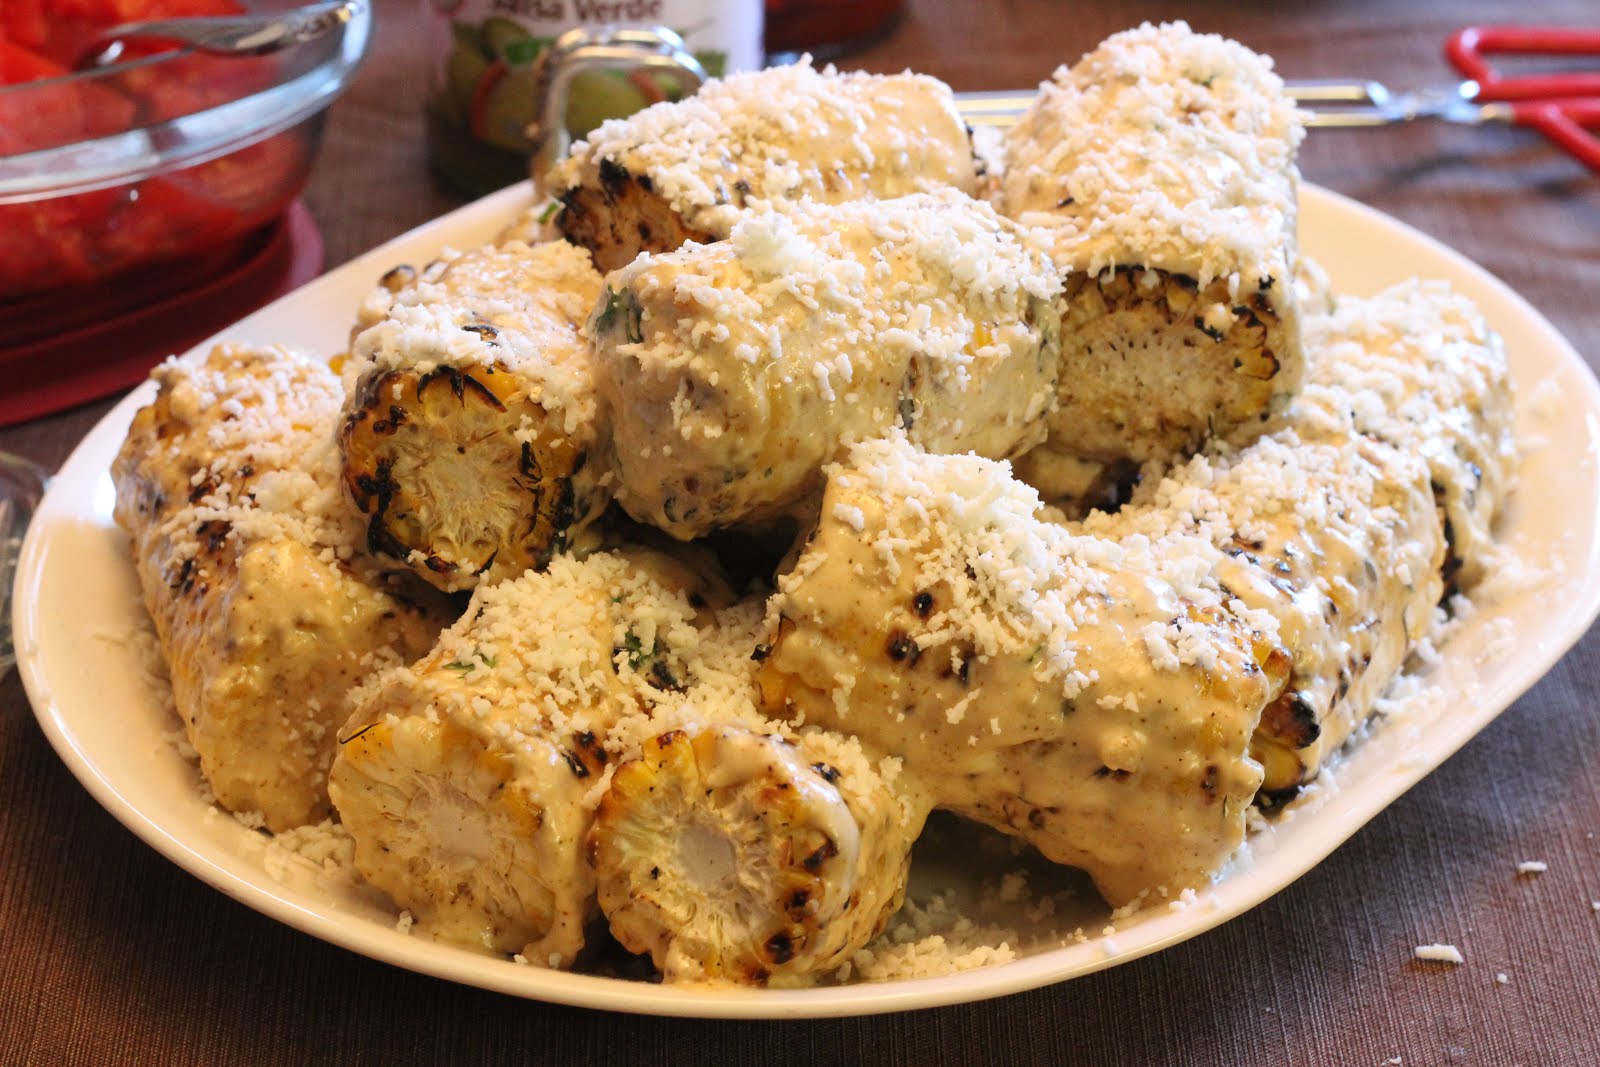
Grilled Mexican Street Corn (Elotes)

Ingredients:

1/4 cup mayonnaise
1/4 cup sour cream or Mexican crema
1/2 cup finely crumbled Cotija or feta cheese, plus more for serving
1/2 teaspoon ancho or guajillo chili powder, plus more for serving
1 medium clove garlic, finely minced (about 1 teaspoon)
1/4 cup finely chopped cilantro leaves and tender stems
4 ears shucked corn
1 lime, cut into wedges

Directions:

Light 1 chimney full of charcoal. When all charcoal is lit and covered with gray ash, pour out and spread coals evenly over half of coal grate. Alternatively, set half the burners of a gas grill to high heat. Set cooking grate in place, cover grill, and allow to preheat for 5 minutes.

While coals heat, combine mayonnaise, sour cream or crema, cheese, chili powder, garlic, and cilantro in a large bowl. Stir until homogeneous and set aside.

When grill is hot, place corn directly over hot side of grill and cook, rotating occasionally, until cooked through and charred in spots on all sides, about 8 minutes total.

Transfer corn to bowl with cheese mixture and use a large spoon to evenly coat corn on all sides with mixture. Sprinkle with extra cheese and chili powder and serve immediately with lime wedges.

Source: We found this on the Serious Eats website. You can find it here.

Notes: Holy cow, this was good. I could eat a meal of this and only this.


Mexican Chopped Salad

Ingredients:

Dressing:

1/4 cup fresh lime juice
2 tablespoons honey
1/2 teaspoon cumin
1 clove garlic, finely minced
1/2 teaspoon salt
2 tablespoons canola oil
2 tablespoons extra virgin olive oil
freshly ground black pepper
Salt, to taste, if needed

Tortilla Strips:

6 6-inch corn tortillas
1 1/2 tablespoons canola oil
1/2 teaspoon sea salt

Salad:

1 medium head romaine lettuce, chopped in approximately 1/2-inch pieces
1 medium bell pepper, diced in 1/4-inch pieces, any color
1/2 medium red onion, diced in 1/4-inch pieces
1/2 medium jicama, peeled and diced in 1/4-inch pieces
1 medium zucchini, diced in 1/4-inch pieces
4 medium tomatoes, seeded and diced into 1/4-inch pieces
4 ears corn, cooked (if fresh corn is not in season, substitute 1 1/2 cups of sweet, tiny frozen corn, thawed)
1 1/2 cups canned black beans, drained and rinsed
1/2 cup finely chopped cilantro, plus whole cilantro leaves for garnish, if desired

Directions:

Dressing:

Combine lime juice, honey, cumin, garlic, and salt. In a slow, steady stream,a dd the oils, stirring continuously with a fork or small whisk. Taste and add more salt and pepper, if needed. Set aside.

Tortilla Strips:

Preheat oven to 400 degrees F. Stack corn tortillas on a cutting board. Cut in half. Cut each stack of halves into thin strips, width-wise, about 1/4-inch thick.

Transfer tortilla strips to a sheet pan. Drizzle with oil. Sprinkle with salt and toss to coat.

Bake for 15-20 minutes, stirring every 5 minutes, or until light golden brown and crisp. Set aside to cool.

Salad:

Combine corn and other salad ingredients in a large bowl. Stir to combine. Add dressing and stir to coat all ingredients. Garnish with cilantro leaves, if desired.

Serve with tortilla strips on top or place a bowl on the side for people to garnish their salad as desired.

Source: The Cafe Sucre Farine. You can find it here.

Notes: This was fantastic even without the tortilla strips. This was such a light, fresh salad. Everyone loved it. It also kept surprisingly well the next day if you have any leftovers.


Vine-ripe Tomato Salad with Queso Fresco and Serrano

Ingredients:

2 large round tomatoes
1 red onion, thinly sliced
1 serrano pepper, thinly sliced
1 tablespoon chopped cilantro leaves
1/4 cup queso fresco
1 teaspoon Mexican oregano
1 tablespoon extra-virgin olive oil
1 tablespoon white wine vinegar
Salt and pepper, to taste

Directions:

Slice tomatoes about 1/4-inch thick and arrange on a plate with the sliced onion. Place the sliced chile alongside the tomatoes and sprinkle the cilantro on top and around the plate. Crumble the queso fresco on top.

In a bowl, combine the oregano, oil, and vinegar and mix well. Drizzle the vinaigrette on top just before serving. Season with salt and pepper, to taste.

Source: Food Network, recipe by Aaron Sanchez. You can find it here.

Notes: Those serrano peppers do give this some heat, so if you don't like spicy stuff, eat around them! However, I thought this was absolutely fantastic. So delicious and such a great way to use up fresh garden tomatoes.

Pico de Gallo

Ingredients:

1 medium tomato, diced
1 onion, finely chopped
1/2 fresh jalapeno pepper, seeded and chopped
2 sprigs fresh cilantro, finely chopped
1 green onion, finely chopped
1/2 teaspoon garlic powder
1/8 teaspoon salt
1/8 teaspoon pepper

Directions:

In a medium bowl, combine tomato, onion, jalapeno pepper (to taste), cilantro, and green onion. Season with garlic powder, salt, and pepper. Stir until evenly distributed. Refrigerate for 30 minutes before serving.

Source: Allrecipes.com, submitted by grneyedmustang. You can find it here.

Notes: Poor Mom. After all the work to make this, she forgot to set it out at our family dinner, so none of us got to partake, and I didn't get to take pictures. I'm sure it was fantastic though!

Monday, May 29, 2017

Dress That Salad

Here are a few homemade salad dressing recipes that we have found. You can't beat the convenience of store-bought bottled dressing, but you can't beat the taste of homemade salad dressing.

My apologies, but I can't find any of my pictures for these dressings. I will have to post them when I find them, or make these again and take pictures again!

Lighter Green Goddess Dressing

Ingredients:

1/2 cup light mayonnaise
1/2 cup light sour cream
1/2 cup chopped scallions, white and green parts (3 to 4 scallions)
1/2 cup chopped fresh basil leaves
2 tablespoons freshly squeezed lemon juice (about 1 lemon)
1 medium clove chopped garlic
1/2 teaspoon kosher salt
1/4 teaspoon freshly ground black pepper

Directions:

Put the mayonnaise, sour cream, scallions, basil, lemon juice, garlic, salt, and pepper into a blender or food processor and whirl just until silky smooth.

Store in the fridge for up to four days.

Source: We found this at Mom's Kitchen Handbook. You can find it here. On that site, it says it was adapted from Barefoot Contessa at Home by Ina Garten. (Clarkson Potter, 2006).

Notes: This makes a thick, creamy dressing that can be used as a vegetable dip or a salad dressing. If you like thinner dressing, you can thin it down with a little olive oil and vinegar, or add a little milk.

Green Goddess Salad Dressing

Ingredients:

2 cloves garlic
1 scallion
1 handful (about 1/2 cup) fresh herbs (parsley, dill, basil, or cilantro are good options)
2 tbsp red wine vinegar
2 tsp. Dijon mustard
1 cup mayonnaise
1/4 cup water (omit if you prefer a thicker, dip-like consistency)
Salt and pepper, to taste

Directions:

Add all ingredients to a food processor and process until smooth and creamy. If you don't have a food processor, mince the garlic and herbs with a knife and add in some finely chopped chives instead of the scallions.

Notes: Experiment with the combination of herbs to find what you like best. If needed, you can add a pinch of sugar, to taste. You can also substitute half of the mayonnaise with fat-free Greek yogurt to lighten this up.

Source: Busy in Brooklyn. You can find it here.

Miso Dressing

Ingredients:

1 rounded tablespoon white or yellow miso
2 tablespoons seasoned rice vinegar, or 1 tablespoon rice vinegar and 1 tablespoon fresh lime juice
1/2 teaspoon grated fresh ginger
1 small garlic press, minced or put through a press
Pinch of cayenne
2 tablespoons dark sesame oil
2 tablespoons peanut oil or grapeseed oil
2 tablespoons low-fat yogurt

Directions:

Combine the miso and vinegar (or the vinegar and lime juice) in a small bowl and whisk together. Add the remaining ingredients and whisk until amalgamated. You can also mix this in a blender.

Toss with the salad of your choice.

Source: NY Times by Martha Rose Shulman. You can find it here.

Notes: The recipe suggests that this dressing is great for cooked vegetable salads, spinach salads, tofu and noodle salads, and that it is also delicious with a simple bowl of rice.

Sunday, May 14, 2017

Another Great Slow Cooker Potato Recipe


I love potatoes in every form and prepared by every cooking method. They just never get old for me. Here's a great slow cooker mashed potato recipe for you to try.


Crockpot Three Cheese Mashed Potatoes

Ingredients:

5 pounds russet potatoes or Yukon gold potatoes, peeled and cubed (you can leave the peels on, if you like)
4 cloves garlic, peeled and smashed
3 cups whole milk
1 cup low sodium chicken broth or water
1 teaspoon salt and pepper, plus more to taste
1 cup shredded sharp cheddar cheese
1 cup shredded gruyere cheese
1/2 cup grated Parmesan cheese
6 tablespoons butter
1 tablespoon sage

Directions:

Add the potatoes, garlic, 1 cup milk, the chicken broth, salt, and pepper to your slow cooker. Cover and cook on high for 5-6 hours, or on low for 6-8 hours. When the potatoes are fork tender, mash them using a potato masher or a hand held mixer until completely creamy, adding the remaining 2 cups milk, if needed, to thin. Stir in the cheese, cover and cook another 15 minutes or until melted and creamy.

Meanwhile, in a skillet, melt the butter over medium heat until just browned, whisking the browned bits off the bottom of the pan. Stir in the sage and let cook for 30 seconds. Pour the browned butter into the warm mashed potatoes. taste and season with salt and pepper, if desired.

Source: Half Baked Harvest. You can find it here.

Notes: You can serve with the butter poured over the top, or you can stir the butter in to mix it throughout. One picture shows pools of butter while the other shows the butter mixed in.

Sunday, April 30, 2017

This Veggie Side Dish Won't Make People Complain


Poor brussels sprouts get a lot of flack...but if you cook them like this, you will wish you doubled the recipe because they will get gobbled up.


Ina Garten's Balsamic Brussels Sprouts

Ingredients:

1 1/2 lb. brussels sprouts, trimmed and cut in half through the core--leave the small ones whole
4 oz. pancetta, sliced 1/4-inch thick
1/4 cup olive oil
1 1/2 tsp. kosher salt, or more or less to taste
1/2 tsp. freshly ground pepper, plus more, to taste
1 tbsp. reduced (syrupy) balsamic vinegar, or 1/4 cup to 1/2 cup standard store-bought balsamic, reduced until syrupy (see instructions in recipe)

Directions:

Preheat oven to 400 degrees F.

Place the brussels sprouts on a baking sheet, including any of the loose leaves. Cut the pancetta into 1/2-inch dice and add to the pan. Add the olive oil, the 1 1/2 tsp. salt (or to taste), and the 1/2 tsp. pepper and toss with your hands. Spread out the mixture in a single layer.

Roast the brussels sprouts until they're tender and nicely browned and the pancetta is cooked, 20 to 30 minutes, tossing once at the 20-minute mark.

Meanwhile, if using standard store-bought balsamic vinegar, pour vinegar in a small saucepan and simmer gently until it is reduced by half and syrupy in consistency. Be careful because this can burn easily. It is better to have it less syrupy and unburned. Once ready, transfer to a small bowl to cool slightly.

Remove pan from the oven, drizzle immediately with the balsamic vinegar, and toss again. Taste and adjust the seasoning with salt and pepper. Serve hot.

Source: Alexandra's Kitchen. Recipe by Ina Garten. You can find it here.

Notes: Oh my, oh my, these were good. You have to try them to understand just how good they are.

Pasta Salad is the Perfect Side Dish


I just love pasta. It's my ultimate comfort food. I love that it can be a main course and a side dish. You're going to love this recipe.


Sun-Dried-Tomato Pasta Salad

Ingredients:

12 sun-dried tomatoes in oil, drained and divided
2 tablespoons red wine vinegar
6 tablespoons olive oil
1 garlic clove, coarsely chopped
1 teaspoon capers, drained
Kosher salt, to taste
3/4 teaspoon freshly ground black pepper
1/2 pound orecciette or other small pasta
1/2 pound cherry tomatoes, halved
1/2 pound fresh mozzarella, medium-diced
3/4 cup good black olives, such as kalamata, pitted and diced (optional)
1 cup freshly grated Parmesan
1 cup packed basil leaves, julienned

Directions:

Add half the sun-dried tomatoes, all the vinegar, olive oil, garlic, capers, 2 taspoons salt, and pepper to a food processor, and process until almost smooth.

Cook the pasta according to the package directions. Drain well, then toss with the dressing in a large mixing bowl. Meanwhile, mince the remaining sun-dried tomatoes.

Add the tomatoes, mozzarella, olives (if using), remaining sun-dried tomatoes, Parmesan, and basil to the salad. Toss to distribute evenly. Season to taste with salt.

Serve at room temperature.

Source: Popsugar. You can find it here.

Notes: Sun-dried-tomatoes just make everything they are in a little better, don't you think? This was a tasty pasta salad.

Friday, February 10, 2017

The Ultimate Salad Bar


Last summer (yes, I am behind in my posts), we had a lovely salad bar for one of our Sunday dinners. We made some wonderful homemade salad dressing discoveries. Plus, it's always handy to have a great list of salad bar ideas on hand. So, check out these salad dressing recipes and the massive list of options to have at your next salad bar!


Chef John's Creamy Blue Cheese Dressing

Ingredients:

1 cup mayonnaise
1 cup sour cream
3/4 cup buttermilk
1 teaspoon crushed garlic
1/2 teaspoon ground black pepper
1/2 teaspoon dry mustard
1/2 teaspoon salt, or to taste
1/2 teaspoon white sugar
1 pinch cayenne pepper, or to taste
1 teaspoon Worcestershire sauce
4 ounces frozen blue cheese, grated

Directions:

Place mayonnaise, sour cream, and buttermilk in a bowl. Add garlic, black pepper, dry mustard, salt, sugar, cayenne, and Worcestershire sauce. Whisk together thoroughly.

Mix grated blue cheese into the cream base a little at a time to ensure it is evenly incorporated and doesn't clump.

Cover bowl with plastic wrap and refrigerate for at least 3 hours (preferably overnight) to consolidate the flavors.

Source: Allrecipes.com, recipe by Chef John. You can find it here.


Creamy Italian Dressing I

Ingredients:

1 cup mayonnaise
1/2 small onion
2 tablespoons red wine vinegar
1 tablespoon white sugar
3/4 teaspoon Italian seasoning
1/4 teaspoon garlic powder
1/4 teaspoon salt
1/8 teaspoon ground black pepper

Directions:

In a blender or food processor, combine mayonnaise, onion, vinegar, and sugar. Season with Italian seasoning, garlic powder, salt, and pepper. Blend until smooth.

Source: Allrecipes.com, submitted by Cathy. You can find it here.


Famous Japanese Restaurant-Style Salad Dressing

Ingredients:

1/2 cup minced onion
1/2 cup peanut oil
1/3 cup rice wine vinegar
2 tablespoons water
2 tablespoons minced fresh ginger root
2 tablespoons minced celery
2 tablespoons ketchup
4 teaspoons soy sauce
2 teaspoons white sugar
2 teaspoons lemon juice
1/2 teaspoon minced garlic
1/2 teaspoon salt
1/4 teaspoon ground black pepper

Directions:

In a blender, combine the minced onion, peanut oil, rice vinegar, water, ginger, celery, ketchup, soy sauce, sugar, lemon juice, garlic, salt, and pepper. Blend on high speed for about 30 seconds or until all of the ingredients are well-pureed.

Source: Allrecipes.com, submitted by MARBALET. You can find it here.


Honey Dijon Balsamic Vinaigrette

Ingredients:

1/3 cup balsamic vinegar
1/2 cup olive oil
2 tablespoons Dijon mustard
1 tablespoon honey
Salt and pepper, to taste

Directions:

Whisk balsamic vinegar, olive oil, mustard, honey, salt, and pepper in a bowl.

Source: Allrecipes.com, submitted by GumboGirl. You can find it here.


Honey-Lime Vinaigrette

Ingredients:

1/4 cup fresh lime juice
2 tablespoons honey
1 teaspoon white sugar
1 teaspoon Dijon mustard
1/2 teaspoon garlic powder
1/2 teaspoon kosher salt
1/4 teaspoon ground black pepper
1/4 teaspoon ground cumin
1/4 cup olive oil
1/4 cup canola oil

Directions:

Blend lime juice, honey, sugar, mustard, garlic powder, salt, black pepper, and cumin in a blender, stream olive oil and canola oil into the juice mixture while blending to emulsify the oil into the juice.

Source: Allrecipes.com, submitted by Lisa Weston. You can find it here.


Spaghetti Factory's Creamy Pesto Salad Dressing

Makes about 2 1/2 cups

Ingredients:

1 cup mayonnaise
1 1/4 cups low-fat buttermilk
1 1/2 tbsp dried basil
1/2 tsp garlic powder
1/8 tsp salt
1/8 tsp fresh ground black pepper
1/4 cup freshly, finely grated Parmesan cheese

Directions:

Combine all ingredients in a medium mixing bowl.  Whisk until smooth and creamy.  Pour into an airtight container and refrigerate 1 hour (this will help the flavors develop).  Serve over salad or use as a dip.

Source: Again, I found this on Pinterest and it is from a blog called "Cooking Classy" which you can find here.

Recipe Notes: The author of the recipe noted that if you are in a hurry and don't have time to refrigerate the dressing for an hour prior to serving, you can serve it right away, if necessary.


Notes: This dressing was great.  I ate it on salad...and then I dipped some baby carrots in it...and then we dipped some pizza and bread sticks in it.  Seriously, this stuff was awesome.


Just Like Cafe Rio Cilantro Ranch Dressing/Creamy Tomatillo Dressing

Ingredients:

1 packet traditional Hidden Valley Ranch mix (not buttermilk)
1 cup mayonnaise
1 cup buttermilk
2 tomatillos, husks removed, cut into quarters
1/2 bunch fresh cilantro
1 clove garlic, roughly cohpped
Juice of 1 lime (1-2 tbsp bottled, if fresh is not available)
1 jalapeno (remove seeds for less heat, keep seeds if you like things spicy)

Directions:

Place all ingredients together in a blender. Mix until well blended. Refrigerate until ready to serve.

Source: I found this online a few years ago on a blog very much like my own. I don't remember the particular site, however.

Notes: This dressing is so spot on. It tastes almost exactly like what you get in the restaurant. Be careful though. This makes a lot, and as you can see, it's not low fat!


Ideas for the Ultimate Salad Bar:


Protein:

Diced or shredded chicken (poached or from a roast chicken)
Diced turkey
Diced ham
Crumbled bacon
Cubed salami
Mini or small shrimp (or a shrimp tray)
Tuna
Sliced or quartered hard-boiled eggs

A Little Crunch:

Toasted Sliced almonds
Toasted macadamia nuts
Candied pecans or walnuts (if you don't have tree nut allergies to deal with like we do)
Croutons
French fried onions
Tortilla strips
Toasted pita strips
Crispy chow mein noodles


Cheese:

Shredded or diced Cheddar cheese
Shredded or diced Monterey Jack cheese
Gorgonzola or blue cheese crumbles
Cubed Swiss cheese
Mozzarella (shredded, cubed, or bocconcine fresh mozzarella balls)
Crumbled Feta
Parmesan
Cotija


Vegetable Toppings:

Peas
Baby corn (canned)
Sliced fresh mushrooms
Sliced beets (canned or roasted)
Black, green, or Kalamata olives
Pepperoncini peppers, whole or sliced
Tomato wedges
Grape or cherry tomatoes
Cucumber slices
Diced or sliced zucchini
Diced or sliced avocado
Thinly sliced red onion
Green onions, sliced
Thinsly sliced red, yellow, and/or green peppers
Shredded carrots
Sliced radishes
Chickpeas aka Garbanzo beans
Kidney beans
Cannellini, white, or navy beans
Black beans
Hearts of palm
Artichoke hearts
Bean sprouts
Alfalfa sprouts


Vegetable sides (for dipping):

Broccoli
Cauliflower
Celery
Sweet peas
Small sweet peppers
Bell pepper slices
Sliced jicama


Fruit salad toppings or sides:

Orange segments, mandarin oranges, or cuties
Quartered strawberries
Raspberries
Blackberries
Sliced kiwi
Diced apples
Diced pears
Dried cranberries
Dried cherries
Grapes
Watermelon


Lettuce Ideas:

Spinach
Romaine
Baby Romaine
Green leaf lettuce
Butter lettuce
Boston lettuce
Arugula
Kale
Sprink mix
Iceberg mix
Coleslaw mix or shredded cabbage (green or purple)

Dressing Ideas:

Ranch dressing (homemade, bottled, or prepared using Hidden Valley Ranch packets)
Italian dressing (prepared using Good Seasons packets)
Blue Cheese dressing
Green Goddess dressing
Thousand Island dressing
Poppy Seed dressing
Balsamic dressing
Asian Sesame dressing
Creamy Tomatillo Ranch dressing
Other favorite homemade or bottled salad dressings

Mexican Themed:

Shredded sweet pork
Crispy tortilla strips
Corn
Caramelized onions
Guacamole
Salsa
Sour cream
Black or pinto beans
Crumbled cotija cheese or Parmesan cheese
Creamy Tomatillo Ranch Dressing

Asian Themed:

Chow mein noodles
Mandarin oranges
Shredded poached chicken
Edamame
Asian Sesame dressing

Fruit Themed:

Berries
Romaine lettuce
Favorite nuts
Chicken (or not if you want to keep it more simple)
Poppy Seed dressing 

Did I miss anything? If so, let me know in the comments and I will add it in! What other ideas do you have? However, that right there is a list for a pretty amazing, satisfying, and filling salad bar!

Thursday, February 9, 2017

Saucy!


Sometimes what you really need to make something really special is homemade sauce. This is one awesome barbecue sauce, and it won't take long to whip it up from scratch.

Coca-Cola Barbecue Sauce

Ingredients:

1 cup Coca-Cola
1 cup ketchup
1/4 cup Worcestershire sauce
1 teaspoon liquid smoke
3 tablespoons A1 Steak Sauce
1 teaspoon onion flakes
1 teaspoon garlic flakes
1/2 teaspoon freshly ground black pepper

Directions:

Combine all the ingredients in a heavy nonreactive saucepan and gradually bring to a boil over medium heat. Reduce the heat slightly to obtain a gentle simmer. Simmer the sauce until reduces by a quarter, 6 to 8 minutes. Use right away or transfer to a large jar, cover, cool to room temperature, and refrigerate. The sauce will keep for several months.

Source: You can find it online here. It's from Steven Raichlen's Barbecue! Bible Sauces, Rubs and Marinades, Bastes, Butters & Glazes.

Sunday, February 5, 2017

Blast From My BYU Past


Almost anyone who has ever been to the Wilkinson Center and the Cougar Eat (whether you attended BYU or not) has tried a BYU mint brownie...and if you haven't, you have probably heard of them. Well, in my BYU alumni email, they shared the recipe one fine day and I am going to share it with you as well.

They didn't divulge their whole recipe. That's probably how they preserve the legacy of these brownies. Ha ha! They shared the brownie recipe and the mint icing frosting recipe, but not the chocolate frosting recipe. They suggested using 12 oz. of canned chocolate frosting, or your favorite recipe for chocolate frosting. However, I found another blog with the recipe for these brownies and the author had cleverly altered the mint frosting recipe to make the chocolate frosting as well.


BYU Mint Brownies

Ingredients:

Brownies:

1 cup margarine or butter
1/2 cup cocoa
2 tbsp. honey
4 eggs
2 cups sugar
1 3/4 cup flour
1/2 tbsp. baking powder
1/2 tsp. salt
1 cup chopped walnuts, optional (I omitted these because of my son's tree nut allergy)

Mint Icing:

5 tbsp. margarine or butter
Dash of salt
3 tbsp. milk
1 tbsp. light corn syrup
2 1/3 cup powdered sugar
1/2 tsp. mint extract
1-2 drops green food coloring

Chocolate Icing:

5 tbsp. butter
Dash of salt
3 tbsp. milk
1 tbsp. light corn syrup
2 1/3 cup powdered sugar
1/3 cup cocoa

Directions:

Brownies:

Melt margarine or butter and mix in cocoa. Allow to cool. Add honey, eggs, sugar, flour, baking powder, and salt. Mix well. Add nuts, if desired. Pour batter into a greased 9x13-inch baking pan. Bake at 350 degrees for 25 minutes. Cool.

Mint Icing:

Soften margarine or butter. Add salt, corn syrup, and powdered sugar. Beat until smooth and fluffy. Add mint extract and food coloring. Mix. Add milk gradually until the consistency is a little thinner than cake frosting.

Frost cooled brownies with mint icing. Place in freezer to stiffen icing while preparing chocolate icing.

Chocolate Icing:

Soften margarine or butter. Add salt, corn syrup, and powdered sugar. Beat until smooth and fluffy. Add cocoa. Mix until smooth.

Remove brownies from freezer and carefully top with chocolate frosting. If you would like, you can place the brownies in the freezer again to allow the frosting to set and to allow for smoother cutting of the brownies.

Source: My BYU Alumni email and a blog called Your Home Based Mom by LeighAnne Wilkes. You can find that blog here. You can find it on BYU's site here.

Notes: I didn't freeze my brownies after adding the chocolate icing and before cutting them. As a result, the cutting process was a little messy. The brownies could have looked neater and prettier if I had frozen them prior to cutting them. Oh well! The brownies were still delicious though!

Monday, December 26, 2016

Christmas Treats


We did a cookie exchange for Christmas, but I also made these treats to give to people that I wasn't able to take cookies to. The problem was that we were going to deliver these on Christmas Eve, but everyone was riled up and crazy, so we didn't get a chance to deliver these on Christmas Eve. So, we were going to deliver these on Christmas Day after we visited family...and then my baby came down with the stomach flu and was throwing up all evening...and the next day. So, we ended up eating these all ourselves.


Pretzel M&M Peppermint Kisses

Ingredients:

70 square pretzels
70 Hershey's peppermint kisses, unwrapped
70 red and green M&Ms

Directions:

Preheat oven to 200 degrees. Line a cookie sheet with waxed paper or parchment paper. Place pretzels on the cookie sheet in a single layer and then top each pretzel with one Hershey's peppermint kiss. Bake in preheated oven for 4-5 minutes, or until the chocolate is shiny and soft, but holding its shape and not completely melted.

Remove from oven and carefully place on M&M in the center of each peppermint kiss and press down gently. Place in refrigerator to allow chocolate to set.

Source: I have gotten this from neighbors and friends for years now. It's pretty self-explanatory, but I found a recipe for it through Pinterest. You can find the recipe here.

Notes: Oh, these were good. I made more than 70. I just filled my jelly role pan as much as I could. I didn't keep track of the final count. You can make these at any time of the year. Use pink, red, and white M&Ms for Valentine's Day. Or use regular colors of M&Ms for any time of the year.


Pretzel M&M Rolo Treats

Ingredients:

70 circular or square pretzels
70 Rolos, unwrapped
70 red and green M&Ms

Directions:

Preheat oven to 350 degrees F.

Line a cookie sheet with waxed paper or parchment paper. Place pretzels on the cookie sheet in a single layer and then top each pretzel with a Rolo.

Bake in oven 1-2 minutes, or until Rolos are softened, but not completely melted.

Remove from oven and place one M&M in the center of each Rolo. Place in refrigerator until set.

Source: Again, this is one I have gotten from family and friends for ages, but I found some instructions on Allrecipes.com. You can find it here.

Sunday, December 4, 2016

Slow Cooker "Roasted" Potatoes


So, these potatoes aren't really roasted since they are made in a slow cooker, but what could be easier?

Slow-Roasted Potatoes

Ingredients:

16 small new red potatoes, washed, unpeeled, and halved
3 tablespoons butter, cubed
1 teaspoon paprika
1/2 teaspoon salt
1/4 teaspoon garlic powder
Black pepper, to taste

Directions:

Combine the potatoes, butter, paprika, salt, garlic powder, and pepper in a slow cooker. Stir to blend. Cover and cook on low for 7 hours or on high for 4 hours.

Source: The Daily Meal. You can find it here. Though be aware that the picture they use on their site is a stock photo and your potatoes won't end up looking like that.

Notes: These were tasty. Be generous with the seasoning though. Feel free to use more salt, pepper, paprika, and garlic powder than noted in the recipe. Also, we used minced garlic rather than garlic powder.

Monday, November 7, 2016

Turning Cereal Into Dessert


I know, I know. Most cereal is sweet enough that it could be considered dessert, but if you want to turn it into a technical dessert, these recipes are for you.


Cookie Cereal Marshmallow Treats

Ingredients:

4 tablespoons butter
10 oz. marshmallows (1 large bag)
6 cups cookie cereal
1 bag white melting chocolate/candy coating wafers
Mini chocolate chips

Directions:

Melt the butter in a large pot and add the marshmallows. Stir the marshmallows until completely melted and smooth. Add cookie cereal and stir to combine.

Press cookie cereal into a buttered cookie sheet (you can line the sheet with foil to make for easier removal).

Press flat and let the cookie cereal treats sit until completely set and cooled.

Cut treats into squares. Melt the white chocolate according to the package directions. Dip half of each treat square into the melted white chocolate. Tap off any excess chocolate.

Place dipped treats on a sheet of waxed paper and sprinkle with mini chocolate chips. Let treats sit until chocolate has set.

Source: Big Bear's Wife. You can find the recipe here.

Notes: We didn't melt the white candy coating wafers and dip the treats into the melted chocolate. We simply sprinkled the candy coating wafers on top along with the mini chocolate chips. We did this to cut down on time, but still incorporate the white chocolate flavor.


Honey Nut Cheerios Peanut Butter Bars

Ingredients:

1 cup white sugar
1 cup light corn syrup
1 cup peanut butter
6 cups Honey Nut Cheerios
1/2 cup chocolate chips (optional)

Directions:

Butter a 9x13-inch baking pan and set aside.

In a large pan, melt sugar and corn syrup over medium heat until it barely comes to a boil. Remove from heat and stir in peanut butter. Add Cheerios, 2 cups at a time and stir until fully coated.

Press mixture into a 9x13-inch dish.

Optional: Melt 1/2 cup chocolate chips in the microwave for 1 minute and drizzle chocolate on top of the bars.

Store leftovers in an air-tight container for up to 3 days.

Source: I Heart Nap Time. You can find it here.

Notes: These were quite tasty!


Cookie Butter and White Chocolate Cheerios Marshmallow Treats

Ingredients:

7 cups Honey Nut Cheerios
2 tablespoons unsalted butter
1/3 cup Biscoff cookie spread
1 (10 1/2 ounce) bag miniature marshmallows
3/4 cup white chocolate chips

Directions:

Line a 9x13-inch baking pan with foil and coat with non-stick cooking spray; set aside.

In a large pot over medium-low heat, melt the butter and Biscoff cookie spread. Add in the marshmallows and stir constantly until completely melted. Toss in the white chocolate chips and stir.

Remove pot from the stove and fold in the Cheerios cereal until evenly coated with the melted marshmallows.

Pour mixture into the prepared pan and press into pan.

Cut into squares after mixture has fully set and cooled.

Store leftovers in an airtight container for up to 3 days.

Source: Belly Full. You can find it here.

Notes: I would increase the cookie butter next time. It was a very subtle taste and I would like to make the cookie butter flavor more prominent. I would use at least 1/2 cup next time.

Sunday, October 16, 2016

Calling All Mushroom Lovers!


If you don't love mushrooms, this recipe is not for you. If you were to pick out the mushrooms, there would be nothing left!

Marinated Button Mushrooms

Ingredients:

1/2 lb. button mushrooms (approximate)
2/3 cup apple cider vinegar (or vinegar of your choice--balsamic or red wine vinegar would also work well)
1/2 cup extra virgin olive oil
2 whole cloves garlic, peeled
1 tbsp. maple syrup (or sweetener of your choice)
1 tsp. salt
1/2 tsp. black pepper
1/2 tsp. dried oregano
1/4 tsp. cayenne pepper
2-3 whole chilis, optional
Large clean mason jar 

Directions:

Prepare your jar. If you are planning to keep these in the fridge for more than a day or two, you should sterilize the jar by boiling it in a saucepan for a few minutes.

Prepare your mushrooms. If they are small, you don't need to do anything, just make sure they're clean (brush off any dirt with a paper towel). If they're a little bigger, then cut them in half or into quarters. Remove the stems, if you like.

Put the mushrooms into the jar.

Put all remaining ingredients into a pot and bring to a simmer. Turn off the heat and pour the hot mixture over the mushrooms. Giver everything a shake or a stir and leave to cool to room temperature. Once cool, store in the fridge.

Makes approximately 2 cups.

Source: Quite Good Food. You can find it here.

Notes: Oh, these were yummy. I love mushrooms.


Sunday, August 28, 2016

Pie Night 2016! Part 2


 The Pie Night 2016 recipes continue!


Chocolate Chip Funny Cake Pie

Ingredients:

Top Layer:

1/2 cup white sugar
1/4 cup (1/2 stick) butter, softened
1 egg
1/2 teaspoon vanilla
1 teaspoon baking powder
1 cup all-purpose flour
1/2 cup milk

Bottom Layer:

1/2 cup sugar
1/4 cup baking cocoa
1/3 cup hot water
1/4 teaspoon vanilla

Additional Ingredients:

9" pie crust
1/2 cup mini chocolate chips

Directions:

Preheat the oven to 375 degrees F.

In a medium bowl, cream together the sugar, butter, and egg.

In a separate bowl, mix together the baking powder and flour.

Add the flour mixture to the sugar mixture alternately with milk.

Mix just until combined.

In a separate bowl, combine the sugar and cocoa. Add the hot water and vanilla and mix until combined completely.

Use a store bought single pie crust or your favorite pie crust recipe and press it into a pie plate.

Pour the chocolate mixture into the pie crust, then spoon the cake batter over the top of the chocolate. Use the back of the spoon to gently spread the batter over top. Be careful while doing this, but don't worry if it doesn't cover the whole top. It will spread as it bakes. You want the fudgy chocolate to stay on the bottom of the pie and not get mixed in.

Sprinkle the mini chocolate chips over the pie.

Bake at 375 degrees F. for 27-30 minutes, or until the cake is set.

Source: Tastes of Lizzy T's. You can find it here.

Notes: If you can't help but miss having cake--even on Pie Night--then this recipe is for you!


Chocolate Chip Cookie Cherry Cheesecake Pie

Ingredients:

1 (16.5 oz) roll refirgerated chocolate chip cookie dough
2 pkgs. (8 oz.) cream cheese, softened
2/3 cup sugar
1 egg
2 tsp. vanilla extract
2 cans (21 oz.) Lucky Leaf Regular or Premium Cherry Fruit Filling, divided

Directions:

Preheat oven to 350 degrees F.

Press cookie dough evenly into bottom and sides of a deep dish (2" deep) 9" pie plate.

Bake 12 minutes at 350 degrees F. Cool completely. While crust is cooling, prepare filling. In a large bowl, beat cream cheese, sugar, egg, and vanilla until smooth. Stir in 1 can of cherry fruit filling.

Pour filling into cooled crust.

Bake 55-70 minutes (or until filling is set and golden brown at 350 degrees F.

Cool. Refrigerate until ready to serve. Top with remaining can of cherry fruit filling.

Source: Lucky Leaf website. We found the recipe in a mailer. You can find it here.

Notes: My mom substituted raspberry pie filling because she doesn't think enough of us like cherries. This was good, but it would have been better with the cherry pie filling as called for in the original recipe.


Raspberry Peach Pie

Ingredients:

1 1/4 cups all-purpose flour
1/2 teaspoon salt
1/3 cup shortening
1/4 cup cold water

Filling:

4 medium peaches, peeled and sliced
1 1/3 cups sugar
5 teaspoons lemon juice
1/4 cup cornstarch
1/3 cup water
3 cups fresh raspberries

Directions:

In a large bowl, combine flour and salt. Cut in shortening until mixture resembles coarse crumbs. Stir in water until mixture forms a ball. Roll out pastry to fit in a 9-in. pie plate.

Transfer to pie plate; trim and flute edges. Line unpricked pastry with a double thickness of heavy-duty foil. Fill with dried beans, uncooked rice, or pie weights.

Bake at 450 degrees F. for 8 minutes. Remove foil and weights; bake 5-7 minutes longer or until golden brown. Cool on a wire rack.

In a large saucepan, combine the peaches, sugar, and juice. Combine cornstarch and water until smooth. Stir into peach mixture. Bring to a boil; cook and stir for 1 minute or until thickened. Remove from the heat; cool to room temperature. Fold in raspberries. Spoon into crust.

Refrigerate for at least 4 hours or overnight. Refrigerate leftovers.

Yield: 8 servings.

Recipe Note: Let pie weights cool before storing. Beans and rice may be reused for pie weights, but not for cooking.

Nutrition information: 1 slice equals 333 calories, 8 g fat, 0 mg cholesterol, 149 mg sodium, 63 g carbohydrate, 39 g sugar, 5 g fiber, 3 g protein.

Source: Taste of Home, recipe by Jean Boelsma, Bethel, Maine. You can find it here.

Notes: Our pie ended up a lot juicier than the recipe pictured. It was still tasty though. You can also substitute a frozen 9" pie crust.


Snickerdoodle Pie

Ingredients:

1 single unbaked pie crust
1 tablespoon raw or coarse sugar
3/4 teaspoon ground cinnamon
2 teaspoons butter, melted
1/2 cup packed brown sugar
1/4 cup butter
3 tablespoons water
2 tablespoons light corn syrup
1 1/2 teaspoons vanilla
1/4 cup butter, softened
1/2 cup granulated sugar
1/4 cup powdered sugar
1 teaspoon baking powder
1/2 teaspoon salt
1/4 teaspoon cream of tartar
1 egg
1/2 cup milk
1 1/4 cups all-purpose flour

Directions:

Preheat oven to 350 degrees F.

Roll out single pie crush and line a 9" pie plate with the crust. Crimp edges as desired.

In a bowl, combine the tablespoon of coarse or raw sugar and 1/2 teaspoon of the cinnamon. Brush the 2 teaspoons of melted butter on the bottom of the pie crust, then sprinkle 1 teaspoon of the cinnamon sugar mixture over the butter. Set aside.

In a small saucepan over medium heat, combine the brown sugar, 1/4 cup butter, water, corn syrup, and remaining 3/4 teaspoon of cinnamon. Bring to a boil, stirring to dissolve the brown sugar. Let the mixture boil for 2 minutes, then remove from the heat. Stir in 1/2 teaspoon of vanilla, and set aside.

In a mixing bowl, beat the 1/4 cup softened butter on medium speed for 30 seconds. Beat in the 1/2 cup of granulated sugar, powdered sugar, baking powder, salt, and cream of tartar. Beat in the egg and the remaining 1 teaspoon of vanilla extract. Slowly beat in the milk, just until combined. Add in the flour, and beat to combine.

Spread the cookie mixture evenly into the pie dish. Slowly pour the syrup over the top. Sprinkle with the remaining cinnamon sugar mixture.

Cover the edges of the pie with foil, and bake for 25 minutes. Remove the foil, and continue to bake until the top of the pie is puffed and golden brown, and a toothpick inserted in the middle comes out clean, about 20 more minutes. Cool for at least 30 minutes before serving. If desired, serve with cinnamon ice cream or vanilla ice cream dusted with cinnamon.

Source: Better Homes and Gardens New Cookbook, 16th Edition, found on a blog called Taste and Tell. You can find the blog post here. You can find the cookbook here.


Chocolate Banoffee Pie

Ingredients:

One 9" pie crust, baked (or you can use a chocolate or graham cracker crumb crust)
1/2 cup good quality dark chocolate or chocolate chips
1/2 cup heavy whipping cream
1 or 2 firm, but ripe, bananas
Lemon juice for bananas
One (14 oz) can of caramel flavored condensed milk or dulce de leche
1 1/2 cups heavy whipping cream
Chocolate sprinkles, optional

Directions:

Place the chocolate in a small pan along with 1/2 cup heavy whipping cream. Stir constantly over low heat until the chocolate melts and becomes a smooth, thick sauce (ganache). Remove from heat.

Slice the bananas and toss with a little lemon juice, then arrance slices on the bottom of the pie crust.

Pour the caramel flavored condensed milk or dulce de leche over the bananas.

Pour the ganache over the condensed milk, and smooth evenly. Place in fridge for at least an hour.

Whip the heavy whipping cream until stiff peaks form, but be careful not to over whip. Pipe or spoon the whipped cream over the top of the pie, leaving the center open, if desired. Decorate with sprinkles, if desired. Refrigerate leftovers.

Source: Chocolate Chocolate and More. You can find it here.

Notes: This was really good and so easy too. You could also make it without the bananas, if you prefer.


Caramel Custard Pie

Ingredients:

Pastry for single-crust pie (9 inches)
2/3 cup packed brown sugar
4 teaspoons all-purpose flour
3 eggs
2 cups 2% milk
1/4 cup sugar
1 teaspoon vanilla extract
1/8 teaspoon salt
1/8 teaspoon ground nutmeg

Directions:

Line a 9-inch pie plate with pastry; trim and flute edges. Combine brown sugar and flour; press into pastry.

In a large bowl, combine the eggs, milk, sugar, vanilla, and salt; pour over brown sugar mixture.

Bake at 350 degrees F. for 55-60 minutes or until a knife inserted near the center comes out clean. Cover edges with foil during the last 15 minutes to prevent overbrowning, if necessary. Cool on a wire rack; sprinkle with nutmeg. Refrigerate for at least 2 hours before serving.

Yield: 8 servings.

Nutrition information: 1 piece equals 277 calories, 10 g fat, 89 mg cholesterol, 201 mg sodium, 41 g carbohydrate, 28 g sugar, 0 g fiber, 6g protein.

Source: Taste of Home, recipe by Roger Clapper of Delavan, Wisconsin. You can find it here.

Notes: I'm not sure why this has such a low review on the Taste of Home website. I thought this was fantastic. My caramel was not gritty (as some people complained theirs was) and my custard was not curdled. This is a great pantry friendly pie.


Old-Fashioned Custard Pie

Ingredients:

Pastry for single-crust pie (9 inches)
4 eggs
2 1/2 cups milk
1/2 cup sugar
1 teaspoon ground nutmeg
1 teaspoon vanilla extract
1 teaspoon almond extract
1/2 teaspoon salt

Directions:

Unroll pastry sheet into a 9-inch pie plate; flute edge. Refrigerate 30 minutes. Preheat oven to 400 degrees F.

Line unpricked pastry with a double thickness of foil. Fill with pie weights, dried beans, or uncooked rice. bake on a lower oven rack 10-15 minutes or until edges are golden brown. Remove foil and weights; bake 3-6 minutes longer or until bottom is golden brown. Cool on a wire rack.

In a large bowl, whisk eggs. Whisk in remaining ingredients until blended. Pour into crust. Cover edges with foil. Bake at 400 degrees F. for 25-30 minutes or until a knife inserted near the center comes out clean. Cool on a wire rack for 1 hour. Refrigerate for at least 3 hours before serving. Refrigerate leftovers.

Yield: 6-8 servings.

Source: Taste of Home. You can find it here.

Notes: This is another recipe with surprisingly low reviews, but it it is so easy and absolutely fantastic. The confusion for many reviewers was because they didn't read the recipe carefully enough and didn't bake the pie crust prior to filling it with the custard filling--and THEN complete the baking of the pie. It's so important to read the whole recipe all the way through before you start making it!


Sugar Cream Pie

Ingredients:

Pastry for a deep dish single-crush pie (9 inches)
1 cup sugar
1/4 cup cornstarch
2 cups 2% milk
1/2 cup butter, cubed
1 teaspoon vanilla extract
1/4 teaspoon ground cinnamon

Directions:

Preheat oven to 450 degrees F. Roll out pastry to fit a 9-inch pie plate. Transfer pastry to pie plate. Trim pastry to 1/2 inch beyond rim of plate; flute edge. Line unpricked pastry with a double thickness of heavy-duty foil. Fill with pie weights, dried beans, or uncooked rice.

Bake 8 minutes. Remove foil and weights; bake 5-7 minutes longer or until light brown. Cool on a wire rack. Reduce oven setting to 375 degrees F.

Meanwhile, in a large saucepan, combine sugar and cornstarch; stir in milk until smooth. Bring to a boil. Reduce heat; cook and stir 2 minutes or until thickened and bubbly. Remove from heat; stir in butter and vanilla. Transfer to crust; sprinkle with cinnamon. Bake 15-20 minutes or until golden brown. Cool on a wire rack; refrigerate until chilled.

Yield: 8 servings.


 Source: Taste of Home, recipe submitted by Laura Kipper, Westfield, Indiana. You can find it here.

Notes: I used a frozen pie crust. I used a regular 9" pie crust the first time and I had way more filling than I could fit in the crust and what I did get in there overflowed. I made it again using a deep dish pie crust and it worked so much better. This pie was absolutely delicious and so, so easy!


Ladyfinger Ice Cream Cake

Ingredients:

2 packages (3 ounces each) ladyfingers, split
3 cups vanilla ice cream, softened
1 jar (16 ounces) hot fudge ice cream topping
1 package (8 ounces) toffee bits
3 cups chocolate ice cream, softened
3 cups coffee ice cream, softened

Directions:

Arrange ladyfingers around the edge and on the bottom of a 9-inch springform pan coated with cooking spray.

Spoon vanilla ice cream into prepared pan. Top with a third of the ice cream topping and toffee bits. Freeze for 20 minutes. Repeat layers, using chocolate and coffee ice creams (pan will be full). Freeze overnight or until firm.

Yield: 16 servings.

Nutrition facts: 1 slice equals 365 calories, 16 g fat, 57 mg cholesterol, 184 mg sodium, 50 g carbohydrate, 35 g sugars, 1 g fiber, 6 g protein.

Source: Taste of Home, recipe by Barbara McCalley of Allison Park, Pennsylvania. You can find it here.

Notes: I love Tiramisu and I am always on the lookout for a caffeine free version. Kroger has a Private Selection Coffee Ice Cream that is fantastic (and uses coffee extract, so it is caffeine free). I would suggest putting the coffee layer of ice cream on the bottom though because it is very strong and that would help to even out the flavors a bit.


Above: Dishonorable Mention: Fruity Pebbles No-Bake Cheesecake Pie. We made this for the kids, but it was awful. Too, too sickeningly sweet. Not sweet in a good way, just sickeningly sweet. The kids liked the looks of it, but not the taste of it. However, if you still want to brave it, you can find the recipe here.