Tuesday, March 17, 2015

St. Patrick's Day Leftovers


I made extra corned beef this year so that we could have Reuben sandwiches. I usually use deli corned beef, or pastrami (which I actually prefer over deli corned beef). However, using leftover corned beef made for such fantastic Reuben sandwiches.

I usually broil my sandwiches, but this time I opted for a shortcut and used the microwave. I don't think it would have worked as well with deli meat, but with the leftover corned beef, it totally worked.


Reuben Sandwiches

Ingredients:

Sliced rye bread
Sliced Swiss cheese
Thousand island dressing
Sauerkraut, drained
Corned beef

Directions:

Toast the slices of rye bread. Place the slices of rye bread on a microwave safe plate.

Top the toasted rye bread with Swiss cheese (one slice per piece of bread, or half a slice of Swiss cheese per piece of bread if you want a lighter sandwich). Spread the Swiss cheese with desired amount of thousand island dressing.

Heat the corned beef in the microwave.

Place desired amount of sauerkraut on one slice of rye. Place desired amount of corned beef on the other slice of rye. Carefully put the two halves of the sandwich together. Slice sandwich in half and serve.

Source: Reuben sandwiches have been around for about 100 years, but the origin isn't really known. It either came from Omaha, Nebraska or from New York City. Read about it here and then decide for yourself.

Notes: These were so good and so easy. It made for a perfect and easy dinner to follow after the more time consuming St. Patrick's Day dinner that we had.

St. Patrick's Day Find


I usually make this Irish soda bread, but I found this recipe and just had to try it. Now I will have to make both kinds of Irish soda bread each year!


Easy Irish Soda Bread

Ingredients:

3 1/2 cups all-purpose flour
1/2 cup sugar
2 tablespoons caraway seeds
2 teaspoons baking powder
1 teaspoon salt
1/2 teaspoon baking soda
2 eggs
2 cups (16 ounces) sour cream
3/4 cup raisins

Directions:

In a large bowl, combine the flour, sugar, caraway seeds, baking powder, salt, and baking soda. In a small bowl, whisk eggs and sour cream. Stir into dry ingredients just until moistened. Fold in raisins.

Spoon into a greased 9-in. springform pan. Bake at 350 degrees F for 40-45 minutes or until a toothpick inserted near the center comes out clean. Cool on a wire rack for 10 minutes before removing sides of pan. Cut into wedges; serve warm.

Yield: 1 loaf (12 wedges)

Source: Taste of Home. You can find it here.

Notes: If you only cut this into 12 wedges, they are very generous in size. I think you can get a lot more than 12 wedges out of this. This was just so good. Moist, flavorful, and so easy to make.

Monday, March 16, 2015

St. Patrick's Day Treats for the Kids


I loved these cookies while growing up. In hindsight, they aren't anything special when it comes to taste...but they always bring back good memories and kids love them.

These cookies are much easier than the length of my instructions would lead you to think. There are just a lot of steps that get repeated. Just read through the instructions and give it a go!

Rainbow Cookies

Ingredients:

1 roll refrigerated sugar cookie dough
Red, yellow, green, and blue food dye (you can use additional colors, if you like)

Directions:

Divide the dough into four portions, ranging in size from small to large.


Above: You can do more colors than just red, yellow, green, and blue. If you do, divide them up better than I did! Red should be the biggest, and each ball of cookie dough should get smaller in size as you go. I didn't do such a great job of that here...oh well, practice makes perfect. Next time, I will get it right!

Knead blue food dye into the smallest portion of cookie dough. Wrap in plastic wrap and place in the refrigerator until ready to use.

Knead green food dye into the second smallest portion of cookie dough. Wrap in plastic wrap and place in the refrigerator until ready to use.

Knead yellow food dye into the second largest portion of cookie dough. Wrap in plastic wrap and place in the refrigerator until ready to use.

Knead red food dye into the largest portion of cookie dough. Wrap in plastic wrap until ready to use.

Rainbow Cookie Option 1:


Pull blue cookie dough out of the refrigerator and shape into a snake-like shape on a piece of waxed paper.

Pull green cookie dough out of the refrigerator. Roll out and then place the blue cookie dough on top of the green cookie dough and roll the green cookie dough over the blue to cover the blue completely.

Pull the yellow cookie dough out of the refrigerator. Roll out and then place the green log of cookie dough on top of the yellow cookie dough and roll the yellow cookie dough over the green to cover the green completely.


Pull the red cookie dough out of the refrigerator. Roll out and then place the yellow log of cookie dough on top of the red cookie dough and roll the red cookie dough over the yellow to cover the yellow completely.

Wrap log of cookie dough in plastic wrap and place in the refrigerator for 30-60 minutes, or until cold and firm.

Remove log of cookie dough out of refrigerator. Unwrap and slice into 1/4 inch rounds. Place sugar cookie circles on cookie sheet and bake according to sugar cookie package directions.

Rainbow Cookie Option 2:


Pull blue cookie dough out of the refrigerator and shape into a snake-like shape on a piece of waxed paper.

Pull green cookie dough out of the refrigerator. Roll out and then place it over the blue cookie dough (not enclosing the blue completely--so that it is like a cylinder cut in half).

Pull the yellow cookie dough out of the refrigerator. Roll out and then place over the green cookie dough (again, not enclosing completely).

Pull the red cookie dough out of the refrigerator. Roll out and then place over the yellow cookie dough (again, not enclosing completely).

Wrap log of cookie dough in plastic wrap and place in the refrigerator for 30-60 minutes, or until cold and firm.

Remove log of cookie dough out of refrigerator. Unwrap and slice into 1/4 inch slices. Place sugar cookie half-circle slices on cookie sheet and bake according to sugar cookie package directions.


Source: I believe my mom found this in a little Pillsbury cookbook years ago.

Notes: I suggest cooking these for less time in order to keep the sugar cookies soft. If the package calls for 8-10 minutes of bake time, bake them for 7 or 8 minutes. They might seem underdone when you pull them out of the oven, but after they cool, they will be nice and soft. If you cook them for 10 minutes, they will be crunchy, crispy cookies after they cool.

If you end up with crunchy cookies, you can always put a little softened vanilla ice cream on the cookie, top it with another cookie, wrap it up and freeze it and then serve it as an ice cream sandwich instead. The ice cream will soften the cookie and make it chewy and it makes for some really tasty ice cream sandwiches. See here.

Another preparation option is that you can do cookie option #1 and slice the whole log in half lengthwise and then slice both halves into 1/4 inch cookie slices. It's up to you.

You can do more colors (and add orange and purple layers, for instance, for a complete ROYGBIV rainbow). However, if you opt to use more colors, I would suggest using two rolls of refrigerated sugar cookie dough instead of just one roll. It will be easier to divide the dough into all the colors that way. Yes, you will end up with more cookies (and a longer log of cookie dough to deal with), but if your kids can't eat them, they freeze well, and you can have them another time.

These cookies aren't really an exact science and it is hard to get them to turn out perfectly, but honestly, the kids won't care. They will think they are fun and tasty even if they look a little crazy (as mine do!).

Saturday, March 14, 2015

Lasagna Overload! Dessert Edition


Now for our desserts for lasagna night! These are layered, creamy, fluffy confections that made it hard to choose just one.


Chocolate Lasagna

Ingredients:

36 Oreo cookies
6 tablespoons butter, melted
1 (8 ounce) package cream cheese, softened
1/4 cup granulated sugar
2 tablespoons cold milk
1 (12 ounce) container Cool Whip, divided
2 (4 ounce) packages chocolate instant pudding
3 1/4 cups cold milk
1 1/2 cups mini chocolate chips

Directions:

Crush the Oreos into fine crumbs using a food processor or by placing them in a zip top bag and using a rolling pin.

Transfer the Oreo crumbs to a large bowl. Stir in 6 tablespoons melted butter and use a fork to incorporate the butter into the cookie crumbs.

Generously coat a 9x13-inch baking dish with cooking spray. Press the cookie crumbs into the bottom of the pan. Place the pan in the refrigerator while you work on the additional layers.

Mix the cream cheese with a mixer until light and fluffy. Add in the sugar and milk and mix well. Stir in 1 1/4 cups of the Cool Whip. Spread this mixture over the crust.

In a bowl, combine chocolate instant pudding with 3 1/4 cups cold milk. Whisk for several minutes until the pudding starts to thicken. Use a spatula to spread the mixture over the cream cheese layer. Allow the dessert to rest in the refrigerator for at least 5 minutes so that the pudding can firm up further.

Spread the remaining Cool Whip over the top. Sprinkle mini chocolate chips evenly on top.

Refrigerate for four hours before serving.

Source: Air Force Mama adapted from Center Cut Cook, found on Food.com. You can find it here.


Notes: The only problem we had with this is that the cookie crust stuck to the bottom (which is why I suggested coating the bottom of the baking dish with cooking spray--that step is not in the original recipe). Great comfort food dessert though.


Peanut Butter Cookie Lasagna

Ingredients:

1 box Nutter Butter cookies
Cool Whip or whipped cream (1 cup cream whipped and sweetened with sugar to your taste)
Peanut butter cup candies
1/2 cup peanut butter, melted in microwave
1 box instant or regular vanilla pudding, prepared according to the package instructions

Directions:

Line the bottom of an 8x8 pan with Nutter Butter cookies.

Top with a drizzle of the melted peanut butter.

Add 1/2 the pudding.

Add half the Cool Whip or whipped cream.
Top with chopped peanut butter cups.

Repeat layers.

Decorate the top with crushed nutter butter cookies, peanut butter cups, and a drizzle of melted peanut butter.

Chill overnight to allow the cookies to soften.

Source: Hugs and Cookies XOXO. You can find it here.


Notes: This was really good. Peanut butter cups? No complaining here!


Caramel Cookie Lasagna

Ingredients:

Lorna Doone cookies
Chips Ahoy cookies
2 containers Cool Whip, or sweetened whipped cream
1 jar caramel topping
1 box vanilla pudding (instant or cooked), prepared and chilled
1/2 bag crushed Heath Bar candies

Directions:

Layer Lorna Doone cookies on the bottom of an 8x8 pan. Add a layer of pudding followed by a layer of Cool Whip or whipped cream, and then drizzle it with caramel topping and sprinkle it with some of the crushed Heath Bar candies.

Add a layer of Chips Ahoy cookies, the remainder of the pudding, more Cool Whip or whipped cream and caramel.

Repeat layers until you reach the top of the pan.

Finish with a layer of Cool Whip or whipped cream topped with caramel topping and the remainder of the crushed Heath Bar candies.

Chill 6 hours or overnight to allow the cookies to soften.

Source: Hugs and Cookies XOXO. You can find it here.

Notes: This was really good. Nice, rich, creamy, and lots of caramel!

Lasagna Overload! Dinner Edition


A couple of weeks back, my mom informed me that we were having lasagna for our family dinner...but not just one kind of lasagna. Oh no, that is not how my mom does it. She told me we would be having three kinds of lasagna for dinner and three kinds of sweet lasagna for dessert. I told her it would probably be a good idea to skip the rolls.

In addition to the two lasagna recipes I am including here, my mom made one of our old favorites, which you can find here.

So, loosen your belts, dig in, and get ready to work off the pounds the next day!


American Lasagna

Ingredients:

1 1/2 pounds lean ground beef
1 onion, chopped
2 cloves garlic, minced
1 tablespoon chopped fresh basil
1 teaspoon dried oregano
2 tablespoons brown sugar
1 1/2 teaspoons salt
1 (29 ounce) can diced tomatoes
2 (6 ounce) cans tomato paste
12 dry lasagna noodles
2 eggs, beaten
1 pint part-skim ricotta cheese
1/2 cup grated Parmesan cheese
2 tablespoons dried parsley
1 teaspoon salt
1 pound mozzarella cheese, shredded
2 tablespoons grated Parmesan cheese

Directions:

In a skillet over medium heat, brown ground beef, onion, and garlic; drain fat. Mix in basil, oregano, brown sugar, 1 1/2 teaspoons salt, diced tomatoes, and tomato paste. Simmer for 30-45 minutes, stirring occassionally.

Preheat oven to 375 degrees F. Bring a large pot of lightly salted water to a boil. Add lasagna noodles, and cook for 5-8 minutes, or until al dente; drain. Lay noodles flat on towels, and blot dry.

In a medium bowl, mix together eggs, ricotta, Parmesan cheese, parsley, and 1 teaspoon salt.

Layer 1/3 of the lasagna noodles in the bottom of a 9x13 inch baking dish. Cover noodles with 1/2 ricotta mixture, 1/2 of the mozzarella cheese, and 1/3 of the sauce. Repeat. Top with remaining noodles and sauce. Sprinkle additional Parmesan cheese over the top.

Bake in the preheated oven for 30 minutes. Let stand 10 minutes before serving.

Source: Allrecipes.com, submitted by ETHELMERTZ. You can find it here.

Notes: This was good. Just your classic lasagna. Tasty stuff.


Creamy White Chicken and Artichoke Lasagna

Ingredients:

2 cups shredded cooked chicken breasts
1 can (14 oz) artichoke hearts, drained, chopped
1 pkg. (8 oz) shredded mozzarella cheese, divided
1/2 cup grated Parmesan cheese
1/2 cup chopped drained oil-packed sun-dried tomatoes
2 pkg. (8 oz each) cream cheese, softened
1 cup milk
1/2 tsp. garlic powder
1/4 cup tightly packed fresh basil, chopped, divided
12 lasagna noodles, cooked

Directions:

Heat oven to 350 degrees F.

Combine chicken, artichokes, 1 cup mozzarella, Parmesan, and tomatoes. Beat cream cheese, milk, and garlic powder with mixer until blended; stir in 2 tbsp. basil. Reserve half; mix remaining half with the chicken mixture.

Spread half of the remaining cream cheese mixture onto bottom of 13x9-inch baking dish; cover with 3 noodles and 1/3 of the chicken mixture. Repeat layers of noodles and chicken mixture twice. Top with remaining noodles, cream cheese mixture, and mozzarella; cover.

Bake 25 minutes or until heated through. Sprinkle with remaining basil. Let stand 5 minutes before cutting to serve.

Source: Kraft recipes. You can find it here.

Chocolate Dessert? Yes, Please


If you are a chocolate lover, you are going to love these two desserts.


S'more Brownies

Ingredients:

2 cups sugar
4 eggs
1 cup butter
 6 tbsp cocoa powder
2 cups flour
2 tsp. vanilla
3 graham crackers, broken into small pieces
3 cups mini marshmallows
3 Hershey bars, broken into individual pieces

Directions:

Preheat the oven to 350 degrees. In a stand mixer or in a mixing bowl, cream together sugar, butter, and cocoa powder. Add the eggs one at a time. Then add vanilla extract and flour, scraping the bowl throughout the mixing process.

Grease a 9x13 pan with cooking spray. Pour prepared brownie batter into the pan and spread out evenly. Bake for 30 minutes.

remove the pan from the oven and immediately sprinkle the marshmallows evenly over the baked brownies. Then sprinkle the graham cracker and chocolate bar pieces over the marshmallows. Place in the oven for two more minutes to allow the marshmallows to melt together.

Cool completely before serving.


Source: Cupcake Diaries. You can find it here.

Notes: If you are of the opinion that a regular s'mores could use more chocolate, then this is just the dessert for you. There is chocolate to spare in this dessert.


Gooey Chocolate Cookie Bars

Ingredients:

1 pouch Betty Crocker double chocolate chunk cookie mix
Vegetable oil, water, and egg called for on cooki mix pound
1 jar (7 oz) marshmallow creme
8 creme-filled chocolate sandwich cookies, coarsely chopped (1 cup)
1/3 cup miniature candy-coated chocolate candies

Directions:

Heat oven to 350 degrees F. Make cookie mix as directed on package, using oil, water, and egg. Spread dough in ungreased 13x9-inch pan. Bake 10 minutes just until dough is set.

Meanwhile, heat jar of marshmallow creme in microwave uncovered on low 30 seconds; spread over partially baked crust. Sprinkle with chopped cookies and chocolate candies.

Bake 12-14 minutes longer or until marshmallows just begin to brown. Cool completely, about 1 hour.

Makes 24 bars.

Recipe Notes: To cut bars easily, line bottom and sides of 13x9-inch pan with foil, leaving foil overhanging at 2 opposite sides of pan. Use foil to lift bars from pan, and pull foil from sides of bars before cutting.

Source: Betty Crocker. You can find it here.

Notes: These are really rich, so pace yourself! A little goes a long way in taking care of your sweet fix. Also, we used white chocolate chips in place of the M&Ms.

More Rice Crispies!

Keep the variations on crispy treats coming! The classic version will always be a favorite, but it is fun to mix things up and try new variations! Also, note that you don't always have to use rice cereal in your variations either. More cereal means more options.


S'Mores Krispie Treats

Ingredients:

2 (16 oz) bags mini marshmallows, divided
1 1/2 sticks (12 tablespoons) salted butter
Pinch salt
1.5 (12 oz) boxes of Golden Grahams cereal
1 (12 oz) bag semi sweet chocolate chips

Directions:

In a large pan, melt the butter. Add all but 1 cup of the mini marshmallows and the salt, and stir over low heat until the marshmallows are melted. Reserve the remaining marshmallows.

In a large bowl (or the pan you melted the marshmallows in), toss the Golden Grahams cereal with the marshmallow mixture until the cereal is coated. Add all but 1/2 cup of the chocolate chips and mix until the chips are evenly distributed throughout the mixture.

Grease and line with parchment a 13x9x2 inch pan. Press the marshmallow mixture into the pan, making it as even and flat as possible. Sprinkle the reserved chocolate chips over the mixture, and the reserved marshmallows over the chocolate chips.

Place the pan under the broiler (watch carefully) for about 30 seconds, or until the marshmallows are toasty brown. Chill thoroughly before cutting into squares, but serve at room temperature.

Source: The Domestic Front. You can find it here.

Notes: Good and gooey. I don't have a picture of this one. Sorry about that!


Cookies and Cream Rice Krispie Treats

Ingredients:

1 full bag of marshmallows (mini or large)
1 cube of butter, 1/2 cup
7 cups rice krispies
2 1/2 cups chocolate sandwich cookies, broken into small pieces, divided
1 1/3 cup white chocolate chips, melted
1/2 cup white chocolate chips or melts, for topping

Directions:

In a heavy pan, melt butter over medium heat.

Add in marshmallows and white chocolate chips and stir until melted.

Stir in cereal and 2 cups of the crushed cookies.

Put into a greased 9x13 pan.

Melt 1/2 cup white chocolate chips and spread over top.

Sprinkle with remaining crushed cookies.

Cool to room temperature and serve.

Source: Your Home Based Mom. You can find it here.

Notes: Who doesn't love Oreos? What a great idea to throw Oreos and rice crispy treats together.

Also, my apologies, but I don't have a picture of this one. I will have to see if my mom does...she made it on a night when I wasn't there.

What a Dump!


What is a dump cake, you ask? Well, let me tell you!


Blueberry Dump Cake

Ingredients:

1 (18.25 ounce) package yellow cake mix
4 cups fresh blueberries
1/2 cup white sugar
1/2 cup butter, melted
1 teaspoon ground cinnamon

Directions:

Preheat oven to 350 degrees F.

Mix berries, sugar, and cinnamon in the bottom of a 9x13 inch pan. Cover berries with dry cake mix. Pour butter over cake mix, do not stir.

Bake for 30 minutes, or until light brown. Serve warm or cold. Top with Ice cream.

Source: Allrecipes.com, submitted by Debbie. You can find it here.

Notes: This was really good. I was too full that particular night to serve up a full helping with ice cream on top...so you only get a picture of what it looked like in the pan. This is a delicious dessert though!

Holiday Goodies: Strawberry Cream Cookies


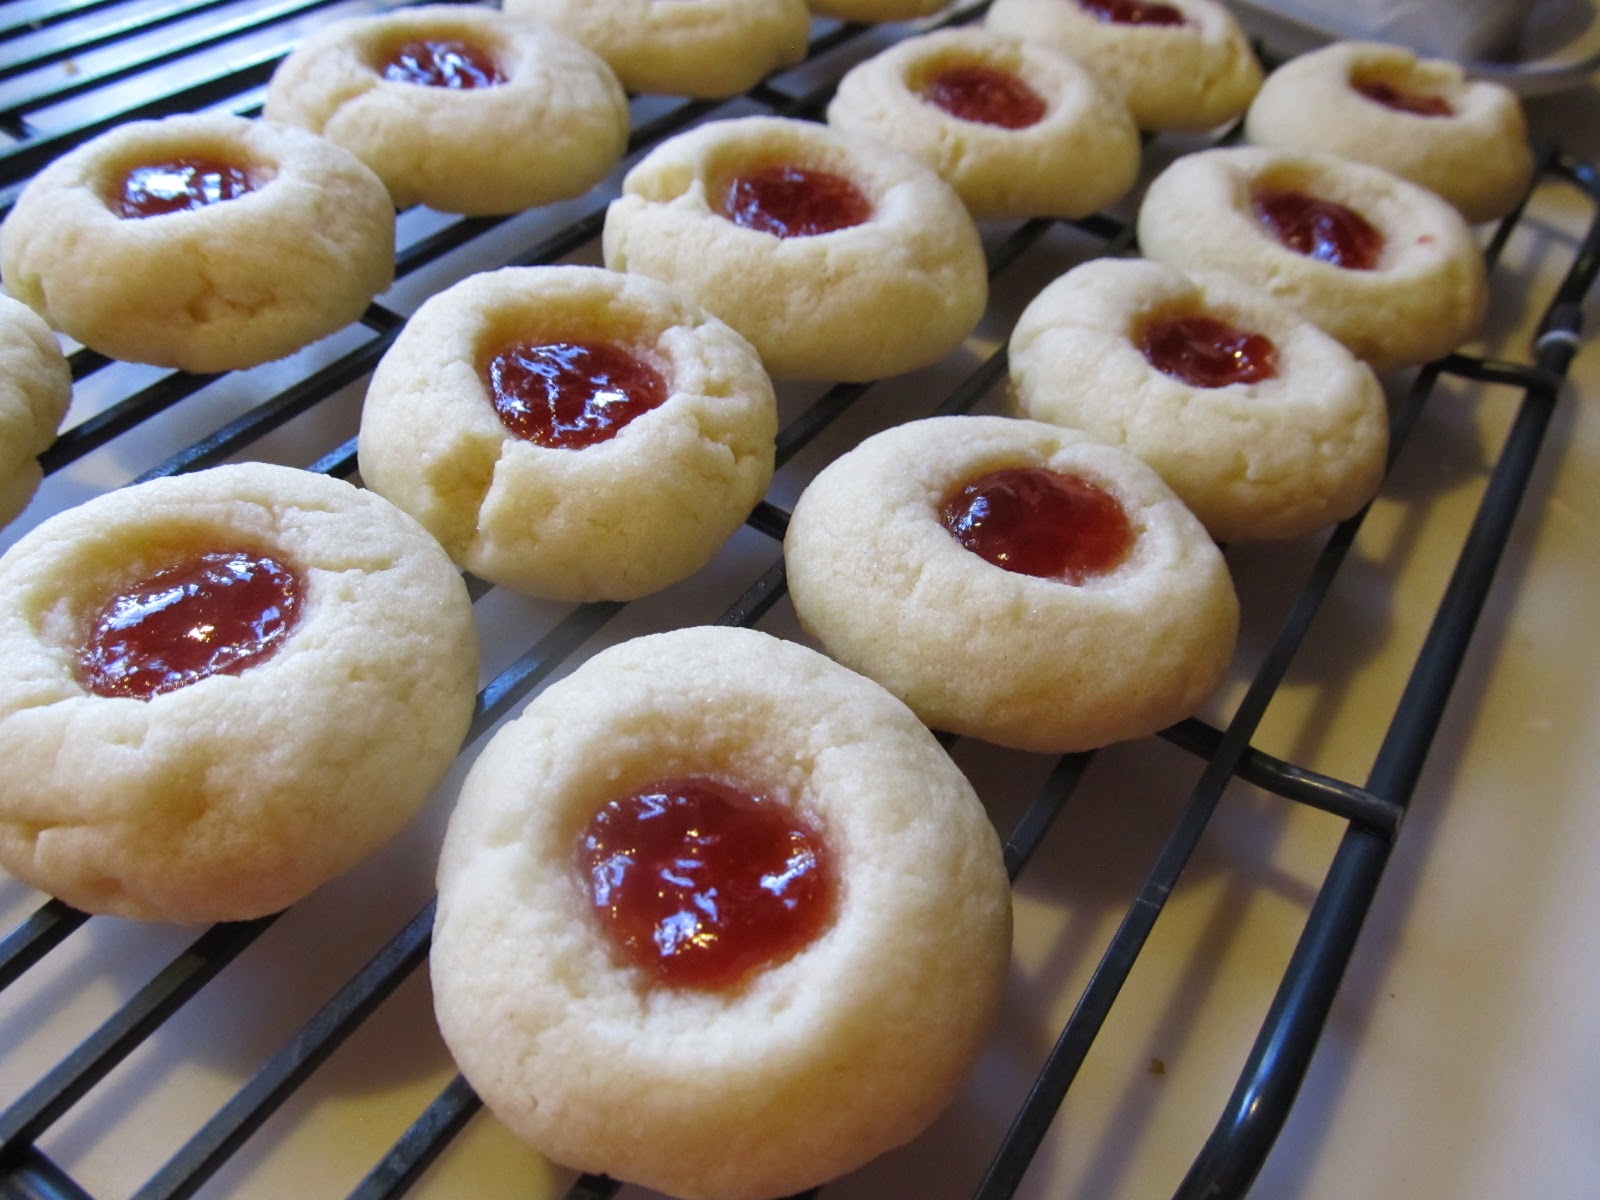
These were soft, not-too-sweet, beautiful little cookies. A very nice addition to your holiday cookie plate.


Strawberry Cream Cookies

Ingredients:

1 cup butter, softened
1 package (3 ounces) cream cheese, softened
1 cup sugar
1 egg yolk
3 teaspoons vanilla extract
2 1/2 cups all-purpose flour
Seedless strawberry jam

Directions:

In a large mixing bowl, cream the butter, cream cheese and sugar until light and fluffy. Beat in egg yolk and vanilla. Add flour and mix well. Cover and refrigerate for 1 hour or until easy to handle.

Shape dough into 1-in. balls. Place 2 in. apart on ungreased baking sheets. Using the end of a wooden spoon handle, make a 1/2-in.-deep indentation in the center of each ball; fill with about 1/4 teaspoon jam. Bake at 350 degrees F. for 10-12 minutes or until set. Remove to wire racks to cook.

Yield: 5 dozen.

Source: Taste of Home's Best & Loved Cookies & Bars. It is currently unavailable, as you can see here, so aren't you glad the recipe is online too? You can find it online here.

Notes: These were soft and satisfying. Really good and quite pretty.


Holiday Goodies: Peppermint Swirl Fudge


I loved this recipe because it is so versatile...and because you can't screw it up. I am really good at screwing up fudge...but you can't screw up this fudge recipe. I promise. Be sure to check out the recipe notes to see how you can make other variations of this. Oh, and those are Sweetened Condensed Cookies in the background. If you want to try those out, check the recipe out here. I made one batch of those with mini M&Ms and one batch with red and green mini M&Ms.


Peppermint Swirl Fudge

Ingredients:

1 teaspoon butter
1 package (10-12 ounces) white baking chips
1 can (16 ounces) vanilla frosting
1/2 teaspoon peppermint extract
8 drops red food coloring
2 tablespoons crushed peppermint candies

Directions:

Line a 9-in.-square pan with foil and grease the foil with butter; set aside.

In a small saucepan, melt chips; stir until smooth. Remove from the heat. Stir in frosting and extract. Spread into prepared pan. Randomly place drops of food coloring over fudge; cut through fudge with a knife to swirl. Sprinkle with candies. Refrigerate for 1 hour or until set.

Using foil, lift fudge out of pan. Gently peel off foil; cut fudge into 1-in. squares. Store in an airtight container.

Yield: about 1 1/2 pounds.

Source: Taste of Home. You can find it here.


Notes: I made this three separate ways. The white chocolate version as you see here, and a semi-sweet and milk chocolate version. For the semi-sweet, I used semi-sweet chocolate chips and chocolate fudge frosting. I then did a milk chocolate version where I used milk chocolate chips and chocolate fudge frosting. For both of those versions, I skipped the red food coloring (because you wouldn't really be able to see it swirled anyway...and it wouldn't have been as pretty). I'll have to add pictures of those ones later.

This was to die for delicious all three ways. You can't go wrong with this easy recipe.

Holiday Goodies: Raspberry Ribbon Cookies


Christmas has come and gone, but as I have mentioned before, I am playing some major catch up with this blog. I have a ton of recipes that I need to post (I'm almost caught up though!). So, here goes!

  
Raspberry Ribbons

Ingredients:

1 cup butter, softened
1/2 cup sugar
1 egg
1 teaspoon vanilla extract
2 1/4 cups all-purpose flour
1/2 teaspoon baking powder
1/4 teaspoon salt
1/2 cup raspberry jam

Glaze:

1 cup confectioners' sugar
2 tablespoons evaporated milk
1/2 teaspoon vanilla extract

Directions:

In a large bowl, cream butter and sugar until light and fluffy. Beat in egg and vanilla. Combine the flour, baking powder, and salt; gradually add to creamed mixture and mix well.

Divide dough into four portions; shape each into a 10-in. x 2-1/2-in. log. Place 4 in. apart on greased or foil-lined baking sheets. 1/2-in. depression down the center of each log. Bake at 350 degrees F. for 10 minutes.

Fill depressions with jam. Bake 10-15 minutes longer or until lightly browned. Cool for 2 minutes. Remove to a cutting board; cut into 3/4-in. slices. Place on wire racks.

In a small bowl, combine glaze ingredients. Drizzle over warm cookies. Cool completely.

Yield: About 5 dozen cookies.

Source: Taste of Home. You can find it here.

Notes: These are rated 5 stars for a reason. They are the most wonderful, soft, melt-in-your-mouth bites of Christmas/holiday goodness you could ever hope for.

My only warning would be that I misunderstood the recipe slightly and I formed these into rectangles on the cookie sheet instead of logs. Definitely keep it as a log. As a result of what I did, mine were a little thinner, and therefore, they were more fragile. They looked and tasted great, but there wasn't enough cookie in the raspberry center and a lot of them broke in half down the middle.

These are going to become a holiday Christmas cookie tradition for years to come. These were amazing.


Above: Oooh, I wish I had a batch of these in the kitchen right about now.

This is Going to Be a Yearly Tradition (for Thanksgiving or for Pi Day!)


Look at how serendipitous this is! I am posting a pie recipe on Pi Day! It totally wasn't planned...but I'm going to go with it and say that it was totally planned. Happy Pi Day!

Anyway, since my son is allergic to tree nuts, we can't have pecan pie at Thanksgiving. However, I discovered this pie recipe in 2013 and we made it again for Thanksgiving in 2014. This is definitely going to be a yearly tradition for Thanksgiving for my family. I previously posted the recipe here, but I am sharing it again with a few of my changes.


Pretzel Pie

Ingredients:

Filling:

4 eggs
1 1/4 cups sugar
1/2 cup, plus 2 tablespoons unsalted butter, melted and cooled
3/4 cup light corn syrup
1 teaspoon vanilla
2 regular frozen pie shells (not deep dish), unbaked

Topping:

1 1/2 cups crushed pretzels
3 tablespoons butter, melted
2 tablespoons sugar

Directions:

Preheat oven to 350 degrees F.

For Filling:

Place first five ingredients in large mixing bowl and mix with wire whisk until well combined. Pour into pie shells, dividing evenly between the two.

Combine all topping ingredients in medium bowl and stir well with a spoon to coat pretzels.

Sprinkle topping evenly, dividing it between the two pies.

Bake in 350 degree F. oven for 1 hour, covering with foil after 30 minutes to prevent over browning.

Allow to cool completely before serving. Can be made a day or two ahead of time and stored in refrigerator.

Source: Slightly adapted from Christy Jordan's Southern Plate. You can find the recipe here.

Notes: Wow, the woman who created this recipe is a genius! The pretzels were such a good stand-in for the pecans. My husband said this is probably his new favorite pie. Fantastic stuff!

I changed it to use regular pie crusts instead of a deep dish one this year simply because I accidentally bought a regular pie crust instead of deep dish. For me, this turned out to be a serendipitous accident. I had thought the year before that I might decrease the amount of pretzels I used for the topping because I felt that it was just a bit too much for us...too pretzel heavy and hard to cut into. However, when I made it into two pies, I just divided the pretzel topping between the two of them and I felt like it worked out perfectly for my tastes. We all loved it and got our pecan pie fix--without the pecans (and thus, without any allergic reactions)! That is a win in my book.


Above: This is one fantastic pie!