Thursday, December 29, 2011

Deli Sandwiches


I thought I would quickly share two easy sandwich recipes. The first is an old favorite and a classic--the Reuben. The second is a new favorite that is so easy to put together.

I craved Reuben sandwiches like crazy during my first pregnancy. So much so that I finally decided to see if I could replicate it on my own--and do you know what? It's a really easy sandwich to make at home. And it tastes just as good as the restaurant versions. But the great thing about making it at home is that you can make it lighter depending on what ingredients (and how much) you use.

Both of these sandwiches use rye bread (one of my personal favorites). Rye can be kind of tricky to find. The deli/bakery department sometimes carries it and sometimes doesn't (and that goes for just about every grocery store I've been to). But I discovered that Sara Lee and Orowheat both make rye bread that can be found by all of your usual sliced loaves of bread and buns. And while I prefer rye bread from the bakery, it is still pretty darn good when you get the pre-sliced loaves in the bread section.

Also, while I consider rye bread to be pretty essential to the flavor of a Reuben sandwich, we tried the salami and cream cheese sandwiches without the rye bread (on regular white bread) and decided that they were still just as delicious. So, if you don't like rye, substitute your favorite kind of bread for these sandwiches.

So, make yourself a sandwich and serve it alongside some veggies and dip or a bowl of soup and have a nice meal!


Reuben Sandwiches

Ingredients:

Rye bread
Swiss cheese slices
Thousand Island Dressing
Sauerkraut (drained and patted dry with a paper towel)
Pastrami or Corned Beef, sliced very thin

Directions:

Toast bread. Place 1-3 slices of pastrami on each slice of bread. Spread Thousand Island dressing on top of pastrami and top with desired amount of sauerkraut. Top with 1-2 slices of Swiss cheese per slice of bread. Toast sandwiches open-faced in an oven or toaster oven until sandwich filling is warm and the cheese is melted.

Source: My own pregnant creativity.

Notes:

You can experiment with the order of the sandwich fillings to suit your tastes and needs. This is the order that I have come up with after a little bit of trial and error. It always makes sense to spread the dressing on the bread, right? Well, I've found that sometimes this makes the bread a little soggy. That's why I started toasting the bread prior to assembling the sandwich. I've also put the cheese right against the bread, followed by the dressing. This works better, but it sometimes results in soggy bread and cheese that doesn't get melted all the way. It's for this same reason that you want to drain and pat dry the sauerkraut. Otherwise, your sandwich will get soggy.

In the picture above, I toasted the bread, spread on some dressing, topped it with cheese, then sauerkraut, and finally the pastrami. It turned out pretty well...but I did have one tiny little soggy spot despite having toasted my bread beforehand. So, assemble it however you like...just beware of soggy spots!

Also, I tend to see this sandwich made more often with corned beef than with pastrami. It's up to your personal preference, but I definitely prefer this sandwich with pastrami. Oh, and one more thing, I prefer my pastrami sliced more thinly than the pastrami in this picture...but this is what was available since the deli counter was closed. So, that's what I used!

Usually this sandwich is made in a skillet by buttering the bread and toasting it and then flipping it (this method makes it a lot less likely that you'll get a soggy sandwich). You can definitely do it this way. I prefer not to because it takes a long time when you are making sandwiches for a lot of people and it adds extra calories for a sandwich which is already pretty calorie heavy. Besides, I don't really notice that much of a taste difference if I skip buttering the bread. It still tastes great to me without the butter. It's up to you.


Salami and Cream Cheese Sandwich

Serves 1

Ingredients:

1 teaspoon grainy mustard
2 slices rye bread
2 ounces salami (about 6 slices), thinly sliced
1/2 small bunch arugula, trimmed and washed
1 tablespoon cream cheese

Directions:

Spread mustard on one slice of bread; top with salami and arugula. Spread cream cheese on the other slice of bread; close sandwich. Serve, or refrigerate, wrapped tightly in wax paper or plastic, up to overnight. Cut in half.

Source: Martha Stewart website. Originally seen on the PBS Everyday Food TV show. You can find it here.

Notes: This was so good. No changes are necessary. It's just so simple and so satisfying. I like the flavor of Genoa salami best (it's the most common type of salami sold, I think). But feel free to use any kind.

Wednesday, December 28, 2011

Quick and Easy Side Salads


From peppermint to salads...ah, how quickly Christmas over-eating catches up to a person! Yes, it's time to buckle down and eat sensibly again (and lose the 5 pounds that we all gained over Christmas!).

I've mentioned before that I tend to put the majority of my focus on the main dish and then think to myself "Oh yeah! Side dishes...what can I throw together really fast to go along with dinner?" Often, I don't have a whole lot of time for side dishes because most main dishes take enough work on their own. But these salads which I am about to share are salads that anyone can throw together quickly and easily. They definitely brighten up the meal and add some nice contrast (taste-wise and color-wise). Besides, it's always a good idea to eat your veggies!

I hope these easy side salads come in handy for you too!


First Feast/Eat Like a Pilgrim Salad

Ingredients:

Mixed spring greens (mixed field greens can also be used)
Red wine vinegar
Olive oil
Coarse salt (such as sea salt)

Directions:

Place mixed greens in a large bowl. Drizzle with equal parts red wine vinegar and olive oil (to your taste...but not too much because you don't want to drench your salad). Toss. Sprinkle with salt, to taste.

Source: Thanksgiving Point does a yearly dinner for Thanksgiving which offers a feast that is more similar to what the Pilgrims actually ate at the time (rather than the traditional Thanksgiving dinner we have become accustomed to). As part of the feast, this simple salad is offered. A bowl of spring greens is placed on your table with separate bowls of red wine vinegar, olive oil, and sea salt. You then dress the salad to your taste. And of course, you eat the salad with your knife and spoon, because the Pilgrims didn't use forks!

Notes: If you want to make this salad lighter (and more tart), use two parts red wine vinegar to one part of olive oil or omit the olive oil completely. It's up to you and your taste!


Arugula Salad

Ingredients:

1 garlic clove, minced (or 1 teaspoon bottled minced garlic)
2 tablespoons fresh lemon juice
2 tablespoons extra-virgin olive oil
Coarse salt and ground pepper
Baby arugula (4-5 cups)

Directions:

In a large bowl, whisk together garlic, lemon juice, and olive oil and season with salt and pepper.

Just before serving, add baby arugula to the bowl and toss until dressing evenly coats the arugula.

Source: This is part of a bigger Martha Stewart recipe called Pork Milanese with Arugula Salad which can be found here.

Notes: This is one of those recipes that I discovered as a result of having too much of an ingredient left over from another recipe. I had made pressed sandwiches which called for arugula and I had a TON of arugula left over. I was flipping through one of my Everyday Food magazines and I came across this recipe. I didn't have any pork on hand, but I figured that this salad would pair nicely with something else I was making later in the week. The salad by itself was awesome. I can only imagine that with breaded and pan fried pork cutlets that it is amazing. I still need to try the recipe in full sometime!


Spinach Salad

Ingredients:

3 cups torn spinach (or baby spinach)
1/4 cup sliced red onion
1/2 cup grape or cherry tomatoes
2 tablespoons fat-free balsamic vinaigrette
1/2 cup plain croutons

Directions:

Combine first 3 ingredients in a large bowl. Add vinaigrette, and toss. Top with croutons.

Yield: 2 (2-cup) servings.

Nutrition information: 116 calories, 2.9 g fat, 4.5 g protein, 18.8 g carbohydrate, 5.2 g fiber, 0 mg cholesterol, 431 mg sodium.

Source: Cooking Light Light and Easy Menus cookbook. ISBN: 0-8487-2383-x

Notes: The first time I had this salad, I couldn't leave it alone...I kept going back for more. I slice the red onion VERY thinly (because, as a rule, I don't like raw onion in anything). I love the flavor that the red onion imparts to this salad, but I don't want to have a huge bite of it either. I probably use a little less than 1/4 cup of onion too. The last time I made this, I used fat-free croutons. It was super yummy!


Spinach Poppy Seed Salad

Ingredients:

Baby spinach
Thinly sliced apple wedges (thinly sliced pears would also be good)
Bottled poppyseed dressing (Litehouse is a good option)

Directions:

Toss spinach and apples together in a large bowl. Drizzle with poppyseed dressing and toss to coat.

Source: This one came from my own head. I had extra spinach left over from the Spinach Salad shared just above. In the past, I had made a berry spinach salad using poppyseed dressing (Spinach, Walnut, and Mixed Berry Salad). I didn't have the berries on hand, but I did have the dressing and the spinach. So, I thought about what fruits I had in the house...and voila! I had apples, so I threw it all together. It was fantastic. As noted above, thinly sliced pears would be delicious too.


Simple Side Salad with Lemon-Honey Dressing

Makes 3-4 servings

Ingredients:

5 ounces English cucumber, halved lengthwise and thinly sliced
5 ounces red leaf lettuce, washed and torn into bite-size pieces
1 tablespoon canola oil
1 tablespoon freshly squeezed lemon juice
1 teaspoon honey
1 teaspoon lightly packed lemon zest
1/2 teaspoon kosher salt
1/4 teaspoon freshly ground black pepper

Directions:

Combine cucumber and lettuce in a bowl and, using clean hands, toss to mix thoroughly.

Mix remaining ingredients in a small jar with a tight-fitting lid, close, and shake until well combined. Pour over greens and toss until lettuce is well coated with dressing. Taste and adjust seasoning as desired. Serve immediately.

Source: Food Network website. Recipe courtesy of Aida Mollenkamp. You can find it here.

Notes: I didn't use equal parts lettuce and cucumber. Also, I accidentally bought Boston leaf lettuce instead of Red leaf lettuce. So, I used two heads of Boston leaf lettuce (the heads are smaller than some varieties of lettuce, so you would need two) and two regular cucumbers (peeled, halved, and thinly sliced).

I also like that the recipe says to "taste and adjust seasoning as desired." Because this really is to your taste. I only used one tablespoon of oil, but I used more lemon juice and honey to suit my tastes.

This salad was really good, but because it is dressed prior to serving it, it won't keep the next day. So, only toss what you plan to eat that night!

Sunday, December 18, 2011

Peppermint!


As we talked about last month, certain months have certain flavors that are associated with them. I definitely crave pumpkin in November...and when December hits, I just can't get enough peppermint! So, this post is devoted entirely to peppermint goodies. These make fun desserts or beautiful gift ideas for the Christmas season. Just make sure you give some of it away, because if you keep all of these goodies at home, you're going to eat too much...and you're going to gain a little more Christmas spirit (or body) than you were planning on.

These recipes are all a lot of fun to make too--whether by yourself or with friends. So, enjoy one of the best flavors of the season and have fun making these treats too!


Peppermint Ice Cream

Ingredients:

2 1/2 cups 2% reduced-fat milk, divided
2 large egg yolks
2 teaspoons vanilla extract
1 (14 ounce) can fat-free sweetened condensed milk
2/3 cup crushed peppermint candies (about 25 candies)

Directions:

Combine 1 1/4 cups 2% milk and egg yolks in a heavy saucepan over medium heat. Cook until mixture is slightly thick and coats the back of a spoon (about 8 minutes), stirring constantly (do not boil). Cool egg mixture slightly.

Combine egg mixture, 1 1/4 cups 2% milk, vanilla, and condensed milk in a large bowl. Cover and chill completely. Stir in crushed candies. Pour mixture into the freezer can of an ice-cream freezer; freeze according to manufacturer's instructions. Spoon the ice cream into a freezer-safe container; cover and freeze 1 hour or until firm.

Source: Cooking Light, December 2001. You can find it here.

Makes 8 servings (1/2 cup per serving)

Nutrition information: 268 calories, 2.9 g fat, 7.6 g protein, 52.2g carbohydrate, 0.0 g fiber, 62 mg cholesterol, 0.3 mg iron, 99 mg sodium, 238 mg calcium.


Above: It is great in the summer too!

Notes: I doubled this recipe, but I think in the future, I would at least triple it...because I usually make this for a crowd. One year, I quadrupled it and it made plenty (with some nice leftovers as well). this is a very soft ice cream. The peppermint keeps the ice cream softer and makes it take a little longer to set up. So, definitely plan on some time for the ice cream to ripen in the freezer. The recipe suggests an hour, but I would say that it should stay in the freezer overnight or longer. If it gets too hard, you can always let it thaw a little. But if you don't freeze it long enough and it's too soft, there's not a lot you can do to fix it--except drink it through a straw!


Candy Cane Cake

Ingredients:

Cake:

1 box Betty Crocker SuperMoist white cake mix
Water, vegetable oil, and egg whites called for on cake mix box
1/2 teaspoon red food color
1/2 teaspoon peppermint extract

White Icing:

1 cup powdered sugar
1 tablespoon milk or water
1/2 teaspoon vanilla, if desired

Decoration:

Crushed candy canes or crushed hard peppermint candies, if desired

Directions:

Heat oven to 350 degrees (325 for dark or nonstick pan). Generously grease and flour 12-cup fluted tube cake pan. Make cake batter as directed on box. Pour about 2 cups batter into pan. In small bowl, pour about 3/ cup batter; stir in food color and peppermint extract. Carefully pour pink batter over white batter in pan. Carefully pour remaining white batter over pink batter.

Bake and cool cake as directed on box.

In small bowl, mix white icing ingredients. If necessary, stir in additional milk, 1 teaspoon at a time, until smooth and spreadable. Spread over cake. Sprinkle crushed candy on top. Store loosely covered.

Makes 12 servings

Source: Betty Crocker website. You can find it here.

Nutrition information: 240 calories, 8 g fat, 0 mg cholesterol, 280 mg sodium, 41 g carbohydrate, 0 g fiber, 2 g protein.


Notes: I used about 1 cup for the red portion of the cake. I was super skeptical about how it would work out. It just didn't make sense how pouring a different color of cake batter in layers could make for such a cool design in the finished cake. But it definitely worked and it was a super easy cake to make!


Peppermint Cake

Ingredients:

1 angel food cake (homemade or store-bought)
2 cups whipping cream (or whipped topping)
1/2 cup sugar (not necessary if you use whipped topping)
2 tsp vanilla (not necessary if you use whipped topping)
1 cup crushed peppermint

Directions:

Whip the cream and add the sugar and vanilla as it begins to thicken. Frost the cake and sprinkle with crushed candy canes.

Hint: Sprinkle crushed peppermint just before serving. If it sits too long, the peppermint will begin to dissolve.

Source: I have now seen this in two different places. First, a cookbook entitled "The Gathering of Friends: Volume One" by Michelle Hustable and Alyse Christensen. ISBN: 978-0-9816986-0-1. The above recipe is taken from that book (with my changes in parenthesis).

Or, you can find it on MyRecipes.com here. They call theirs "Candy Cane Cake."

The two recipes are very similar. The MyRecipes (Sunset) recipe includes a recipe for a homemade angel food cake if you would like to make one from scratch. That recipe also uses almond extract instead of the vanilla (which I'm sure would be fantastic).

To make my cake, I opted for much, much easier and much, much lighter. So, I used a store-bought cake and fat-free whipped topping. That way, it makes for a very light and fluffy dessert. Very refreshing at this time of the year when one is often eating very heavy and calorie-laden foods.


White Chocolate Popcorn with Peppermint

Ingredients:

10 cups popped and buttered popcorn (I prefer my popcorn plain and un-buttered for this recipe)
24 oz white chocolate chips (or white chocolate candy coating)
1 dash of salt
2 candy canes, crushed (or to taste)

Directions:

Pour already popped popcorn into a large bowl. Add a dash of salt and set aside. Melt white chocolate slowly in the microwave stirring every 30 seconds until smooth (a minut to a minute and a half). Spread popcorn out on a cookie sheet. Drizzle warm chocolate over popcorn until evenly coated. Add crushed candy cane; let cool.

Source: "The Gathering of Friends: Volume One" by Michelle Hustable and Alyse Christensen. ISBN: 978-0-9816986-0-1.

Notes: I first tried this recipe at one of my jobs. A co-worker's wife made it for him to bring in for the office. I was pregnant at the time and simply couldn't get enough of it. I saw this recipe and decided to try it. I've made changes to it to fit it to my tastes. I prefer to use white chocolate candy coating. Let me tell you why.

First, unless you temper the chocolate, melted chocolate chips tend to get soft and melty again unless you keep it in the refrigerator. Candy coating stays hard at room temperature. Plus, I like the color of the candy coating better. White chocolate chips are kind of off-white in color. Whereas, white chocolate candy coating is pure white. Finally, I kind of prefer the taste of the candy coating in this recipe.


Oh, and I used a lot more peppermint than just two candy canes' worth.


Peppermint Bark and Variations


Ingredients:

1 (12 oz) bag semi-sweet chocolate chips (about 2 cups)
1 (12 oz) bag white chocolate chips (about 2 cups)
1 cup crushed peppermint (or to taste)

Directions:

Line a jelly roll pan with heavy duty aluminum foil.

Melt semi-sweet chocolate chips. I prefer to do this in a microwave-safe bowl in the microwave at 30 second intervals (stirring between each interval). It takes about a minute to a minute and a half to melt the chocolate.

Spread melted semi-sweet chocolate onto the jelly roll pan covered in foil. Spread chocolate over the pan to create an even layer. Place pan into a refrigerator or freezer to allow the chocolate to set.

Melt white chocolate chips. Stir until smooth. Remove hardened semi-sweet chocolate and spread the melted white chocolate chips over the first layer. Be careful when you spread the white chocolate. The warm white chocolate can melt the semi-sweet chocolate and can create swirls (instead of a pristine white layer). Once the white chocolate has been spread in an even layer over the semi-sweet chocolate, sprinkle immediately with crushed peppermint. Press the peppermint into the white chocolate layer (this just helps make sure that the peppermint sticks to the bark once it is set).

Put the pan back into the refrigerator or freezer until the bark is completely set.

Once the bark is set, use the foil as a barrier between the bark and your hands while you break the bark into bite size pieces with your hands. Using the foil keeps things less messy. If you try to break the bark with your hands (without the foil), the warmth of your hands might melt the chocolate a little. Not only will your hands be a chocolatey mess, but it might make your bark look messy as well.

Store in the refrigerator (otherwise, it will become soft and melty).

Source: You can find recipes for peppermint bark just about everywhere. But I really like the step-by-step instructions found on About.com. You can find it here. She also includes instructions for how to temper your chocolate, which you can find here.


Notes: The process of tempering chocolate is a pretty lengthy one (one which I don't currently have time for). If you don't have time to temper your chocolate, here are your two options: first, melt chocolate chips in the microwave and store the finished candy product in the refrigerator to avoid melting or; second, use candy coating instead. Candy coating is formulated to stay hard at room temperature after being melted, so you don't have to temper it and you don't have to keep it in the refrigerator either.


Peppermint Bark Variations:
  • Use milk chocolate in place of the semi-sweet chocolate.
  • Skip the milk/semi-sweet chocolate altogether and only use white chocolate.
  • Use two or three parts of candy coating. You can have fun with colors. You can use food coloring to dye one or two parts of the candy coating. So, you could have peppermint bark that is white on the bottom and green on the top. Or, white on the bottom and red on the top. Or, white on the bottom, green in the middle, and red on the top. The color possibilities and combinations are endless. This actually looks super cute. You can find a picture of this example here. This version is absolutely adorable. It looks so cute having the white layer, the green layer and then the red and white peppermint on top. Very Christmas-y.
  • If you don't like it layered, stir the peppermint into the melted chocolate and spread it out and let it set up. Then break into pieces like normal. You would only use one type of chocolate for this version. So, either you would have dark or milk chocolate with peppermint spread throughout or white chocolate with peppermint spread throughout. This one is the fastest version (though it isn't as pretty as the other versions). It's only one layer, so you save yourself the time of waiting for the first layer to set up, etc. If you want to make this version a little prettier, you can sprinkle some additional crushed peppermint on top of the chocolate before it hardens.

Frozen Peppermint Cheesecake
Ingredients:
2 cups chocolate wafer cookie or sandwich cookie crumbs
1/4 cup granulated sugar
1/4 cup butter or margarine, melted
1 (8 ounce) package cream cheese, softened
1 (14 ounce) can EAGLE BRAND® Sweetened Condensed Milk
2 teaspoons peppermint extract
2 cups whipping cream, whipped
Red food coloring (optional)
Smucker's® Chocolate Fudge Spoonable Ice Cream Topping, if desired

Directions:

Combine cookie crumbs and sugar. Add butter; mix well. Line 9-inch round cake or springform pan with foil. Press 2 cups crumbs firmly on bottom and part way up sides in prepared pan. Chill.

In large bowl, beat cream cheese until fluffy. Gradually add sweetened condensed milk until smooth. stir in extract and food colorings, (optional); mix well. Fold in whipped cream. Pour filling into pan. Cover; freeze 6 hours or until firm. Garnish with topping. Store leftovers covered in freezer.

Source: Eagle Brand recipe. You can find it here.


Notes: The only change I made to this recipe was to add one more 8 oz package of cream cheese (for 16 oz total instead of just 8 oz). I just wanted it to have a little more body to it and more cream cheese flavor. I also added crushed peppermint candies to the top as a garnish. I forgot to add the chocolate ice cream topping. It tasted great without the chocolate ice cream topping, but it would be yummy with the topping too.


White Chocolate Peppermint Pretzels

Ingredients:

White chocolate (or white candy coating)
Pretzels (I like to use the twists, but you could use any shape)
Crushed peppermint

Directions:

Line a cookie sheet or jelly roll pan with aluminum foil.

Melt the white chocolate (or white candy coating) in the microwave at thirty second intervals (stirring between each interval).

Dip each individual pretzel into the melted chocolate, turning to coat. Lift out of the chocolate with a fork and shake or tap slightly to allow the excess chocolate to drip off. Set the chocolate coated pretzel onto the foil-lined jelly roll pan. Repeat with additional pretzels. Top with crushed peppermint before the chocolate has hardened (otherwise the peppermint won't stick). You'll have to do this in batches because you won't be able to dip all of the pretzels before topping them with peppermint--they would harden before you got to the peppermint step.

Place cookie sheet or jelly roll pan into the refrigerator and allow the chocolate to set up. Using your fingers or a spatula, gently remove the pretzels from the foil. Store in a zip-top bag.

If using melted white chocolate, store in the refrigerator.

Source: Again, too many sources to cite. I just made up this recipe to match a store-bought version I had been craving.

Wednesday, December 7, 2011

A Tale of Two Chilies


Yep, it's here. Chili weather. But the same chili won't fit every mood. Sometimes you want something a little different, a little out there. Other times, you want something smooth, hot and smoky. Well, here's one of each! Chili for the best of times, for the worst of times....


BEEF & BACON CHILI

3/4 lb. bacon, crisp and crumbled
1 1/2 lb. Angus hamburger
1 1/2 c. onion, coarsely chopped
1 large green pepper, chopped
1 Tbsp. Worcestershire
28 oz. can diced tomatoes, undrained
15 oz. can pinto beans, undrained
2 c. Pace Picante Sauce (mild, med, hot: your choice)
1 Tbsp. chili powder
2 tsp. cumin
1 tsp. salt
1 Tbsp. Hickory Liquid Smoke
Optional Toppings: Sour cream, chopped onion, shredded cheese (your choice), picante sauce, crumbled bacon

In a large sauce pan, cook bacon over medium heat until crisp. Drain on paper towel. Pour off all but about 1 tablespoon of the bacon drippings. In drippings, add onion and green pepper. Cook until lightly browned. then add hamburger and cook until browned. Drain. Add Worcestershire to beef mixture and simmer 2 minutes. Add bacon, tomatoes, beans, picante, spices and mix well. Then add liquid smoke and bring to a boil. Reduce heat, cover and simmer 20 minutes. Spoon into bowls and top as desired. Makes 8 one cup servings.

(This recipe came from 13th Ward Cookbook, Glade Tanner)

Cooks note: The liquid smoke gives this a rich flavor. Yes, 1 tablespoon of chili powder is what is called for and it's not too much. I double or even triple this when it's for our crowd. Thanks, Glade. Anything that has bacon in it has got to be good.


SLOW COOKER CHILI MOLE

1 lb. lean (at least 80%) ground beef
1 medium onion, chopped (1/2 c.)
1 package (1.25 oz.) Tex Mex chili seasoning mix (or any brand if this is not available)
1 can (28 oz.) diced tomatoes, undrained
1 can (28 oz. ) crushed tomatoes, undrained
1 can (15 oz. ) spicy chili beans, undrained
1 oz. unsweetened baking chocolate, coarsely chopped (or a bit more if desired)

1. In a 10" skillet, cook beef and onion over medium heat 8 to 10 minutes, stirring occasionally, until beef is thoroughly cooked; drain.

2. Spray 4 to 5 qt slow cooker with cooking spray. In cooker, mix beef mixture and remaining ingredients.

3. Cover; cook on Low setting 4 to 6 hours. Stir well before serving.

Cooks note: This came from the Betty Crocker website. BC knows how to do everything well. This is a comforting and rich chili. It reheats really, really well. You can find it here.

Friday, December 2, 2011

Pork...Slow Cooker Style

I know, I know...we've shared many pork recipes. And we've shared many slow cooker recipes. And we've even shared many pork slow cooker recipes. But when you have a good thing, why stop at just one?

So, let me tell you what recipes I will be sharing today.

I'm not exactly sure what it is about pork that makes it awesome when paired with fruit. But it works. You will often see pork paired with apples or dried fruits (like prunes or apricots). However, this recipe pairs pork with blackberries. Delicious! Also, can I tell you that sage has to be one of my favorite spices! I never cooked with sage before this year. I don't know why...I just didn't. I started to incorporate it into my cooking because my father-in-law planted some sage and I love using fresh herbs. This recipe uses dried sage (instead of fresh), but my love of sage knows no bounds at this point! Dried or fresh, sage is awesome. The combination of the sage, rosemary, and blackberries is so, so good. This dish is both sweet and savory (though not overwhelmingly sweet...it's just right).

The next recipe is to-die-for. It is for Cuban sandwiches. Do you know how some recipes or ingredients become the "new" thing? You know, the "it" thing. For instance, how many recipes could you find about 10 years ago that called for quinoa? (Answer: next to none) And now, quinoa is everywhere! Well, I swear, I have seen recipes for Cuban sandwiches just about everywhere lately. We went on a family vacation in September and I ordered a Cuban sandwich through room service...it wasn't bad. It definitely had potential. But it was a little dry. However, because of the potential, I felt intrigued to find a better recipe that I could make at home. This, my friends, is it. It is fantastic! The aioli is deliciously addicting and the pork is so flavorful and moist. This is a recipe I will be making A LOT for years to come.

The final recipe is nothing fancy...just good, old fashioned comfort food. It pairs pork with sweet flavors again...but this time, the sweet comes in the form of sweet potatoes rather than fruit. And it's quite easy and calls for very few ingredients. So, it's easy to pull together quickly.

Slow Cooker Blackberry Pork Tenderloin

Ingredients:

1 (2 pound) pork tenderloin
1 teaspoon salt
1 teaspoon ground black pepper
1 tablespoon dried rubbed sage
1 tablespoon crushed dried rosemary, or to taste
1 (16 ounce) jar seedless blackberry jam
1/4 cup honey
2 tablespoons dry red wine (see notes)
1/2 cup dry red wine (see notes)
2 tablespoons honey (see notes)
1 cup fresh blackberries (see notes)

Ingredients:

Season the pork tenderloin on all sides with salt, pepper, sage, and rosemary. Place the tenderloin into a slow cooker, and spoon the blackberry jam, 1/4 cup honey, and 2 tablespoons of red wine over the pork. Set the cooker to low, and cook until very tender, 4-5 hours.

About 15 minutes before serving time, pour 1/2 cup red wine, 2 tablespoons of honey, and the fresh blackberries into a saucepan. Bring to a boil over medium-low heat, and simmer until the sauce thickens slightly and some of the berries burst, about 15 minutes.

To serve, slice the tenderloin and spoon blackberry-wine sauce over slices.

Source: Allrecipes.com submitted by leeann3800. You can find it here.

Notes: I used a pork shoulder roast instead of pork tenderloin. I also used a roast that was about 4 lbs. Even though the recipe only calls for 2 lbs. of meat, I doubled the meat, but didn't increase any of the other ingredients. There was no need to increase the other ingredients. There were plenty of spices and enough jam to make plenty of sauce.

I also excluded the red wine. I felt like the blackberry jam provided enough flavor for a sauce and as mentioned above, it created plenty of juice. So, rather than making a separate sauce on the stovetop, I removed the drippings from the slow cooker, put them in a bowl, and simply stirred in the blackberries. Also, since there was already honey in the blackberry jam mixture, I felt no need to add additional honey.

I used frozen blackberries because I really hate using fresh fruit in recipes where the fruit just gets cooked. The beauty of fresh fruit is that it's fresh! When it's cooked, it loses that fresh taste...so why not use frozen fruit instead? To be honest, I can NEVER tell the difference between fresh or frozen fruit after it has been cooked. I would rather eat fresh raspberries plain or with a little sugar and cream than cook them. It almost seems like a travesty to take a luscious fresh fruit and then cook it. So, use frozen!

Cuban-Style Pork Sandwiches

Ingredients:

1 large onion, cut into wedges
3/4 cup reduced-sodium chicken broth
1 cup minced fresh parsley
7 garlic cloves, minced and divided
2 tbsp cider vinegar
1 tbsp plus 1 1/2 tsp lemon juice, divided
2 tsp ground cumin
1 tsp ground mustard
1 tsp dried oregano
1/2 tsp salt
1/2 tsp pepper
1 boneless pork shoulder butt roast (3-4 pounds)
1 1/4 cups fat-free mayonnaise
2 tbsp Dijon mustard
10 whole wheat hamburger buns, split
1 1/4 cups (5 oz) shredded reduced-fat Swiss cheese
1 medium onion, thinly sliced and separated into rings
2 whole dill pickles, sliced

Directions:

Place onion wedges and broth in a 5 quart slow cooker. In a small bowl, combine the parsley, 5 garlic cloves, vinegar, 1 tbsp lemon juice, cumin, mustard, oregano, salt and pepper; rub over pork. Add to slow cooker. Cover and cook on low for 6-8 hours or until meat is tender.

Remove meat; let stand for 10 minutes before slicing. In another small bowl, combine the mayonnaise, mustard, and remaining garlic and lemon juice; spread over buns. Layer bun bottoms with pork, cheese, sliced onion and pickles; replace tops.

Cook on a panini maker or indoor grill for 2-3 minutes or until buns are browned and cheese is melted.

Serves 10.

Nutrition information: 1 sandwich equals 415 calories, 18 g fat, 90 mg cholesterol, 943 mg sodium, 32 g carbohydrate, 5 g fiber, 33 g protein.

Source: Oct./Nov. 2011 Healthy Cooking magazine (from the editors of Taste of Home). You can find it here.

Notes: I couldn't find fat free mayonnaise--only low fat. If I could have found fat free, I would have SLATHERED my sandwich with the aioli. It was that good. As it was, I restrained myself because of the fat and extra calories.

I also used Swiss cheese slices instead of shredded. That added a few more calories, but it just made my life a little easier. I skipped the raw onions on my sandwich. I would suggest using the cooked onions from the slow cooker on your sandwich if you don't like raw onions on your sandwiches.

Finally, I didn't have time to press the sandwiches with a panini maker (which I don't have anyway). I had planned to press the sandwiches on the stovetop by putting the sandwiches in a large pan, toasting them, pressing them with a smaller pan, flipping them, and toasting until the cheese had melted and the buns were browned and crispy. However, as usually happens with kids, there was some sort of crisis and the pressing didn't really happen. I simply pressed my sandwich, untoasted, by hand and called it good. It was still super tasty. But, if I were pressed for time like that in the future, I would probably toast the buns in a toaster oven first, place the cheese on the bun while the bun was still hot, and then just press them by hand.

Slow Cooker Garlic Pork Roast and Sweet Potatoes

Ingredients:

1 boneless pork loin roast (3 1/2 pounds)
1 tablespoon vegetable oil
1 teaspoon salt
1/2 teaspoon pepper
4 cups (1-inch pieces) peeled dark-orange sweet potatoes
1 medium onion, sliced
6 cloves garlic, peeled
1 cup Progresso chicken broth

Directions:

If pork roast comes in netting or is tied, remove netting or strings. Remove fat from pork. In 10-inch skillet, heat oil over medium-high heat. Sprinkle salt and pepper over pork. Cook pork in oil about 10 minutes, turning occasionally, until brown on all sides.
In 4- to 5-quart slow cooker, place sweet potatoes, onion and garlic. Place pork on vegetables. Pour broth over pork.
Cover; cook on Low heat setting 8 to 10 hours.

Tips:


You can use apple juice for the chicken broth.

The flavor of dark-orange sweet potatoes is preferred, but you can use whatever variety you like. Also, after browning the roast, use a small amount of chicken broth to deglaze the pan. Heat the broth in the skillet, and stir to loosen the browned bits of food on the bottom.

Serves 8.

Nutrition information: 1 serving is 410 calories, 17 g fat, 125 mg cholesterol, 510 mg sodium, 18 g carbohydrate, 2 g dietary fiber, 46 g protein.

Source: Betty Crocker website. You can find it here.

Notes: I used white sweet potatoes (not yams) because, frankly, that's what I had on hand. I bought them for another recipe that fell through, so I chose to make this recipe partly because I needed to use up the sweet potatoes.

I also didn't brown the meat because that's just an extra step that I really don't have time for these days! If you have time for it, great. It adds a lovely browned look (basically, it just looks prettier) in addition to a nice caramelized taste to the meat. However, if you don't have the time, the pork will still taste great...I really don't think you'll miss any flavor from skipping this step.

Wednesday, November 30, 2011

It's the Great Pumpkin!


So, September is all about apples, October is all about Halloween candy, and November is all about pumpkin dishes. At least, in my opinion.

As a result, I decided to share some favorite pumpkin recipes today. I'm sharing recipes that focus on the sweet side of the pumpkin flavor. One of these days, I'll have to share some savory pumpkin recipes...but not this day! Bring on the pumpkin sweets!


Above: This loaf slightly sank in the middle because of my high altitude (I live on a mountain, whereas in the other pictures, I lived down in the valley).

Pumpkin Bread

Ingredients:

2 eggs
1 cup brown sugar
2 cups flour
1/2 cup white sugar
1/4 tsp ginger
1 cup pumpkin
1/2 cup oil
1 tsp soda
1/2 tsp each salt, nutmeg, and cinnamon
1 cup raisins or chocolate chips (mini chocolate chips, preferably)
1/2 cup nuts, optional
1/4 cup water

Directions:

Heat oven to 350 degrees.

Blend eggs, brown sugar, flour, white sugar, ginger, pumpkin, oil, soda, salt, nutmeg, and cinnamon.

Then add raisins or chocolate chips, nuts (if using), and water.

Pour into greased and floured bread pans.

Bake for 65-75 minutes or until toothpick inserted comes out clean.

Notes: Mini chocolate chips make it a lot easier to slice the bread, but you can use regular chocolate chips as well.


Above: Pumpkin Ring Cake pictured without the glaze...to illustrate the point that this cake is awesome plain, with the glaze, with powdered sugar sprinkled over the cake, or with a dollop of whipped cream on each slice.


Above: Pumpkin Ring Cake with the glaze.


Above: Pumpkin Ring Cake with glaze and a dollop of whipped cream.

Pumpkin Ring Cake

Ingredients:

3 cups Original Bisquick mix
1 cup granulated sugar
1 cup packed brown sugar
1/4 cup butter or margarine, softened
2 1/2 teaspoons pumpkin pie spice
1/4 cup milk
4 eggs
1 can (16 oz) canned pumpkin (not pumpkin pie mix)
1 cup powdered sugar
1 tablespoon milk
1/2 teaspoon vanilla

Directions:

Heat oven to 350 degrees. Grease and flour 12 cup fluted tube cake pan.

Beat Bisquick, granulated sugar, brown sugar, butter, pumpkin pie spice, 1/4 cup milk, eggs, and pumpkin in a large bowl on low speed for 30 seconds. Beat on medium speed for 3 minutes. Spread in pan.

Bake for about 50 minutes or until toothpick inserted in center comes out clean. Cool 10 minutes; turn upside down onto heatproof plate or wire cooling rack. Remove pan, cool cake completely.

Stir remaining ingredients until smooth and thin enough to drizzle. Drizzle over cake.

Nutrition information: 1 serving (makes 12 servings) equals 405 calories, 10 g fat, 70 mg cholesterol, 500 mg sodium, 76 g total carbohydrate, 2 g fiber, 5 g protein.

Source: Betty Crocker website. You can find it here.

Notes: This is also very good with whipped cream (in place of or in addition to the powdered sugar glaze).


Pumpkin Chocolate Chip Cookies

Ingredients:

1 spice cake mix
1 pkg. chocolate chips
1 egg
1 (15 oz) can pumpkin
1 tsp pumpkin pie spice

Directions:

Preheat oven to 350 degrees. Mix all ingredients together well (I would suggest mixing all ingredients except the chocolate chips with an electric mixer and then folding the chocolate chips in).

Grease cookie sheet. Drop by teaspoonfuls on sheet. Bake cookies for 10-12 minutes.

Makes 2 1/2 dozen cookies.

Source: The Gathering of Friends: Volume 1 cookbook. ISBN: 9780-09816986-0-1

Notes: I made these a LOT bigger than a teaspoon each. I would say that each cookie took nearly 2 tablespoons of cookie dough. As a result, they took longer to cook than 10-12 minutes. I would suggest cooking them for 12 minutes and then checking them and adding 2-4 minutes and then checking them again until they are done. Use the toothpick test to check for doneness. Just like a cake, a toothpick inserted in the center of the cookie should come out clean. And that is when the cookies are done.

Also, if you like your cookies a little sweeter, I would suggest mixing in 1/4-1/2 cup of granulated sugar prior to folding in the chocolate chips.


Pumpkin Pie Cake (Aunt Margaret's Recipe)

Ingredients:

1 pkg. yellow cake mix (reserve 1 cup for topping)
1/2 cup melted butter
1 beaten egg
2 cups pumpkin
1/2 cup brown sugar
2 1/2 tsp pumpkin pie spice
2 eggs beaten with 2/3 cup milk
1/4 cup butter

Directions:

Mix the yellow cake mix, 1/2 cup melted butter, and 1 beaten egg and put in a greased 9 x 13 cake pan. Mix pumpkin, brown sugar, pumpkin pie spice, and 2 beaten eggs with 2/3 cup milk, and pour over cake in pan. Mix reserved cake mix and 1/4 cup butter, and sprinkle over cake. Bake at 350 degrees for 45 minutes. Serve with whipped cream, if desired.

Serves 12

Source: This is my Aunt Margaret's recipe (I know you weren't expecting that from the title).

Notes: Definitely serve this with whipped cream. Don't skip it! Also, the edges of my cake are curved and rounded because I made it in a disposable tinfoil pan that had shaped edges. I kind of like it! It added some personality! And then I didn't have to worry about bringing a dirty pan home.


Pumpkin Pound Cake with Buttermilk Glaze

Ingredients:

Cake:

Cooking spray
1 tablespoon all-purpose flour
1 (15 oz) can pumpkin
3/4 cup granulated sugar
3/4 cup packed dark brown sugar
1/2 cup butter, softened
4 large eggs
1 teaspoon vanilla extract
3 cups all-purpose flour (about 13 1/2 ounces)
1 1/2 teaspoons pumpkin pie spice
1 teaspoon baking powder
1/2 teaspoon baking soda
1/2 teaspoon salt
3/4 cup fat-free buttermilk

Glaze:

1/3 cup fat-free buttermilk
1/4 cup granulated sugar
2 tablespoons butter
2 teaspoons cornstarch
1/8 teaspoon baking soda

Directions:

Preheat oven to 350 degrees.

To prepare the cake, lightly coat a 10-inch tube pan with cooking spray; dust with 1 tablespoon flour. Spread pumpkin over 2 layers of paper towels; cover with 2 additional layers of paper towels. Let stand about 10 minutes. Scrape drained pumpkin into a bowl.

Place 3/4 cup granulated sugar, brown sugar, and 1/2 cup butter in a large bowl; beat with a mixer at medium speed 3 minutes or until well blended. Add eggs, 1 at a time, beating well after each addition. Beat in pumpkin and vanilla. Lightly spoon 3 cups flour into dry measuring cups, and level with a knife. Combine flour and next 4 ingredients (through salt) in a bowl, stirring well with a whisk. Add flour mixture and 3/4 cup buttermilk alternately to sugar mixture, beginning and ending with flour mixture.

Spoon batter into prepared pan. Bake at 350 degrees for 55 minutes or until a wooden pick inserted inc enter comes out clean. Cool in pan for 10 minutes on a wire rack. Remove from pan, and cool completely on wire rack.

To prepare glaze, combine 1/3 cup buttermilk and remaining ingredients in a small saucepan over medium heat; bring to a boil. Cook 1 minute or until thick, stirring constantly; remove from heat. Drizzle cake with glaze.

Source: December 2006 Cooking Light. You can find it here.

Nutrition information: 1 serving (makes 16 slices. 1 slice per serving) equals 273 calories, 8.7 g fat, 5 g protein, 4.6 g carbohydrate, 1.4 g fiber, 72 mg cholesterol, 2 mg iron, 243 mg sodium, 66 mg calcium.

Notes: I really like this cake. It's not a super sweet cake. I would describe it as a breakfast or brunch cake...or a tea cake. But that buttermilk glaze is addicting. You'll love it!


Pumpkin Pie Punch

Start to finish: 10 minutes

Makes: 1 1/2 gallons (about 24 cups)

Ingredients:

15 oz can pumpkin puree
1 cup packed dark brown sugar
1 teaspoon cinnamon
1 teaspoon ground ginger
1/4 teaspoon nutmeg
1/4 teaspoon ground cloves
1/2 gallon apple cider
2 liters ginger ale, cold

Directions:

In a medium bowl, whisk together the pumpkin, brown sugar, cinnamon, ginger, nutmeg, and cloves. Add the apple cider and whisk until smooth and the sugar is dissolved. Chill.

In a large punch bowl, gently stir together the cider, pumpkin mixture, and ginger ale. Serve with ice.

Source: Deseret News/Alison Ladman/Associated Press

Notes: I know this sounds kind of weird...but it was awesome! Trust me!

Thursday, November 17, 2011

"He Stuck a Feather in His Hat and Called it 'Macaroni'"


Today, as you might have guessed, we're sharing recipes for macaroni and cheese. Oh, and this post is going to be chock full of fun facts.

Did you know that the song "Yankee Doodle" dates back to the Seven Years' War (1754-1763) and that it is the state anthem of Connecticut? The use of the word "macaroni" in the song referred to a term used in mid-18th century England to describe an outlandishly fashionable fellow. Basically someone who was over-the-top in terms of fashion (over-the-top meaning ridiculous). As used in "Yankee Doodle" it is derogatory to Americans. It was sung by British military officers to mock the disheveled and disorganized colonials whom they served with in the French and Indian War. Basically, the verse is saying that the yankees were so unsophisticated that they thought that simply putting a feather in their hat made them stylish and fashionable.

I think it just shows the brazen pride of the early Americans that they would adopt such a song as an anthem for themselves. Way to turn things around on your persecutors!

And you're probably aware of this, but you can find anything and everything on the internet. I found a nice little cheese website that had some interesting tidbits on it. For instance, there are over 2,000 varieties of cheese. But as impressive as that is, you can probably find even more versions of macaroni and cheese out there than there are varieties of cheese. Cheese has been found in 4,000 year old Egyptian tombs (I guess if you thought you could take it with you, cheese would definitely be something you'd want to pack for the journey!). The site also includes directions for a fun game where you take turns saying the different names/varieties of cheese and when you can't come up with any more, you're out. The winner is the last person out. Sounds like some good, old-fashioned culinary inspired fun to me.

The origins of macaroni and cheese can't be pinpointed exactly. Nobody knows when it was first made. However, it dates back to at least colonial times because Thomas Jefferson brought it back after a trip to Italy and served it at his dinner parties.

Kraft introduced its version of macaroni and cheese in 1937...and I can only imagine that it gained a great deal of popularity during World War II when the use of meat was few and far between due to rationing for the war.

Macaroni and cheese was something we didn't really have growing up--except the packaged variety. I didn't really like the packaged version of macaroni and cheese as a kid...or even when I was in college. I only came to appreciate it when it came time to make it for my own little one. And do you know what? I like it now. It really does have a charm all its own.

But while the packaged macaroni and cheese has its place, there's nothing quite like homemade macaroni and cheese. Tonight, I am collaborating with my sister. I will share her macaroni and cheese recipes first (there are three of them) and then mine (I have four to share).

And don't feel tied down to using only elbow pasta in your macaroni and cheese. You can use any of your favorite smaller pastas: penne, mostaccioli, tubetti, wagon wheels, shells, etc. That just mixes things up and makes it more fun for your kids.

So, without further ado, enjoy our macaroni and cheese recipes!


Here's what my sister has to say: "There is nothing like Mac and Cheese! It is comfort food at its finest. It's cheap, it feeds a bunch, and it's very tasty! You can't go wrong. Here are a few of my favorite variations on the classic."

Mac 'n' Cheese with Chipotles

Serves 8

Ingredients:

1 (1 ounce) slice white bread
1/3 cup all-purpose flour
4 cups fat-free milk
1/4 cup (1 ounce) grated fresh Parmesan cheese, divided
1 cup (4 ounces) shredded reduced-fat sharp cheddar cheese
1/2 cup (2 ounces) shredded Monterey Jack cheese
1 tablespoon Dijon mustard
1/2 teaspoon salt
2 drained canned chipotle chiles in adobo sauce, seeded and chopped
8 cups hot cooked cavatappi (about 5 cups uncooked pasta)
1/2 cup chopped green onions
1 (10 ounce) can diced tomatoes and green chiles, drained
Cooking spray

Directions:

Preheat oven to 375 degrees.

Place bread in a food processor, pulse until coarse crumbs form to measure 1/2 cup; set aside.

Lightly spoon flour into a dry measuring cup, and level with a knife. Place flour in a large saucepan. Gradually add milk, stirring constantly with a whisk. Bring to a boil; reduce heat, and simmer mixture for 2 minutes or until thick. Remove from heat; stir in 2 tablespoons Parmesan and the next 5 ingredients (2 tablespoon Parmesan through chipotle chiles), stirring until cheese melts. Combine cheese sauce, pasta, onions, and tomatoes in a bowl.

Spoon the mixture into a 13 x 9 inch baking dish coated with cooking spray. Combine 2 tablespoons remaining Parmesan and breadcrumbs; sprinkle over pasta mixture. Cover and bake at 375 degrees for 10 minutes. Uncover and bake for an additional 10 minutes or until mixture is bubbly.

Note: To make ahead, assemble casserole as directed, but stop before adding breadcrumb topping. Cover and refrigerate overnight. Let stand 30 minutes at room temperature; sprinkle with breadcrumb topping, and bake as directed.

Nutrition Information: Makes 8 (1 cup) servings. 328 calories, 7.3 g fat, 17.7 g protein, 46 g carbohydrates, 1.8 g fiber, 20 mg cholesterol, 2.4 mg iron, 638 mg sodium, 415 mg calcium.

Source: March 2001 Cooking Light. You can find it here.

Notes: Followed the recipe as written--no changes made.

Mac and Cheese with Roasted Tomatoes

Serves 10

Ingredients:

Cooking spray
8 plum tomatoes, cut into 1/4 inch thick slices (about 2 pounds)
1 tablespoon olive oil
1 tablespoon minced fresh thyme
3/4 teaspoon salt, divided
4 garlic cloves, thinly sliced
1 pound uncooked multigrain whole wheat elbow macaroni (such as Barilla Plus)
1/2 cup all-purpose flour (about 2 1/4 ounces)
5 cups 1% low-fat milk
1 1/2 cups (6 ounces) shredded extrasharp white cheddar cheese
1 cup (4 ounces) shredded fontina cheese
1/2 teaspoon black pepper
1/2 cup (2 ounces) grated fresh Parmesan cheese
1/3 cup dry breadcrumbs
1/2 teaspoon paprika

Directions:

Preheat oven to 400 degrees.

Cover a baking sheet with aluminum foil, and coat foil with cooking spray. Arrange tomato slices in a single layer on baking sheet. Drizzle oil over tomatoes. Sprinkle with thyme, 1/4 teaspoon salt, and garlic. Bake at 400 degrees for 35 minutes or until tomatoes start to dry out.

Cook pasta according to package directions, omitting salt and fat. Drain well.

Place flour in a large Dutch oven; gradually add milk, stirring with a whisk until blended. Cook over medium heat 8 minutes or until thick and bubbly, stirring constantly with a whisk. Add cheddar, fontina, remaining 1/2 teaspoon salt, and pepper, stirring until cheese melts. Remove from heat. Stir in tomatoes and pasta. Spoon into a 13 x 9 inch baking dish coated with cooking spray. Combine grated Parmesan cheese, breadcrumbs, and paprika; sprinkle over pasta mixture. Bake at 400 degrees for 25 minutes or until bubbly.

Nutrition Information: Makes 10 (1 cup) servings. 411 calories, 14 g fat, 22.8 g protein, 49.9 g carbohydrates, 4.7 g fiber, 29 mg cholesterol, 2.5 mg iron, 638 mg sodium, 414 mg calcium.

Source: March 2006 Cooking Light. You can find it here.

Notes: Again, no changes were made. Recipe was followed as written.

Macaroni and Cheese with Butternut Squash

Serves 6

Ingredients:

1 small butternut squash (about 1 pound), peeled, seeded, and cut into 1-inch cubes (about 3 cups)
1 cup homemade or low-sodium canned chicken stock skimmed of fat
1 1/2 cups nonfat milk
Pinch of freshly grated nutmeg
Pinch of cayenne pepper
3/4 teaspoon coarse salt
Freshly ground black pepper
1 pound elbow macaroni
4 ounces extra-sharp cheddar cheese, finely grated (about 1 cup)
4 tablespoons Parmesan cheese, finely grated (1 ounce)
2 tablespoons fine breadcrumbs
1 teaspoon olive oil
Olive-oil, cooking spray
1/2 cup part-skim ricotta cheese

Directions:

Preheat oven to 375 degrees. Combine squash, stock, and milk in a medium saucepan; bring to a boil over medium-high heat. Reduce heat to medium; simmer until squash is tender when pierced with a fork, about 20 minutes. Remove from heat. Mash contents of saucepan; stir in nutmeg, cayenne, and salt, and season with black pepper. Stir to combine.

Meanwhile, bring a large pot of water to a boil. Add noodles; cook until al dente according to package instructions, about 8 minutes. Drain, and transfer to a large bowl; stir in squash mixture, cheddar, ricotta, and 2 tablespoons Parmesan.

Lightly coat a 9-inch square baking dish (4 inches deep) with cooking spray. Transfer noodle mixture to dish. In a small bowl, combine breadcrumbs, remaining 2 tablespoons Parmesan, and oil; sprinkle evenly over noodle mixture.

Cover with foil, and bake 20 minutes. Remove foil, and continue baking until lightly browned and crisp on top, 30-40 minutes more. Serve immediately.

Source: Martha Stewart website. You can find it here.

Notes: No changes made.


Baked Mac and Cheese

Ingredients:

4 1/2 cups (12 ounces) uncooked penne (tube-shaped pasta)
1 (12 ounce) carton 2% low-fat cottage cheese
1/2 cup (2 ounces) finely shredded sharp cheddar cheese
1/2 cup (2 ounces) grated fresh Parmesan cheese, divided
1/2 teaspoon salt
1/8 teaspoon freshly ground black pepper
Cooking spray
3 tablespoons panko (Japanese breadcrumbs)
1 tablespoon minced fresh flat-leaf parsley

Directions:

Preheat oven to 375 degrees.

Cook pasta according to package directions, omitting salt and fat. Drain; place in a large bowl.

Place cottage cheese in a food processor; process until smooth. Combine cottage cheese, cheddar cheese, 1/4 cup Parmesan cheese, salt, and pepper. Add the cheese mixture to pasta, and stir well. Spoon mixture into an 11 x 7 inch glass or ceramic baking dish coated with cooking spray.

Combine remaining 1/4 cup Parmesan, panko, and parsley in a small bowl. Sprinkle evenly over pasta mixture. Bake at 375 degrees for 10 minutes.

Preheat broiler (do not remove dish from the oven). Broil pasta 1 minute or until top browns.

Nutrition information: Makes 6 (1 1/3 cup servings. 329 calories, 7.4 g fat, 191 g protein, 47 g carbs, 19 g fiber, 21 mg cholesterol, 2 mg iron, 455 mg sodium, 275 mg calcium.

Source: November 2011 Cooking Light. You can find it here.

Notes: The only change I made is that I used a full pound of penne pasta. I hate when you are asked to use less than a box of pasta. What am I going to do with 4 oz of pasta? Save it until you have 4 other boxes of the same kind of pasta that only called for 12 oz each? I added a teeny tiny bit more cottage cheese, cheddar cheese, and Parmesan cheese since I increased the amount of pasta. I also added salt and pepper, to taste (meaning, a lot more pepper than 1/8 teaspoon otherwise it is too bland for my tastes).

I also increased the panko to about 1/2 a cup.

I really liked this. It was very simple and kid pleasing. Very basic and ingredients that are easy to keep on hand at any time. I chose it, specifically, because I already had all the ingredients for it (except for the panko which I had just used up the week before). I would, however, add between 1/4 and 1/2 cup of milk to the sauce mixture to make it a little creamier next time around.


Family-Favorite Macaroni and Cheese

Ingredients:

2 cups uncooked elbow macaroni (7 ounces)
1/4 cup butter or margarine
1/4 cup Gold Medal all-purpose flour
1/2 teaspoon salt
1/4 teaspoon pepper
1/4 teaspoon ground mustard
1/4 teaspoon Worcestershire sauce
2 cups milk
2 cups shredded or cubed Cheddar cheese (8 ounces)
1 cup Italian-style breadcrumbs (my touch, not part of the original recipe)

Directions:

Heat oven to 350 degrees.

Cook macaroni as directed on package.

While macaroni is cooking, melt butter in 3 quart saucepan over low heat. Stir in flour, salt, pepper, mustard, and Worcestershire sauce. Cook over medium low heat, stirring constantly, until mixture is smooth, and bubble; remove from heat. Stir in milk. Heat to boiling, stirring constantly. Boil and stir 1 minute. Stir in cheese. Cook, stirring occasionally, until cheese is melted.

Drain macaroni. Gently stir macaroni into cheese sauce. Pour into ungreased 2-quart casserole. Bake uncovered 20-25 minutes or until bubbly.

Fun variations: You can have fun with additional ingredients by adding in sliced black or green olives, bite-sized pieces of cooked vegetables, hot dogs, or cooked sausage. Or, you could add a 4-oz can of chopped green chiles for a spicier version.

Nutrition information: Serves 6 (that's using only 7 ounces of pasta). 400 calories, 22 g fat, 45 mg cholesterol, 560 mg sodium, 34 g carbohydrates, 1 g fiber, 17 g protein.

Source: Betty Crocker website. You can find it here.

Notes: I doubled the recipe (again, don't ask me to use less than a whole box of pasta! Besides, leftovers always come in handy!). If I remember correctly, though, I didn't double the sauce exactly. I kept the amount of butter and flour the same (1/4 cup) and used 3 cups of milk and 3 cups of cheese...but I doubled the other sauce ingredients (salt, pepper, ground mustard, Worcestershire sauce).

I also added breadcrumbs because I like the added crunch and different texture that they add.


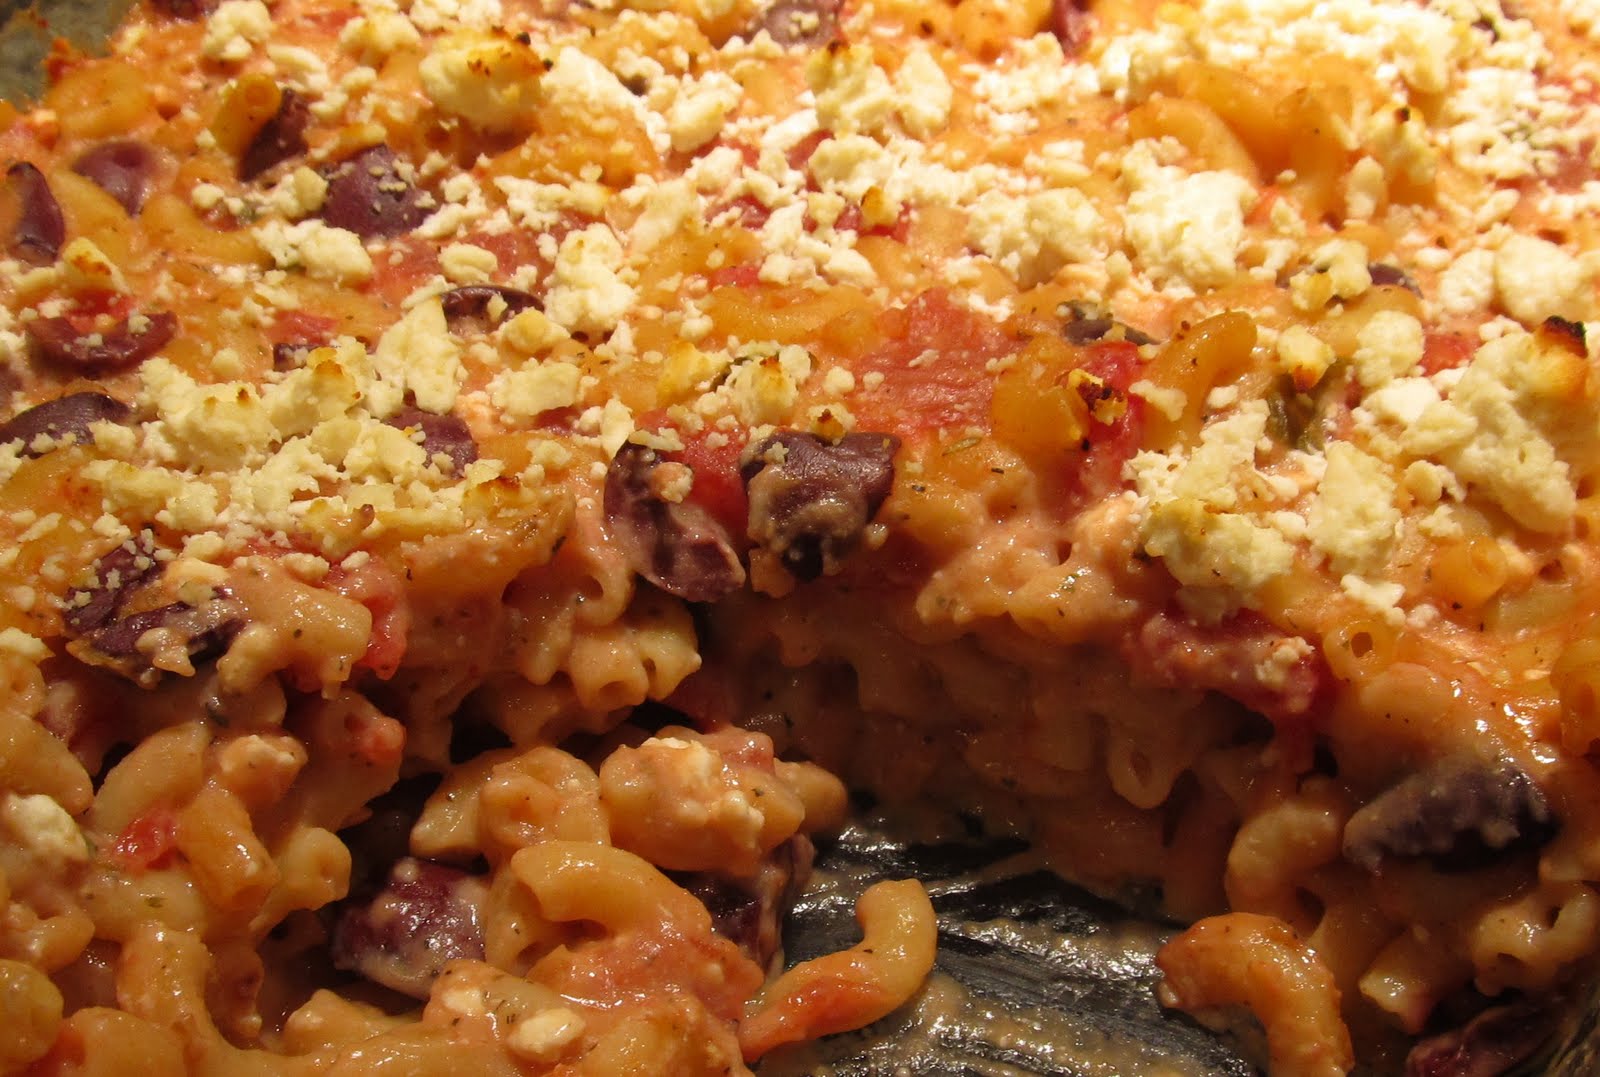
Mediterranean Macaroni and Cheese

Ingredients:

Coarse salt and ground pepper
1/4 cup (1/2 stick) unsalted butter, plus more for baking dish
1 can (14.5 ounces) diced tomatoes, drained
1/3 cup pitted Kalamata olives, chopped
1/2 teaspoon dried oregano
8 ounces elbow macaroni
1 garlic clove, minced
1/4 cup all-purpose flour
2 cups whole milk
8 ounces feta, crumbed

Directions:

Preheat oven to 400 degrees. Set a large pot of salted water to boil and butter an 8-inch square baking dish. In a small bowl, combine tomatoes, olives, and oregano.

Cook pasta 2 minutes less than package instructions; drain pasta and return to pot. Meanwhile, melt butter in a medium saucepan over medium. Add garlic; cook until fragrant, 1 minute. Add flour and cook, stirring constantly, 1 minute. Whisk in milk and bring to a boil. Reduce heat to medium-low; simmer, whisking constantly, until sauce thickens, 3 minutes. Remove from heat; whisk in ounces feta. stir in tomato mixture. Season with salt and pepper. Pour mixture over pasta; stir to combine. Pour pasta mixture into dish and top with 4 ounces feta. Bake until sauce is bubbling and cheese begins to brown, 20-25 minutes.

Source: Martha Stewart website. You can find it here.

Notes: Again, I doubled the recipe (I had a large crowd to feed and I wanted to use the whole bag of pasta).

The recipe mentioned that you can add canned tuna, browned ground meat, or cooked chicken when you stir in the feta, if you like. While I think those would be nice additions, they aren't necessary because this recipe is awesome without them.


Macaroni and Cheese

Ingredients:

Coarse salt and ground pepper, to taste
1 pound elbow pasta, cooked and drained
4 tablespoons butter
1 small onion, chopped
1/4 cup all-purpose flour (spooned and leveled)
4 cups milk
1/8 teaspoon cayenne pepper, optional
1 1/4 cups (5 ounces) shredded white cheddar cheese
8 ounces ham, diced into 1/2 inch pieces, optional
2 slices white sandwich bread

Directions:

Preheat oven to 375 degrees. Cook pasta, and drain; reserve. Meanwhile, in a 5-quart heavy pot, melt butter over medium heat. Add onion; cook, stirring occasionally, until softened, 3-5 minutes. Whisk in flour to coat onion. In a slow steady stream, whisk in milk until there are no lumps.

Cook, whisking often, until mixture is thick and bubbly and coats the back of a wooden spoon, 6-8 minutes. Stir in cayenne, if using, and 1 cup each yellow and white cheddar cheese. Season with 1 teaspoon salt and 1/4 teaspoon pepper (or to taste).

Toss pasta with cheese mixture; fold in ham, if using. Transfer to a 9x13 inch baking dish or individual dishes. Set aside.

In a food processor, pulse bread until large crumbs form. Toss together with remaining 1/4 cup each white and yellow cheddar, and 1/4 teaspoon salt. Top pasta with breadcrumb mixture. Bake until top is golden, about 30 minutes.

Recipe Notes: This recipe makes enough to fill eight 12-16 ounce baking dishes. Divide the macaroni and cheese evenly, sprinkle with topping, and bake for 15-20 minutes, until golden. If you like, use just one type of cheddar or mix with another melting cheese, such as pepper Jack, Muenster, Swiss, or mozzarella.

Source: Martha Stewart Everyday Food recipe. You can find it here.

Serves 8.

Notes: I did not use the ham and I only used yellow cheddar cheese. I highly recommend using the cayenne pepper (even though it is listed in the ingredients as "optional"). It adds such a nice kick (though nothing overwhelming if you don't like spicy food).