Monday, July 29, 2013

From Across the Pond


My mom had a friend who had an abundance of gooseberries, so she shared them with my mom...who then shared some with us! I used my gooseberries to make jam. I ate some of them fresh as well. Fresh, they are sweet and a little tart, but without a really distinct flavor. When I made it into jam, I wasn't exactly sure what I thought of it...but then the flavor grew on me...I was eating this stuff plain with a spoon! It prompted my husband to ask me if I was pregnant (I'm not). So, if you would like some pregnancy cravings without the pregnancy, let me suggest this jam!

If you ever do get a hold of gooseberries, you will discover that there aren't many recipes to be found for them. I found the bulk of the recipes on the UK Allrecipes website.


Above: The berries are edible when they are green, but let them ripen a little longer if you want a lovely red jam instead.


Easy Gooseberry Jam

Gooseberries are naturally high in pectin, so you don't need pectin for this easy jam recipe! Simply use an equal quantity of gooseberries and granulated sugar. Green gooseberries work just as well as ripe ones, though you may want to add a little more sugar and water if they are very under-ripe.

Ingredients:

5 cups gooseberries
5 cups sugar
2 cups water

Directions:

Place a plate or saucer in the freezer.

Wash and trim the gooseberries (see notes below). Place in a heavy-bottomed saucepan with the water. Bring to a boil and boil rapidly for 1 minute. Reduce heat and simmer for 10-15 minutes, til gooseberries are soft. Add the sugar, then bring back to a rolling boil for another 10 minutes (watch carefully so that it doesn't boil over).

Remove pan from heat, and test to see if jam has set. Take the plate from the freezer and drop a bit of jam onto the cold plate. After a few seconds, push the jam with your finger. If the surface of the jam wrinkles and somewhat holds its shape, it has reached setting point and is ready. If the jam slides across the plate and seems very liquid, then it needs to be boiled for another few minutes, at which point, you need to test the jam again.

Skim off any scum from the top of the jam. Place the hot jam in hot, sterilized jars.

To sterilize jars:

Wash and rinse your jars and lids well with warm, soapy water. Line a roasting tin with a clean cloth, and place your clean jam jars upside down on the cloth. About half an hour before potting your jam, place your jam jars in a preheated oven (250 degrees F).

Meanwhile, place clean lids in a large pan and cover with water. Boil for 10 minutes to sterilize the lids. Also boil any other utensils, such as a funnel or spoon, at this point.

When ready to pot your jam, remove the jars from the oven. Using an oven mitt, turn your jars right side up, keeping them in the roasting tin. Pour your hot jam into the warm jars. Make sure to leave 1 cm headspace in each jar.

Immediately place the lids on the jars. Allow to cool thoroughly at room temperature, then store in a cool, dark place for up to 1 year. If you can press down on the center of the lid and make it move, the jar is not properly sealed: refrigerate and consume within two weeks.


Source: I found this on the UK Allrecipes site, submitted by yummers. You can find it here.

Notes: I wasn't planning on storing this for a year, so I didn't sterilize my jars--and oh yes, it was consumed within two weeks! This stuff was addicting for me!


Oh, and by the way, it takes a really, really, really long time to trim the tops and bottoms off of those gooseberries! I ended up trimming 2 cups worth...and then I pushed the rest through a strainer. I liked the mix of having whole berries and mashed berries. The whole berries have a great texture and they kind of pop when you eat them. I love that. However, it seriously would have taken me 2 or 3 hours to trim 5 cups worth of gooseberries. So, I did it this way instead. It worked great. Delicious!

You will be surprised at how well this sets up. No pectin needed!

Update 8/2/2014:

I made Gooseberry Jam again this year, and due to my procrastinating, most of the berries ripened further in the refrigerator (so more of them were reddish purple as opposed to green) and it completely changed the color of the jam to a deep red. Still just as tasty (and I felt it tasted pretty much the same, but maybe a little less tart). Good stuff, and I can still eat this stuff by the spoonful!


Above: This is how much jam I got from this recipe.


Above: Beautiful AND tasty!


Above: I really love this stuff. I hope my mom keeps in touch with this lady who has gooseberries! :) Otherwise I might have to grow them myself someday.

Sunday, July 28, 2013

Memories....Like the Corners of My Mind

I saw this recipe and had to try it.  My mother, who passed away in 1993, always loved the flavor Anise. She wasn't much of a cookie maker, but she did make these candy cane cookies where the red was Anise and the white was vanilla. We always had a bottle around our house.  However, I hadn't bought one in years.  It's a very strong flavor and certainly not for everyone.  It has a slight flavor of black licorice.  As one who picks out the black jelly beans at Easter to eat not to throw away, it's made for me.  These cookies were so, so good and took me back to my childhood.  My daughter, Emily, who doesn't like the black jelly beans gave them her stamp of approval, so maybe you don't have to acquire the taste before you like them.  Also, these are kind of interesting because they use oil instead of shortening or butter.  It really took me back to my mom's cookies.  For some reason she hated shortening and we never used it in our cookies!


ITALIAN ANISETTE COOKIES

4 cups all-purpose flour
1 cup white sugar
1/2 cup milk
2 eggs
1 tablespoon baking powder
3/4 cup vegetable oil
1 tablespoon anise extract
1 teaspoon anise extract
1 cup confectioners sugar
2 tablespoons hot water

Preheat over to 375 degrees.

In large bowl, mix flour, baking powder and white sugar.  Make a well in the center and add oil, milk, 1 tablespoon anise extract, and eggs.  Mix together until dough is sticky.

Oil fingers and pinch off dough in 1 inch pieces.  Roll into a ball and place on a lightly greased cookie sheet, 1 inch apart, flatten top slightly.  Bake for 8 minutes.  Dip cookies in icing while warm.

To make icing:  blend in 1 teaspoon anise extract and enough hot water to 1 cup confectioners sugar to form a smooth icing.

Source:  Allrecipes.com, Submitted by Heather. You can find it here.


Above: Here are the cookies that my mom gave me so I could try. I ate them for breakfast this morning! I have decided that if I ever make these, I will need to have a plan to give most of them away...because these would be a dangerous thing for me to have in the house. They would be gone before the week was out, and they would be eaten mostly by me! The flavor was just right...not overpowering, and as I said before, the texture was amazing...they melt in your mouth.

Yes, It's That Good!

Another pesto recipe for freezing.


LIGHT LEMON PESTO PASTA

1 (16 oz) package spaghetti
4 oz. Pecorino-Roman cheese, cut into cubes
6 cloves garlic
2 cups loosely packed baby spinach
1 cup firmly packed basil leaves
1/2 cup chopped walnuts
1/2 cup lemon juice
1/4 teaspoon lemon zest
1/4 teaspoon salt
2 Tablespoons olive oil

1.  Bring a large pot of lightly salted water to a boil.  Cook spaghetti at a boil until cooked through but firm to the bite, about 12 minutes; drain.  Transfer spaghetti to a large bowl.

2.  Put cubed Romano cheese in the bowl of a food processor; process until coarsely grated, about 30 seconds.  Put garlic into the food processor and process until the cheese and garlic are combined.  Add spinach, basil, walnuts, lemon juice, lemon zest, and salt; process until the mixture comes together into a thick paste.  Scrape down the sides of the bowl with a spatula.

3.  With food processor running, drizzle olive oil into the mixture.  Continue processing until the oil is integrated smoothly.

4.  Pour sauce over spaghetti and toss to coat.

Source:  Allrecipes.com, submitted by Baking Nana. You can find it here.

Cook's Note:  I didn't make the whole recipe, just the pesto.  And I omitted the walnuts due to our nut free zone.  This had such a good flavor!

Facebook Recipes


Above: Update 7/29/13. I had to try my mom's recipe for the boys' breakfast this morning! So good!

Lately a lot of Facebook is taken up with people reposting recipes to their timeline to keep them.  Well, that would be the last place that I would want to store recipes....not a very handy way to search.  But I have been curious how good some of these recipes can be.  Most people repost without having tried them.  So I saw one posted and decided that since I had the ingredients, I wanted to test it out.  Well, I can't say for all of them, but this one was really good.


MINI GERMAN PANCAKES

1 c. milk 
6 eggs
1 c. (all-purpose) flour
1/2 tsp. salt
1 tsp. vanilla
1/4 c. butter, melted

Preheat over to 400 degrees.  Blend first five ingredients in a blender.  Be sure to smooth out any flour lumps.

Blend in butter a little at a time.

Grease muffin tins well and fill slightly less than half full.

Bake for 15 minutes, or until puffy and golden on top.  The crater will form on its own.

Add your favorite toppings and a dusting of powdered sugar.

Cook's note:  These puff up and form the pocket.  I didn't have powdered sugar, which would have made them look really pretty.  I had jam for filling, but pie filling would have been just as good.

Very easy and nice.


Above: Proof that my oven cooks unevenly. I knew that one side cooked a little hotter than the other...but now I have definitive proof!


Above: I made big ones and little ones (using a jumbo muffin pan and a regular muffin pan).


Above: Here are the smaller ones. Perfect size for my little boys (the jumbo ones are a better side for my husband's breakfast). I cooked mine for 20 minutes instead of 15 because of my son's egg allergy. So, they were a little more browned than my mom's, but still delicious!

After Work Quick Dinner

Here's the story, and I'm stickin' to it.  Sometimes you fall into a handy recipe by accident.  We were grocery shopping and I told my husband to pick up an ingredient.  By mistake, he picked up 3 cans of Crescent rolls.  I don't often use them, so I did a search for recipes using them so they wouldn't go to waste.  I found this one and it's a week night keeper.  Quick, easy after a long day of work and very satisfying.

ITALIAN CRESCENT CASSEROLE


1 lb ground beef, cooked, drained
1 c. basil and garlic tomato pasta sauce (from 16 oz jar)
1 can (8 oz) Pillsbury refrigerated crescent dinner rolls
1 1/2 c shredded Italian cheese blend (6 oz)
1/4 teaspoon dried basil leaves

In 10 inch skillet, mix beef and pasta sauce.  Heat to boiling over medium-high heat, stirring occasionally.

Separate dough into 8 triangles.  Place dough in ungreased 9-inch pie plate in spoke pattern, with narrow tips overlapping rim of plate about 3 inches.  Press dough in side and bottom to form crust; sprinkle with 1 cup of the cheese.  Spoon meat mixture evenly over cheese.  Bring tips of dough over filling to meet in center; do not overlap.  Sprinkle with remaining 1/2 c cheese and the basil.

Bake at 375 degrees 15-20 minutes.

Makes 2 servings.

Source:  bettycrocker.com. You can find it here.

Saturday, July 27, 2013

The "It" Recipe


Sometimes there is a new "it" ingredient...like chipotle, or quinoa. Sometimes there is a new "it" recipe. This is a new recipe that just came out and I swear everyone and their dog has been trying this recipe. So, I had to try it too.

I really liked it. It was really very easy. You should give it a try (but be sure to read my notes on the recipe because it took longer for me than stated in the original recipe).


One-Pan Pasta

Ingredients:

12 ounces spaghetti
12 ounces cherry or grape tomatoes halved or quartered if large
1 onion, thinly sliced (about 2 cups)
4 cloves garlic, thinly sliced
1/2 teaspoon red pepper flakes
2 sprigs basil, plus torn leaves for garnish
2 tablespoons extra virgin olive oil, plus more for serving
Coarse salt and freshly ground pepper
4 1/2 cups water
Freshly grated Parmesan cheese for serving

Directions:

Combine pasta, tomatoes, onion, garlic, red-pepper flakes, basil, oil, 2 teaspoons salt, 1/4 teaspoon pepper, and water in a large straight-sided skillet. Bring to a boil over high heat. Boil mixture, stirring and turning pasta frequently with tongs, until pasta is al dente and water has nearly evaporated, about 9 minutes. (see notes below)

Season to taste with salt and pepper, divide among 4 bowls, and garnish with basil. Serve with oil and Parmesan.

Source: Martha Stewart Living, June 2013. You can find the recipe online here.


Notes: This was really good. A great, easy recipe to have in your repertoire.

I have some suggestions though. I was a little worried about cooking it for only 9 minutes. I was dubious that the pasta would be done in that amount of time. I mean, it usually takes my pasta water at least 10 minutes just to start boiling. My gut was right. It took 8 or 9 minutes for the water to start boiling. At that point, my pasta was pretty much still uncooked and the water was not evaporated. So, then I reset the timer for another 9 minutes to cook the pasta.

I mean, it still worked. It tasted awesome, and the pasta ended up al dente. However, I had to check the pasta to make sure it was done all the way and I ended up cooking the pasta for about 20 minutes total instead of the 9 minutes stated in the recipe.

Next time, I think I will try boiling the water first. While the water is boiling, I will prep all the ingredients. Once the water is boiling, I will then put the ingredients into the water and set the timer for 9 minutes (the amount of time needed to cook the spaghetti and for the water to evaporate.)

So, you can either put all the ingredients in the pot, and then add water...but be sure to watch the pasta carefully and test it so that it isn't underdone or overdone, because it won't take 9 minutes on the dot. Or, you can boil the water first and then add all the ingredients.

Maybe the stove tops in the Martha Stewart test kitchens burn hotter and boil water faster than mine does. :)

I used a whole pound (16 ounces) of pasta instead of 12 ounces. I also used 2 pints of grape tomatoes. I would also suggest being very generous with the salt and pepper (prior to boiling). When you serve the pasta, top it with additional salt and pepper, shredded Parmesan, and torn basil. Yum!

Pie!


 There's just no other title for this post. No further explanation needed. Get ready for some pie recipes, folks.


Five Minute Blueberry Pie

Ingredients:

1/2 cup sugar
2 tablespoons cornstarch
3/4 cup water
4 cups fresh or frozen blueberries, thawed
1 (9-inch) graham cracker crust
Whipped cream, for serving

Directions:

In a saucepan, combine sugar and cornstarch. Stir in water until smooth. Bring to a boil over medium heat; cook and stir for 2 minutes. Add blueberries. Cook for 3 minutes, stirring occasionally. Pour into crust. Chill. Garnish with whipped cream, if desired.

Source: Originally found on Allrecipes.com, submitted by Milda Anderson. However, the recipe is no longer on their site. It is now on the Taste of Home website. You can find it here.

Notes: This was just so good! It is hard to serve up...and it looks more like a crumble when served, but who cares? This is fantastic.


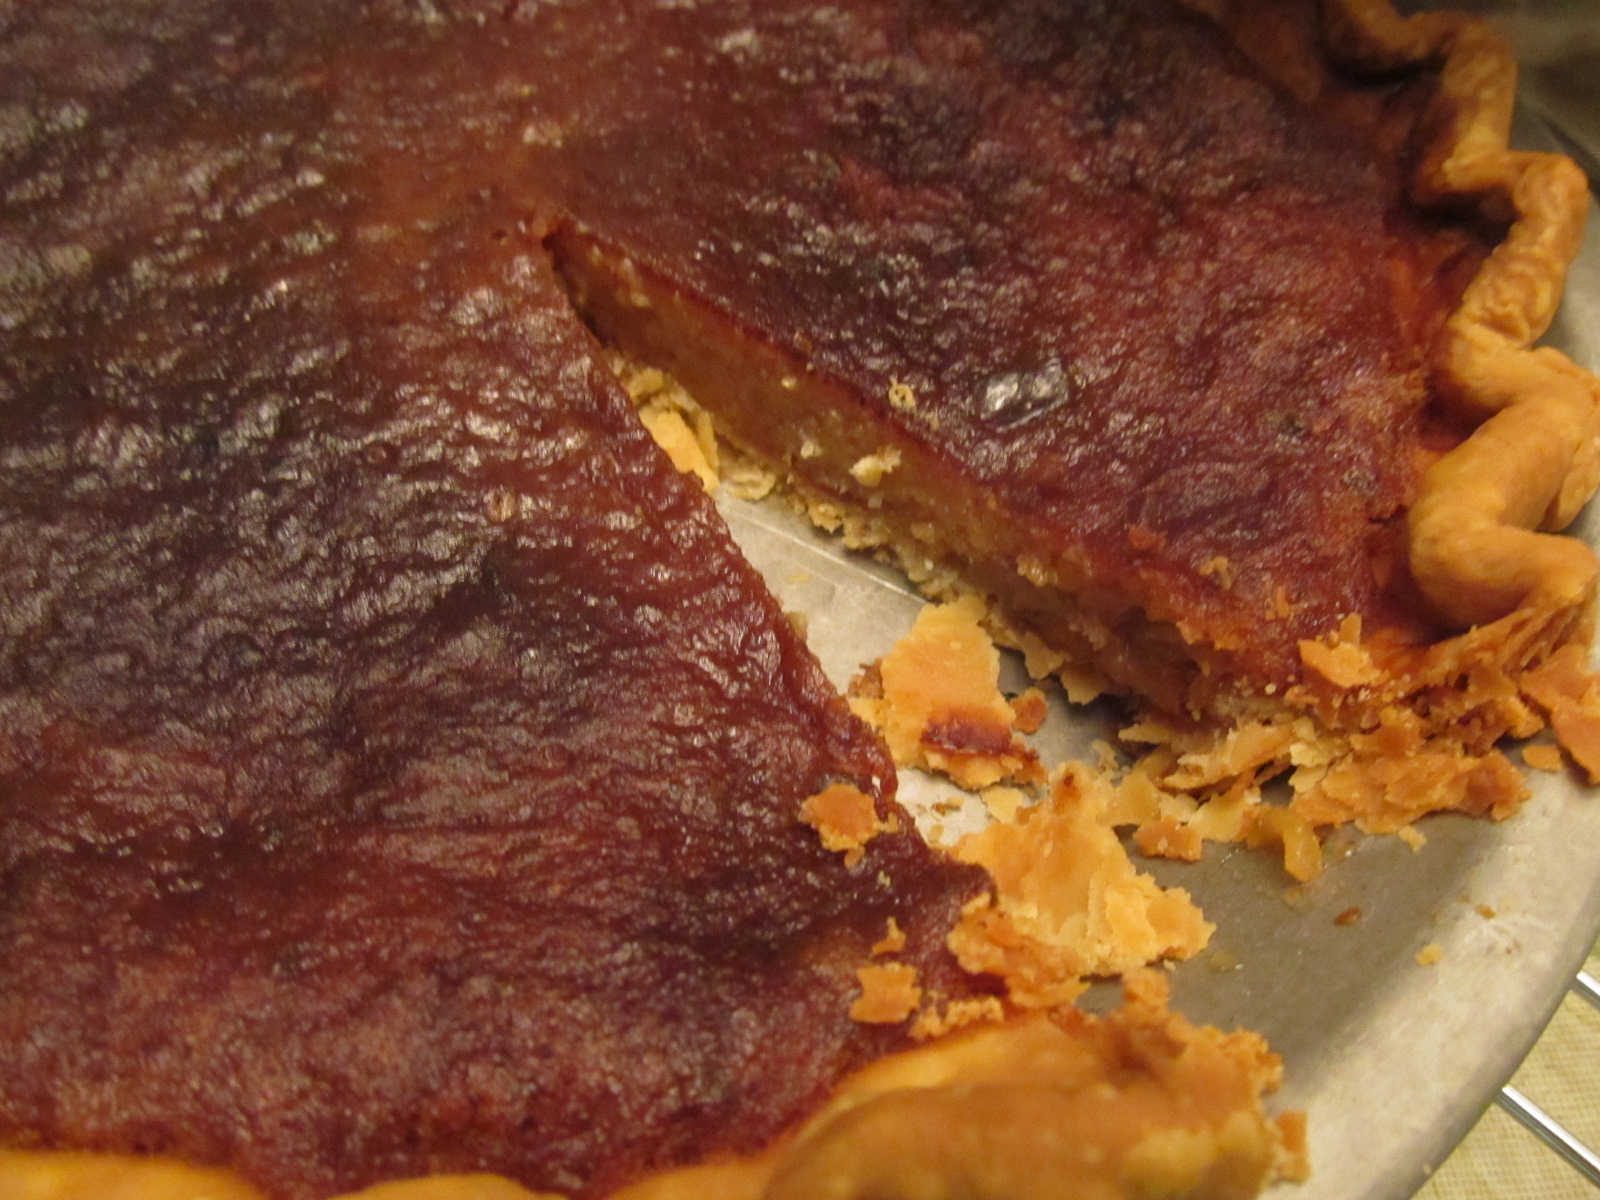
Gabrielle's Honey Pie

Makes one 9-inch pie

Ingredients:

Crust:

2 1/2 cups all-purpose flour, plus more for surface
1 tablespoon sugar
Coarse salt
4 tablespoons unsalted butter, cut into small pieces and frozen
3/4 cup cold rendered leaf lard or regular lard (5 ounces), cut into small pieces
1/4 to 1/2 cup ice water

Filling:

3/4 cup plus 2 tablespoons honey (preferably organic wildflower)
3 tablespoons unsalted butter
4 large eggs
1 teaspoon pure vanilla extract
1/2 teaspoon freshly grated nutmeg
Coarse salt

Directions:

Make the crust:

Pulse flour, sugar, and 1 teaspoon salt in a food processor until combined. Add butter and lard, and pulse until mixture resembles coarse meal with some larger pieces remaining, about 10 seconds. Drizzle 1/4 cup water evenly over mixture. Pulse until mixture just begins to come together (dough shold not be wet or sticky). If dough is too dry, add more water, 1 tablespoon at a time, and pulse.

Shape dough into 2 disks, and wrap in plastic wrap. Refrigerate 1 disk until firm, about 1 hour (Freeze remaining disk for another use).

Meanwhile, make the filling:

Warm honey in a saucepan over low heat. Remove from heat, and stir in butter.

Whisk together eggs, vanilla, nutmeg, and 1/4 teaspoon salt. Stir into honey mixture. Refrigerate until cooled, up to 1 hour.

Preheat oven to 350 degrees, with 1 rack in the middle position and 1 rack in the bottom third of oven. Roll out dough to a 13-inch round on a lightly floured surface. Line a 9-inch pie plate with dough. Trim overhang to 1 inch; crimp. Prick bottom all over with fork. Refrigerate for 30 minutes.

Line crust with parchment, and fill with dried beans or pie weights. Bake, covered for 15 minutes. Uncover, and bake 10 minutes more. Remove dried beans and parchment. Let cool completely on a wire rack.

Stir filling, and pour into cooled crust. Bake on bottom rack until center is set, and crust is golden, 30 to 35 minutes.

Source: Martha Stewart Living, November 2010. You can find it here.


Bob's Pineapple Pie

Ingredients:

1/4 cup cornstarch
2 (20 ounce) cans crushed pineapple, drained with juice reserved
1 1/2 cups white sugar
1/4 teaspoon salt
4 egg yolks
Pastry for a (10 inch) double crust pie

Directions:

Dissolve the cornstarch in 1/4 cup of the reserved pineapple juice. Combine the drained pineapple, sugar, salt, egg yolks, cornstarch mixture, and 1 cup of the reserved pineapple juice in a large saucepan. Cook and stir over medium heat just until the mixture has thickened slightly and turned shiny. Do not boil. Remove from heat, and cool 15 minutes.

Preheat oven to 400 degrees F.

Line a 10-inch pie plate with half of the pastry. Pour the cooled pineapple mixture into the crust. Top with second crust, and seal and crimp the edge. Use a fork to poke holes in the top crust in a few places.

Bake in preheated oven until the crust is golden brown, about 35 to 40 minutes. Cool before serving.

Source: Allrecipes.com, submitted by pvf. You can find it here.


Eggnog Pie

Ingredients:

2 cups eggnog
1 cup milk
1 package (4.6 ounces) cook-and-serve vanilla pudding mix
1 tablespoon rum or 1/2 teaspoon rum extract
1/8 teaspoon ground nutmeg
1 pastry shell (9 inches), baked
Whipped topping and additional ground nutmeg, optional

Directions:

In a large saucepan, cook the eggnog, milk, and pudding mix over medium heat until thickened and bubbly. Remove from the heat and cool slightly. Stir in rum and nutmeg. Pour pudding mixture into crust. Chill until set. Garnish with whipped topping and sprinkle with nutmeg, if desired.

Yield: 8 servings.

Nutrition information: 1 slice equals 287 calories, 13 g fat, 46 mg cholesterol, 274 mg sodium, 38 mg carbohydrate, trace fiber, 4 g protein.

Source: Taste of Home recipe. You can find it here.

Notes: This was a new recipe for eggnog pie that we tried (different than the one we posted a few years ago). Holy cow, this is so good. It is so creamy...wonderful texture, so delicious. Yum. I could go for a piece right now! Too bad eggnog won't be for sale for another four months!


Milk Pie aka Galatoboureko

Ingredients:

4 cups whole milk
1/2 cup fine semolina
1 cup sugar
2/3 cup unsalted butter
4 large eggs
1/2 teaspoon vanilla extract
1 (16 ounce) package phyllo dough, thawed
2/3 cup unsalted butter, melted
3 cups water
2 cups sugar
1/2 large lemon

Directions:

In a 4 to 6 quart heavy pot, bring the milk to a boil, and reduce heat to low. Sprinkle in the semolina, whisking constantly. Add the sugar, and simmer for 5 to 6 minutes, stirring occasionally. Remove from the heat, whisk in 2/3 cup of the butter, and add eggs, one at a time, stirring well after each addition. Blend in the vanilla. The mixture will be thick, but pourable, like a soft polenta.

Preheat the oven to 375 degrees F.

Butter a 9-by-13-inch baking pan. Line bottom with 8 sheets of phyllo, layering them one at a time, and brushing each sheet with butter. The sheets will be larger than the baking pan. Be certain that the bottom is covered by pressing the dough into the corners, and allow the excess to run up the sides of the pan. Phyllo sheets not in use should always be covered with a damp towl.

Pour the milk filling over the sheets. Cover with remaining 12 sheets of phyllo, repeating the layering process, and brushing each sheet with butter.

With a very sharp knife, trim the dough around the edges of the pan, and score the top diagonally in two directions to make diamond-shaped slits on the surface. Sprinkle the top with a little water, and bake 45 minutes to 1 hour. Check after 45 minutes. Pie is done when top is light brown and the filling is set.

As soon as the pie is in the ove, begin to make the syrup. Combine water and sugar in a 4 quart saucepan. Squeeze the halved lemon in the sugared water, and drop the juiced half in the liquid. Simmer on low heat for about 45 minutes. Discard the lemon. Very carefully, because syrup can boile vigorously, pour the hot syrup over the pie as soon as it is removed from the oven.

Let the pie cool completely, and then serve by cutting along the diagonal scores made prior to baking.

Source: Allrecipes.com, submitted by Kenmore featured chef, Cat Cora. You can find it here.


Notes: This is one of my favorite Greek desserts. At the Greek Festival held in Salt Lake City, Utah, they add almond flavoring to their galatoboureko (also spelled galaktoboureko). It is soooo good!


Warm Apple-Buttermilk Custard Pie

Ingredients:

Crust:

1/2 (15 ounce) package refrigerated pie dough (such as Pillsbury)
Cooking spray

Streusel:

1/3 cup all purpose flour
1/3 cup packed brown sugar
1/2 teaspoon ground cinnamon
2 1/2 tablespoons chilled butter, cut into small pieces

Filling:

5 cups sliced peeled Granny Smith apple (about 2 pounds)
1 cup granulated sugar, divided
1/2 teaspoon ground cinnamon
2 tablespoons all-purpose flour
1/4 teaspoons salt
3 large eggs
1 3/4 cups fat-free buttermilk
1 teaspoon vanilla extract

Directions:

Preheat oven to 325 degrees.

To prepare crust, roll dough into a 14-inch circle; fit into a 9-inch deepdish pie plate coated with cooking spray. Fold edges under; flute. Place pie plate in refrigerator until ready to use.

To prepare streusel, lightly spoon 1/3 cup flour into a dry measuring cup; level with a knife. Combine 1/3 cup flour, brown sugar, and 1/2 teaspoon cinnamon in a medium bowl; cut in butter with a pastry blender or 2 knives until the mixture resembles coarse meal. Place stresuel in refrigerator.

To prepare the filling, heat a large nonstick skillet coated with cooking spray over medium heat. Add sliced apple, 1/4 cup granulated sugar, and 1/2 teaspoon cinnamon; cook 10 minutes or until the apple is tender, stirring mixture occasionally. Spoon the mixture into prepared crust.

Combine remaining 3/4 cup granulated sugar, 2 tablespoons flour, salt, and eggs, stirring with a whisk. Stir in buttermilk and vanilla. Pour over apple mixture. Bake at 325 degrees F. for 30 minutes. Reduce oven temperature to 300 degrees F (do not remove pie from oven); sprinkle streusel over pie. Bake at 300 degrees F for 40 minutes or until set. Let stand 1 hour before serving.

Yield 10 servings.

Nutrition information: 317 calories, 10.1 g fat, 5 g protein, 52.6 g carbohydrate, 1.3 g fiber, 76 mg cholesterol, 0.8 mg iron, 230 mg sodium, 73 mg calcium.

Source: Cooking Light, March 2003. You can find it here.

Friday, July 26, 2013

A Very Complete Meal


Side dishes are often an afterthought for me. My mom, on the other hand, never forgets them! She always discovers such fun, delicious, and amazing side dishes. Side dishes definitely make the meal complete.

Here is an example of a lovely Sunday dinner we had a few weeks back, complete with side dishes.

Honey Baked Chicken (Original Recipe)

Ingredients:

6 skinless, boneless chicken breast halves
1/3 cup butter, melted
1/3 cup honey
2 tablespoons prepared mustard
1 teaspoon salt
1 teaspoon curry

Directions:

Preheat oven to 350 degrees F.

Place chicken breasts into a 9x13-inch baking dish. Whisk butter, honey, mustard, salt, and curry powder together in a bowl until smooth; pour sauce evenly over chicken.

Bake in the preheated oven until sauce is bubbling and chicken is no longer pink inside, 30 to 45 minutes. An instant-read meat thermometer insterted into the thickest part of a breast should read at least 160 degrees F.

Source: Allrecipes.com, submitted by Brucejoy. You can find it here.


Honey Baked Chicken (Our Version)

Ingredients:

6 skinless, boneless chicken breast halves
1 egg, beaten
2 cups Panko
1/3 cup butter, melted
1/3 cup honey
2 tablespoons prepared mustard
1 teaspoon salt
1 teaspoon curry

Directions:

Preheat oven to 350 degrees F.

Dredge the chicken breasts in the egg. Then coat with the Panko.

Place chicken breasts onto a foil-lined jelly roll pan. Bake until chicken is no longer pink inside, 30 to 45 minutes.

Whisk butter, honey, mustard, salt, and curry powder together in a bowl until smooth. Place in a saucepan over medium heat. Simmer and stir until sugar is dissolved.

Serve sauce on top of the chicken, or on the side for dipping.


Source: Allrecipes.com, submitted by Brucejoy. You can find it here.

Notes: My mom made the original recipe and it was a hit. However, my sister said, "This would be even better if the sauce was served over crispy chicken." Voila. My brother described this as being "delectable." Now, you know that means it has to be good! Oh, and it was!


Roasted Garlic Cauliflower

Ingredients:

2 tablespoons minced garlic
3 tablespoons olive oil
1 large head cauliflower, separated into florets
1/3 cup grated Parmesan cheese
Salt and black pepper, to taste
1 tablespoon chopped fresh parsley

Directions:

Preheat the oven to 450 degrees F. Grease a large casserole dish.

Place the olive oil and garlic in a large resealable bag. Add cauliflower, and shake to mix. Pour into the prepared casserole dish, and season with salt and pepper, to taste.

Bake for 25 minutes, stirring halfway through. Top with Parmesan cheese and parsley, and broil for 3 to 5 minutes, until golden brown.

Source: Allrecipes.com, submitted by SHELLERY. You can find it here.

Notes: I would never have guessed that this recipe called for so much garlic. This doesn't leave you with dragon breath. It is just so, so flavorful and tasty. This is a great recipe!


Stewed Celery in Cream

Ingredients:

2 cups celery, cut in 1 inch pieces
1/2 cup chicken broth
4 teaspoons flour
2 tablespoons butter
1/2 cup light cream
Dash of nutmeg

Directions:

Simmer celery in stock until just tender, about 12-15 minutes. Remove from heat, drain, and reserve stock (about 2/3 cup).

In a heavy saucepan, melt the butter and stir in flour, using a whisk to blend well. Cook until it bubbles.

Combine the cream and stock, pour into butter and flour mixture. Simmer until thickened, about 3 minutes. Add nutmeg. Put celery back into the sauce and warm through before serving.

Source: RecipeSource. You can find it here.

Notes: This was tasty. The only thing I would change is that I would add more celery. The sauce to celery ration would have been better with more celery. We discovered this recipe because of a fun British television show called "The Supersizers Eat..." It is such an entertaining show. Basically, they pick a time period and then they spend a week eating exactly what the people of that time would have eaten. Some time periods look more fun than others. Beware though, this show has a fun time making a lot of food look seriously unappetizing (for instance when people would be served whole calf heads or a dormouse appetizer). Check it out on IMDB here. You can watch full episodes on IMDB or on YouTube.


Spicy Strawberry Salad

Ingredients:

3/4 cup vegetable oil
1/2 cup white sugar
1 tablespoon poppy seeds
1 1/2 teaspoon garlic powder
1 teaspoon mustard powder
1/3 cup balsamic vinegar
1 1/2 cups fresh sliced mushrooms
8 cups mixed salad greens
1 1/2 cups chopped pecans, optional (we substituted crumbled bacon instead)
4 cups sliced fresh strawberries

Directions:

Whisk together the oil, sugar, poppy seeds, garlic powder, dry mustard, and vinegar. Refrigerate until chilled.

In a salad bowl, combine the mushrooms and mixed greens; add drssing and toss. Sprinkle with strawberries and pecans (or bacon).

Source: Allrecipes.com, submitted by Leslie Oscarson. You can find it here.

Notes: In the hunt for substitutions for nuts, my mom decided to use bacon in place of the pecans to add some crunch and saltiness to the salad. Everyone LOVED it. It was a nice way to mix it up. The salty and sweet combination in this salad was really good.

Spinach Caprese Salad

Ingredients:

1 cup baby spinach leaves
1 large tomato, sliced 3/4 inch thick
1 ball of fresh mozzarella cheese, sliced
2 tablespoons chopped fresh basil
1 tablespoon extra virgin olive oil
2 tablespoons balsamic vinegar
Salt and pepper, to taste

Directions:

Spread the spinach out on a serving plate. Place the slices of tomato on the bed of spinach. Top each slice of tomato with a slice of fresh mozzarella. Sprinkl the basil over the salad and drizzle with olive oil and balsamic vinegar. Sprinkle with salt and pepper, to taste.

Source: Allrecipes.com, submitted by mcbeal. You can find it here.

Notes: We served this a different night, but I figured this was as good a place as any to post it! Sorry, no picture! A variation for this salad is that you can use grape tomatoes, cube the cheese, and serve it as a tossed salad.

Going Bananas


We recently had a little family luau, or 'Tiki Party,' as my son called it. Along with some old favorites, we tried out some new recipes as well. We had particularly good luck with bananas. Let me share the two fantastic banana recipes we discovered.

This is a great way to use up some extra bananas if you need a change from making banana bread!


Royal Hawaiian Pie

Ingredients:

2 (9 inch) pie shells
4 cups sliced bananas
1/2 cup sweetened pineapple juice
1/2 cup white sugar
1 teaspoon ground cinnamon
2 tablespoons butter

Directions:

Preheat oven to 400 degrees F.

Place sliced bananas in a medium bowl and cover with pineapple juice. Toss gently until slices are coated. Let soak for 30 minutes, then drain. Place bananas in pie shell.

In a small bowl, mix sugar and cinnamon. Sift over top of bananas. Dot with slices of butter. Put on top crust and seal, slashing two to three vents near center. Bake in preheated oven until crust is golden brown, about 30 minutes. Pie can be served hot or cold.

Source: Allrecipes.com, submitted by Cathy. You can find it here.

Notes: My mom was worried that this would taste like baby food. Far from it! The bananas stayed pretty firm...almost the texture of apple pie. The flavor of the bananas paired with the pie crust was great. A wonderful, tasty surprise!


Hawaiian Baked Bananas

Ingredients:

4 bananas, peeled
1/2 cup brown sugar, firmly packed
1/4 cup orange or pineapple juice
3 tablespoons sherry, optional
1 dash nutmeg
2 tablespoons butter
1/2 cup chopped almonds or macadamia nuts, optional

Directions:

Preheat oven to 350 degrees F.

Slice bananas in half lengthwise. Place the bananas in a small glass baking dish. Stir together the brown sugar, juice, and sherry (if using); pour over the bananas, then sprinkle with nutmeg. Melt the butter in a small pan over medium heat. Stir in chopped nuts, and cook until lightly browned, about 4 minutes. Sprinkle over the banana mixture.

Bake in preheated oven for 15 minutes until bananas are tender, and have become slightly glazed.

Source: Allrecipes.com, submitted by LADYC20054. You can find it here.

Notes: We skipped the nuts because of my son's allergies. Even so, these were really, really good! You have to try them!

A Taste of Paradise


For our second luau, we made our old favorites, which you can find here, we went bananas (see here), and discovered a few new keepers, which you will find below.

Island Kielbasa in a Slow Cooker

Ingredients:

2 pounds kielbasa sausage, sliced into 1/2 inch pieces
2 cups ketchup
2 cups brown sugar
1 (15 ounce) can pineapple chunks, undrained

Directions:

Place the sausage, ketchup, sugar, and pineapple in the slow cooker and mix together.

Cover and cook on low setting for 5 to 6 hours, until sausage is cooked through.

Source: Allrecipes.com, submitted by Denise. You can find it here.

Notes: We really liked this a lot. You could also use crushed pineapple or pineapple tidbits in place of the pineapple chunks, if you would like.


Tropical Punch

Ingredients:

1 (12-ounce) can frozen pineapple juice concentrate
5 cups seltzer
5 cups ginger ale
4 cups cranberry juice
2 cups orange juice
1 lemon
2 limes

Directions:

Place 1 12-oz. can frozen pineapple juice concentrate (thawed) in a large pitcher; pour in 5 cups seltzer and 5 cups ginger ale. Stir vigorously until well blended. Stir in 4 cups cranberry juice and 2 cups orange juice; mix well. Scrub 1 lemon and 2 limes, then thinly slice. Just before serving, add sliced lemon and limes to pitcher and pour punch over ice.

Source: All You, July 2008, found on MyRecipes.com. You can find the recipe here.

Saturday, July 20, 2013

Battle of the Barbecued Chicken


Okay, so it doesn't really have to be a battle. Everyone is a winner here!

I like making homemade barbecue sauce because it is so easy and it tastes so amazing. There is a place for bottled barbecue sauce...but it is not here.

I still have a lot of barbecue chicken recipes that I want to try, but there can be other posts in the future. For now, enjoy these two recipes that I recently tried. They are both very good!


Barbecued Chicken

Ingredients:

1/2 cup ketchup
1 teaspoon hot sauce
1/3 cup cider vinegar
3 tablespoons Dijon mustard
3 cloves garlic, minced
1/2 cup light-brown sugar
1/4 cup molasses
1 cup-up chicken (3 pounds)
1 tablespoon vegetable oil
Coarse salt and ground pepper

Directions:

Heat grill to medium. Simmer sauce ingredients (first seven ingredients) in a small saucepan over medium heat until reduced to about 1 1/4 cups, 5 to 7 minutes. Divide barbecue sauce between two bowls; use one for basting and set aside the other for serving.

In a large bowl, toss chicken with vegetable oil; season well with coarse salt and ground pepper.

Lightly oil grates; place chicken on grill. Cover grill; cook, turning frequently, until chicken registers 165 degrees on an instant-read thermometer, 10 to 15 minutes. Uncover grill; continue cooking, basting frequently with sauce, until chicken is glazed thoroughly, 3 to 4 minutes more. Serve with remaining sauce.

Source: Everyday Food, July/August 2004. You can find it here.

Notes: I really liked this. It was really easy. I think in the future, I would use chicken pieces (such as drumsticks) or boneless skinless chicken breasts. Also, I think I would decrease the apple cider vinegar to 1/4 cup instead of 1/3 cup. It was slightly too tangy for my tastes...however, even so, it was really delicious and worth a try!


Grilled Chicken with Honey-Chipotle BBQ Sauce

You can also use 8 thighs or 8 drumsticks or 4 pieces of each; cook about 10 minutes per side.

Ingredients:

2 teaspoons olive oil
1/4 cup minced shallots
1/2 cup lower-sodium ketchup
2 tablespoons water
1 1/2 tablespoons honey
2 teaspoons cider vinegar
1/2 teaspoon dry mustard
1/2 teaspoon chipotle chile powder
1/2 teaspoon kosher salt, divided
1/2 teaspoon garlic powder
1/2 teaspoon ground cumin
1/4 teaspoon black pepper
4 bone-in chicken leg-thigh quarters, skinned
Cooking spray

Directions:

Preheat grill to medium-high heat.

Heat a small saucepan over medium-high heat. Add oil; swirl to coat. Add shallots; saute 2 minutes or until tender. Stir in ketchup, next 5 ingredients (through chile powder), and 1/4 teaspoon salt. Reduce heat to low, and cook 5 minutes, stirring occasionally.

Combine 1/4 teaspoon salt, garlic powder, cumin, and black pepper; sprinkle over chicken. Place chicken on grill rack coated with cooking spray; grill 15 minutes on each side or until done. Baste chicken generously with sauce; turn over, and grill 1 minute. Baste again; turn over, and grill 1 minute. Serve with remaining sauce.

Serves 4.

Nutrition information (1 leg quarter): 256 calories, 9.8 g fat, 25.9 g protein, 16.3 g carb, 0.6g fiber, 139 mg cholesterol, 1.5 mg iron, 366 mg sodium, 25 mg calcium.

Source: Cooking Light, July 2013 issue.

Notes: I simply used boneless skinless chicken breasts. I also didn't really measure the spices to sprinkle over the chicken (the salt, garlic powder, cumin, and black pepper). I eyeballed it, and seasoned it according to my taste. I thought that the spices added to the chicken prior to basting it with barbecue sauce really added to the depth of flavor in this recipe. I really loved this.

A Recipe You Should Make More Than Once

I actually made this recipe for my birthday a few years back (and posted it at that time...you can find the original post here).

However, this recipe is just so good, that it deserves to be highlighted again.


Macaroni Grill Chicken Scaloppine (My version)

Ingredients:

Lemon Butter Sauce (my version):

1 cup whole milk or 1 can evaporated whole milk
1/2 cup lemon juice
1 stick butter
Salt and pepper, to taste
1 tablespoon capers, drained

Chicken and Pasta:

8 (3 ounce) chicken breasts, pounded thin
Oil and butter for sauteing chicken
3/4 cup flour, seasoned with salt and pepper, for dredging
6 ounces pancetta (I used prosciutto instead of pancetta because that's what Macaroni Grill uses)
12 ounces mushrooms, sliced
12 ounces artichoke hearts, sliced
1 tablespoon capers
1 pound cappellini pasta, cooked
Chopped parsley, for garnish, if desired

Directions:

To make the sauce:

Melt butter in a saucepan. Remove from heat, and allow to cool slightly. Using a wire whisk, very slowly add whole milk or evaporated milk and lemon juice. Then simmer over low heat until completely heated. Season with salt and pepper. Add capers. Remove from heat and keep warm.

To make the chicken and pasta:

Heat a small amount of oil and two tablespoons butter in a large skillet. Dredge chicken in flour and saute in pan, turning once, until browned and cooked through. Remove chicken from pan and add pancetta or prosciutto, mushrooms, artichoke hearts, and capers. Heat until mushrooms soften and are cooked; add chicken back to pan.

Cook pasta according to package directions.

To serve:

In a large serving bowl or platter, toss pasta, chicken mixture, and sauce all together. Forget the parsley because you almost always forget to add the parsley garnish anyway! Serve!

Notes: My only warning with using milk instead of the traditional cream in the sauce is that you can't add the milk while the butter is super hot, otherwise the milk will curdle. If this happens, I suggest adding a little cornstarch, and then bringing the sauce to a low boil to thicken the mixture. The cornstarch thickening the sauce will help the sauce look smoother, and it will coat the pasta better. However, if you use evaporated milk, you won't have to worry about it curdling.

I pounded the chicken thin and cut it into medallion-sized pieces. In the future, I might actually slice the chicken into strips before tossing it with the pasta.

I would suggest sprinkling the prosciutto into the mixture rather than throwing it in all at once. I put mine in all at once the first time I made this and the prosciutto kind of stuck together.


Above: So many wonderful flavors in this pasta.

Wednesday, July 17, 2013

You Call This Pesto....Well, Yes, I Do

Usually when one hears the word pesto, basil comes to mind.  But our garden produced a lot of cilantro this year.  Unfortunately, a lot of it went to seed and I don't know how to do the coriander thing, so I decided to make these two recipes that use cilantro instead of basil.


THAI PESTO (The darker one)

1 bunch cilantro
1/4 c. peanut butter
3 cloves garlic, minced
3 tablespoons extra virgin olive oil
2 tablespoons minced fresh ginger
1 1/2 tablespoons fish sauce
1 tablespoon brown sugar
1/2 teaspoon cayenne pepper

Blend cilantro, peanut butter, garlic, olive oil, ginger, fish sauce, brown sugar, and cayenne pepper in a blender until smooth.

Add to noodles, salad, rice or any dish to give it a Thai flavor.

Source:  Allrecipes.com

Cook's note:  This has a good flavor but is quite spicy.  Adjust accordingly.  Also, I used a food processor.

MEXICAN PESTO  (The lighter green)

1/4 c. hulled pumpkin seeds (pepitas)
1 bunch cilantro
1/4 c. grated cotija cheese
4 cloves garlic
1 serrano chili pepper, seeded
1/2 t. salt
6 tablespoons olive oil

Place the pumpkin seeds in a food processor or blender, pulse until coarsely chopped.  Add cilantro, cheese, garlic, chile pepper, salt, and olive oil; cover and process until smooth, scraping the sides of the bowl with a spatula as necessary.

Source:  Allrecipes.com

Cook's note:  I made the mistake of buying roasted pumpkin seeds.  I was too lazy to try to hull them, so I ground them up really fine.  People eat the shells anyway, right?  Well, the cojita cheese is quite salty (much like mizithra) and so the pesto came out really, really salty.  Also, I was getting to the end of my cilantro, so it could have used more.  I'm going to make another batch and leave out the pumpkin seeds altogether.  I don't think it needs it.  But the flavor was very, very promising.

Sunday, July 14, 2013

Pesto, Pesto, Do Your Very Besto


Our garden is full of basil and what do you make when you have a lot of basil?  Well, Pesto, of course!  Oh, wait!  Pesto has pine nuts......except when it doesn't!

I did a search and found these two recipes that don't have nuts (we are nut free due to a sweet little grandson with fatal nut allergies) and can be frozen.  What the ????  Best of both worlds.  If you search our blog, you will see that a lot of our recipes call for pesto.  Why?  Lots of flavor, little punch.  These two recipes were so, so easy.  I'm gonna make and freeze and save myself mucho $$$$ for a long time to come!


SUN DRIED TOMATO PESTO (NO NUTS)

1 c. sun dried tomatoes
1/2 c. fresh basil
2 tablespoons shredded Parmesan cheese
1 tablespoon minced garlic
1 teaspoon salt
3/4 c. olive oil

1.  Place sun dried tomatoes in a small pot and cover with water.  Bring to a boil.  Remove from heat and let tomatoes soften, about 10 minutes.

2.  Blend tomatoes, basil, Parmesan cheese, garlic, and salt in a blender until mixed.  Slowly add olive oil, about 1/4 cup at a time.  Blend until smooth.

Source:  Allrecipes.com

Cooks note:  A blender will work, but a food processor would be easier.  Can be mixed with cooked pasta for a quick weeknight meal.


BASIL PESTO "PISTOU"

3 c. fresh basil leaves
2 - 3 cloves garlic
About 1/4 c. quality parmesan cheese, grated
Splash of fresh lemon juice
About 1/2 c. olive oil
Salt and pepper to taste

1.  In food processor blender, chop up the garlic until it is minced.
2.  Add in the basil and cheese and start to blend.  Slowly drizzle in the olive oil while the machine is running.  Blend until smooth.
3.  Squeeze in a little lemon juice and add salt and pepper to taste.
4.  Taste the sauce and adjust to your liking.
5.  Put in freezer container and freeze, if you wish; or use it right away.

Source:  twopeasandtheirpodrecipes.com. You can find it here.

I found this when I did a search for nut free pesto recipes.

Oh, finally, the title is from an old movie "Houseboat."  Cary Grant & Sophia Loren.  It's a song that gets in your mind and stays there for days.  Except that the song is actually Presto, Presto, Do Your Very Besto.  If you want to blow your mind, check it out here.

http://www.youtube.com/watch?v=I9IvNh4Iba8