Tuesday, August 20, 2013

Another Egg-Free Cookie Recipe


I found these around Valentine's Day this year (hence the name of Valentine Cream Wafers). However, I didn't get a chance to make them until now.

I really wanted to try them because they didn't have eggs in them and my youngest son is allergic to eggs.

Holy cow, these are good. They are hard to describe. The cookie itself is like a cross between a really flaky pie crust and a sugar cookie...the addition of frosting to make it into a sandwich cookie is perfection. These are so melt-in-your-mouth good.

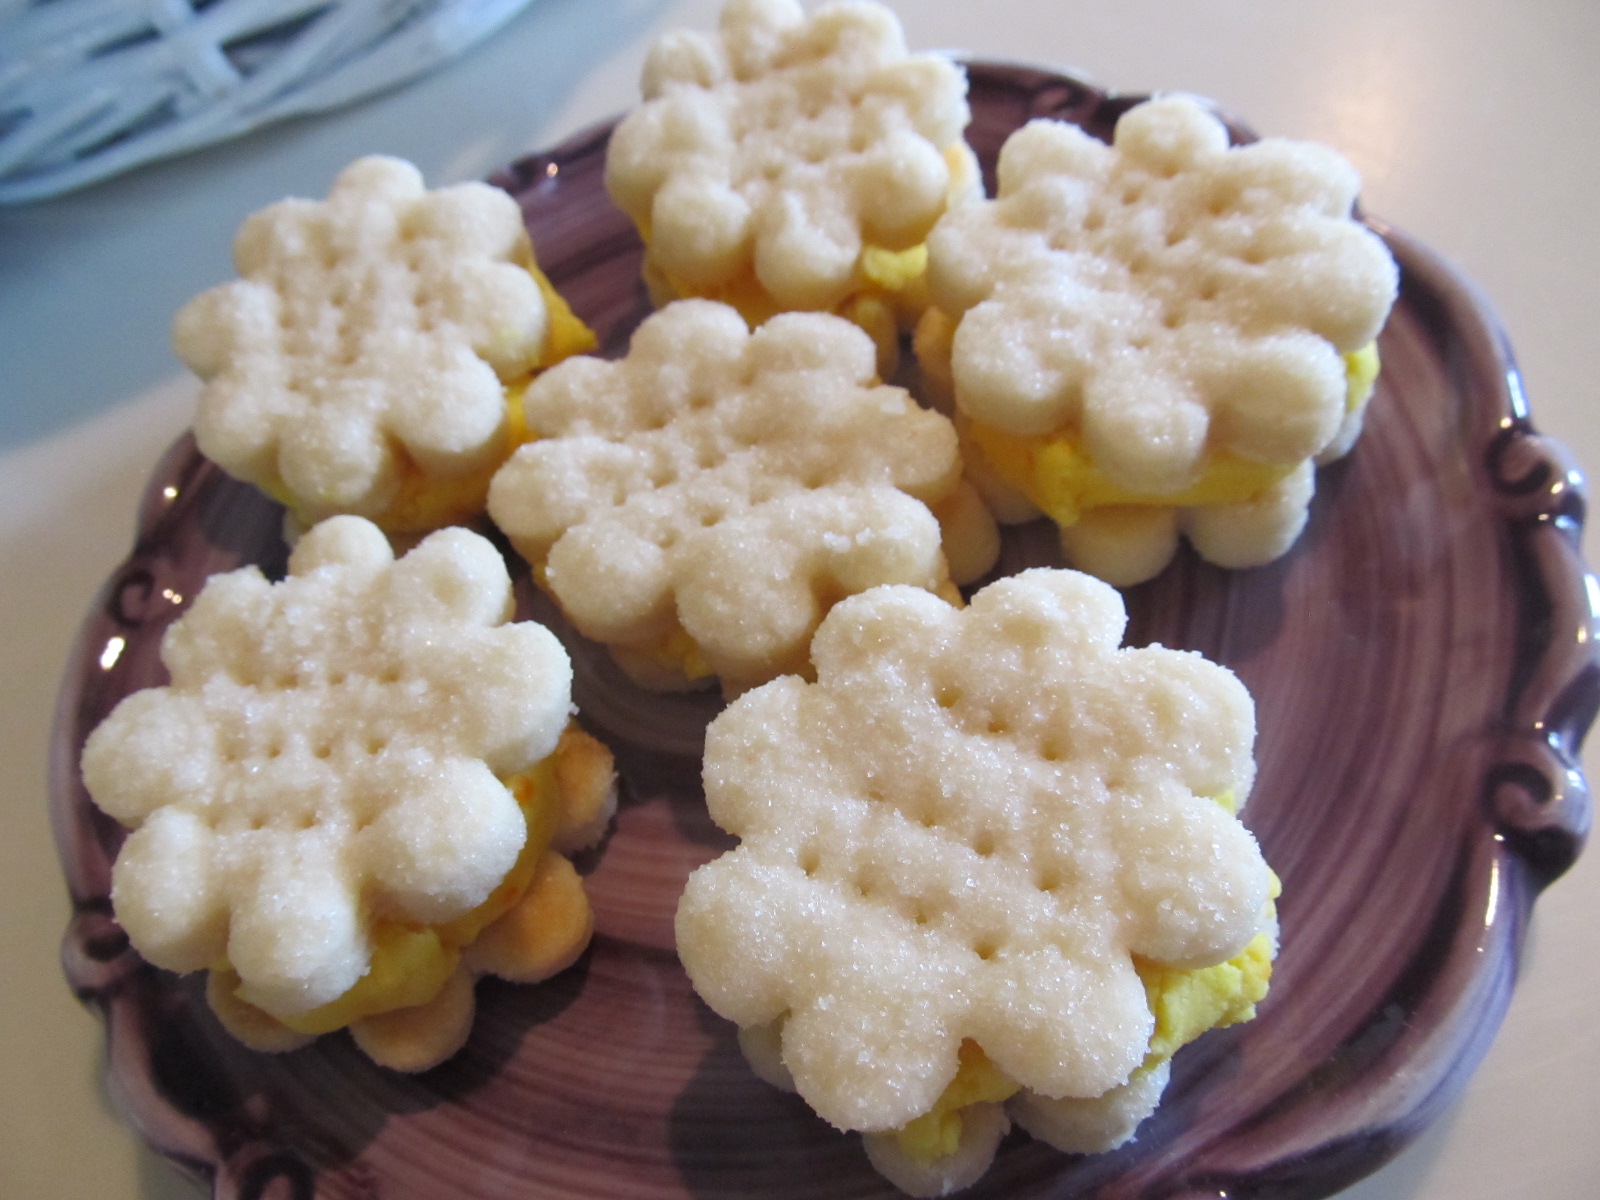
Rather than making hearts, I made flower shapes. You could do all sorts of shapes. These would also be really cute as stars, four leaf clovers (if you had a sturdy, rather than delicate cookie cutter shape), Christmas trees, simple circles, etc.


Valentine Cream Wafers

Ingredients:

Wafers:

2 cups all-purpose flour
1 cup butter, softened
1/3 cup heavy whipping cream
Granulated sugar

Creamy Filling:

1 1/2 cups powdered sugar
1/2 cup butter, softened
1 teaspoon vanilla
Red liquid food color (or any color you like to match the shape of cookie you choose to make)

Directions:

In medium bowl, mix flour, 1 cup butter, and the whipping cream with spoon. Cover and refrigerate about 1 hour or until firm.

Heat oven to 375 degrees F. Roll one-third of dough at a time 1/8-inch thick on lightly floured surface. (Keep remaining dough refrigerated until ready to roll.) Cut with 2 1/4-inch heart shaped cookie cutter. Generously cover large piece of waxed paper with granulated sugar. Transfer cutouts to waxed paper using pancake turner. Turn each cutout to coat both sides. Place on ungreased cookie sheet. Prick each cutout with fork about 4 times.

Bake 7 to 9 minutes or just until set but not brown. Cool 1 minute; remove from cookie sheets. Cool completely, about 15 minutes.

Meanwhile, beat powdered sugar and butter until smooth. Add vanilla. Beat until fluffy. Divide frosting into six small bowls. Add the following different amounts of red liquid food color to one of each of the bowls starting with a toothpick, 1 drop, 3 drops, 7 drops, 12 drops, and 25 drops to make different shades of pink. (see notes)

For each sandwich cookie, spread about 1 teaspoon frosting on bottom of 1 cooled cookie. Top with second cookie, bottom side down; gently press cookies together. (see notes)

Makes 44 sandwich cookies.

Nutrition information: 1 serving is 100 calories, 7g fat, 20 mg cholesterol, 55 mg sodium, 10 g carbohydrate, 0 g fiber, 5 g sugar, 0 g protein.

Source: Betty Crocker website. You can find it here.


Notes: I used shortening in place of the butter for the frosting. I had made a separate batch of cookies that day that also used two sticks of butter, and call me crazy, but I kind of draw the line at using over a pound of butter in one day. One pound is enough for me, thank you. I know shortening is kind of the same thing, but it is less expensive than butter. :)

I also didn't divide the frosting and do varying shades of food color. That would be adorable...but I didn't have the time or the energy. One shade was enough for me!

Finally, when the recipe says "gently press cookies together" let me stress the word "gently." These cookies are so delicate that they crack and crumble very easily. What I found that worked best was to place the first cookie onto a flat surface (not by holding it in your hand). Then gently press the frosting onto the first cookie, and then oh so very gently place the other cookie on top, and very, very gingerly and lightly press the cookie onto the frosting, just so it will stick together. Any more pressure than that and you are going to have a delicious little cracked cookie sandwich. Once you get the hang of it though, you can assemble the cookies pretty quickly. I ended up cracking about 4 cookies before I got the hang of it. After that, it was a breeze.

No Churn Ice Cream (Tastes Like Soft Serve!)


So, my ice cream machine motor has slowly been dying. My little 2 quart maker is still going strong. I am talking about my 6 quart maker. I was pretty sad about this. We tried making ice cream earlier this summer and it simply would not freeze because the motor wouldn't turn the tub fast enough. So, I need to look for a replacement.

In the meantime, however, I found this recipe for ice cream that doesn't require an ice cream maker, so I thought I would give it a try. It has very few ingredients, and it is so fast and easy to make. It doesn't taste like my favorite homemade ice cream (old-fashioned vanilla ice cream and all of the variations you can make with it), but it still tastes very yummy. I couldn't put my finger on where I had tasted it before...until I had some in a cake cone and then it struck me...this stuff tastes exactly like soft serve ice cream!

I am a huge fan of soft serve, so I was happy to make this discovery. The texture is different than soft serve (not as soft and shake-like), but because of the sweetened condensed milk, the ice cream stays soft--you don't have to let it defrost on the counter to soften. Just pop it out of the freezer and scoop it up. Eat fast though, because this stuff melts fast.

Oh, sweetened condensed milk, is there anything you can't do?


No Churn Vanilla Ice Cream

Ingredients:

1 can (14 ounces) sweetened condensed milk
2 teaspoons pure vanilla extract
2 tablespoons bourbon, optional (I didn't use this, see notes below)
2 cups cold heavy cream

Directions:

In a medium bowl, stir together condensed milk, vanilla extract, and bourbon, if using. In a large bowl, using an electric mixer, beat cream on high until stiff peaks form, 3 minutes. With a rubber spatula, gently fold whipped cream into condensed milk mixture. Pour into a 4 1/2-by-8 1/2-inch loaf pan. Freeze until firm. 6 hours.


Source: Martha Stewart Everyday Food. You can find it here.

Notes: I didn't use the bourbon. Instead, I added the seeds of one vanilla bean in addition to the vanilla extract. Maybe their recipe used the bourbon to max the soft serve flavor of this ice cream. However, you could do a lot with this recipe. One of these days, I want to try mixing chocolate syrup into the sweetened condensed milk mixture to see if I can make chocolate ice cream. You could fold in crushed berries, candies, or cookies when you fold in the sweetened condensed milk into the whipped cream too.

This recipe was great. No substitute for my ice cream maker, but an awesome, quick, and easy recipe to know and have on hand!


Above: I topped this with some strawberry freezer jam (I will post that easy recipe soon). This would also be awesome with sprinkles, mini M&M's, crushed cookies or candy, or any of your favorite ice cream toppings.

Sunday, August 18, 2013

Easy Treats

Often, we are called upon to take treats to social functions, office, parties, etc.  I was called upon to do that just yesterday.  Saturdays are so busy and I needed something quick and easy.  This one was just the ticket!  I found it here

http://jensfavoritecookies.com/

Jen is a wonderfully talented girl and her blog will prove it!


PEANUT BUTTER BARS (NO BAKE!)

Bars:
2 cups graham cracker crumbs
2 cups powdered sugar
1 cup butter
1 cup peanut butter

Frosting:
1 1/2 cups chocolate chips
1/4 cup peanut butter

1.  In a bowl, melt butter and peanut butter together.  Add cracker crumbs, sugar, butter and peanut butter.  Spread mixture evenly into a 9 x 13 pan.
2.  Melt chocolate chips with peanut butter in 30 second intervals in the microwave, stirring between each, until melted and smooth.
3.  Pour chocolate mixture over bars, and frost evenly.
4.  Chill for 40-50 minutes until chocolate is set.

Cook's note:  This couldn't have been more easy.  I would have let it chill a bit longer before cutting because it was a bit crumbly.  But this is such a great recipe for taking places.  Loved it and will use it often.

Easy Cookies! No Eggs!

Jonathan has an egg allergy and can't eat baked goods that haven't been cooked at least 20 minutes @ 350.  Well there are not many cookie recipes that cook that long.  These were a great find.  I found them here: http://jensfavoritecookies.com/

Jen is a wonderful woman that I've known since she was a teenager.  She's multi-talented and her blog reflects only a few of those talents.

These cookies were so, so easy and tasted a little like Mexican wedding cookies with chocolate chips. I'll bet you could roll them in powdered sugar and they would be great.  I think the base of these could be used for many, many things....dried fruit, etc.


CONDENSED MILK COOKIES

1 c. butter, softened
1/2 c. sweetened condensed milk
2 cups all-purpose flour
3 tsp. baking powder
1/2 tsp. salt
1/2 c. chocolate chips

1.  Mix butter and condensed milk.  Add salt, baking powder and flour.  Mix just until combined.
2.  Stir in chocolate chips.
3.  Roll into 1 inch balls and place on a baking sheet.  Bake at 350 degrees for 8 - 10 minutes.

Cook's notes:  I used regular sized milk chocolate.  Mini semi-sweet would have mixed in a little better, but I'm a milk chocolate fan versus semi-sweet.  Bottom line, these were wonderful and a great find!  Thanks, Jen!

8/20/2013 Update: I (Sarah) tried these too today after you posted this. I didn't have any chocolate chips, so I used mini M&M's. It worked great. The boys loved them...though they were a little crumbly and Johnny discovered this and had more fun crumbling his cookies than eating them. What a sassy kid! Here are some pictures I took of my batch:


Above: Prior to baking.


Above: After baking.


Above: I got about 24 cookies total. Yum!


Above: Aren't they cute?

Wednesday, August 7, 2013

One Fish, Two Fish

See, I never get to cook fish.  Well, almost never.  My family in Utah doesn't like it.  But I've been visiting my daughter in Ohio, who just had a baby.  So I begged for the opportunity to cook for her.  We've had fish twice.  The other one was blogged about quite a while ago.  This was the one we've tried tonight.  And it was good!  Really good!  And easy!  Really easy!  And if you have a small family, the recipe is made for two; easily doubled or tripled for more, of course.


HERB-CRUSTED TILAPIA WITH LEMON POTATOES

1 large unpeeled potato, cut into 1/2 in pieces
2 teaspoons olive oil
1/4 teaspoon salt
2 tablespoons all purpose flour
1 egg
3/4 cup panko bread crumbs
3/4 teaspoon seasoned salt
2 tablespoons butter, melted
2 tilapia fillets (5 to 6 oz. each)
1 medium zucchini, cut into 1/2 inch slices
2 teaspoons chopped fresh thyme leaves
2 teaspoons grated lemon peel

Heat oven to 425 F.  Spray 15x10x1 in pan with cooking spray.  In medium bowl, toss potato, oil and salt to coat.  Spread potato in half of pan.  Bake 15 to 20 minutes or until potato is tender.

Meanwhile, place flour on plate.  In shallow dish, beat egg with fork.  In another shallow dish, mix bread crumbs, seasoned salt, and butter.

Coat fillets with flour.  Dip into egg; coat well with bread crumb mixture.  Place fillets in other half of pan.  Place zucchini over potatoes; toss to combine.

Bake 10 to 12 minutes or until fish flakes easily with fork and vegetables are tender.  Sprinkle fish with thyme; toss vegetables with lemon peel.

2 Servings

Source:  Bettycrocker.com

Cook's notes:  I made the mistake of cubing the zucchini instead of slicing it.  Tasted good but the cooking was a little uneven.  I also didn't measure the lemon zest (cooking in someone else's kitchen is always a little challenging and I was beating the clock).  It was a little tart, but I liked it.  I thought this was a great recipe and even the fish-challenged would like it.

Tuesday, August 6, 2013

A Variation on A Theme

One of the things I really like about our smaller world is that when a cook finds a good recipe, it's incumbent upon them to try to improve on it and the cooking world has gotten smaller and smaller.  It's as if each cook share their recipes and their neighbor, like an old friend, says, "Have you tried this?"  And they are off!

There has been a great trend for do-ahead breakfasts.  I, myself, am a fan.  I love breakfast in the morning, breakfast in the evening, breakfast at suppertime.  So when I saw this recipe, I knew I had to try it even though we had posted something similar before.


OVERNIGHT BLUEBERRY FRENCH TOAST

12 slices day-old bread, cut into 1 inch cubes.
2 (8 oz) packages cream cheese, cut into 1 inch cubes
1 cup fresh blueberries
12 eggs, beaten
2 cups milk
1 teaspoon vanilla extract
1/3 cup maple syrup

1 cup white sugar
2 tablespoons cornstarch
1 cup water
1 cup fresh blueberries
1 tablespoon butter

Lightly grease a 9x13 inch baking pan.  Arrange half the bread cubes in the dish, and top with cream cheese cubes.  Sprinkle 1 cup blueberries over the cream cheese and top with remaining bread cubes.

In a large bowl, mix the eggs, milk, vanilla extract, and syrup.  Pour over the bread cubes.  Cover and refrigerate overnight.

Remove the bread cube mixture from the refrigerator about 30 minutes before baking and preheat the oven to 350 degrees F. (175 degrees C)

Cover and bake for 30 minutes.  Uncover and continue baking for 25 to 30 minutes, until center is firm and surface is lightly browned.

In a medium saucepan, mix the sugar, cornstarch, and water.  Bring to a boil stirring constantly, cook 3 to 4 minutes.  Mix in the remaining 1 cup of blueberries.  Reduce heat and simmer for 10 minutes, until the blueberries burst.  Stir in the butter, and pour over the baked French Toast.

Source:  Allrecipes.com  Originally posted by Karan1946

Cook's note:  Unfortunately, I forgot to take a picture with the sauce, which is too bad because it was prettier and made it quite tasty.  We tried this on our own with raspberries and the result wasn't as good.  Perhaps I didn't use enough.  The sauce really helped, too.  This could be replicated with any kind of berry, I think.  Yum.

Monday, August 5, 2013

I Will Never Stop


What will I never stop? I will never stop trying new pasta recipes. I have so many amazing pasta recipes up my sleeve...but there are always so many more fantastic ones to discover! It never gets old. I love discovering new recipes.

This one is particularly quick, easy, and flavorful. It is a recipe by Giada De Laurentiis that I saw in one of my Food Network email newsletters.

I hope you like it as much as I did!


Penne with Sun-Dried Tomato Pesto

Ingredients:

12 ounces penne pasta
1 (8.5-ounce) jar sun-dried tomatoes packed in olive oil
2 garlic cloves
Salt and freshly ground black pepper
1 cup (packed) fresh basil leaves
1/2 cup freshly grated Parmesan

Directions:

Cook the pasta in a large pot of boiling salted water until tender but still firm to the bite, stirring occasionally, about 8 minutes. Drain, reserving 1 cup of the cooking liquid.

Meanwhile, blend the sun-dried tomatoes and their oil, garlic, salt and pepper, to taste, and basil in a food processor and blend until the tomatoes are finely chopped. Transfer the tomato mixture to a large bowl. Stir in the Parmesan.

Add the pasta to the pesto and toss to coat, adding enough reserved cooking liquid to moisten. Season the pasta, to taste, with salt and pepper and serve.

Source: As mentioned above, this is a recipe by Giada De Laurentiis, found on Food Network. You can find it here.

Notes: Holy moly ravioli, this was good! So easy too. I don't have a food processor, so I used my blender. It worked fine (though I did have to shake it and mix it with a spoon to get it all to blend). I also added the reserved pasta water to the pesto (it was still plenty thick, but it helped it to blend better in my blender). I also used a full pound of pasta (16 ounces) instead of 12 ounces (I also cooked it according to package directions, which was 10-11 minutes rather than 8 minutes). There was still plenty of pesto to coat the noodles. I really loved it. I can't wait to have some leftovers tomorrow!

Above: Sorry. This is not a single serving. :) This is the whole recipe in a large serving bowl. I wouldn't advise eating this much by yourself...though when you taste it, you will be tempted to do so!

Sunday, August 4, 2013

A Great Dinner Idea


This is a recipe I tried because I had most of the ingredients on hand, so it wasn't too hard to just add a couple of things to my grocery list. This was really good. My husband and I liked it a lot. My boys ate the chicken and wouldn't touch the rice. You do what you can, eh?


Chipotle Chicken and Rice

Ingredients:

2 tablespoons vegetable oil
8 boneless, skinless chicken thighs (about 2 pound total)
Coarse salt and ground pepper
1 medium red onion, thinly sliced lengthwise
3 garlic cloves, coarsely chopped
1/2 teaspoon ground cumin
2 canned chipotle chiles in adobo, minced
2 large tomatoes, diced large
1 cup long-grain white rice
Lime wedges, for serving
Chopped cilantro leaves, for serving

Directions:

In a large Dutch oven or heavy pot, heat oil over medium-high. Season chicken on both sides with 1 teaspoon salt and 1/8 teaspoon pepper. Working in batches, brown chicken on both sides, about 5 minutes total; transfer to a plate.

Reduce heat to medium. Add onion and saute until soft, about 5 minutes, scraping up any browned bits from bottom of pot (if necessary, add a bit of water to release browned bits).

Add garlic, cumin, and chiles; cook until garlic is soft and fragrant, 2 minutes. Add tomatoes and 1 teaspoon salt and cook until tomatoes begin to break down and release their juice, 3 minutes. Stir in 1 cup water and return chicken and any accumulated juices to pot. .Cover, reduce to a simmer, and cook 25 minutes.

Remove several pieces of chicken and stir in rice, making sure it is completely submerged in liquid. Replace chicken, cover, and cook until rice is tender, and liquid has been absorbed, 25 to 30 minutes more. Serve with lime wedges and cilantro, if desired.

Serves 4


Nutrition information: 474 calories, 18.4 g fat, 31.8 g protein, 43.5 g carb, 1.8 g fiber.

Source: Martha Stewart Everyday Food. You can find it here.

Notes: I added one more tomato (for a total of three). I also used chicken breasts instead of thighs. I had the chicken breasts on hand already, so I decided to use those instead of buying thighs.

I would also suggest watching the level of liquid when you add the rice. I think my rice needed just a little more water to make it just right. Even so, this was such a great meal. So easy to put together and very tasty. The lime adds such a nice pop. I would suggest serving this with sour cream as well as the lime and cilantro.

Saturday, August 3, 2013

Something a Little Different


My youngest son has been loving meatballs these days. He even calls the sausage on top of a pizza "meatballs." So, when I saw this recipe, I thought he might like it. He did...even though he only ate the meat. He is two, so what else can you expect? I was just glad he ate any of it!

My husband and I really liked this though. The pairing of the sausage, artichokes, and polenta isn't one I would have thought of, but it was really good. If you are looking for something that is easy to throw together that is different than what you normally make, this is a good option.


Baked Polenta with Sausage and Artichoke Hearts

Ingredients:

2 teaspoons extra virgin olive oil
1/2 white onion, thinly sliced
1 pound sweet Italian sausage, casing removed
2 garlic cloves, thinly sliced
3/4 cup marinated artichoke hearts, coarsely chopped
Coarse salt and ground pepper
1 tube (18 ounces) prepared polenta, cut into 1/4-inch round
1/3 cup chicken broth
1/4 cup fresh parsley (optional), coarsely chopped

Directions:

Preheat oven to 400 degrees F. In a large skillet, heat oil over medium. Add onion and cook until softened, 5 minutes. Add sausage and cook, breaking up meat with a wooden spoon, until browned, 8 minutes. Add garlic and cook until fragrant, 30 seconds. Remove skillet from heat and stir in artichokes; season with salt and pepper.

In a w-quart baking dish, layer polenta rounds and spoonfuls of sausage mixture. Pour stock over top and bake until bubbling and polenta is pale golden, 20 to 25 minutes. Sprinkle with parsley and serve.

Serves 4

Nutrition information: 330 calories, 15 g fat, 21 g protein, 30 g carb, 4 g fiber.

Source: Martha Stewart Everyday Food. You can find it here.

Notes: The only change I made was to add more artichokes than the recipe called for. This was really good!

Candy Bread?


Yes. Candy and bread combined make candy bread. Whoohoo! Check it out!

This would make a great Christmas gift bread too.

Gumdrop Bread

Ingredients:

2 1/2 cups all-purpose flour
1/2 cup granulated sugar
1/2 cup packed brown sugar
1/4 cup shortening
1 1/4 cups buttermilk
3 teaspoons baking powder
1 teaspoon salt
1 teaspoon vanilla
1/2 teaspoon baking soda
2 eggs
1 cup small gumdrops, cut in half (see notes)
1/2 cup chopped nuts, if desired

Directions:

Heat oven to 350 degrees F. Grease bottom only of loaf pan (9x5x3 inches).

Beat all ingredients except gumdrops and nuts in large bowl with electric mixer on low speed 15 seconds. Beat on medium speed 30 seconds, scraping bowl constantly. Stir in gumdrops and nuts. Pour into pan.

Bake 60 to 65 minutes or until toothpick inserted in center comes out clean. Loosen sides of loaf from pan; remove from pan to wire rack. Cool completely about 2 hours, before slicing. For best results, wrap and refrigerate at least 8 hours before slicing.

Recipe notes: Hold the nuts! Some kids have serious nut allergies, so check with parents before sharing this gumdrop goodie.

Squeeze those gumdrops in the store. Look for soft and moist candies for best bread results.

Source: Betty Crocker recipe. You can find it here.

Notes: The bread itself isn't overly sweet. At first, I felt it could be a little sweeter...but after having a few more slices, I decided it was good that it wasn't too sweet because you get a lot of sweetness from the gumdrops.

I would also suggest tossing the gumdrops in some flour before mixing it into the batter. It will keep the gumdrops from sinking to the bottom. That way, the candy will be interspersed throughout the bread.

As I was eating this bread, I thought of some good possibilities. Our grocery store has some awesome Juju fish that are just the right consistency and softness. Some of those chopped up would be absolutely delicious in this bread.

I also think Swedish Fish might work well in this recipe. They might be a little too firm though. I'll have to try it out and report back as to how successful that is. However, if it is a success, can you imagine anything better than Swedish Fish bread?!


Above: I found this recipe, but thanks to my mom for trying it out and sharing it with us! It was yummy!

Food Moods


I was craving some kind of Asian chicken and noodle combination. I don't know, it just sounded good. So, I did a search to see what I could find. This recipe sounded easy, so I thought I would give it a go. We all really liked it! I hope you will too.

Thai Chicken and Noodle Salad

Ingredients:

1 1/4 pounds boneless, skinless chicken breasts, thinly sliced crosswise
Spicy Asian Dressing (recipe below)
Coarse salt
3 1/2 ounces Chinese rice noodles, broken in half if long
1 tablespoon vegetable oil
2 carrots, sliced into ribbons with a vegetable peeler
1 English cucumber, halved lengthwise and thinly sliced crosswise
1/4 cup fresh basil, torn
Bean sprouts, chopped peanuts, fresh mint leaves, red-pepper flakes, and sliced scallion greens, for garnish (optional)

Directions:

Place chicken and half of dressing in a resealable plastic bag (reserve remaining dressing). Marinate at room temperature for 30 minutes (or refrigerate up to overnight).

In a large pot of boiling salted water, cook noodles until tender. Drain, and rinse under cold water to stop the cooking. Transfer to a platter.

In a large skillet, heat oil over medium-high. Working in batches, cook chicken (do not crowd skillet) until cooked through, 1 to 2 minutes; transfer to platter on top of noodles. 

Top with carrots, cucumber, and basil. Drizzle with reserved dressing, and sprinkle with garnishes, if desired.

Source: Martha Stewart Everyday Food recipe. You can find it here.

Notes: The Spicy Asian Dressing uses anchovy paste which gives it a very subtle fish taste. If you don't like this flavor, reduce the amount of anchovy paste or omit it entirely. The flavor will still be great.

I would suggest serving the noodles in individual portions on each plate and topping it first with the carrots and cucumbers, then the chicken, and then any toppings you choose to use, if any. It just looks prettier that way!

Spicy Asian Dressing

Ingredients:

4 thinly sliced scallion whites
2 minced garlic cloves
1/2 cup soy sauce
1/2 cup rice vinegar
2 tablespoons light brown sugar
1 tablespoon fresh lime juice
1/2 teaspoon anchovy paste (or 1 minced canned anchovy)
1/2 teaspoon red pepper flakes

Directions:

In medium bowl, mix together all ingredients.

Source: Martha Stewart Everyday Food. You can find it here.

Notes: Really flavorful. As mentioned above, if you don't like the hint of fish flavor, reduce or omit the anchovy paste.

A Good Find


So, in mourning the fact that Everyday Food Magazine is no more, I have been going over my past issues and finally making the recipes within that I never got around to making before.

Here is an awesome recipe I found that packs a lot of flavor, which is surprising because it has very few ingredients.


Chili Verde

Ingredients:

3 pounds pork shoulder, excess fat trimmed, cut into 1-inch pieces
Salt and pepper
1 medium yellow onion, thinly sliced
1 cup green tomatillo salsa
1 1/2 cups low sodium chicken broth
Fresh cilantro and lime wedges, for serving

Directions:

Season pork with salt and pepper. In a large Dutch oven or other heavy-bottomed pot, add pork, onion, salsa, and broth. Bring to a boil, then cover and reduce heat to medium-low. Simmer until pork pulls apart easily, 1 1/2 to 2 hours. Skim fat off top. Season with salt and pepper. Top with cilantro and limes to serve.

Source: Martha Stewart Everyday Food, March 2013. You can find it here.


Notes: This was really good. Here is my advice though. Watch the amount of liquid as you simmer it. I didn't watch it, and too much of my liquid evaporated, so I had to add some more. Also, be careful when you season the pork with salt and pepper. Salsa verde can be pretty salty...so don't season the pork with too much salt. I used Herdez brand salsa verde. I actually used 1 1/3 cups of salsa. I worried that it wouldn't be flavorful enough, but it was so delicious. The most time consuming part was cubing the pork. Other than that, this is a very easy meal to prepare.

You Mean There is a Chocolate Version Too?!


We have an awesome Tres Leches Cake recipe. You can find that here (it is at the bottom of a long post containing all sorts of yummy Mexican food recipes).

However, now we found an awesome chocolate version of Tres Leches Cake! No complaints here! May you enjoy it as much as we did!

Triple Chocolate Tres Leches Cake

Ingredients:

1 pkg. (2 layer size) devil's food cake mix
2 pkg. (4 oz. each) Baker's Semi-Sweet Chocolate, divided
1 can (14 oz) sweetened condensed milk
1 can (12 oz) evaporated milk
1/2 cup sour cream
1 tbsp. unsweetened cocoa powder
1 cup thawed Cool Whip Whipped Topping

Directions:

Prepare cake batter and bake in a 13x9-inch pan as directed on package. Cool cake in pan 10 minutes, then pierce cake with large fork at 1/2-inch intervals.

Melt 7 oz. chocolate as directed on package. Blend milks and sour cream in blender until smooth. Add melted chocolate; blend well. Pour over cake, re-piercing cake if necessary until milk mixture is absorbed. Refrigerate 1 hour. Meanwhile, make curls from remaining chocolate.

Stir cocoa into Cool Whip. Frost cake with cool whip mixture; top with chocolate curls. Keep refrigerated.

Source: This is a Kraft recipe. You can find it here.

Notes: I still regret not having a second piece...even though it probably would have put me into a coma. It was soooo good. We did add a little extra cocoa powder to the Cool Whip though. Do it to your taste.

We're Not Done Yet!


One more pie recipe to share!

Back before I learned about my son's allergy to coconuts (among other allergies), I found this super delicious recipe. You should try it!

Coconut Key Lime Pie

Ingredients:

1 can (14 ounces) sweetened condensed milk
1 can (13.5 ounces) unsweetened coconut milk
1/3 cup fresh or bottled Key lime juice
7 large egg yolks
1 easy press-in pie crust (made from graham crackers), recipe below
2 cups cold heavy cream
2 tablespoons confectioners' sugar
3 tablespoons sweetened shredded coconut, toasted

Directions:

Preheat oven to 325 degrees. In a medium bowl, whisk together condensed milk, coconut milk, lime juice, and egg yolks until smooth. Pour into crust and bake until set but still slightly wobbly in center, 40 minutes. Let cool on a wire rack, 1 1/2 to 2 hours, then refrigerate 3 hours (or up to 1 day).

In a large bowl, using an electric mixer, beat cream and sugar on high until stiff peaks form, about 3 minutes. To serve, top pie with whipped cream and sprinkle with toasted coconut.

Source: Martha Stewart website. You can find it here.

Notes: The only change I would make is to add more Key lime juice. The coconut milk somewhat masked the taste of the lime. So, I would use at least 1/2 cup lime juice instead of the 1/3 cup called for in the recipe. This was really good. The texture was awesome. So creamy.

Easy Press-in Pie Crust

Ingredients:

6 ounces cookies (about 12 graham crackers, 46 vanilla wafers, or 30 chocolate wafers, such as Famous)
3 tablespoons sugar
1/4 tsp coarse salt
5 tablespoons unsalted butter, melted

Directions:

Preheat oven to 350 degrees. In a food processor, pulse cookies until finely ground (you should have about 1 1/2 cups). Add sugar, salt, and butter and pulse until combined.

Firmly press crumb mixture into bottom and up sides of a 9-inch pie plate. (If using a springform pan, press crumbs halfway up sides.) Bake until crust is dry and set, about 12 minutes. Let cool completely in plate on a wire rack before filling.

Source: Martha Stewart recipe. You can find it here.

Thursday, August 1, 2013

What Could Be More Southern?

Peaches, Pecans & Peanuts....can you think of anything more indicative of the South?  Well, maybe fried chicken.  But we're still talking pies here.  Everyone's had pecan pie, but how many have smacked their lips to peanut pie?  Haven't?  Well, make this one up and begin smacking away!


DIXIELAND PEANUT PIE

Ingredients:

1 (9 in) unbaked pie shell
1 cup dark corn syrup
1/2 cup firmly packed brown sugar
3 eggs
2 tablespoons butter, melted
2 teaspoons vanilla
3/4 cup coarsely chopped salted peanuts
1/4 cup whole salted peanuts

Directions:

Combine corn syrup, brown sugar, eggs, butter and vanilla in large bowl.  Beat at medium speed, scraping often, until well-mixed.  Stir in 3/4 cup chopped peanuts.  Pour into prepared crust.  Sprinkle top with 1/4 cup whole peanuts.

Bake for 40 to 45 minutes or until top of pie feels dry.  (If browning too quickly. cover edge with 2 inch strip of aluminum foil.)  Cool completely.  Refrigerate at least 2 hours.

Just before serving, garnish with whipped cream and chopped peanuts if desired.

Source: Land O Lakes recipe. You can find it here.

Gimme Some Sugar!

There are some foods that just make you smack your lips and brown sugar is one of them.  Can you name anything with brown sugar in it that you don't like?  Go on.  I dare you.  Well, here is a simple pie for the ages.  Tastes like down home....wherever home is.  It tastes like a little like pecan, without the pecans, so there's a little calorie saving going on.


BROWN SUGAR PIE

Ingredients:

6 tablespoons all-purpose flour
2 cups packed brown sugar
1 1/2 cup evaporated milk
4 tablespoons butter
1/2 teaspoon salt
1 teaspoon vanilla extract
1 (9 in.) unbaked pie shell

Directions:

Preheat oven to 400 degrees F (200 degrees C)

In a saucepan, combine flour and sugar.  Stir in milk, butter, salt, and vanilla.  Cook, stirring constantly, until mixture comes to a boil.  Pour into unbaked pie shell.

Bake at 400 degrees (200 degrees C) for 5 minutes.  Reduce heat to 350 degrees F (175 degrees C) and continue baking for 25 minutes.

Source:  Allrecipes.com, Submitted by Suzanne. You can find it here.

Who's Your Daddy?

Okay, that's not the title, but I can't help thinking about it when I hear the name of this pie.  Or that wonderful movie with Gene Hackman...one of the best sports movies ever.


HOOSIER SUGAR CREAM PIE

Ingredients:

2 cups heavy cream
1/2 cup all purpose flour
1/2 cup brown sugar
1/2 cup granulated sugar
3 tablespoons granulated sugar (for sprinkling)
1/2 cup whole milk
1 teaspoon vanilla extract
1 - 2 tablespoons of butter, for dotting inside of pie crust
1 (9 in.) pie crust, unbaked
1 tablespoon unsalted butter
1 teaspoon ground cinnamon

Directions:

Preheat oven to 350 degrees F.  In medium bowl, combine heavy cream, flour, brown sugar, 1/2 cup granulated sugar, milk, and vanilla.

Dot inside of pie crust with butter.  Pour filling into crust.  Combine cinnamon and remaining 3 tablespoons of sugar and sprinkle on top.  Bake pie until set and center is firm to the touch, about one hour.  Cool on wire rack.

Source:  Country Living. You can find it here.

Cook's notes:  This was a little runny and probably needed a little more cooking.  Watch carefully.  But this was really good and sinfully decadent...but what do you expect with 2 cups of heavy cream.  Yum.

Bi-Partisan Pie

Yes, food should never make you have to take sides.  However, I don't believe in changing the titles from recipes as I found them.  I don't really know if our former president really has eaten this pie, let alone if it's his favorite.  All I know is that this is my new favorite pie.  It's easy, as, well, pie.  And, it's the perfect blend of tart and sweet. It tastes like a lemon bar in pie form.  You won't be able to leave it alone no matter your political leanings.


BILL CLINTON'S LEMON CHESS PIE

Ingredients:

1 (9 in. pie shell)
2 cups white sugar
1/2 cup butter, softened
5 eggs, beaten
1 cup milk
1 tablespoon all-purpose flour
1 tablespoon cornmeal
1/4 cup fresh lemon juice
3 tablespoons lemon zest

Directions:

Preheat oven to 350 degrees F (175 degrees C).

In a large mixing bowl, cream together sugar and butter until light and fluffy.  Beat in eggs and milk.  Add flour, cornmeal, lemon juice, and lemon zest.  Mix until smooth.  Pour mixture into pastry shell.

Bake in preheated oven for 35 to 40 minutes, until set in center.

Source:  Allrecipes.com  Submitted by Carolyn. You can find it here.