Sunday, March 3, 2024

Stocking Candy Cookies


My boys love Sweet’s chocolate orange and raspberry sticks. However, this year, we ended up with too many and my boys got a little tired of them.

I searched for recipes that I could use these chocolate sticks in and found this one. They are fan-freaking-tastic. Seriously, so good. This recipe is a keeper. I will probably be stocking up on these chocolate sticks every year from here on out just so I can make these cookies every Christmas.

We tried them in both the orange and raspberry flavors. I don’t always love the combination of orange and chocolate, but I loved these! Some liked the orange better, some liked the raspberry better, and some loved them both equally and couldn’t choose a favorite.

I will have to try the blueberry and cherry flavors next year!

You could also add these to your favorite chocolate chip cookie recipe in place of the chocolate chips.

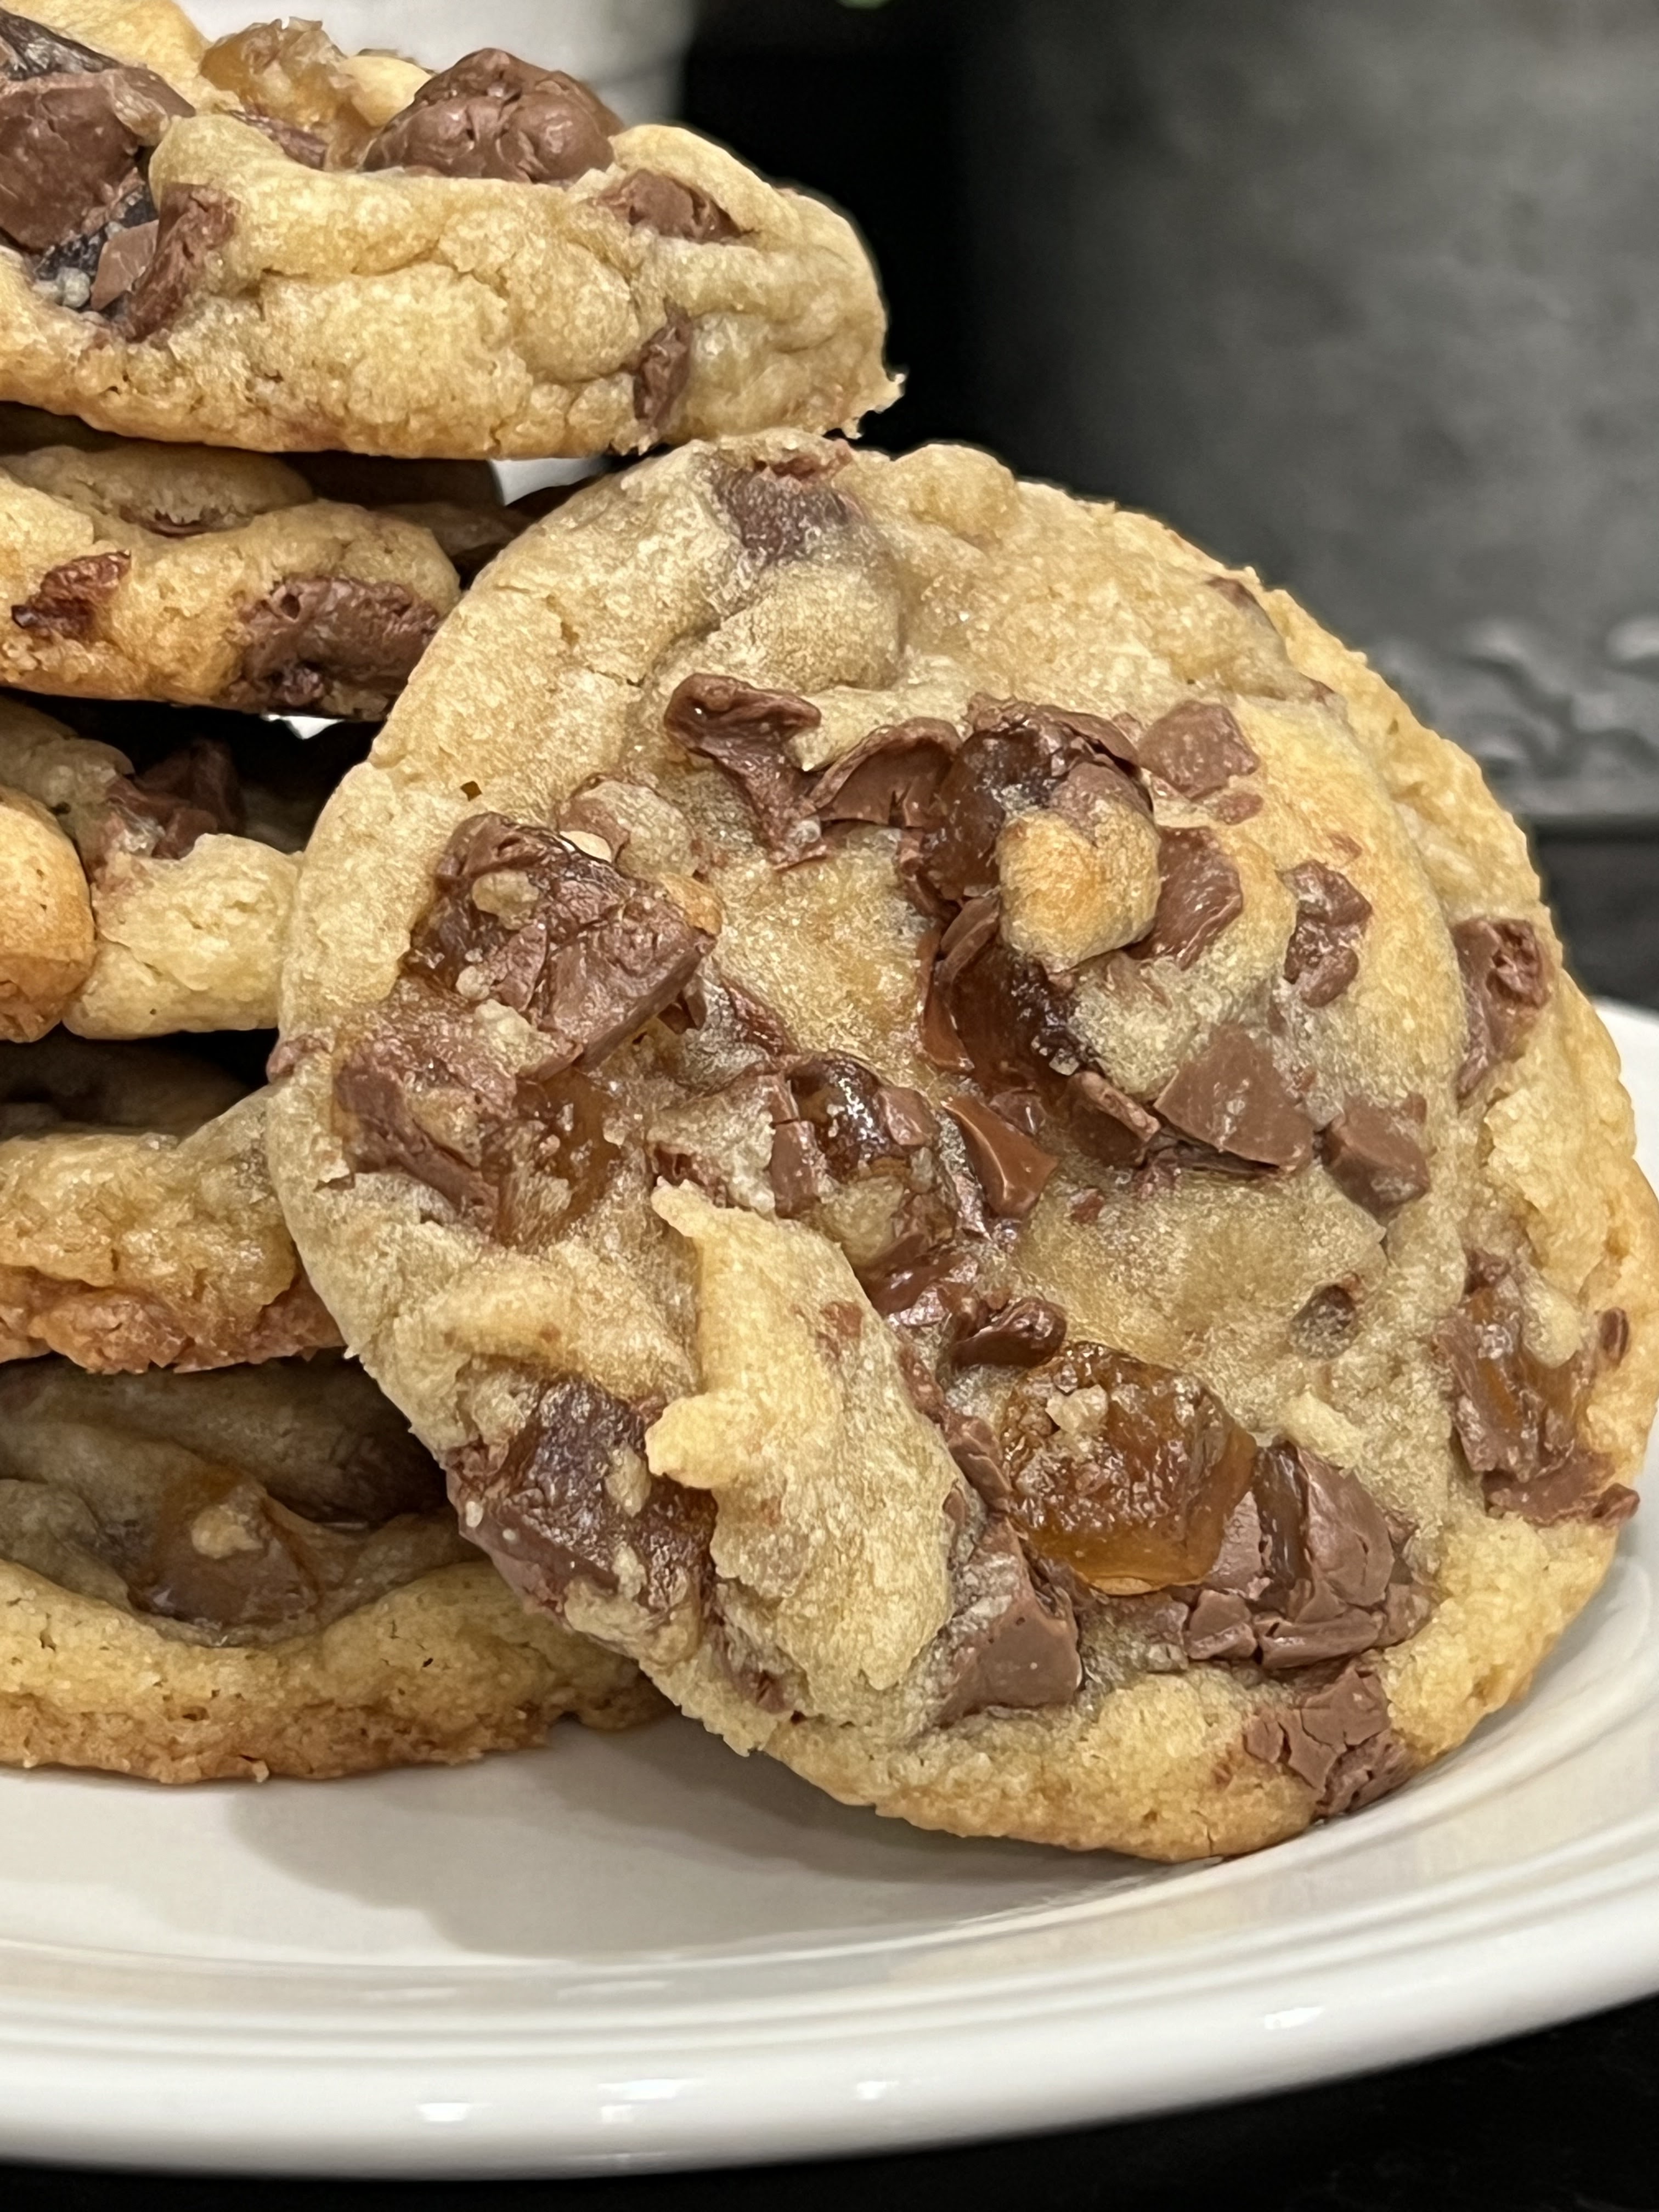
Sweet’s Candy Chocolate Stick Cookies

Ingredients:

3/4 granulated sugar

3/4 packed brown sugar

1 cup butter, softened

1 tsp. vanilla

1 egg

2 1/4 cups flour

1 tsp. baking soda

1/2 tsp. salt

18 sticks (or up to one full box) Sweet’s chocolate sticks, cut into 1/4” cubes

Directions:

Preheat oven to 375 degrees F. 

Cream sugars and butter together in a large bowl. Add vanilla and egg and mix until combined and smooth.

Mix in flour, baking soda, and salt (dough will be stiff).

Drop dough by rounded tablespoonfuls about 2 inches apart onto an ungreased cookie sheet.

Bake 8-10 minutes, or until light brown (centers will be soft).

Cool slightly on cookie sheet (for 5-10 minutes). Move to wire cooling rack until cooled completely.

If cookies have spread, or are irregular in shape, you can shape them with a round top glass or bowl. Place glass or bowl over cookies and swirl around in a circular pattern to smooth and round the edges of the cookie.

Source: You can find the recipe here.

Video of how to round spread cookies (and my apologies that the video isn’t better. It is hard to record with one hand and round the cookies with the other! Ha ha.):


Family Potatoes


I call these “Washburn Potatoes” since it is a recipe I got from my husband’s side of the family. This is a lovely and classic gratin potato recipe.

They are a little time consuming (only because most potato recipes are since potatoes take so long to cook), but not difficult. However, they are delicious and so satisfying—especially when it is cold outside. I make them at least once every winter.

Potatoes Dauphinois (Uncle Steve Washburn’s Recipe)

Ingredients:

3 lbs potatoes, peeled and thinly sliced (any white potatoes or Yukon gold)

1 clove garlic (see notes)

3 cups milk

2 eggs

Salt, to taste

Pepper, to taste

1/2 cup heavy cream or creme fraiche

1 cup shredded gruyere cheese (cheddar, Colby jack, or gouda can also be used)

Directions:

Preheat oven to 400 degrees F.

Cut garlic clove in half and rub the inside of a 6-quart casserole dish or 9x13” baking dish with the cut sides of the garlic. (See notes)

The casserole or baking dish does not need to be sprayed with cooking oil.

Layer the potatoes in the dish.

Mix together the milk, eggs, salt, and pepper. Pour mixture over the potatoes. The potatoes should just be covered, but not drowned. You can add more milk, if necessary, to cover the potatoes.

Place in the oven for 50-60 minutes, or until potatoes are tender, breaking the crust that forms, and folding it in two or three times throughout the bake time.

Remove from the oven, dot the surface with cream and top with shredded cheese.

Return to the oven and bake an additional 10-15 minutes, or until the cheese is nicely browned with a rich, brown crust.

Remove from oven and let rest for 5-10 minutes before serving.

Source: I got this from Mike and Debra Washburn, and they got it from Steve Washburn.

Notes: Rather than rubbing the sides of the pan with a cut piece of garlic clove, I stir in about 1 teaspoon (or to taste) of minced garlic or bottled minced garlic to the milk and egg mixture prior to pouring it over the potatoes.

Saturday, March 2, 2024

Everything is Rosy! Potato Style!


Potato Roses
Ingredients:
6 large Yukon gold potatoes, thinly sliced with a mandolin (I did just under 1/8 inch thick)
1/2-1 cup Parmesan cheese
6 tbsp butter (olive oil could also be used)
1 tsp Italian seasoning
1 tsp salt
1/2 tsp pepper
Preheat oven to 400 degrees F. Spray each cup of a 12 cup muffin tin (regular sized muffin pan) with cooking spray. Sprinkle 1-2 tablespoons Parmesan cheese on the bottom of each muffin cup.
Layer slices of potato on top of each other starting from the left, placing slices on top of the last. Then, start rolling, beginning at the right and rolling to the left to form a rose. Place in muffin tin. The slices will most likely spread out. Place additional potato slices in the middle to fill in the gaps.
Melt butter and stir in Italian seasoning, salt, and pepper. Spoon or brush mixture evenly over the tops of each rose.
Bake in oven for 40 minutes, or until edges are browned and crispy, and the rest is tender.
Makes 12 rose potatoes.

Tried and True Sugar Cookies!

My sister-in-law has a fantastic sugar cookie recipe, but you have to add in flour intuitively...and I kind of stink at that. So, I leave those sugar cookies to her and make these ones, which are also a fantastic recipe. These sugar cookies have never failed me! My mom got this recipe from her friend, Karrie. Hence the name! I hope you like them!


Karrie's Sugar Cookies

Ingredients:

2 cups sugar
2 cups butter
6 eggs
2 tsp. vanilla or almond flavoring
1 pinch salt
7 cups flour
3 tsp baking powder

Directions:

Cream sugar and butter. Add eggs and vanilla. Add flour mixed with baking powder and salt. Roll out the sugar cookie dough onto a well-floured surface and cut out cookies.

Bake at 350 degrees for 8-10 minutes. Do not over-bake. You don't even want these cookies to start to brown. 

Frost with royal icing glaze or frost with smooth buttercream frosting.


Smooth Buttercream Frosting

Ingredients:

1/2 cup butter, softened
1/2 cup vegetable shortening
1 1/2 teaspoons vanilla extract
5 cups confectioners sugar
3 tablespoons milk

Directions:

Mix butter and shortening together in a bowl until smooth. Mix in vanilla extract. Beat sugar, one cup at a time, into butter mixture, on medium speed. Add milk and beat on high speed until light and fluffy.

Refrigerate when not using.

Source: Allrecipes.com, submitted by morabam2011. You can find it here.

Royal Icing with Meringue Powder

Ingredients:

4 cups (about 1 lb.) powdered sugar (confectioners' sugar)
5 tablespoons warm water
3 tablespoons meringue powder

Beat all ingredients together until icing forms peaks, about 7-10 minutes at low speed with a heavy-duty mixer or 10-12 minutes at high speed with a hand-held mixer.

Check the consistency of your royal icing. If icing is too stiff, add more water, 1 teaspoon at a time, until desired consistency is achieved. If icing is too thin, add powdered sugar, a little at a time, until desired consistency is achieved.

For stiff consistency: Use 1 tablespoon less water. Stiff royal icing is preferred for making 3-D decorations. With stiffer royal icing, opt for larger piping tips to relieve the pressure on the piping bag.

Medium consistency for icing outlining: Add 1/8 teaspoons of water for every cup of stiff icing. Use a flat utensil like a small angled or straight silicone spatula, to mix icing in a figure-8 motion. Avoid beating or mixing vigorously.

Thin consistency for flooding: To thin for pouring, add 1 teaspoon water per cup of royal icing. Use a grease-free spoon or spatula to stir slowly. Add 1/2 teaspoon water at a time until you reach proper consistency. Use a flat utensil, like a small angled or straight silicone spatula, to mix in a figure 8-motion. Avoid beating or mixing vigorously.

  • 10-second test: Take some icing on a spatula and drop it back down into the bowl to check for the correct thin consistency for flooding. If it sinks after a full count of 10, then the consistency is thin enough for flooding.
  • Let icing sit for 15 minutes to an hour to let air bubbles rise naturally. Alternately, tap the bowl on the table several times to force the air bubbles up. Gently stir the top surface to release the air.

Notes:

  • Use grease-free tools: Keep all icing utensils and bowls completely grease-free for proper icing consistency and to ensure the icing properly sets.
  • Use meringue powder: Meringue powder is a must for this recipe. Do not substitute with raw egg whites (which can be a food safety issue) or dried egg whites; neither will produce the same results as meringue powder. If you plan to use egg whites, use a different recipe specifically meant to be made with egg whites.
  • Don't overbeat: Do not overbeat the royal icing base. This will incorporate too much air, which will create bubbles. Vigorous stirring will also create air bubbles.
  • Cover with a damp towel: Cover the decorating tip with a warm, damp towel to prevent the royal icing from drying when not using.
  • To speed up the drying process: Royal icing can take up to 2 hours to dry. Place iced treats in front of a fan to speed up the icing's drying process.
  • Storage: Store royal icing in an airtight container at room temperature for up to two weeks. Before reusing, re-whip using a paddle attachment on low speed until it's back to the correct consistency.
    •  Never store royal icing decorations in the freezer. Instead, keep decorations in an airtight container in a dry, dark place to prevent fading for up to 6 months.
 Source: Wilton website, you can find it here.

Having a Ball! A Cheese Ball!

I wanted a white cheese ball that I could roll in cranberries. I was inspired by this recipe that I found on Slim Sanity. I made enough changes that I feel I can call this version of the recipe my own. 

I love the sweet and salty mix of the cheese and cranberries. It is great during the holidays…or any time of the year!


White Cheddar Cranberry Cheese Ball

Makes 2 cheese balls

Ingredients:

2 (8 oz) packages cream cheese, softened
2 cups (16 oz) shredded sharp white cheddar cheese
1-3 tablespoons grated white onion, to your taste
1-2 tablespoons Worcestershire sauce, to your taste
1 teaspoon garlic powder
1 teaspoon salt, or to taste
2 cups dried cranberries

Directions:

Add all ingredients, except cranberries, into a bowl. Mix together with a hand mixer until smooth.

Refrigerate for 30 minutes, or until firm.

Spread a piece of plastic wrap flat and sprinkle with dried cranberries. Spoon half of the cheese ball mixture on top of the cranberries. Top with more dried cranberries. Shape into a ball and add more dried cranberries, as needed, until cheese ball is completely covered with dried cranberries.

Repeat with other half of the cheese mixture and dried cranberries.

Wrap in plastic wrap and place in a bowl to set up. The bowl will help the ball keep its shape until you are ready to serve.

Refrigerate until ready to serve. Let cheese ball come to room temperature for 30 minutes to soften before serving. 


Wednesday, January 10, 2024

Caramel Pie


I found this caramel pie recipe in my Anne of Green Gables Treasury a few decades ago. My, how time flies. It is a recipe that takes some time to perfect, but practice makes perfect!


Caramel Pie

Ingredients:

4 T. cornstarch
1 ½ c. water, divided
2 eggs, yolks and whites separated
1 ½ c. sugar
½ c. butter, melted
1 tsp. vanilla
1 baked 9-inch pie shell
1 T. sugar

In a bowl, dissolve the cornstarch with ¾ c. water. Beat the egg yolks and stir them into the cornstarch mixture. Set aside.

In another bowl, mix ¾ c. sugar, ¾ c. water, and ½ c. melted butter. Set aside.

In a heavy saucepan with high sides, cook ¾ c. sugar over low to medium heat until it is completely melted and a golden brown color. Watch carefully, as it can burn easily. Increase the heat slightly if the sugar takes a long time to melt. Don’t stir the sugar until the majority has melted on its own. Stirring too early will cool the sugar, causing it to harden again, and make it take longer to melt.

Once the sugar is completely melted, add the mixture containing the remaining ¾ c. sugar, ½ c. melted butter, and the remaining ¾ c. water. This may create a cloud of steam, so stand back while adding!

Bring the mixture to a boil and stir until the sugar has completely dissolved.

(Once the second batch of sugar is added with the water, the first batch of melted sugar often hardens with the sudden temperature change. As everything heats back up, the hardened caramel will melt again. Stir this mixture—breaking up the hardened caramel into smaller pieces to speed up the melting process—until everything has dissolved and the mixture is smooth. You may have to remove small pieces of hardened caramel that do not completely melt.)

Once the caramel mixture is smooth, pour the cornstarch/egg mixture into the saucepan and bring the mixture to a low boil, stirring it constantly. Continue to boil slowly until the mixture thickens; about 2 minutes.

Take the mixture off the heat, stir it until smooth, and let it cool. Stir in the vanilla and pour the filling into the baked pie shell.

To make a meringue topping for the pie, beat the egg whites until soft peaks form. Add 1 T sugar and continue beating until stiff peaks form. Spoon the meringue on top of the pie filling, spreading it right up to the edge of the filling. Bake at 350 for about 15 minutes or until the top of the meringue is delicately browned. Chill the pie before serving. 

Can be topped with whipped cream instead, if desired.

Source: The Anne of Green Gables Treasury, ISBN 0-14-017231-9, published 1991.

Notes: I prefer to top the with whipped cream, personally. My meringue topping always shrinks and pulls away from the crust. I use the reserved egg whites to make meringue cookies for my boys instead!

Below are pictures of the recipe without my changes as originally printed.