Thursday, April 29, 2010

Buona Notte


It's always a good night for Italian food, isn't it?

The first recipe is a very classy dish with the classic tastes of Italy (tomatoes, oregano, and Italian sausage). Make sure to use fresh mozzarella. It's rich and creamy. Polenta is an italian corn meal. My husband hates polenta and corn meal and he loves this dish. There won't be leftovers!

The second recipe is comfort, not classy. It's basic, tummy-pleasing Italian!


Baked Polenta with Sausage and Tomato-Pepper Sauce

Ingredients:

5 1/2 Tablespoons olive oil
1 can (28 oz.) crushed tomatoes
1 Tablespoon chopped fresh oregano
1 medium yellow onion, halved lengthwise, then cut into thin wedges
1 medium yellow, red, or orange bell pepper, cut lengthwise into thin slices
2 cloves garlic, minced
1/2 t. each salt, freshly ground black pepper, and red chile flakes
1 pound bulk Italian sausage, sweet or spicy (or 1 lb. Italian sausage links removed from their casings)
2 tubes (16 oz. each) prepared polenta, sliced into 1/2" thick rounds (in the Italian portion of the supermarket)
8 oz. fresh mozzarella, drained and sliced into 1/4" thick rounds

Directions:

Preheat broiler to high. Heat 3 tbsp. oil in a 2 - 3 qt. saucepan set over medium heat, then add tomatoes and oregano and simmer, uncovered for 15 minutes.

Meanwhile, in a large frying pan, heat 1 tbsp. oil over medium heat. Add onion, bell pepper, garlic, salt, pepper, and chile flakes, and stir to combine. Cover pan, lower heat to medium, and cook until vegetables soften, about 5 minutes. Add sausage, stirring and breaking it into small pieces with a wooden spoon as it firms up, about 5 minutes. Cover pan and cook until vegetables are tender and sausage is cooked through, 5 to 8 minutes more. Add tomato sauce and simmer 10 minutes.

While sauce is cooking, pour remaining 1 1/2 tbsp oil into 1 9x13 baking pan and tilt to coat bottom. Add polenta slices to pan and turn to coat with oil, then arrange slices lengthwise in 3 slightly overlapping rows. Broil polenta about 4" from heating element until golden brown and crispy, 10 to 15 minutes.

Pour sauce over broiled polenta, thena rrange mozarella slices over the top. Broil until cheese is melted and beginning to brown, about 2 minutes. Let cool slightly before serving.

Yield: 6 servings

510 Calories, Fat 30 g., Cholesterol 82 mg., Carbohydrate 33g; Sodium 1505 mg; Protein 23g; Fiber 4.8g

From Sunset Magazine website


One-Pot Pasta


Ingredients:

1 lb. lean ground beef
1 small onion, diced
1 (8 oz.) pkg. sliced fresh mushroom
1 tsp. vegetable oil
2 garlic cloves, minced
2 (26 oz.) jars tomato-basil pasta sauce
1 c. water
1 tablespoon dried Italian seasoning
1/2 teaspoon salt
1/4 teaspoon pepper
1 (20 oz.) pkg refrigerated four-cheese ravioli
1 c. (4 oz.) shredded mozzarella cheese

Directions:

Cook ground beef in a Dutch oven or over medium-high heat, stirring until it crumbles and is no longer pink; drain. Wipe Dutch over clean.

Saute onion and mushrooms in hot oil over medium-high heat 8 minutes or until tender. Add garlic, and saute 1 minute. Stir in beef, pasta sauce, 1 cup water, and next 3 ingredients.

Bring sauce to a boil; add ravioli. Reduce heat to medium-low, cover, and simmer, stirring occasionally, 8 to 10 minutes or until pasta is done. Stir in cheese. Serve immediately.

From Southern Living website

For testing purposes only, Sunset magazine used Classico Tomato & Basil pasta sauce and Buitoni Family Size Four Cheese Ravioli.

Notes: This dish is very freezer friendly. Simply freeze in a freezer friendly container (don't forget to label and date it!). When you are ready to use it, defrost it in the fridge overnight. You can either reheat it in the microwave or over the stove top.

Monday, April 26, 2010

I have proof!

Thanks Sister! Hubby and I loved the Sweet Orange Salmon recipe posted below. I thought I'd post a picture for proof. We just spent the week dining at nice restaurants in Toronto and we both agree, this is the best meal we've had all week!

Sunday, April 25, 2010

Pressed For Time?


We had a family dinner with my husband's side of the family tonight. We decided to take it outside since it can get kind of crowded inside when you're having dinner with 9 adults and 6 children/babies.

So, we needed a main course that could travel with us to the great outdoors. I was in charge of the main course this month and because of a Primary Eight is Great program right after church, I knew I wouldn't have any time to cook on Sunday. I was inspired by my mother (who made them about a month ago) and I chose to make pressed sandwiches.

I found too many recipes to resist and I ended up making five different kinds of sandwiches (some created by me, some improvised, and some following recipes). I created a mozzarella sandwich following the caprese salad formula that I've described in past posts. I made two different sandwiches using salami. I made a turkey and cranberry sandwich, and I made a sandwich using Italian cold cuts.

I made them all on Saturday night and we ate them on Sunday evening. They were all flavorful and none of them were soggy (that's the great thing about pressed sandwiches! I'm sure the thick ciabatta bread helps avoid soggy situations).

They were all a hit! I'm going to share the three sandwiches I was personally able to try (no, I didn't eat three full sandwiches for dinner, I promise!).

I went to Granatos in Salt Lake City to get the ciabatta bread. I got the large loaves and they were massive! I would probably get the smaller loaves next time if I do multiple sandwich recipes. But if you're doing one kind of sandwich, the large loaf size will be perfect because it can be cut perfectly to feed a crowd. But, if you would like to try the bread at Granatos (it is fantastic, by the way), they have three locations. You can find the locations listed on their website: http://granatos.org/cart/index.php?main_page=contact_us&zenid=743790a1edcdc08aaa2738ce0d134c11

These sandwiches will be fantastic at any summer picnic!


Pressed Mozzarella and Tomato Sandwich

Ingredients:

1/3 cup extra virgin olive oil
1/4 cup balsamic vinegar
Salt and pepper, to taste
1 large loaf of ciabatta bread
6 roma tomatoes, sliced
12 ounces fresh mozzarella, sliced
12-18 large basil leaves

Directions:

In a small bowl, whisk together olive oil, balsamic vinegar, and salt and pepper to taste (I used about 1 teaspoon salt and 1/2 teaspoon pepper).

Slice loaf of ciabatta bread in half lengthwise. Brush the olive oil mixture onto each half of the bread. Layer bottom half of the bread with mozzarella, tomatoes, and basil. Season with more salt and pepper, if desired. Place the top half of the bread on top.

Wrap the sandwich tightly in plastic wrap and place on a baking sheet. Top with another baking sheet and weigh it down with something heavy (such as canned goods, a heavy skillet, or cookbooks). Leave the weight on for about 30 minutes.

Remove the weight and refrigerate at least 1 hour or up to overnight to meld flavors. Cut into desired serving size and enjoy!

Source: I basically created this one myself. I meant to do a similar sandwich recipe that I found on the Martha Stewart website, but I forgot to buy some of the ingredients, so I made this one instead. I figured that you can never go wrong with caprese salad. It works on so many levels! This sandwich was very flavorful.

Turkey-Cranberry Pressed Sandwich

Ingredients:

1 cup whole-berry cranberry sauce
2 tablespoons whole-grain mustard
1 teaspoon ground ginger
Salt and pepper, to taste
2-3 sliced green onions
1/2 cup chopped pecans, lightly toasted
1 large loaf ciabatta bread
1/2 pound sliced deli style turkey breast
8 ounces sliced Provolone cheese
2 cups mixed salad greens (such as spring mix)

Directions:

Mix together the whole-berry cranberry sauce, whole-grain mustard, ginger powder, salt and pepper, to taste, green onions, and chopped pecans.

Slice the loaf of ciabatta bread in half lengthwise. Spread both halves of the bread with the cranberry mixture.

Layer the bottom half with the sliced turkey breast, Provolone slices, and mixed salad greens.

Place the top half of the bread on top. Wrap the sandwich tightly in plastic wrap and place on a baking sheet. Top with another baking sheet and weigh it down with something heavy (such as canned goods, a heavy skillet, or cookbooks). Leave the weight on for about 30 minutes.

Remove the weight and refrigerate at least 1 hour or up to overnight to meld flavors. Cut into desired serving size and enjoy!

Source: I looked everywhere online for some pressed turkey sandwich recipes. I could only find panini-style sandwiches (that required cooking of some sort, which I wanted to avoid because I didn't have time to cook anything the day of our dinner). So, I created my own. As my inspiration, I used a Weight Watcher's wrap recipe (I'll have to post that recipe sometime because it is a lovely recipe). Basically, I got the cranberry sauce mixture from that recipe. The turkey and provolone were my idea. I figured it was somewhat of an homage to Thanksgiving. It turned out great! I also doubled this recipe and made two of these sandwiches because I wasn't sure how many people would like salami. It turned out that they loved these sandwiches as well as the salami sandwiches found below.


Pressed Mediterranean Sandwiches

Ingredients:

1/3 cup olive oil
2 teaspoons red wine vinegar
Salt and pepper, to taste
1 large loaf ciabatta bread
3/4 pound sliced Genoa salami
4 ripe tomatoes, sliced
16 fresh basil leaves

Directions:

In a small bowl, whisk together oil and vinegar. Season with salt and pepper.

Halve the loaf of ciabatta bread lengthwise. Brush each loaf generously with oil mixture; set aside some of the oil mixture.

Cover the bottom half with salami and then tomatoes; brush tomatoes with remaining oil. Place basil leaves on top of tomato slices. Place top half of loaf on top and wrap tightly with plastic wrap.

Wrap the sandwich tightly in plastic wrap and place on a baking sheet. Top with another baking sheet and weigh it down with something heavy (such as canned goods, a heavy skillet, or cookbooks). Leave the weight on for about 30 minutes.

Remove the weight and refrigerate at least 1 hour or up to overnight to meld flavors. Cut into desired serving size and enjoy!

Source: I found this recipe on myrecipes.com (it is an All You recipe first published in July of 2006).


Make-Ahead Dagwood Sandwiches

Ingredients:

2 loaves herb-flavored or cheese-flavored bread, such as Foccacia, Ciabbata, or Asiago cheese bread (1 lb. each about 1 inch thick)
1 container (6.5 oz) garlic-and-herbs spreadable cheese
1 lb. thinly sliced smoked turkey
8 oz sliced provolone cheese
8 oz thinly sliced salami
1/4 cup loosely packed fresh basil leaves
8 slices bacon, cooked
1 sweet onion, thinly sliced, separated into rings
3 small plum (Roma) tomatoes, thinly sliced
4 cups lightly packed torn arugula
1/2 cup basil pesto

Directions:

With long serrated knife, cut bread in half horizontally. Spread cut side of each bread bottom with half of the spreadable cheese. Overlapping slices, arrange remaining ingredients except pesto in order listed over each bread bottom. Spread cut side of each bread top with half of the pesto, and place over arugula.

Place each whole loaf in large food storage plastic bag; seal and refrigerate topped with cast-iron skillet or other heavy weight up to 24 hours.

When ready to serve, cut each loaf into 6 equal sandwiches. Secure sandwiches with toothpicks or small skewers.

Recipe note: You can tailor make this sandwich to suit personal tastes. Replace the tomato slices with sun-dried tomato or roasted red pepper strips.

It you don't have anything heavy to weigh the sandwich down, wrap it tightly in plastic wrap instead.

Source: Betty Crocker website.

Friday, April 23, 2010

Salmon--You're Going To Rush Upstream For These Recipes!


"As the evening sky faded from a salmon color to a sort of flint gray, I thought back to the salmon I caught that morning, and how gray he was, and how I named him Flint."

--Jack Handy

Ahh, don't you miss Jack Handy quotes on Saturday Night Live?

You probably won't want to name your salmon, because then you won't want to eat it--and these recipes are scrumptious!

I was hesitant to post because my sister's picture of her shrimp dish was so beautiful! She does a lovely job of photographing her food. I, on the other hand, don't photograph food very well (plus, I always forget to do it...maybe if I got more practice, my pictures would be better!). So, instead, I stole the picture that she took when she made this salmon recipe after she got it from me!

I tried out the first recipe just this week. It was so easy and so yummy. The second recipe is an old favorite of mine. It is a little more time consuming, but well worth the effort. The final recipe is a pasta recipe that my mom and I found that closely resembles a dish that was served at a favorite French recipe that is no longer open.

I hope you like them!


Sweet Orange Salmon

Ingredients:

2 tablespoons brown sugar
1 teaspoon chili powder
1/2 teaspoon grated orange rind
1/2 teaspoon ground cumin
1/2 teaspoon paprika
1/4 teaspoon salt
1/4 teaspoon ground coriander
1/8 teaspoon black pepper
4 (6 ounce) salmon fillets
Cooking spray
Orange wedges, optional

Directions:

Preheat broiler.

Combine first 8 ingredients in a small bowl. Rub spice mixture over both sides of fish. Place fish on a broiler pan coated with cooking spray. Broil 8 minutes or until fish flakes easily when tested with a fork. Serve with orange wedges, if desired.

Yield: 4 servings (serving size: 1 fillet)

Nutrition Information: 303 calories, 13.3 g fat, 36.2 g protein, 7.5 g carbohydrates, 0.5 g fiber, 87 mg cholesterol, 1 mg iron, 235 mg sodium, 33 mg calcium.

Notes: I highly suggest serving the orange wedges along with this meal. It is so refreshing and so complimentary to the flavors of this salmon. I doubled mine (I got one of those massive full fillets of salmon and let everyone cut their own portions when they served up their plates).

Source: Cooking Light Weeknight cookbook, published 2007.

Potato-Wrapped Salmon

Ingredients:

2 large baking potatoes, peeled, and thinly sliced lengthwise
2 teaspoons fresh lemon juice
1/4 teaspoon salt
1 (1 pound) salmon fillet, cut into 4 pieces
4 teaspoons Dijon mustard
2 teaspoons unsalted butter, melted
Butter flavored nonstick cooking spray

Directions:

Place the potatoes in a colander; toss with the lemon juice and salt. Let stand until the potatoes are soft and pliable, about 10 minutes. Pat the potatoes dry with a paper towel.

Spray a large baking sheet with nonstick cooking spray. Tear off four 12" squares of wax paper and spray with butter-flavored non-stick cooking spray. Shingle all but four of the potato slices horizontally to form a 5x9" rectangle on each square; spray the potatoes with the butter-flavored spray. Place the salmon lengthwise over the potatoes; spread the salmon with the mustard. Lift the right side of the wax paper and fold it over the salmon, covering it with the potatoes; lightly press the paper to help the potatoes adhere to the fish and peel back the wax paper. Repeat with the left side of the wax paper. Lay the remaining potato slices over the seam where the shingled potatoes meet; brush with the butter. With a spatula, carefully transfer to the baking sheet; turning the bundles over so the side with the additional potato slice is down. Cover loosely with plastic wrap and refrigerate so the potatoes set, about 30 minutes.

Preheat the broiler; spray the potatoes with the butter-flavored spray. Broil 6" from the heat until the potatoes are golden and crisp, about 5 minutes per side.

Notes: This sounds way more complicated than it actually is. In reality, it's really fun to shingle and layer those potato slices together so that you can create a wrapping for the salmon made out of potatoes. Plus, it's so yummy!

Source: My mom and I made this recipe for the first time about 15 years ago. I have no idea where she got it from. I'll have to ask!


Fettuccine with Smoked Salmon

Ingredients:

3 1/2 oz smoked salmon
1/4 cup sun-dried tomatoes
1 tablespoon olive oil
1 clove garlic, crushed
1 cup cream
1/4 cup snipped fresh chives, plus extra for garnish
1/4 teaspoon mustard powder
2 teaspoons lemon juice
12 oz fettuccine (you can use linguine instead, if you prefer)
2 tablespoons freshly grated Parmesan, for serving

Directions:

Cut the smoked salmon into bite-sized pieces and the sun-dried tomatoes into small pieces.

Heat the olive oil in a frying pan, add the garlic and stir over low heat for 30 seconds. Add the cream, chives, mustard powder, and salt and pepper, to taste. Bring to a boil, reduce the heat and simmer, stirring, until the sauce begins to thicken.

Add the salmon and lemon juice to the pan and stir to combine. Heat gently.

While the sauce is cooking, cook the fettuccine in a large pan of rapidly boiling salted water until al dente. Drain well and return to the pan. Toss the sauce through the hot pasta. Serve immediately topped with the sun-dried tomato, Parmesan, and chives.

Makes 4 servings.

Nutrition information:

640 calories, 90 mg cholesterol, 5 g dietary fiber, 70 g carbohydrate, 30 g fat, 20 g protein.

Notes: Sorry, this is by no stretch of the imagination a low calorie meal!

Source: The Essential Pasta Cookbook, published 1998.

Tuesday, April 20, 2010

Who you calling Shrimp?


So as I previously stated, My husband and I made a goal to eat fish at least once a week. (Mostly I made the goal after reading some nutrition websites one particularly boring day at work) We both LOVE seafood, and it has so many wonderful health benefits. The only thing that has been holding me back is that it is so cheap to cook chicken dinners! Pretty much the cheapest thing out there. Compare 1.99 per pound to 7.99 and up per pound, you can see why! But I decided the benefits are better then the costs, and I will just budget some cheaper meals to offset the cost.

Anyway, this week I bought frozen shrimp. (7.99 per pound for the shells on, veins and all, makes for more work, but worth the cost to us poor kids)

Here are two rather tasty shrimp recipes we had. The first a lovely Everyday Foods recipe. We have had it twice now and it is a lovely little meal. See photo above

Shrimp with Scallions and Crispy Potatoes

* 2 tablespoons plus 1 teaspoon olive oil
* 2 baking potatoes (about 1 pound total), scrubbed and cut into 1/2-inch cubes
* 2 scallions, white and green parts separated and thinly sliced
* 1 pound large peeled and deveined frozen shrimp, thawed
* 2 teaspoons curry powder
* Coarse salt and ground pepper

Directions

1. In a large nonstick skillet, heat 2 tablespoons oil over medium-high. Add potatoes, and cook, stirring occasionally, until browned and crisp, 12 to 14 minutes. Add scallion whites, and cook 1 minute more. Transfer to a plate (reserve skillet).
2. Add remaining teaspoon oil, shrimp, and curry powder to skillet; cook, stirring occasionally, until shrimp are cooked through, 2 to 3 minutes. Return potatoes and scallion whites to skillet, and toss with shrimp; season with salt and pepper. Serve topped with scallion greens. Serves 4

Coconut Shrimp Tostadas

This is a little recipe I kinda made up, using a fish topping from a Cooling Light recipe. It is very tasty and coconut and shrimp just go together like peanut butter and jelly. Plus, we love Tostasdas it is one of our favorite meals.

1 lb shrimp
tortillas
1/4 cup toasted coconut
diced tomatoes (tomatoes are never optional!)
diced avocado (optional)
pepper jack cheese (optional)

dressing: this was inspired by this cooking light recipe which I also highly recommend

1 cup cilantro sprigs
juice from 2 limes
3 T olive oil
1 teaspoon curry powder
3 garlic cloves, peeled
jalapeño pepper, halved and seeded

put dressing ingredients in a blender or food processor. Combine well

heat oven to broil. place 2-4 tortillas on cookie sheet, grate a little pepper jack cheese if desired. Broil until crispy and puffed about 4-6 minutes. Watch carefully! They can burn very fast.

Heat a little oil in pan, cook shrimp until pink about 3 minutes.

Add shrimp, lettuce, tomato, avocado and dressing. Serve over top of tortillas and sprinkle coconut on top. Yum! Serves 4

Let Them Eat Cake!


Yesterday I shared two new favorite cake recipes I discovered.

Today, I'm going to share two old favorites.

One of the nice things about these two cakes is that if you don't have two cake pans, you don't have to worry because the first cake uses a bundt pan and the second cake uses a 13x9 inch pan--and most people have one of those.

The first recipe is a chocolate and caramel concoction that is really rich, but it is to die for. I discovered the second recipe when I was looking for a birthday cake to make for my brother-in-law's birthday last year. I chose this recipe because I had a jar of marshmallow creme that I wanted to use up. The marshmallow creme is used in the frosting and you won't be able to stop eating it! Besides, doesn't marshmallow creme make EVERYTHING better? Okay, well maybe marshmallow creme wouldn't do mashed potatoes and gravy any favors, but in a dessert, marshmallow creme is a welcome ingredient!

Enjoy!


Chocolate Cake with Penuche Frosting

Serves: 16
Preparation Time: 10 minutes
Baking Time: 50-55 Minutes
Assembly Time: 15 Minutes

Cake Ingredients:

Vegetable oil spray for misting the pan
Flour for dusting the pan
1 package (18.25 oz) plain devil's food cake mix
1 package (6 oz.; 1 cup) semisweet chocolate chips
3/4 cup chopped pecans
1 package (3.9 oz.) chocolate instant pudding mix
1 cup sour cream
1/2 cup vegetable oil, such as canola, corn, safflower, soybean or sunflower
1/4 cup water
4 large eggs
1 teaspoon pure vanilla extract
Penuche Frosting (see below)

Instructions:

Place a rack in the center of the oven and preheat the oven to 350 degrees F. Lightly mist a 10 inch tube pan with vegetable oil spray, then dust with flour. Shake out the excess flour. Set the pan aside.

Place 2 tablespoons of the cake mix, the chocolate chips, and the pecans in a small bowl. stir and set aside.

Place the remaining cake mix, along with the chocolate pudding mix, sour cream, oil, water, eggs and vanilla in a large mixing bowl. Blend with an electric mixer on low speed for 1 minute. Stop the machine and scrape down the sides of the bowl with a rubber spatula. increase the mixer speed to medium and beat 2 to 3 minutes more, scraping the sides down again, if needed. The batter should be thick and well blended. Fold in the chocolate chip and pecan mixture until it is well distributed. pour the batter into the prepared pan, smoothing the top with the rubber spatula. Place the pan in the oven.

Bake the cake until it springs back when lightly pressed with your finger and just starts to pull away from the sides of the pan, 50-55 minutes. Remove the pan from the oven and let it cool on a wire rack for 15 minutes. Run a long, sharp knife around the edge of the cake and invert the cake onto a cooling rack, then invert it again onto a serving platter to finish cooling, 20 minutes more.

Prepare the Penuche Frosting. Spread the top and sides of the cooled cake with the warm frosting, using clean, smooth strokes. Let the cake stand 30 minutes before slicing and serving.

Store this cake, covered in aluminum foil, at room temperature for up to 1 week or freeze it, wrapped in foil, for up to 6 months. Thaw overnight in the refrigerator before serving.


Penuche Frosting

Makes 3 cups, enough to frost a 2 or 3 layer cake or a bundt or tube cake.
Preparation time: 10 minutes

Ingredients:

1 cup packed light brown sugar
8 tablespoons (1 stick) butter
1/4 cup whole milk
2 cups confectioners' sugar, sifted

Instructions:

Place the brown sugar and butter in a medium-size heavy saucepan over medium heat. Simmer, stirring constantly, until well combined, 2 minutes. Carefully pour in the milk, stirring and bring the mixture to a boil. Remove the pan from the heat and cool slightly.

Place the confectioners' sugar in a large mixing bowl. Pour the hot brown sugar mixture over the confectioners' sugar. Beat with an electric mixer on low speed until the frosting is smooth and creamy, 2-3 minutes.

Use immediately (while still warm) to frost the cake of your choice or the frosting will harden. If it does harden while you are frosting the cake, simply place the pan back over low heat and stir until the frosting softens up.

Notes: If you don't like nuts or don't have them on hand, you can omit them. But don't skip the chocolate chips! The frosting is like a glaze that sets up after you pour it on the cake. Don't even try to use a knife to cover parts of the cake you may have missed. This frosting sets up so fast that if you try to do that, your cake will just look messy. Just let the frosting fall where it may and enjoy!

Source: The Cake Mix Doctor cookbook


Above: Mississippi Mud Cake with such luscious, gooey frosting that it overflows!

Mississippi Mud Cake

Ingredients:

Vegetable oil spray for misting the pan
1 package (18.25 oz) plain devil's cake mix
8 tablespoons (1 stick) butter or margarine, melted
1 1/2 cups buttermilk
2 large eggs
1 teaspoon pure vanilla extract
1 jar (7 oz) marshmallow creme
Chocolate pan frosting (recipe below)
1 cup chopped toasted pecans (optional)

Directions:

Place a rack in the center of the oven and preheat the oven to 350 degrees. Lightly mist a 13 x 9 inch baking pan with vegetable oil spray. Set the pan aside.

Place the cake mix, melted butter, buttermilk, eggs and vanilla in a large mixing bowl. Blend with an electric mixer on low speed for 1 minute. Stop the machine and scrape down the sides of the bowl with a rubber spatula. Increase the mixer speed to medium and beat 2 minutes more, scraping the sides down again if needed. The batter should look well blended. Pour the batter into the prepared pan, smoothing it out with the rubber spatula. Place the pan in the oven.

Bake the cake until it springs back when lightly pressed with your finger, 40-42 minutes. Remove the pan from the oven and place it on a wire rack to cool. Spread the warm cake with the marshmallow creme.

Prepare the Chocolate Pan Frosting.

Pour the hot frosting on top of the marshmallow creme and spread it out with a spatula so that the frosting reaches the edges of the cake. Scatter the top with the toasted pecans. Cool the cake for 20 minutes before serving.

*Store this cake, covered in aluminum foil, at room temperature for up to 1 week. Or freeze it, wrapped in foil, for up to 6 months. Thaw the cake overnight on the counter before serving.


Chocolate Pan Frosting


Ingredients:

8 tablespoons butter (1 stick), melted
4 tablespoons unsweetened cocoa powder
1/3 cup whole milk
4 cups confectioners' sugar, sifted

Directions:

Place the butter in a medium saucepan and melt over low heat, 2-3 minutes. Stir in the cocoa powder and milk. Let the mixture come just to a boil, stirring and then remove the pan from the heat. Stir in the confectioners' sugar until the frosting is thickened and smooth.

Pour the warm frosting over the top of a cooled cake of your choice, spreading it with a spatula so that it reaches all sides of the cake. Work quickly because this frosting goes on best while still warm.

Notes: Again, if you don't like nuts or don't have any on hand, you can omit them and the cake is just as good. I also swirled the frosting into the marshmallow creme to create a marbled effect.

Source: The Cake Mix Doctor cookbook

Monday, April 19, 2010

Have Your Cake and Eat It Too


It's birthday season in my family (on my husband's side, we have 4 birthdays between April-July and on my side, we have 4 birthdays between April-May).

But even when it isn't birthday season, who wouldn't go for a piece of cake?

I have found great success with the cakes found in The Cake Doctor cookbook (I LOVE those books--I have all of them--there are three cake doctor books, one cupcake doctor book, a dinner doctor book, and a potluck/what should we bring doctor book--and I hope there are many more to come!).

I am going to share two great cake recipes that I just recently tried (one last month and one we just had yesterday). I might have to do another cake post tomorrow to post two of my old favorites from this book that I have been making for a few years now.

These two cakes are similar, yet opposite. They both have chocolate frosting, but one is white chocolate and one is regular chocolate.

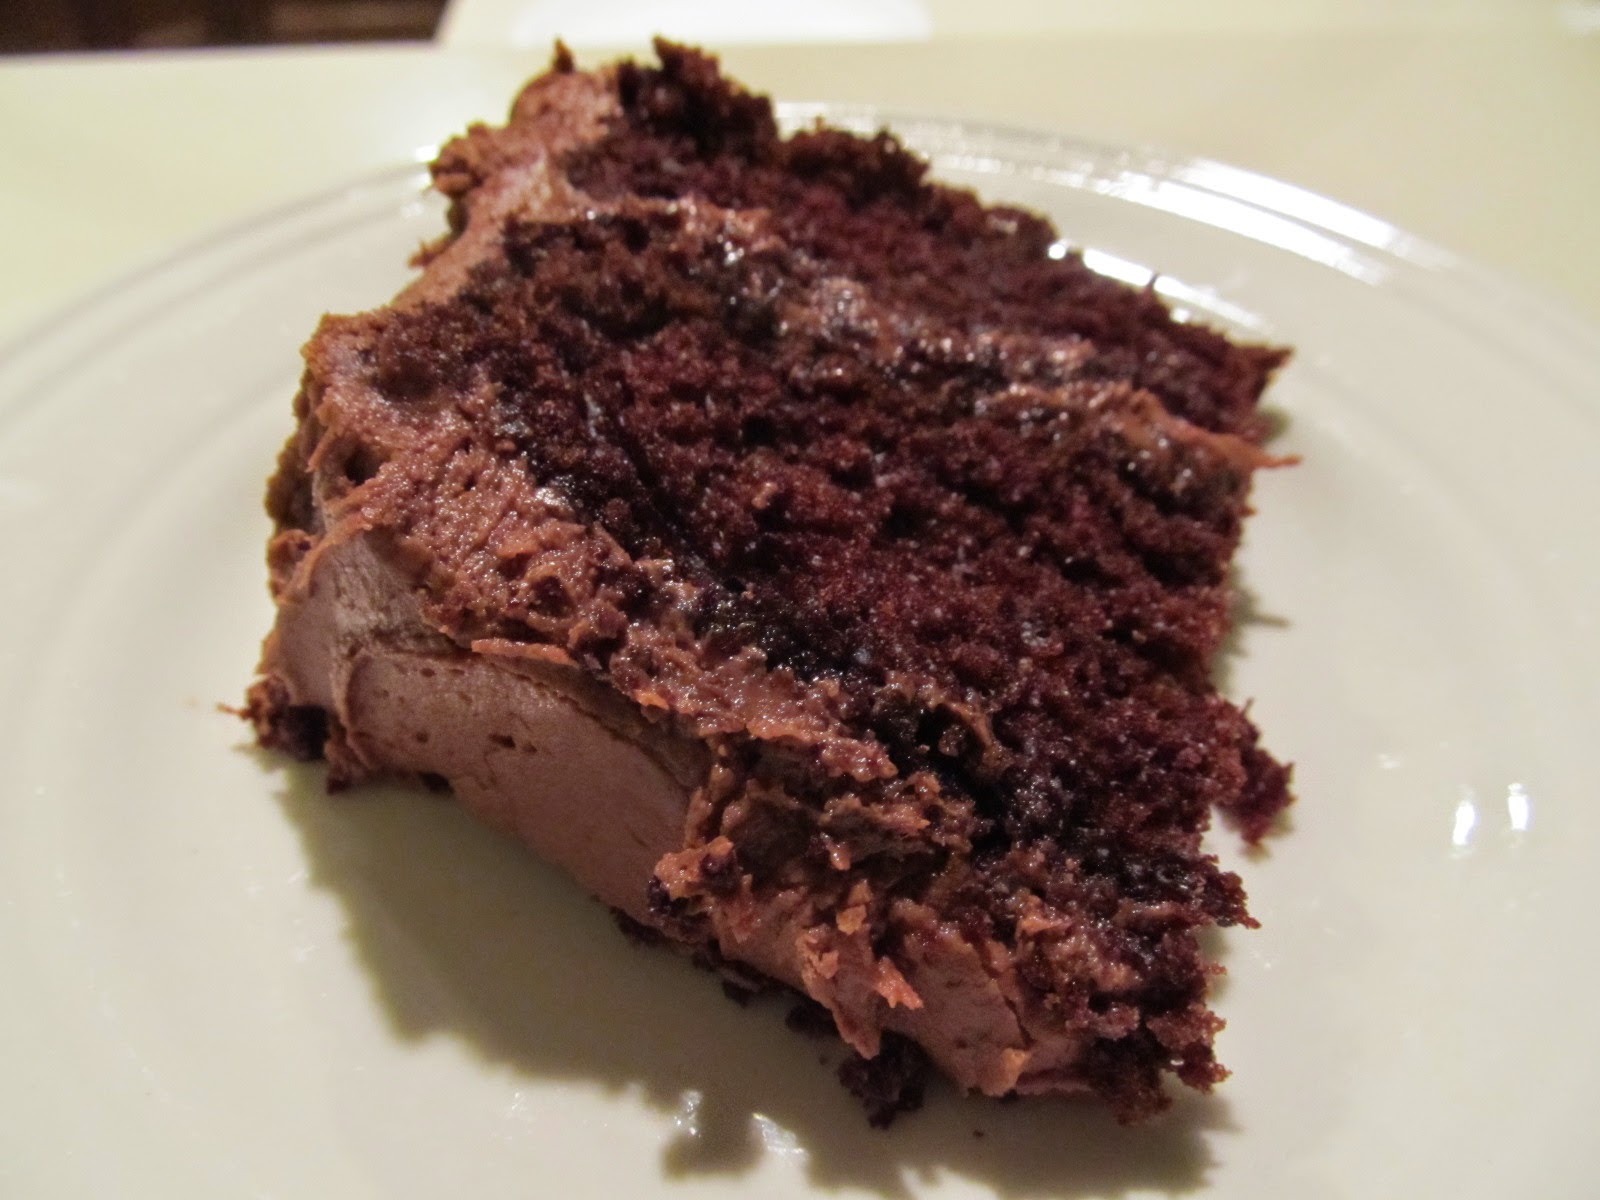
They are fantastic. Pair them with a glass of cold milk or a scoop of your favorite ice cream and you will have a dessert that is to die for!


Deeply Chocolate Almond Cake with Chocolate Cream Cheese Frosting

Ingredients:

Solid vegetable shortening for greasing the pans
Flour for dusting the pans
1 ounce unsweetened chocolate, coarsely chopped (see notes below)
1/3 cup water
1 package (18.25 ounces) plain devil's food cake mix
1 cup buttermilk
1/2 cup vegetable oil, such as canola, corn, safflower, soybean, or sunflower
3 large eggs
1 teaspoon pure almond extract
Chocolate Cream Cheese Frosting (recipe below), made with pure almond extract

Directions:

Place a rack in the center of the oven and preheat oven to 350 degrees F. Generously grease two 9-inch round cake pans with solid vegetable shortening, then dust with flour (or you can use cocoa powder if you want to make it even richer). Shake out the excess flour. Set the pans aside.

Heat the chopped chocolate and water in a small saucepan over low heat until melted, stirring constantly. Set the pan aside to cool for 10 minutes.

Place the cake mix, buttermilk, oil, eggs, almond extract, and melted chocolate mixture in a large mixing bowl. Blend with an electric mixer on low speed for 1 minute. Stop the machine and scrape down the sides of the bowl with a rubber spatula. Increase the mixer speed to medium and beat 2 minutes more; scraping the sides down again if needed. The batter should look thick and combined. Divide the batter between the prepared pans, smoothing it out with the rubber spatula. Place the pans in the oven side by side.

Bake the cakes until they spring back when lightly pressed with your finger and just start to pull away from the sides of the pan, 28-30 minutes. Remove the pans from the oven and place them on wire racks to cool for 5 minutes. Run a dinner knife around the edge of each layer and invert each onto a rack, then invert them again onto another rack so that the cakes are right side up. Cool completely, 30 minutes.

Meanwhile, prepare the Chocolate Cream Cheese Frosting.

Place one cake layer, right side up, on a serving platter. Spread the top with frosting. Place the second layer, right side up, on top of the first layer and frost the top and sides of the cake with clean, smooth strokes.


Chocolate Cream Cheese Frosting

Ingredients:

1 package (8 ounces) cream cheese, at room temperature
8 tablespoons (1 stick) butter, at room temperature
1/2 cup unsweetened cocoa powder
1 teaspoon pure almond extract (or pure vanilla extract--see notes below)
4 cups confectioners' sugar, sifted

Directions:

Place the cream cheese and butter in a large mixing bowl. Blend with an electric mixer on low speed until combined, 30 seconds. Stop the machine. Add the cocoa powder, extract, and confectioners' sugar and blend with the mixer on low speed until the ingredients are moistened, 30 seconds. Increase the speed to medium and beat until the frosting is fluffy, 2 minutes more.

Use at once to frost the top and sides of the cake of your choice.

Note: If you don't like almond flavoring, or if you simply want a good old fashioned chocolate cake instead of almond chocolate, substitute vanilla extract for the almond extract in both the cake and the frosting. Also, if you want to save some time, use Pam for Baking rather than greasing the pans with shortening. It works just as well and it is a lot less messy! Finally, I melted the chocolate in the microwave rather than in a pan on the stove (checking and stirring at 30 second intervals).

Source: The Cake Mix Doctor cookbook

Bride's Cake with Raspberry Filling and White Chocolate Frosting

Ingredients:

Solid vegetable shortening for greasing the pans
Flour for dusting the pans
1 package (18.25 ounces) plain white cake mix
1 cup whole milk
8 tablespoons (1 stick) butter, melted
3 large eggs
2 teaspoons pure vanilla extract
White Chocolate Frosting (recipe below)
1/4 cup seedless raspberry jam (see notes below)
1 cup fresh raspberries, rinsed and drained (see notes below)

Directions:

Place a rack in the center of the oven and preheat the oven to 350 degrees F. Generously grease two 9-inch round cake pans with solid vegetable shortening, then dust with flour. Shake out the excess flour. Set the pans aside.

Place the cake mix, milk, melted butter, eggs, and vanilla in a large mixing bowl. Blend with an electric mixer on low speed for 1 minute. Stop the machine and scrape down the sides of the bowl with a rubber spatula. Increase the mixer speed to medium and beat 2 minutes more, scraping the sides down again if needed. The batter should look well blended. Divide the batter evenly into the prepared pans, smoothing it out with the rubber spatula. Place the pans in the oven side by side.

Bake the cakes until they are light brown and spring back when lightly pressed with your finger, 27-29 minutes. Remove the pans from the oven and place them on wire racks to cool for 10 minutes. Run a dinner knife around the edge of the cakes and invert each onto a rack, then invert them again onto another rack so that the cakes are right side up. Allow to cool completely, 30 minutes more.

Meanwhile, prepare the White Chocolate Frosting.

Place one cake layer, right side up, on a serving platter. Spread the top with a thin layer of the White Chocolate Frosting, then spread with the raspberry jam, spreading the jam with a spatula up to 1 inch from the cake edge. Place the second layer, right side up, on top of the jam. Spread frosting on the top and sides of the cake with clean, smooth strokes.

Garnish the cake with the fresh raspberries. Slice and serve.

White Chocolate Frosting

Ingredients:

6 ounces white chocolate, coarsely chopped (see notes below)
1 package (8 ounces) cream cheese, at room temperature
4 tablespoons (1/2 stick) butter, at room temperature
1 teaspoon pure vanilla extract
2 1/2 cups confectioners' sugar, sifted (see notes below)

Directions:

Place the white chocolate in a small saucepan and melt over low heat, 4 minutes, stirring constantly. Remove the pan from the heat and let the chocolate cool.

Place the cream cheese and butter in a large mixing bowl. Beat with an electric mixer on low speed until well combined, 30 seconds. Stop the machine. Add the melted white chocolate and blend on low for 30 seconds. Add the vanilla and confectioners' sugar and blend on low speed for 30 seconds more. Increase the mixer speed to medium and beat until the frosting is fluffy, 1 minute more.

Use to frost the top and sides of the cake of your choice. Refrigerate the frosted cake until serving time.

Notes: I made this cake for my mother's birthday. She just wanted a white on white cake and declined the raspberries. Having now tasted this cake, I can say that it was fabulous without the raspberry jam and fresh raspberries, but I am sure that it would be fantastic with the raspberries as well (not to mention a very pretty and decorative addition). Also, I melted my chocolate in the microwave (checking it at 30 second intervals and stirring until it was melted to avoid burning). It was just faster that way and I'd rather get a bowl dirty than a pan. The last change I made was that I added much more powdered sugar to the frosting than the recipe called for. The frosting looked great as followed by the recipe, but it was a little wet for my tastes. I kept adding powdered sugar until the frosting was fluffy and creamy--I probably added about 6 cups of powdered sugar (I eyeballed it). The frosting was still moist and delicious--there was just more of it and it was a little fluffier than the original frosting.

Source: The Cake Mix Doctor cookbook

Saturday, April 17, 2010

Simple, Easy, and Light Salads (No Cooking Required!)


With the weather getting warmer, sometimes you just don't want to cook. I mean, on a really hot day, who wants to heat up the kitchen (and possibly the whole house) by preheating the oven?

Also, sometimes you just need something that isn't going to sit heavy on your stomach (aka lower calorie).

So, these two salads are cool, refreshing, and very light. They are South Beach recipes. They are actually so light, in fact, that you might need a little something else paired along with it...otherwise, you might be snacking quite a bit before bedtime. I would pair it with some crusty bread, a light sandwich, or soup (and if you wanted to keep with the cool theme--you could serve it with gazpacho).

Also, when it comes to serving salads for dinner, I prefer to put the toppings in separate containers and allow everyone to serve the toppings of their choice. That way, picky eaters can skip certain toppings. It also makes storing leftovers a lot easier too. You simply cover the individual containers and put them in the refrigerator. That way you avoid soggy salad leftovers that have to be thrown out the next day anyway.

I'm also including a seafood pasta salad that I came up with myself in my college days.

Oh, and if you don't like seafood--skip these salads!


Crab Cobb Salad (pictured at the top with dressing and above without dressing)

Ingredients:

6 cups romaine lettuce, torn into bite-size pieces
2 cans crabmeat (6 ounces), drained
2 cup diced ripe tomatoes or cherry or grape tomatoes, halved
1/2 cup crumbled blue cheese
4 tablespoons cholesterol-free bacon bits
Prepared low-sugar dressing or olive oil vinaigrette (see notes below)

Directions:

Arrange the lettuce on a large serving platter. Arrange the crabmeat, tomatoes, blue cheese, and bacon bits in rows over the lettuce.

Right before serving, drizzle some dressing evenly over the salad and toss well. Transfer to the 2 chilled plates.

Serves 4

Nutrition information: 267 calories, 27 g protein, 12 g carbohydrates, 13 g fat, 4 g saturated fats, 1012 mg sodium, 95 mg cholesterol, 4 g fiber.

Source: South Beach cookbook.

Notes: The first time I had this, I used a fat-free Italian dressing, and it was okay, but I didn't love it. I got a little more and used fat-free Thousand Island Dressing instead and LOVED it. It also works quite well (obviously) with Blue Cheese Dressing too (though I have yet to find a really tasty fat-free blue cheese dressing). My suggestion would be to use your favorite kind of salad dressing because the toppings are complementary to a lot of different dressings.


Tuna, Cucumber, and Red Pepper Salad with Lemony Dill Dressing

Ingredients:

Lemony Dill Dressing:

1/4 cup extra virgin olive oil
3 tablespoons fresh lemon juice
1-2 tablespoons chopped fresh dill
1/2 teaspoon salt
1/2 teaspoon coarsely ground black pepper

Salad:

2 medium cucumbers, chopped
1 red bell pepper, chopped
2 cans (6.5 ounces each) solid white tuna, drained and flaked (see notes below)
Romaine lettuce
1 small lemon, peeled, seeded, and sliced (see notes below)

Directions:

To make the lemony dill dressing: Whisk the olive oil, lemon juice, dill, salt, and black pepper together in a small bowl.

To make the salad: Combine the cucumbers, bell pepper, and tuna in a large bowl. Set aside. Arrange the lettuce on 4 plates. Spoon the tuna mixture into the center of each plate. Arrange the lemon around the plates. Drizzle with the dressing.

Serves 4.

Nutrition information: 282 calories, 24 g protein, 9 g carbohydrates, 17 g fat, 3 g saturated fat, 640 mg sodium, 39 mg cholesterol, 2 g fiber.

Source: South Beach cookbook.

Notes: Rather than peeling the lemon, I quartered it and used the wedges to squeeze the juice over the salad. I also bought the pouches of albacore tuna (equaling about 13 ounces for the recipe) so that it wouldn't taste quite as "fishy." It was delicious! Honestly, it is a little more expensive, but this one change makes all the difference. I forgot to buy the pouches once and used canned and it wasn't quite as good.


Seafood Pasta Salad

Ingredients:

1 pkg. (about l lb) large shell pasta, cooked according to package directions and drained
cherry or grape tomatoes, halved
mozzarella, cubed
1/2 cup basil leaves, thinly sliced
1 pkg. imitation crabmeat
1/4 cup olive oil
2-3 tablespoons balsamic vinegar
salt and pepper, to taste

Directions:

In large bowl, combine shell pasta, tomatoes, mozzarella, basil, imitation crabmeat, olive oil, balsamic vinegar, and salt and pepper. (Add whatever amount of tomatoes, mozzarella and crabmeat you desire to your taste)

Mix and chill well.

Serve chilled.

Source: Sarah's brain. Basically, this is a combination of some of my favorites: seafood, pasta, and caprese salad (I'll have to give you that recipe later on this summer--it is heavenly with home-grown tomatoes). I came up with this as an easy and light dinner for myself. It keeps quite well for about 1 week. As a college student, I would eat it for dinner every night the week after I made a batch. It would also make a wonderful side dish. If you don't like seafood, simply omit the imitation crabmeat.

Friday, April 16, 2010

Ground Beef, It's What's For Dinner


This goes along with my post from yesterday (dedicated to beef of the non-ground beef variety).

When I was a kid, I HATED ground beef. This was due to a combination of reasons. I hated the texture and I hated how it made my hands smell if you had to handle it raw.

However, taste buds change over time. Now, I really enjoy ground beef and it is a great everyday cooking staple to keep on hand (I usually buy a four pound package, divide it into fourths, put it in freezer bags and keep it in my freezer).

The first recipe is a calzone recipe. It has very few ingredients, but you'll be surprised by how flavorful it is. Plus, it has my favorite requirement: it's quick and easy. The second recipe is for shepherd's pie. I never liked shepherd's pie until I found this recipe. Sadly, it's not really quick to make (though it is easy). But trust me, it's worth it!


Meaty Calzones

Pictures above topped with our basic Marinara Sauce)

Prep: 7 minutes
Cook: 21 minutes

Prepare the pizza dough rectangles while the beef mixutre cooks so that you can spoon hot beef directly form the skillet onto the dough.

Ingredients:

1/2 pound ground round
3/4 cup frozen chopped onion
1 tsp. bottled minced garlic
1/2 tsp. dried Italian seasoning
1/4 tsp. salt
1/8 tsp. freshly ground black pepper
1 (10 oz) can refrigerated pizza crust dough
3/4 cup (3 oz.) shredded part-skim mozzarella or reduced fat Cheddar cheese
Cooking spray
1 1/3 cups pasta sauce

Directions:

Preheat oven to 400 degrees.

Cook beef, onion and garlic in a large non-stick skillet over medium-high heat until beef is browned, stirring to crumble. Drain. Return to pan and add Italian seasoning, salt and pepper.

Unroll pizza crust onto an ungreased baking sheet. Cut dough into 4 squares. Press each square into a 6 x 5 inch rectangle. Spoon beef mixture evenly into the center of each rectangle; sprinkle evenly with cheese. Bring opposite corners of rectangles together, pinching seams together to seal. Coat tops of calzones with cooking spray.

Bake at 400 degrees for 11 minutes or until lightly browned. Place pasta sauce in a microwave-safe dish; microwave at high 2 minutes or until thoroughly heated. Serve calzones with warm pasta sauce on top.

Yield: 4 servings (serving size: 1 calzone and 1/3 cup pasta sauce).

Calories 374; Fat 9.5 g; Protein 26 g; Carb 43.8 g; Fiber 2.9 g; Chol 45 mg; Iron 3.9 mg; Sodium 994 mg; Calc. 176 mg.

Exchanges: 2 starch, 2 vegetable, 3 lean meat.

Source: Cooking Light Superfast cookbook

Notes: These calzones are freezer friendly. You can either cook them and then freeze them and first defrost them and then reheat them in the microwave. Or, you can freeze them prior to baking the calzones (freeze individually on a foil-lined cookie sheet for a few hours. Then, wrap each in aluminum foil and place in a freezer friendly container or zip top freezer bag). When you are ready to use them, put the frozen calzones in the oven on a foil lined cookie sheet and cover them with foil. Bake for 25-30 minutes. Then, remove foil and continue to bake for an additional 10-20 minutes (or until the tops are nicely browned).


Shepherd's Pie

Ingredients:

Shepherd’s Pie

2 pounds freshly ground lamb or beef
1 large onion, finely chopped
2 tsp-1 tbsp garlic salt (to taste)
4 carrots, coarsely chopped
2 tablespoons tomato paste
2 tablespoons flour
1 to 2 tablespoons Worcestershire sauce
Coarse salt and ground pepper, to taste
10 ounces frozen peas, thawed

Potato Topping:

2-½ pounds russet potatoes, peeled and quartered
Coarse salt and ground pepper, to taste
1 cup milk
6 tablespoons butter

Directions:

Shepherd's Pie:

Preheat oven to 425°. Heat a large skillet over high heat. In two batches, cook lamb or beef until no longer pink, about 5 minutes per batch. Transfer lamb/beef to a colander set in a bowl; let fat drain off and discard.

Add ¼ cup water to the skillet, scraping up browned bits with a wooden spoon. Reduce heat to medium; add onion and carrots. Cook, stirring occasionally, until softened, about 5 minutes. Stir in tomato paste. Add flour; cook, stirring, 2 minutes.

Add Worcestershire sauce, 2 cups water, and lamb/beef. Season with 2 teaspoons salt and ¼ teaspoon pepper (or to taste). Simmer until thickened, stirring occasionally, about 10 minutes. Stir in peas; cook 1 minute. Divide among eight 8-ounce ramekins or two 9-inch glass pie dishes.

Meanwhile, make potato topping. Spread over pies; use a fork to make peaks. Bake on a baking sheet until tops are browned, 25 to 30 minutes. Cool slightly; serve.

Note: If you would like to save some time, use instant mashed potatoes. I have done this a number of times and it still makes for a very tasty shepherd's pie!

Source: Martha Stewart website, Everyday Food section.

Notes: This dish is also freezer friendly. Layer casserole in a freezer friendly aluminum or glass casserole dish. Prior to freezing, allow casserole to cool. Cover in aluminum foil and label and date it. When you are ready to use, defrost in fridge overnight or put frozen casserole in the preheated oven (keep it covered) for about 30 minutes. Remove foil and continue baking for an additional 25-30 minutes or until it is hot and bubbly and the potatoes are nicely browned. Adjust the cooking times accordingly depending on whether you cook it from frozen or defrosted.


Cheese-Garlic Biscuits

Ingredients:

2 cups Bisquick mix
2/3 cup milk
1/2 cup shredded cheddar cheese
2 tbsp butter
1/8 tsp garlic powder

Directions:

Heat oven to 450 degrees.

Stir Bisquick mix, milk, and cheese until soft dough forms. Drop dough by 9 spoonfuls onto ungreased cookie sheet.

Bake 8-10 minutes, or until golden brown. Stir together butter and garlic powder and brush over warm biscuits.


Big-Batch Cheese-Garlic Biscuits

Ingredients:

8 cups Bisquick
2 2/3 cup milk
2 cups shredded Cheddar cheese
1 cup butter, melted
1 teaspoon garlic powder

Directions:

Heat oven to 450 degrees.

In a large bowl, mix Bisquick, milk, and cheese until soft dough forms. Beat 30 seconds.

On ungreased cookie sheets, drop dough by 40-48 spoonfuls about 2 inches apart.

Bake 8-10 minutes or until golden brown. In a small bowl, mix butter and garlic powder; brush on warm biscuits before removing from cookie sheets. Serve warm.

Source: Betty Crocker website.

Notes: I like to add garlic powder, to taste when I am mixing the dough. I like more of a garlic flavor in these biscuits. These biscuits can also be bought in packages. All you do is add water, mix, and bake. They are so easy. The mixes are great too. So, whether you take a little more time and make them from scratch or use the mix, it is a fast and easy bread to serve on the side!

Thursday, April 15, 2010

Beef, It's What's For Dinner


I promised myself that I wouldn't do a blog about chicken this time! I like other foods too! I promise.

So, I decided to focus on beef this time. If you are addicted to beef, then you'll love this website: www.beefitswhatsfordinner.com

The first recipe was given to me by my husband. It is his family's signature recipe for flank steak and it is scrumdiddlyumptious. If you don't like mushrooms, you can omit them (or pick around them!).

The next recipe is a beef stew recipe (I know it's not soup, stew, or chili season, but it fits with my theme!). It is a South Beach recipe I found while planning meals for my in-laws. It is hands down the best beef stew recipe I've ever made! It is so flavorful. It has a kick to it (which I love). I did add a few more potatoes than called for in the original recipe. I wanted the stew to go farther and come on...it's beef stew! You can't have beef stew with only one potato! Besides beef, potatoes are one of the things that make beef stew...beef stew! Again (I know I'm a broken record here), I don't agree with low-carb diets, but I believe that you can find a good recipe anywhere!

I hope you like them.


Washburn Flank Steak (pictured above)

Ingredients:

1 bottle of Kraft Light Zesty Italian Dressing
1 Flank Steak
4 Tbsp.-1/3 cup Worchestershire Sauce (flavor according to your taste)
4 Tbsp.-1/3 cup Soy Sauce (flavor according to your taste)
2 cans mushrooms (pieces and stems)

Optional Ingredients (to make a rounded out meal):

Instant mashed potatoes (even flavored ones work great here. I prefer the Idahoan brand that you can buy in the pouch)
Side salad or vegetables

Directions:

Put flank steak in a ziploc bag. Cover with whole bottle of Italian dressing. Add in Worchestershire Sauce and Soy Sauce. Squish the bag to mix dressing, Worchestershire Sauce and Soy Sauce. Marinate overnight (you can marinate for only an hour if you don't have enough time).

After marinating, put flank steak (without sauce) on a foil lined cookie sheet or jelly roll pan. Broil on high for 5-7 minutes per side (depending on how well done you want your steak). If this is done too far in advance, you can leave the steak in the oven on low broil while you finish the rest of the dinner.

Put marinade in a pan on medium-high heat. Add both cans of mushrooms. Cook until well-heated.

Thinly slice flank steak and serve sauce on top.

This goes very well with instant mashed potatoes (again, use the sauce as a gravy on top of the potatoes) and a side salad or vegetables.

Source: My husband said that either his dad made up this recipe or found it in the New York Times 10-15 years ago.


Notes: For medium-rare, broil for 6 minutes per side. For medium-well, broil for 8 minutes per side. For well done, broil for 9 minutes per side. The picture at the very top is well done because I made it while pregnant and couldn't eat rare meat. I usually prefer mine medium to medium-well and my husband prefers his medium-rare. The picture just above is cooked to medium-rare.


South Beach Pepper-Spiked Beef Stew

Note: This stew freezes well, so you might want to simmer up a double batch and freeze half of it. You can also substitute sweet potatoes or even butternut squash for the potatoes and carrots, if desired.

Ingredients:

2 tablespoons whole wheat flour
1 tablespoon chili powder
1/2 teaspoon salt
2 pounds lean round steak, top or bottom, trimmed of all visible fat and cubed
1 tablespoon extra virgin olive oil
3 onions, sliced
3 cloves garlic, minced
1 teaspoon dried oregano
2 cups beef broth
2 cans (14 1/2 ounces each) stewed tomatoes
1/2 teaspoon crushed red-pepper flakes
1 potato, scrubbed and cubed (I used 3 large potatoes)
4 carrots, sliced

Directions:

In a large zip-top plastic bag, combine the flour, 1 teaspoon of the chili powder, and the salt. Add the beef, seal the bag, and toss to coat well.

Heat the oil in a large saucepan over medium-high heat. Add the beef and cook, stirring occasionally, for 7 minutes, or until browned. Add the onions, garlic, and oregano. Reduce the heat to medium and cook, stirring often, for 5 minutes.

Add the broth, tomatoes (with juice), red-pepper flakes, and the remaining 2 teaspoons chili powder. Bring to a boil. Reduce the heat to low, cover, and simmer for 2 hours, stirring occasionally, or until the beef is tender. (Note: do not boil during this time as it will not speed up cooking time--it will only make the beef tough).

Add the potatoes and carrots. Cover and cook for 30-60 minutes, or until the vegetables are tender.

Makes 8 servings.

Nutrition information:

190 calories, 5 g fat, 1 1/2 g saturated fat, 24 g protein, 19 g carbohydrate, 4 g dietary fiber, 45 mg cholesterol, 440 mg sodium.

Source: The South Beach Diet Cookbook.

Sunday, April 11, 2010

Easy Chicken--Southwestern Style


I know. There are an awful lot of chicken recipes on this blog. But the truth of the matter is that chicken is the least expensive protein out there and it is fast and easy to prepare.

These are two very simple southwestern style chicken dinners. For both, pair them with a side salad (perhaps with some salsa ranch or jalapeno ranch salad dressing) and you're set!


Southwestern Strudel

Thaw Time: 40 minutes
Bake Time: 30 minutes
Prep Time: 20 minutes
Makes: 6

Ingredients:

1 egg
1 tablespoon water
1 1/2 cups chopped cooked chicken
1 cup shredded Colby Jack cheese (about 4 ounces)
1 can (11 ounces) Mexican-style corn, drained
1/2 cup fresh bread crumbs
1 cup Pace® Picante Sauce
1/2 of a 17.3-ounce package Pepperidge Farm® Puff Pastry Sheets (1 sheet), thawed
2 teaspoons chopped fresh parsley
1 package (about 5 ounces) mixed salad greens
Sour cream

Directions:

Heat the oven to 400°F. Beat the egg and water in a small bowl with a fork.

Stir the chicken, cheese, corn, bread crumbs and picante sauce in a medium bowl.

Unfold the pastry sheet on a lightly floured surface. Roll the pastry sheet into a 16x12-inch rectangle. With the short side facing you, spoon the chicken mixture onto the bottom half of the pastry to within 1-inch of the edges. Starting at the short side, roll up like a jelly roll. Place the pastry seam-side down onto a baking sheet. Tuck the ends under to seal. Brush the pastry with the egg mixture and sprinkle with the parsley. Cut 2-inch slits 2 inches apart in the pastry top.

Bake for 30 minutes or until the pastry is golden brown. Slice and serve warm on the salad greens with the sour cream, if desired.

Serving Suggestion: Serve with home-style coleslaw. For dessert serve chilled key lime pie.

Source: http://www.puffpastry.com/


Chicken Tamale Casserole

Ingredients:

1 cup (4 ounces) preshredded 4-cheese Mexican blend cheese, divided
1/3 cup fat-free milk
1/4 cup egg substitute
1 teaspoon ground cumin
1/8 teaspoon ground red pepper
1 (14 3/4-ounce) can cream-style corn
1 (8.5-ounce) box corn muffin mix (such as Martha White)
1 (4-ounce) can chopped green chiles, drained
Cooking spray
1 (10-ounce) can red enchilada sauce (such as Old El Paso)
2 cups shredded cooked chicken breast
1/2 cup fat-free sour cream

Directions:

Preheat oven to 400°.

Combine 1/4 cup cheese and next 7 ingredients (through chiles) in a large bowl, stirring just until moist. Pour mixture into a 13 x 9–inch baking dish coated with cooking spray.

Bake at 400° for 15 minutes or until set. Pierce entire surface liberally with a fork. Top with chicken and pour enchilada sauce over top; sprinkle with remaining 3/4 cup cheese. Bake at 400° for 15 minutes or until cheese melts. Remove from oven; let stand 5 minutes. Cut into 8 pieces; top each serving with 1 tablespoon sour cream.

Yield: 8 servings

CALORIES 354 (36% from fat); FAT 14.1g (sat 7.1g,mono 3.3g,poly 1.2g); IRON 1.7mg; CHOLESTEROL 58mg; CALCIUM 179mg; CARBOHYDRATE 36.3g; SODIUM 620mg; PROTEIN 18.9g; FIBER 2.5g

Source: Cooking Light, http://www.myrecipes.com/

Notes: This dish is freezer friendly. Make the casserole in a freezer friendly casserole dish or aluminum casserole dish. After baking the cornbread mixture until it is set, top with chicken, enchilada sauce, and cheese as noted in the recipe. Allow to cool. Cover with foil and label and date it. When ready to use, defrost in fridge overnight or place frozen casserole in the oven and bake (covered) for 25-30 minutes. Remove foil and bake an additional 15 minutes or until cheese is melted and nicely browned. Adjust the cooking times accordingly depending on whether you cook it from frozen or defrosted.

Here's what I did for the side salad:

Mexican Side Salad

Ingredients:

Romaine lettuce, cut or torn into bite size pieces
Grape tomatoes, halved
1 can corn, drained
1 can black beans, drained and rinsed
1 teaspoon cumin
1/2 teaspoon chili powder
1/4 teaspoon ground red pepper
2 tablespoons lime juice
Ranch dressing (favorite bottled or homemade)
Salsa

Directions:

Mix together the corn, black beans, cumin, chili powder, ground red pepper, and lime juice. Place Romaine lettuce on your plate and top with grape tomatoes, corn/black bean mixture, Ranch dressing, and salsa.

Source: This was inspired by a simple southwestern salad I found on the Kraft Recipes website. I simply embellished it by adding tomatoes, spices, and lime juice. Their recipe used sliced red peppers in place of the tomatoes.

Wednesday, April 7, 2010

One-Pot Light Chicken Dinners


I would like to share two very simple and light recipes that have a pretty short ingredient list. One of the things that I like about these recipes is that they are fast and easy (I am all about fast and easy dinners because my 14 month old little guy does NOT like it when I cook).

I also like that apart from poaching the chicken, everything else is done using only one large skillet pan.

The first recipe is a South Beach Diet recipe. I am not a fan of the diet itself, but my in-laws like to follow the diet, so I try to make at least one South Beach recipe a week for their sakes. Now, while I don't like the diet myself, I must say that I have run across a number of absolutely fantastic South Beach recipes. So, that has been a plus.

The second recipe is a Martha Stewart Everyday Food recipe. I made it after my sister raved about it and my mom made it after I raved about it. It's one of those recipes that has basic pantry ingredients and it sounds so simple that you don't think it will be as yummy as it actually is. But it is oh so good!

Enjoy!

South Beach Lemon Couscous Chicken

Ingredients:

1 1/4 cups water
1 tablespoon extra-virgin olive oil
2 cups broccoli florets
1 package Near East Roasted Garlic & Olive Oil Couscous mix
1 1/2 cups chopped cooked chicken
Juice of 1 lemon (about 3 tablespoons)
1/4 teaspoon lemon peel

Directions:

In a large skillet, bring the water, oil, broccoli, and contents of the spice sack from the couscous mix to a boil. Stir in the couscous, chicken, lemon juice, and lemon peel. Remove from the heat. Cover and let stand for 5 minutes. Fluff lightly with a fork.

Serve warm or chill well and serve cold.

Serves 4.

Nutrition information: 311 calories, 24 g protein, 39 g carbohydrates, 7 g fat, 1 g saturated fat, 478 mg sodium, 48 mg cholesterol, 3 g fiber.

Notes: I usually double this recipe. I also add salt and pepper to taste. Also, if you microwave the lemon for about 20-30 seconds first, it will be a lot easier to juice and it will produce a lot more juice.

Source: South Beach Diet book.


Chicken Chilaquiles
Prep: 30 minutes
Total: 30 minutes

For an authentic touch, use fresh Mexican cheese (queso fresco) or aged (queso anejo) in place of feta.

Ingredients:

1 tablespoon olive oil
4 cloves garlic, chopped
1 can (28 ounces) whole peeled tomatoes in puree
2 canned chipotle chilies in adobo, finely chopped (about 1 heaping tablespoon), plus 1 tablespoon adobo sauce (from same can)
Coarse salt
1 small cooked rotisserie chicken (about 1 3/4 pounds), skinned and shredded (about 4 cups), carcass discarded
1/2 cup lightly packed cilantro leaves, chopped, plus 4 sprigs for garnish
4 cups (about 3 ounces) tortilla chips
1/4 cup reduced-fat sour cream
1.75 ounces feta cheese, crumbled (about 1/4 cup)

Directions:

Combine oil and garlic in a large (3-to-4-quart) saucepan. Cook over medium heat, stirring occasionally, until fragrant and sizzling, 1 to 2 minutes.

Add tomatoes with their puree (breaking tomatoes up), chipotles and adobo, and 1 cup water.

Bring to a boil; season with salt. Reduce heat and simmer rapidly until lightly thickened, 6 to 8 minutes.

Add chicken and cook, stirring, until hot, about 1 minute. Remove from heat; stir in chopped cilantro.

Divide chips among four shallow bowls; top with chicken mixture and sauce. Garnish with cilantro sprigs, sour cream, and feta. Serve.

Notes: I've tried both and I actually prefer the bite of feta cheese to the more authentic queso fresco. Also, rather than using a rotisserie chicken (I tend to think that they are pretty messy to get the meat off of), I poached and thickly shredded some chicken breasts. One last thing--this is a spicy meal. If you don't like spicy foods, reduce (but don't omit) the amount of chipotle chilies and adobo sauce you add.

Source: Martha Stewart website and Everyday Food cookbook.


Above: Chicken Chilaquiles with my old camera.