Mmmm. Lemons and limes. I have a confession to make (that will be no secret to my immediate family). I love lemons and limes. I love them as a flavoring in things. But I also love them just as they are. Squeezed or sliced to flavor water...or cut in half with salt sprinkled on top.
Yup. I know it sounds weird to anyone who hasn't acquired that taste, but I love it. I loved it since I was a kid. I got it from my Dad. Half of my siblings love it too and the other half have no interest whatsoever. You sprinkle salt on top of a halved lemon or lime, spread it around with your finger, and then squeeze the lemon or lime and lick it. Repeat until all the juice is gone...and then eat the remaining pulp! My mouth is watering and I'm smacking my lips right now. In fact, I have a lemon in my fridge downstairs right now... And this sounds even crazier, but that was the only craving I had in common with my two pregnancies. I craved lemons and limes with salt on it and I craved salted lemon and lime juice.
However, I'm aware that this particular food craving isn't mainstream and that most people hate it. The recipes I am going to share with you today are ones that I know you will like. I promise!
Oh, and the bonus with a lot of these recipes is that they are great pantry recipes...not a lot of ingredients and mostly stuff that you can always keep on hand!
Some of these recipes are sweet and some are savory. That's the beauty of the lemon and the lime. They can be used both ways. So, pucker those lips and get ready for some tart citrus flavors!
Lemon and Lime Ice Cream
Ingredients:
4 cups whole milk
1 1/2 cups sugar
1 cup whipping cream
1 teaspoon finely shredded lemon peel
1/3 cup lemon juice
1 teaspoon finely shredded lime peel
3 tablespoons lime juice
Several drops yellow food coloring (optional)
Lemon and/or lime slices and curls (optional)
Directions:
In a large mixing bowl, thoroughly combine milk, sugar, whipping cream, lemon peel, lemon juice, lime peel, lime juice, and, if desired, food coloring. (Mixture may appear curdled.)
Freeze in a 3-4 quart ice cream freezer according to the manufacturer's directions. Ripen 4 hours in freezer. If desired, garnish with lemon and lime slices and curls.
Makes 2 quarts (16 servings)
Source: recipe found on www.razzledazzlerecipes.com
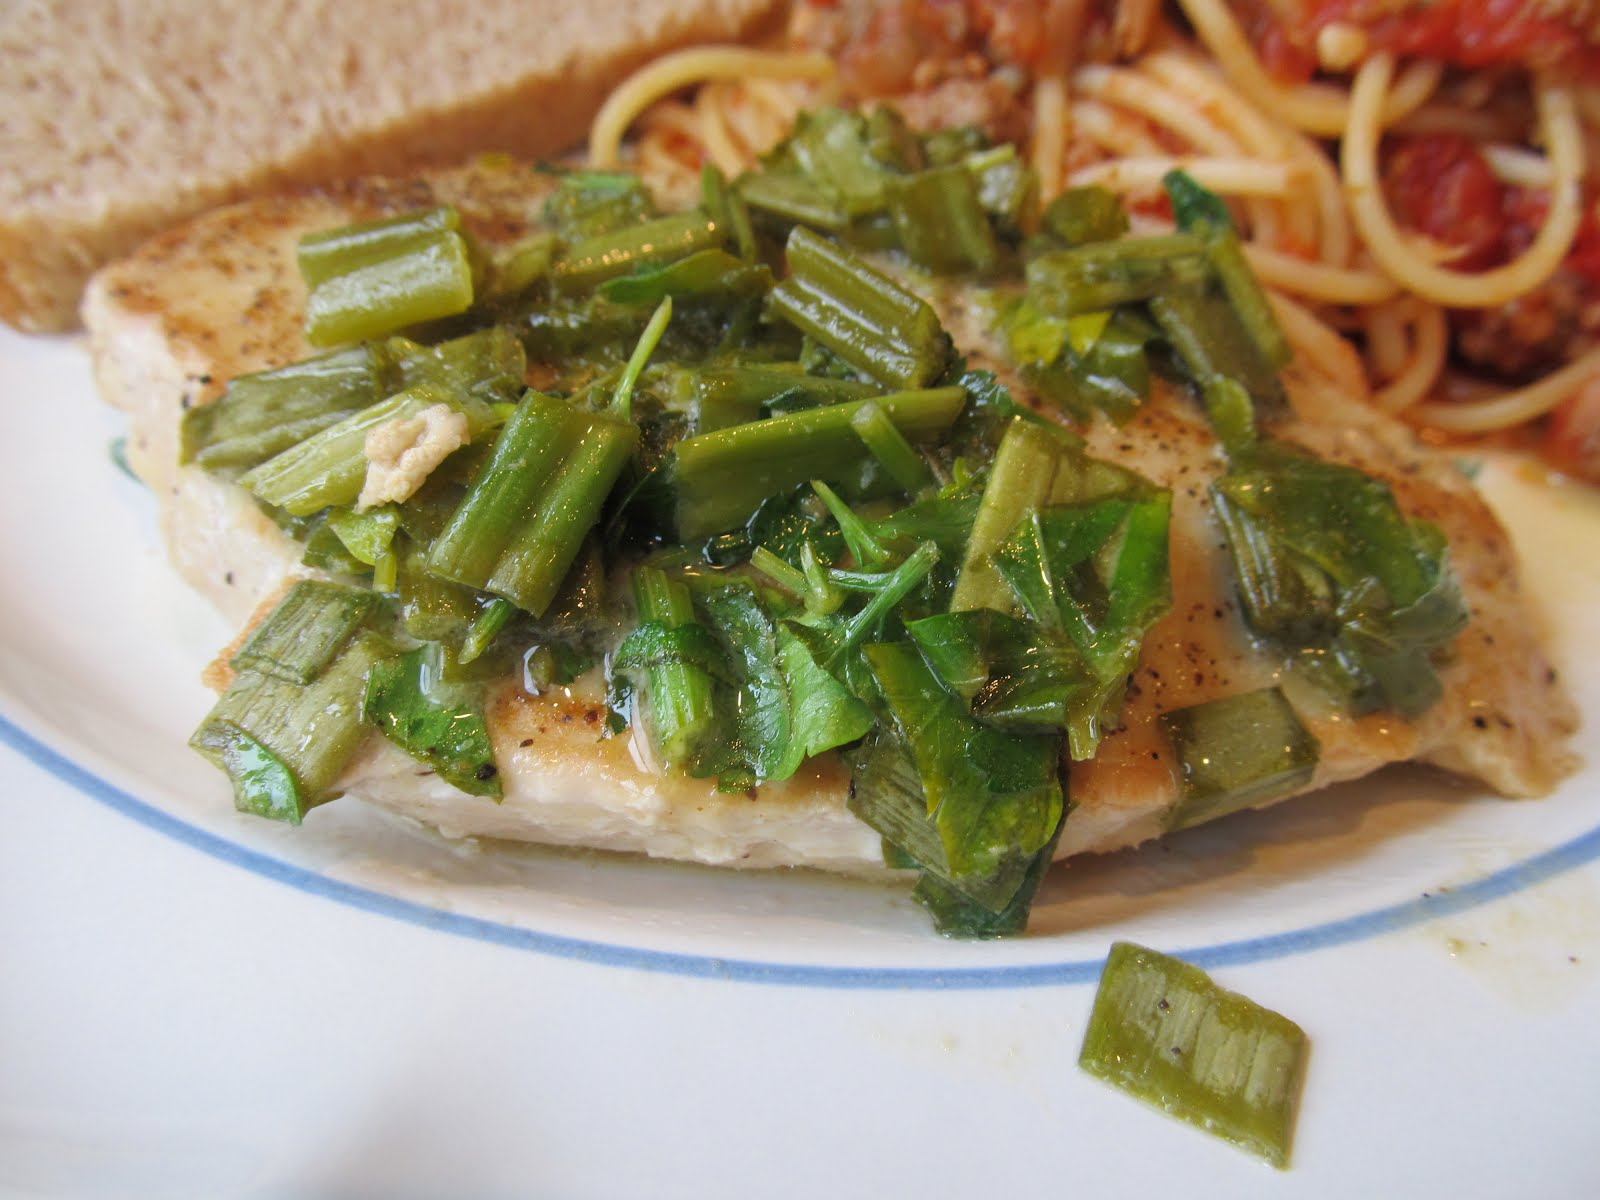
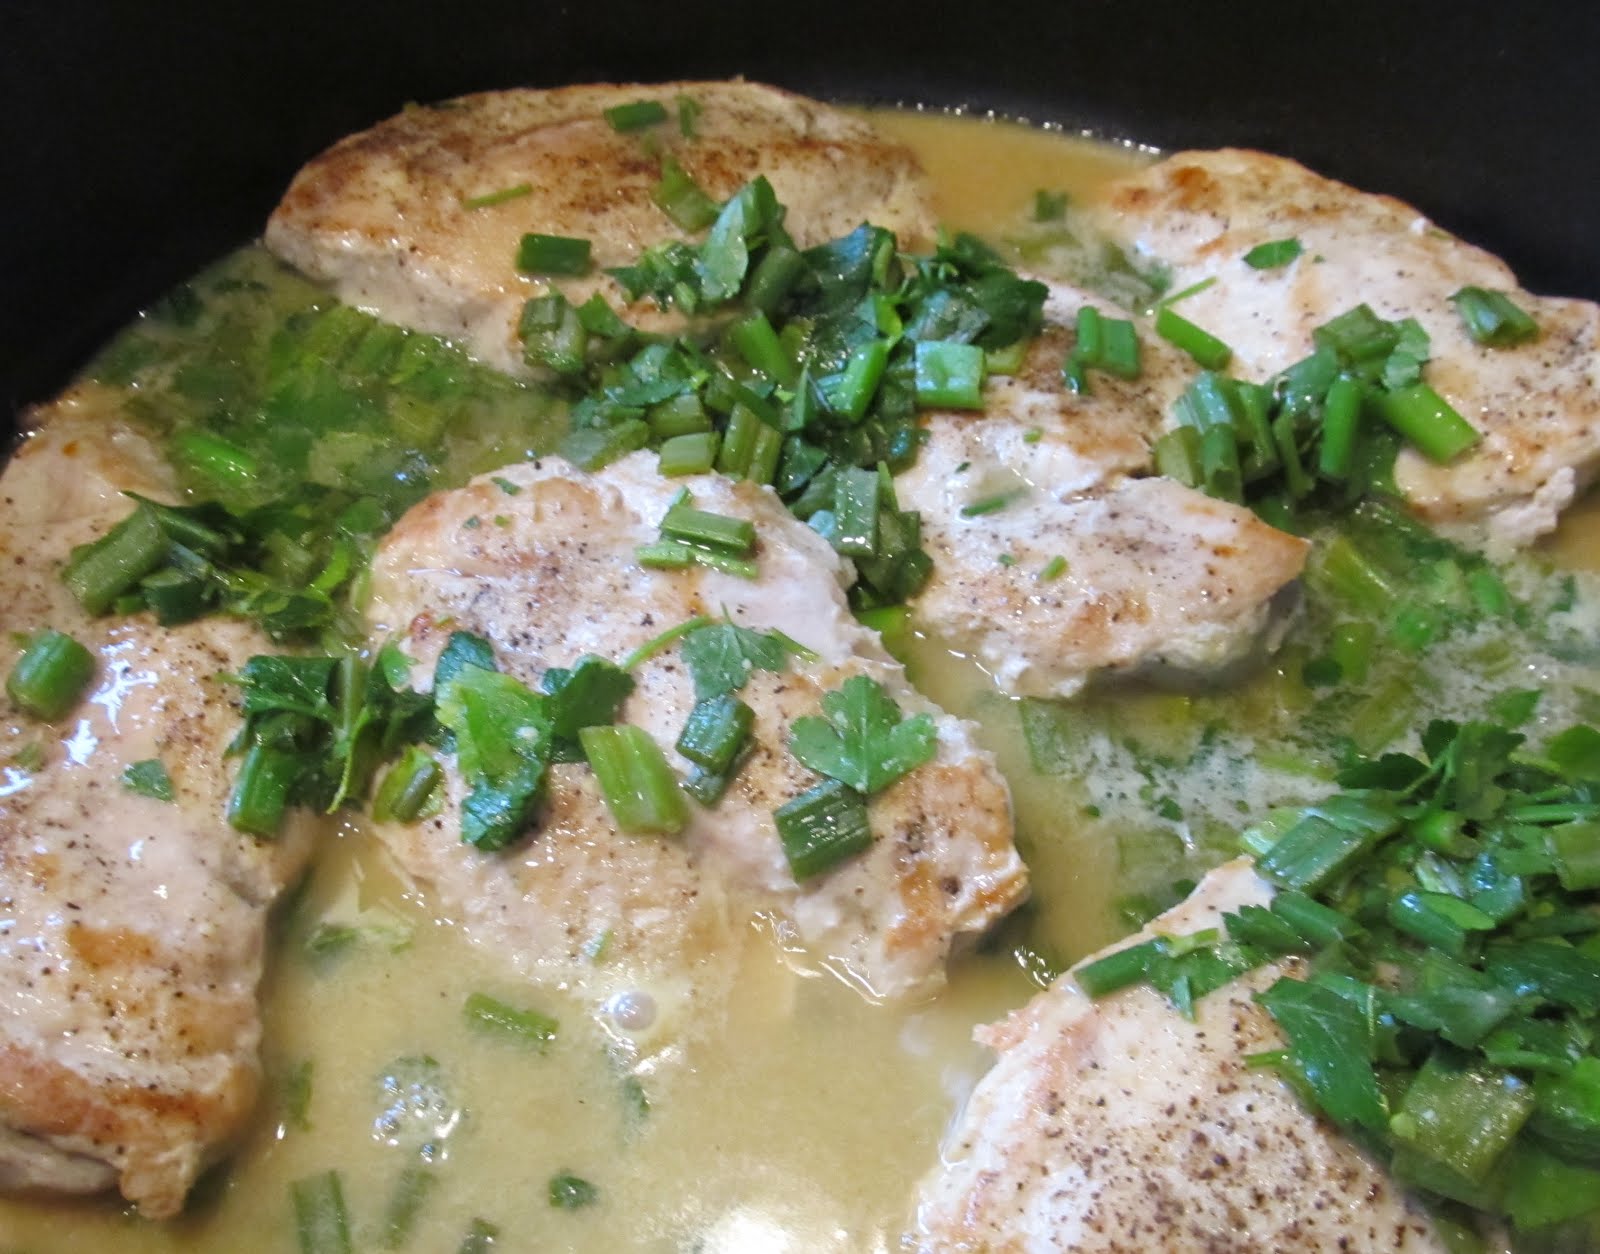
Chicken Breasts Diane
Ingredients:
4 large boneless chicken breast halves (or 8 small)
1/2 tsp salt
1/4-1/2 tsp black pepper
2 tbsp olive or salad oil
2 tbsp butter or margarine
3 tbsp chopped fresh chives or green onions
Juice of 1/2 lime or lemon
3 tbsp chopped parsley
2 tsp Dijon-style mustard
1/ cup chicken broth
Directions:
Place chicken breast halves between sheets of waxed paper or plastic wrap. Pound slightly with mallet. Sprinkle with salt and black pepper.
Heat 1 tablespoon each of oil and butter in large skillet (see notes below).
Cook chicken over high heat for 4 minutes on each side. Do not cook longer or they will be overcooked and dry. Transfer to warm serving platter.
Add chives or green onion, lime juice, parsley, and mustard to pan. Cook 15 seconds, whisking constantly (see notes below).
Whisk in broth. Stir until sauce is smooth. Whisk in remaining butter and oil (see notes below).
Pour sauce over chicken. Serve immediately.
Recipe Tips: You can pound chicken breasts flat and leave flattened between sheets of plastic wrap. Wrap them airtight in one package and freeze for later use.
This recipe is good served with noodles with tomato sauce, steamed broccoli, and or a fresh salad.
Nutrition information: 409 calories, 44.2 g protein, 24.2 g fat, 0.9 g carobhydrates, 580 mg sodium.
Source: This is from a recipe card dated 1988 for Great American Recipes (in the Poultry at Its Best section, card 47, group 5).
Notes: My Mom made this a long, long time ago and she and I, apparently, were the only ones in my family who loved it (everyone else was too picky about green onions at the time). Because no one else liked it, my Mom was going to throw the recipe card out, but I held onto it for myself. Yum! I'm glad I did because this recipe is fantastic. If you don't like green onions, use the chives instead. But I love the mix of Dijon mustard and lemon or lime juice. I usually use lime juice, but it works either way.
My chicken breasts are a little small because when I was thawing them, they seemed huge and I decided to cut the breasts in half rather than use the whole breasts and pound them. But I should have stuck with the recipes. Once the chicken breasts thawed, they weren't as big as I thought. It would have been better if I had pounded them and cooked them according to the recipe.
As for the sauce, I often tend to have problems with pan sauces (sometimes, they get a little too overdone or browned for my liking). So, I used the following method:
I cooked the chicken as stated in the recipe--except I used cooking spray in place of the butter and oil. I omitted the oil completely from the recipe. While the chicken was cooking, I made the sauce by combining all of the ingredients (2 tbsp butter, 3 tbsp green onions, lime juice, parsley, Dijon mustard, and chicken broth) in a microwave-safe bowl. When the chicken was nearing completion, I microwaved the sauce in the microwave for about a minute (to melt the butter). I removed the sauce and whisked it until smooth. When the chicken was finished, I kept it in the pan and poured the sauce directly on top of it. I then removed it from the heat and served it. You could also keep the green onions and parsley out of the sauce until after you had microwaved it and then stirred it in after whisking the mixture until smooth.
By using smaller chicken breasts and omitting the oil, you will cut down on the calories and fat listed in the original nutrition information facts.
Southwestern Chicken Scaloppine
Ingredients:
4 boneless skinless chicken breasts (about 1 1/4 lb)
1/4 cup Gold Medal all-purpose flour
1 teaspoon ground cumin
1/2 tsp salt
1 1/2 tablespoons canola oil
1/2 cup Progresso chicken broth (from 32 oz carton)
1/4 teaspoon red pepper sauce, if desired
2 tablespoons lime juice
2 tablespoons chopped fresh cilantro
Directions:
Between pieces of plastic wrap or waxed paper, place chicken breast half with smooth side down; gently pound with flat side of meat mallet or rolling pin until about 1/4 inch thick. Repeat with remaining chicken. Cut chicken into smaller pieces, if desired.
In shallow dish, mix flour, cumin, and salt. Coat chicken with flour mixture. Reserve 1 teaspoon flour mixture.
In 12-inch nonstick skillet, heat oil over medium heat. Add chicken; cook 3-5 minutes on each side or until golden brown and no longer pink in center. remove chicken from skillet; cover to keep warm (see notes below).
In small bowl, stir reserved 1 teaspoon flour mixture into broth. Gradually stir broth mixture and red pepper sauce into skillet. Heat to boiling; stir in lime juice and cilantro. Serve sauce over chicken (see notes below).
Makes 4 servings
Recipe notes: Serve with cornbread or corn muffins, steamed green beans or broccoli, and fresh fruit.
Variation: Instead of chicken, use 1 pound pork tenderloin. Cut into 4 pieces, and flatten as directed for the chicken.
Nutrition information: 250 calories, 10 g fat, 85 mg cholesterol, 500 mg sodium, 7 g carbohyrdate, 0 g fiber, 33 g protein.
Source:
Betty Crocker website.
Notes: I followed the recipe, except I used non-stick cooking spray in place of the oil to brown the chicken. Also, rather than removing the chicken and making the sauce in the pan, I combined the sauce ingredients in a microwave-safe bowl and microwaved it until thickened. Then, when the chicken was done, I poured the sauce directly over the chicken in the pan. This was sooo yummy! It would work great with any of your favorite southwestern or Mexican sides (like rice or cornbread).
Pork Milanese
Ingredients:
1 small garlic clove, minced
2 tablespoons fresh lemon juice
2 tablespoons extra-virgin olive oil
Coarse salt and ground pepper
1 cup all-purpose flour
1 1/2 pound pork cutlets (1/4 inch thick)
2 tablespoons vegetable oil, plus more if needed
3 cups baby arugula
1 head radicchio, or endive, or a combination, thinly sliced
1/3 cup thinly sliced red onion
Directions:
In a small bowl, whisk together garlic, lemon juice, and olive oil, and season with salt and pepper; set dressing aside. Place flour in a small bowl. Season pork with salt and pepper and dredge in flour, shaking off excess.
In a large skillet, heat vegetable oil over medium-high. When oil is hot, add cutlets, working in batches and adding more oil if necessary (do not overcrowd pan). Cook until cutlets are golden on bottom, 3 minutes. Flip and cook until cooked through, 3 minutes. Transfer cutlets to a large platter.
In a large bowl, toss arugula, radicchio, and onion with dressing, then top cutlets with salad.
Source: Martha Stewart Everyday Food recipe. Found originally in the magazine (but can now be found
on the website).
Notes: I originally only made the salad...which I fell in love with. Arugula can be so bitter on its own, but when paired with lemon juice, it is out of this world. I happened to have some pork chops on hand and thought, what the heck, I'll try the whole recipe. As usual, I omitted the oil and used non-stick cooking spray to brown the pork.
I debated slicing the pork chops down the middle to make them thinner because they were thick-cut pork chops, but I opted not to. But in hindsight, I should have. It would have worked a little better. But even so, this meal was delicious. The arugula salad pairs so nicely with the pork. Easy and delicious!
Refreshing Lemon Trifle
Ingredients:
1 angel food cake (either prepared or your favorite recipe)
1 package lemon jell-o pie filling
1 large tub whipped topping
Directions:
Cut angel food cake into cubes. Alternately layer angel food cake, lemon pie filling, and whipped topping until your bowl or trifle dish is full.
Source: My piano teacher when I was a child used to make this in cake form.
Notes: My piano teacher would make it as follows: She would slice the angel food cake to make three layers. She would use the lemon pie filling in between each layer and then frost with the whipped topping.
I think it works a little better as a trifle because it's a little easier to serve. But either way works great. I just love this combination! It's such a light and refreshing dessert.
If you needed a little something else in the trifle, I would suggest roughly crushed Golden Oreos (do the layers as follows: angel food cake, Golden Oreos, lemon pie filling, and whipped topping).
You can also use lite whipped topping to cut down on calories. It tastes exactly the same.
Lemon Yogurt Bread
Ingredients:
3 c. flour
1 tsp salt
1 tsp baking soda
1 tsp baking powder
3 eggs
3/4 c. canola oil
1 1/2 c. sugar
2 c. lemon yogurt
2 tbsp lemon juice
Optional: 1 tbsp grated lemon peel
Directions:
Preheat oven to 325 degrees F.
Sift all dry ingredients and set aside.
Lightly beat eggs in a large bowl.
Add sugar and oil, cream well.
Mix in exact amount of yogurt.
Add the rest of the ingredients.
Pour into two well-greased loaf pans (or one bundt pan).
Glaze for Lemon Bread
Ingredients:
3/4 cup sugar
1/4 cup orange juice
1/2 tsp vanilla
1/2 tsp almond flavoring
1/2 tsp butter flavoring
Directions:
Mix all ingredients together. Pour over semi-cooled lemon bread.
Source: This recipe came from my good friend, April Farmer. It is a recipe that they use at the bed and breakfast that she works at. She brought it as part of a dinner she brought to me after I had my second son. It was so good we had to restrain ourselves from eating the whole loaf that very night!
Notes: It seems that I very rarely have orange juice on hand, so the glaze I make is a little different. I use 3/4 cup sugar, 1/4 cup lemon juice, and 1 tsp vanilla flavoring (since my son is allergic to tree nuts). It is a little more tart than the other glaze is, but I like tart! I think it works well. After seeing how pretty the lime zest looks on the glaze for the lime bread, I would definitely add lemon zest to this glaze as well.
Sweet Lime Bread
Ingredients:
Bread:
1/2 pound butter, softened
2 cups sugar
2 tablespoons grated lime peel
2 cups all-purpose flour
2 teaspoons baking powder
1 teaspoon salt
4 eggs, beaten
1 cup milk
Glaze:
1/2 cup sugar
3 tablespoons lime juice
Finely shredded lime peel
Directions:
Heat oven to 350 degrees.
Lightly grease two 8 1/2 x 4 1/2 loaf pans; set aside.
To make the bread, cream the butter, sugar, and grated lime peel in a large bowl. In another large bowl, place flour, baking powder, and salt. Mix with a wire whisk until thoroughly blended. In medium bowl, mix eggs and milk. Add dry ingredients and egg mixture alternately to butter mixture in three installments. Mix well after each addition. Divide batter evenly between the two prepared loaf pans and bake in the oven for 55 minutes or until golden and a toothpick inserted in the center comes out clean. (Adjust the baking time if making smaller loaves.)
To make the glaze, mix the sugar, lime juice, and peel in a small pan. Cook, stirring, over low heat, until the sugar is dissolved. As soon as the bread is removed from the oven, perforate the top of the loaves with a toothpick and drizzle the glaze over the hot bread. Allow the loaves to cool in the pans on a wire rack for 10 minutes. Remove from the pans and cool completely on racks. The bread may be served immediately or wrapped tightly and frozen.
Lighter Sweet Lime Bread
Ingredients:
Bread:
1/4 cup corn-oil margarine, softened
1/4 cup unsweetened applesauce
1/4 cup light corn syrup
1 1/4 cups sugar
2 tablespoons grated lime peel
3 cups unbleached all-purpose flour
2 teaspoons baking powder
1 teaspoon salt
1 cup liquid egg substitute
1 cup nonfat milk
Glaze:
1/3 cup sugar
3 tablespoons freshly squeezed lime juice
1 teaspoon grated lime peel
Directions:
Preheat oven to 350 degrees. Coat 2 standard-size loaf pans (8 1/2 x 4 1/2 inches) with a nonstick vegetable spray; set aside. (You can also use Pam for Baking which contains flour. It works wonderfully on baked goods without adding fat).
In a large mixing bowl, blend together margarine, applesauce, corn syrup, sugar, and lime peel. In another large bowl, combine flour, baking powder, and salt. In a 2 cup measure or small bowl, combine egg substitute and milk. Add dry ingredients and milk mixture alternately to margarine mixture in three installments. Beat well after each addition.
Divide batter evenly between the two loaf pans. Bake for about 55 minutes, or until golden and a toothpick inserted in the center comes out clean. When the breads are almost finished baking, combine the glaze ingredients in a small saucepan and cook over low heat, stirring, until the sugar is dissolved.
As soon as the breads are removed from the oven, poke holes in the top of the loaves with a toothpick. Drizzle the glaze evenly over the top of each loaf. Cool in the pans on a wire rack for 10 minutes. Remove the bread from the pans and allow to cool completely on racks. May be served immediately or wrapped and frozen. Makes two loaves, up to 16 slices per loaf.
Source: This is a recipe that my Mom made years ago as Christmas gifts for our neighbors years ago (among many other different kinds of quick bread). I'm not exactly sure, but I think she found this recipe in the Deseret News recipe section. She'll have to provide to correct source.
Notes: Mmmmm. This is so good. I love sweet quick breads!
Lemon Chicken
Ingredients:
2 lbs chicken (bone-in or boneless skinless may be used)
salt, to taste
1 cup lemon juice
2 tsp marjoram leaves
1 tsp thyme
1 tsp onion salt
Directions:
Rub the chicken with salt. Place chicken in baking dish. Mix the remaining ingredients and pour over chicken. Bake at 400 degrees for 45 minutes. Turn chicken over. Bake for another 20 minutes. Baste every 10 minutes until browned.
Source: This is one that my Mom used to make for us years ago, she will need to provide the source.
Notes: I believe this recipe was originally written for bone-in chicken breasts (which take longer too cook and retain their moisture better). If you are using boneless, skinless chicken breasts, you will most likely have to reduce the cooking time. Just watch your chicken and check it after 30 minutes by slicing into the center with a knife. Once it is no longer pink and the juices run clear, it is done. You don't want to overcook the chicken otherwise it will be dry and tough.
This recipe might definitely for lemon lovers only! It is still very tart, but since we are all lemon lovers, we all adored this recipe while we were growing up. It's a wonder we didn't get more cavities than we did!
However, cavities or not, I suggest that you use a little of the sauce to dip the chicken in. It is too thin of a sauce to pour on top, but the combination of the lemon juice, marjoram, thyme, and onion salt are so yummy to dip each bite of chicken in.
It's not the prettiest chicken presentation-wise (the chicken is almost being poached in the lemon juice mixture, so it's pretty pale in color), but it's a great pantry recipe to have on hand and it is really easy to throw together!