Showing posts sorted by relevance for query carrot cake. Sort by date Show all posts

Saturday, September 26, 2015

Slightly Different Than Normal


Usually, I make this fantastic carrot cake for my husband's birthday. However, I had just had a baby and was looking for ways to simplify things and had also found this very similar (and quicker) recipe. The carrot cake I usually make is a layer cake and I had always wondered if it would work as a sheet cake, but I had never gotten around to trying it out. This recipe was a sheet cake and I felt that would save me time because frosting a layer cake always takes longer than frosting a sheet cake. This carrot cake is every bit as delicious, moist, and wonderful as the layer cake one.

Rather than shredding the carrots, I followed the layer cakes instructions and instead blended the carrots with the other wet ingredients (except the pineapple) to save time. It worked beautifully. This is one delicious cake!


Mrs. Thompson's Carrot Cake Recipe

Ingredients:

3 cups shredded carrots
1 can (20 ounces) crushed pineapple, well-drained
2 cups sugar
1 cup canola oil
4 eggs
2 cups all-purpose flour
2 teaspoons baking soda
2 teaspoons ground cinnamon

Frosting:

1 package (8 ounces) cream cheese, softened
1/4 cup butter, softened
2 teaspoons vanilla extract
3-3/4 cups confectioners' sugar

Directions:

In a large bowl, beat the first five ingredients until well blended. In another bowl, mix the flour, baking soda, and cinnamon; gradually beat into carrot mixture.

Transfer to a greased 13-in. x 9-in. baking pan. Bake at 350 degrees F for 35-40 minutes or until a toothpick inserted in center comes out clean. Cool completely in pan on wire rack.

For frosting, in large bowl, beat the cream cheese, butter, and vanilla until blended. Gradually beat in confectioners' sugar until smooth. Spread over cake. Cover and refrigerate leftovers.

Yield: 15 servings.

Nutrition information: 1 piece equals 552 calories, 25 g fat, 81 mg cholesterol, 269 mg sodium, 80 g carbohydrate, 2 g fiber, 5 g protein.

Source: Taste of Home, February/March 2013. You can find it here.

Notes: As I said, I used my blender rather than shredding the carrots. I filled my blender to the 3 cup line with baby carrots and then added the oil and eggs. I then blended it until all the carrots were smoothly blended. This is one fantastic and delicious cake. You will notice from the nutrition information that while it has carrots in it, it doesn't necessarily make it a light cake! However, we only have carrot cake once a year for my husband's birthday, so it's worth the splurge.


Above: Ahhhh, the ease of frosting a sheet cake versus a layer cake.

Sunday, June 17, 2012

Cookies from Cake Mix


I love cookies as much as the next person, but I'm not going to lie, I'm not really big on making cookies.  I tend to only make cookies when I have to (for a social event, for neighborhood Christmas gift cookie plates, or as a "thank you" gift, etc.).  They just take so long when you have a ton of batches.  Plus, they can make such a mess of your kitchen.  And then if I don't give some of them away, I can't keep my hands off of them and I eat way too many.

So, these cookies are great because you won't have a ton of batches, you only use one bowl, and they are really quick and easy to throw together.  Besides that, with all of the different flavors of cake mixes and all of the add-in possibilities, the kinds of cookies that you can make are endless.

Seriously, you could do so many things with this basic cookie idea.  You could add nuts (not me because of my boys' nut allergies, sniff, sniff), dried fruit (such as chopped dried apricot or cherries), any kind of baking chip (semi-sweet, milk chocolate, white chocolate, white vanilla, mint, butterscotch, peanut butter, toffee chips, etc.), or you can add candies (like M&Ms, red hots, etc.).  And as you can see from the two recipes, you can make them with or without the pudding mix too.  So many possibilities! (Be sure to read to the end of this post to see a list of combinations and possibilities...only the tip of the iceberg, folks!).

So, follow the basic recipe, get creative and have some cookie fun!


Banana-Rainbow Chip Cookies

Ingredients:

1 box Betty Crocker SuperMoist party rainbow chip cake mix
1 box (4 serving size) banana cream instant pudding and pie filling mix
1/2 cup vegetable oil
2 eggs
3/4 cup white vanilla baking chips

Directions:

Heat oven to 350 degrees F.

In large bowl, stir together all ingredients.

Drop dough by rounded tablespoonfuls about 2 inches apart onto ungreased cookie sheet.

Bake 8-10 minutes or until light brown (centers will be soft).  Cool slightly; remove from cookie sheet to cooling rack.

Recipe Notes: Replace banana cream pudding with another flavor if you are not a fan of banana.  Store tightly covered at room temperature up to 2 days or in refrigerator up to 5 days.

Makes 16 servings.

Notes: I made these twice, two different ways.  I didn't follow the recipe exactly either time.  I doubled the recipe both times.  The first time, I used the party rainbow chip cake mix, vanilla instant pudding, and no white vanilla baking chips (I forgot to buy them and didn't have time to run to the store).  The second time, I used a white cake mix, half vanilla instant pudding, and half banana cream instant pudding, I used white vanilla baking chips, and I rolled the cookies in pink sugar sprinkles.  They were great cookies--both versions.  The first version is what I would describe as "cake mix cookies" in that they taste like yellow cake mix, only in cookie form.  They definitely fit the cake mix flavor trend that is going on right now.  The second version was really yummy too.  The banana pudding helps the cookies to taste less cake-like.  It deepens the flavor without making you think "these taste too banana-like."


Also, perhaps I made these cookies smaller than the recipe intended, but I ended up with 24 cookies (four batches of 12 cookies each).  I thought that the cookies were the perfect size.

Source: Betty Crocker website, recipe found here.  It is a recipe featured on Betty Crocker originally featured on a blog called Inspired Taste.


Quick-Mix Chocolate Cookies

Ingredients:

1 box Betty Crocker SuperMoist devil's food cake mix
1/3 cup vegetable oil
1 teaspoon vanilla
2 eggs
1/4 cup sugar

Directions:

Heat oven to 350 degrees F (325 degrees F for dark or nonstick pans).  In large bowl, mix cake mix, oil, vanilla, and eggs with spoon until dough forms.

Refrigerate dough 15-30 minutes or as needed for easier handling.  Shape dough into 1-inch balls; roll in sugar.  On ungreased cookie sheets, place balls about 2 inches apart.

Bake 9-11 minutes or until set.  Cool 1 minute; remove from cookie sheets to cooling racks.  Cool completely, about 30 minutes.  Store tightly covered.

Recipe notes: To make Chocolate Chip-Chocolate Cookies, stir 2/3 cup miniature semisweet chocolate chips into the dough.

Makes 30 cookies.

Nutrition information: 1 cookie is 90 calories, 3.5 g fat, 15 mg cholesterol, 125 mg sodium, 13 g carbohydrate, 0 g dietary fiber, 1 g protein.

Source: Betty Crocker website, recipe found here.

Notes: I made these exactly as written, except for two changes.  I used a Triple Chocolate Fudge cake mix instead of the Devil's Food...because that's what I had on hand.  The Triple Chocolate Fudge cake mix has little chocolate chips in it.  It tasted great.  Also, instead of 30 cookies, I made a total of 24 cookies--two batches of 12 cookies.  We might have had more, but my son kept asking for more cookie dough.  I would have had 30 cookies.  He ate about 3 cookies worth of dough!  I took dough from what would have been the other three cookies and just added it evenly into the other cookie dough balls so that I wouldn't have to put a batch of three cookies in the oven.  Because I hate when that happens!

These taste like brownies in cookie form...and there's nothing wrong with that!


Here are some other mix and add-in ideas I found in the comments sections of each cookie on the Betty Crocker website: 

  • Chocolate cake mix, chocolate pudding, white chocolate chips.
  • Chocolate cake mix, peanut butter chips.
  • Chocolate cake mix, mint chips.
  • Yellow or white cake mix, rolled in cinnamon-sugar for a Snickerdoodle cookie.
  • Yellow cake mix, vanilla pudding, and rainbow sprinkles (you could either mix the sprinkles into the dough or roll the cookie dough balls in the sprinkles).
  • Lemon cake mix rolled in powdered sugar.
  • Chocolate cake mix, chocolate chips, rolled in powered sugar.
  • Strawberry cake mix, vanilla pudding, white chocolate chips.
  • One person shared her personal cake mix cookie version: She used 1 box of cake mix, 1 egg, 4 drops of vanilla (maybe 1 teaspoon?), and one 8 oz container of frozen whipped topping (such as Cool Whip).  They mixed the dough together, formed it into balls, and rolled it into powdered sugar, then baked.
  • Another person said that they followed the chocolate cookie recipe, wrapped the dough around unwrapped Rolo candies, and rolled the cookie dough balls in a mixture of sugar and chopped pecans.
  • Another person said that they made a Christmas cherry cookie using white cake mix and almond extract.  They topped the cookies with half of a red or green maraschino cherry and drizzled it with melted chocolate.  They also noted that this same version would be great with a chocolate cake mix, cherry, and a drizzle of melted white chocolate. 
  • You can use white or chocolate cake mix and roll them in different colors of sugar for different holidays: green, orange, and purple for Halloween, red and green for Christmas, pink and red for Valentine's Day, multiple pastel or bright shades for Easter, red and blue for a Patriotic twist, etc.
  • You could use two cookies and fill them with your favorite frosting for a cookie sandwich, similar to a whoopie pie.
  • White cake mix, dried chopped pineapple, coconut (toasted or un-toasted), macadamia nuts, white chocolate chips for a tropical/pina colada cookie.
  • White cake mix, craisins, orange zest.
  • White cake mix, chopped dried apricots, white vanilla chips.
  • Lemon cake mix and chopped crystallized ginger.
  • Red velvet cake mix and white chocolate chips.
  • Chocolate cake mix and toffee chips.
  • Chocolate cake mix and butterscotch chips.
  • White cake mix, white chocolate chips, and chopped macadamia nuts.
  • Carrot cake mix and white chocolate chips.
  • Spice cake mix rolled in granulated sugar.  Kind of like a gingersnap.
  • White cake with M&Ms (red and green for Christmas).
  • Spice cake mix with craisins and walnuts.
  • Carrot cake mix...use two cookies and fill with cream cheese frosting for a carrot cake sandwich cookie.
  • Spice cake mix with oatmeal and raisins.
  • German chocolate cake mix rolled in powdered sugar to make chocolate crinkles cookies.
  • Yellow cake mix, toffee bits, rolled in cinnamon-sugar.
  • Yellow cake mix, butterscotch chips, butterscotch pudding.
  • Chocolate cake mix (follow recipe above, but omit coating cookie dough in granulated sugar), frost with fluffy white frosting, and top with crushed candy canes.
  • Chocolate cake mix, white chocolate chips, and craisins or dried cherries.
  • Chocolate cake mix cookie recipe, made into a sandwich cookie with cream cheese frosting for a homemade soft Oreo cookie.  You could even add food color and different extracts to the frosting...such as green food color and peppermint extract for a Christmas version.

Sunday, September 29, 2013

An Old Favorite Deserving of the Spotlight


This recipe was already been posted on our blog about three years ago. However, it is just so good and easy that I thought it needed a repeat appearance. I make it every year for my husband's birthday. Soooo good! You can find the original post here.

The main reason for this being that my sister-in-law said to me, "Carrot cake is so time consuming and so much work to make." That is not the case for this carrot cake! It is greatly simplified by the fact that the wet ingredients are mixed together with the carrots in a blender until smooth. No peeling and grating of carrots necessary. Super easy...oh, and did I mention that this is the most delicious carrot cake I have ever had? The search is over. No need to look for another carrot cake recipe. This is the one.


Heather's Carrot Pineapple Cake

Cake:

1 1/2 cup flour
1 cup sugar
1 teaspoon baking powder
1 teaspoon baking soda
1 teaspoon cinnamon
1/2 teaspoon salt
2/3 cup salad oil (vegetable oil)
2 eggs
1 teaspoon vanilla
carrots, roughly sliced or chopped (enough to make 1 cup shredded)
1 cup crushed pineapple with juice (or half cup, if preferred. I use one 8 oz can)

Frosting:

1 package cream cheese
2 Tbsp. butter
4 cups confectioners sugar
1 tsp. vanilla

Sift together first six ingredients (flour through salt).

Blend together next 4 ingredients (salad oil through carrots) in a blender.

Combine dry and wet ingredients. Then add crushed pineapple with juice.

Pour batter into 3 greased baking pans. Bake at 350 degrees for 25-30 minutes.

For the frosting, whip together the final four ingredients (cream cheese through vanilla) and frost on top of cooled cake.

Source: My wonderful former co-worker, Heather Bowen.

Notes: I like a lot of frosting, so I would suggest doubling the frosting recipe. I always do. Also, I highly suggest using three cake pans instead of two. It is necessary for the consistency of the cake. If you do try to use two cake pans, you might have to cook the cake a little longer. Check the cake using the toothpick method to ensure that it is cooked completely, otherwise it might be too crumbly.


Above: I use baby carrots so I don't have to peel or cut them. I fill the blender with carrots to almost the 2 cup line. Here is the blender filled with all of the wet ingredients.


Above: When everything is blended, you will have about 2 cups of wet ingredients (eggs, vegetable oil, carrots and vanilla).


Above: Throw all of your ingredients together in one bowl (wet, dry, and pineapple).


Above: Mix it all together and pour it into your pans.


Above: Bake for 25-30 minutes in three pans. Once cooled, frost. I like to frost my cake the day before. Somehow the texture of the cake is just more awesome that way. :) Keep your cake covered and it won't dry out. It will just be absolutely delicious.

Tuesday, October 12, 2010

Cake and Ice Cream...Yum!


There are an awful lot of cake recipes on our blog! Especially since our blog has only been up and running for 7 months!

But I promise you, each and every one of these cake recipes are worth it!

As for ice cream, isn't it the perfect compliment to cake?

I got this fantastic cake recipe from a co-worker. She would make it to celebrate everyone's birthday in the office. It was too hard to resist (I'm sure it added to my pregnancy weight gain!). It is honestly the best carrot cake I have ever had. My husband's favorite kind of cake is carrot cake, so this was a natural for his birthday celebration. Before I found this recipe, I tried a number of different carrot cakes (store-bought and homemade) to find just the right one. I just wasn't pleased. They were either too spice-cakey or too crumbly. This carrot cake is moist and hard to resist.

As for the ice cream, I dreamed up this recipe myself (one of my pregnant food craving dreams!). I had been craving the flavor of hazelnut. In order to satiate my craving, I got some hazelnut coffee creamer to flavor my glasses of milk and later, I got some chocolate hazelnut spread as well. I think the combination of milk, hazelnut coffee creamer, and chocolate hazelnut spread just sort of evolved into an ice cream recipe during my REM cycle!

While I would never pair these two recipes to serve together (the ice cream and cake are too rich to go together and the flavors don't match), I find that it is fitting to pair them together here since I craved the carrot cake during my first pregnancy and I dreamed up the ice cream during my second pregnancy!

Oh, and I must apologize for the pictures. Each time, we had already dug in and it only occurred to me afterward that I needed to take a picture. So, the pictures are definite afterthoughts and they don't do these recipes the justice they deserve. They really are awful pictures. Sorry! (Notice how the carrot cake is placed on one of my son's baby plates because I was pressed for time and besides paper plates, it was the only thing I had nearby!)

Above: You can simply frost the layers and let the frosting overhang a little, or...

Above: You can frost the whole thing and bask in the wonderful cream cheese frosting/carrot cake combination. It's up to you!

10/21/10 Amendment: In order to class up this blog post (because my pictures were so lousy and Laurie's are so fantastic), I am adding one of my sister's posts from her personal blog with two of her ice cream recipes. These fantastic recipes came straight from her own brain!


Heather's Carrot Pineapple Cake


Cake:

1 1/2 cup flour
1 cup sugar
1 teaspoon baking powder
1 teaspoon baking soda
1 teaspoon cinnamon
1/2 teaspoon salt
2/3 cup salad oil
2 eggs
1 teaspoon vanilla
carrots, roughly sliced or chopped (enough to make 1 cup shredded)
1 cup crushed pineapple with juice (or half cup, if preferred)

Frosting:

1 package cream cheese
2 Tbsp. butter
4 cups confectioners sugar
1 tsp. vanilla

Sift together first six ingredients (flour through salt).

Blend together next 4 ingredients (salad oil through shredded carrots) in a blender.

Combine dry and wet ingredients. Then add crushed pineapple with juice.

Pour batter into 3 greased baking pans. Bake at 350 degrees for 25-30 minutes.

For the frosting, whip together the final four ingredients (cream cheese through vanilla) and frost on top of cooled cake.

Source: My wonderful former co-worker, Heather Bowen.

Notes: I like a lot of frosting, so I would suggest doubling the frosting recipe. Also, I highly suggest using three cake pans instead of two. It is necessary for the consistency of the cake. If you do try to use two cake pans, you might have to cook the cake a little longer. Check the cake using the toothpick method to ensure that it is cooked completely, otherwise it might be too crumbly.


Hazelnut Chocolate Ice Cream

Makes 4 quarts

Ingredients:

8 cups heavy cream (see note below)
1 1/2 cups sugar
Pinch of salt
4 cups hazelnut flavored coffee creamer
1 1/4-1 1/2 cups toasted, chopped hazelnuts
1 container chocolate hazelnut spread (such as Nutella)

Directions:

In a large bowl, whisk together cream, sugar, salt, and coffee creamer. Refrigerate until you are able to add the cooled nuts. Toast hazelnuts and allow to cool. Stir cooled hazelnuts into the cream mixture. Transfer mixture to an ice cream maker, and freeze according to manufacturer's instructions.

You will want to swirl the chocolate hazelnut spread into the ice cream mixture before you ripen it in your freezer. The best way to do this is to spoon a layer of the ice cream into a freezer safe container and swirl a layer of chocolate hazelnut spread on top. Top with another layer of ice cream followed by another layer of chocolate hazelnut spread. Repeat until all of the ice cream and chocolate hazelnut spread has been combined. Be careful not to leave large clumps of chocolate hazelnut spread. You will want the swirls to be fine. When the spread freezes, it freezes very hard and if you have large swirls or clumps within the ice cream, it makes scooping the ice cream very difficult.

Allow ice cream to fully ripen in the freezer before serving (at least 2 hours). Store in an airtight, freezer safe container.

Source: The crazy craving dreams of a pregnant woman...me!

Notes: If you want to lighten this recipe and make it a little less rich, you can use 4 cups of heavy cream and 4 cups of half and half. I've tried it both ways. It is still great with the half and half. It is just a little lighter, not quite as rich, and a little less creamy.

Also, I must repeat that it is so important not to create large or thick pieces/swirls of chocolate hazelnut spread. It is so much tastier and easier to serve if you have fine, string-like swirls. The first time I made this, the swirls were very fine and I thought I would try it again with twice as much chocolate hazelnut spread and in much thicker swirls. The problem with this is that the chocolate hazelnut spread hardens as soon as it makes contact with the cold ice cream (it's kind of like the chocolate shells you can get on your soft serve ice cream cone). The result was that I had thick and impenetrable layers of chocolate hazelnut spread and I practically had to use a knife to serve the ice cream! The dainty, fine layers of chocolate hazelnut spread are far preferable for this recipe. If you want more chocolate hazelnut spread, I would suggest drizzling some more on top of your ice cream just prior to serving.

Garden + Ice Cream Maker = True Love


My roommates gave me an ice cream maker for my wedding and ever since then I have been making ice cream non-stop. I lay in bed thinking of new ideas for flavor combinations and I get so excited! The first kind I made was using the fresh mint in our back yard and it was delicious! Mint is of course one of my favorite things. After the mint, I decided to be more creative and I was inspired by my favorite ice cream shop, Jeni's (They always have very creative, gourmet and absolutely delicious flavors). So I made Cucumber Coconut Sorbet and Butternut Squash Ice Cream with Caramel & Candied Pecans. And they were both a success! hooray!!!

Cucumber Coconut Sorbet

I love how cool and refreshing cucumber is. People don't give cucumber enough opportunities as a dessert flavor, but I'm telling you this one is delish! It's light and tasty, with a smooth texture. Yum!

Ingredients:

2 large cucumbers
1 tablespoon honey
1 can light coconut milk
Juice from 1 lime
3/4 cup simple syrup, (recipe below)

Directions:

Blend the cucumbers and honey together in a blender or food processor until the cucumber is almost pureed, but still has some chunks. Refrigerate for 6-24 hours. The honey will draw out the moisture in the cucumbers. Then blend again until smooth, and pour into a fine strainer, pushing out juices and discarding pulp & peel.

Combine the juices with a can of coconut milk, the lime juice, and the simple syrup

Freeze in Ice cream maker for 20-30 minutes or until thick and creamy. YUM!!!

Simple Syrup

Ingredients:

1/2 cup sugar
1/4 cup light corn syrup
1/4 cup water

Directions:

In a small saucepan, combine the sugar, corn syrup and water and bring to a boil. Cook over moderate heat until the sugar dissolves, about 2 minutes. Remove from the heat. Let stand until cool, 30 minutes.

Butternut Squash Ice Cream

The squash has a richer flavor and is more decadent with the caramel and pecans. We had friends over for dinner last night and they were shocked that the secret ingredient was squash. It tastes a little like pumpkin pie, only more mild.

Ingredients:

One medium-sized butternut squash
1 tsp. vanilla
One recipe of your favorite vanilla ice cream
1 tsp. cinnamon
1/4 tsp. nutmeg
2-4 tbsp. brown sugar
One recipe of your favorite candied pecans (or toast pecans in a pan on the stove top while adding enough brown sugar to evenly coat the nuts, remove from heat and cool completely)

Directions:

Start by peeling and cubing one medium sized butternut squash. Boil for 5-10 minutes with a little vanilla in the water.

Using your favorite basic vanilla ice cream recipe, add cinnamon, nutmeg, and brown sugar.

Add a cup of the cream mixture in a blender with the butternut squash and puree until smooth. Pour into fine strainer to remove pulp. I would probably strain this twice. I only did it once and the texture was a little too grainy. Mix with remaining ice cream mixture.

Then pour into ice cream machine! and freeze!

Yummy yummy yummy.

Next up, I'm thinking Basil Lime.... I love my garden!

Sunday, March 31, 2013

Should Cake Ever Really Be a Snack?


I don't know what I think of the term "snack cake." My problem with it is that shouldn't a snack be something like a handful of pretzels or a piece of fruit? If I think of cake as a snack, I have a hard time stopping at just one piece. Nevertheless, if you do like snack cake, here is a nice little recipe for you to try.


Carrot Snack Cake

Ingredients:

1/4 cup margarine or butter, softened
1/2 cup sugar
1 egg
1/4 cup skim milk
1/2 teaspoon vanilla
1/2 cup finely shredded carrot
1 cup all-purpose flour
1 1/4 teaspoons baking powder
1/4 teaspoon ground cinnamon
1/8 teaspoon salt
Dash ground nutmeg
Nonstick spray coating
Powdered sugar, optional

Directions:

In a small mixing bowl, beat margarine or butter and sugar until blended. Beat in egg, milk, and vanilla. Stir in carrot.

In another bowl, combine flour, baking powder, cinnamon, salt, and nutmeg. Add to carrot mixture, and stir until blended.

Spray an 8x8x2-inch baking pan with nonstick spray coating. Pour batter evenly into pan.

Bake in a 350 degree oven for 20 to 25 minutes or until a tootpcik inserted near the center of the cake comes out clean. Cool on wire rack. (If desired, remove from pan after coling 10 minutes. Then, cool completely.)

Lightly sift some powdered sugar evenly over the cake, if using. Makes 9 servings.

Nutrition information per serving: 156 calories, 2 g protein, 23g carbohydrate, 6 g fat, 31 mg cholesterol, 145 mg sodium, 55 mg potassium.

Source: This comes from a cookbook called Better Homes and Gardens New Dieter's Cook Book,  ISBN: 0-696-01974-4, published in 1992.

Notes: This was just an easy, simple, slightly sweet little snack cake. A good snack option...if you can stick to just one serving!

Thursday, October 31, 2013

Halloween 2013


A lot of the Halloween-themed foods I made this year really don't require a recipe. It just revolves around making ordinary things look spooky. Very easy to do!


I will include all of the instructions and recipes in here as soon as I can. However, for now, I just wanted to get this post up. So, I have provided a link to the recipe/instructions, but some of the recipes/instructions aren't typed up in this actual post yet. I'll do it soon though!


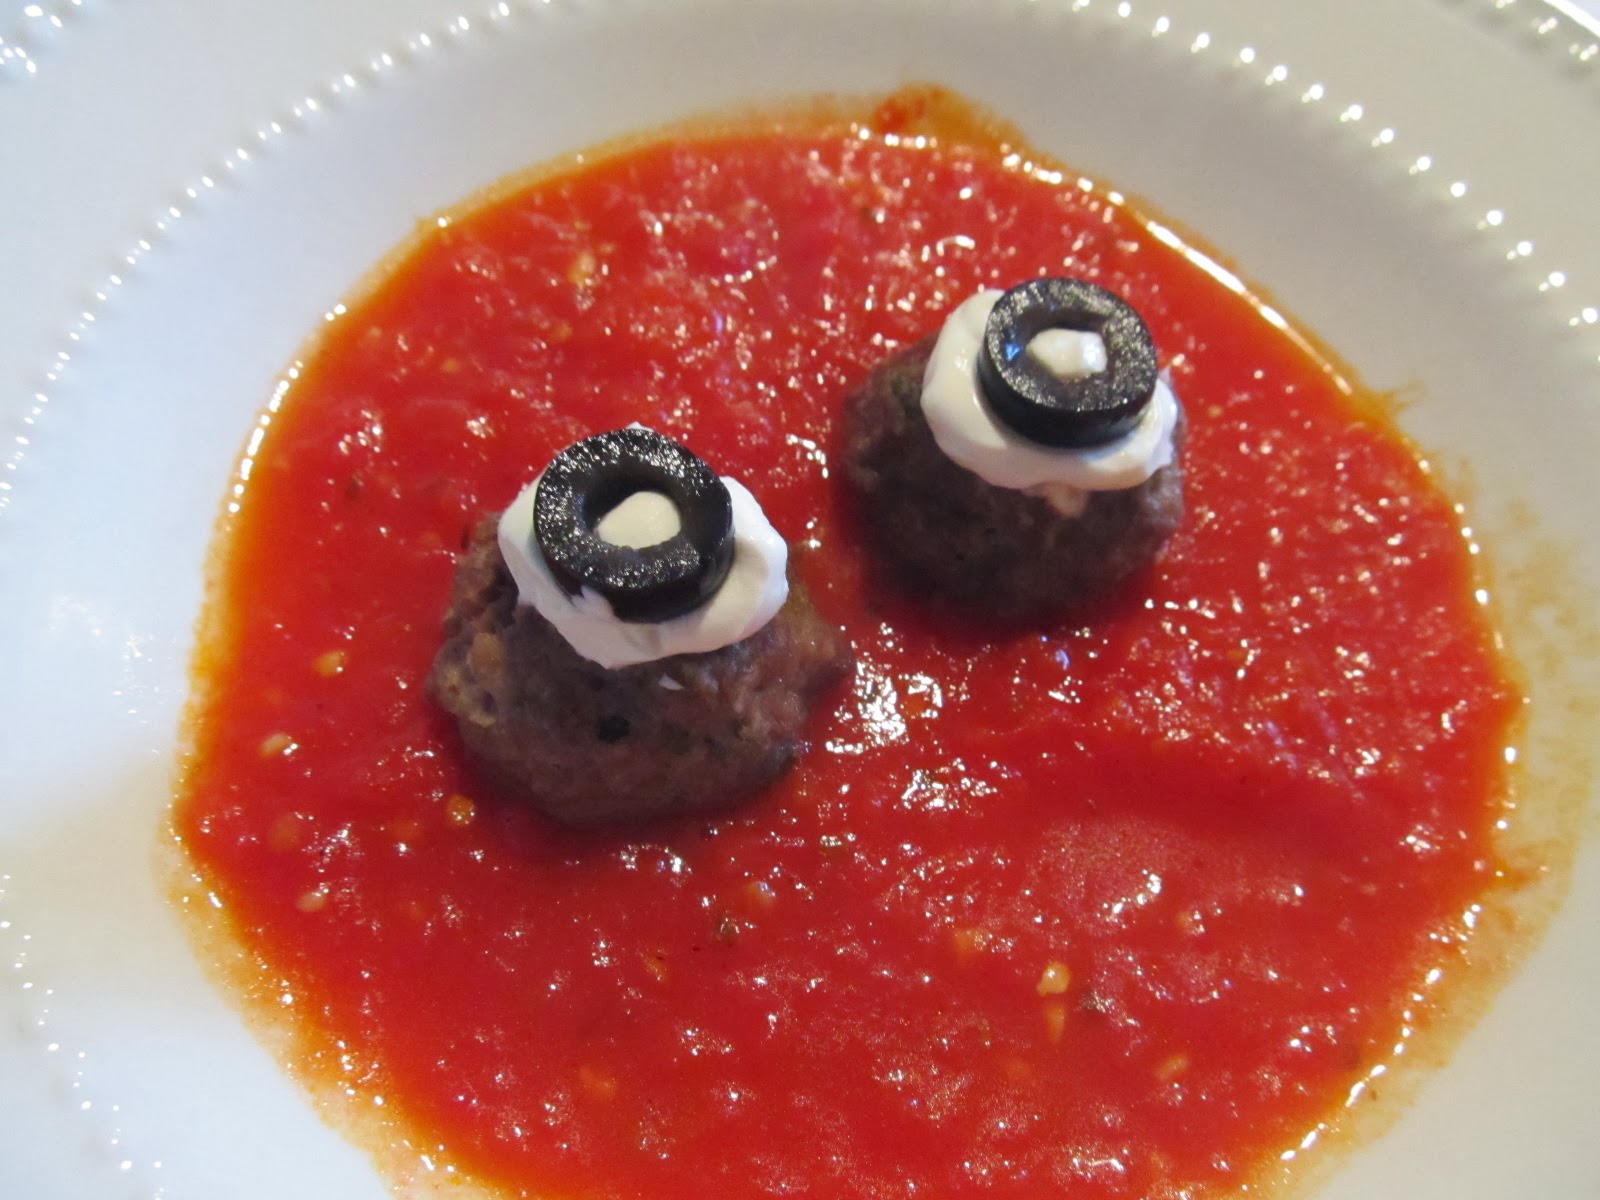
Above: Meatball eyeballs. I made these with my favorite Greek meatball recipe, which you can find here. Here is the non-spooky version for my little boys.


Above: Meatballs Floating in Blood. The spookier version for adults. I made some Three Ingredient Marinara (here) and added about 1 teaspoon of oregano to match the Greek meatballs. I served it with Greek potatoes (you can find that in the same link as the Greek meatballs above). Another way you can use the meatball eyeballs is to make meatball eyeball tacos by filling taco shells with cheese, lettuce, refried beans, etc. and flavoring your meatballs with taco seasoning in place of the other seasonings and serving the taco shells with two meatballs apiece. Simply put a dab of sour cream on each meatball and then top it with a sliced black olive.


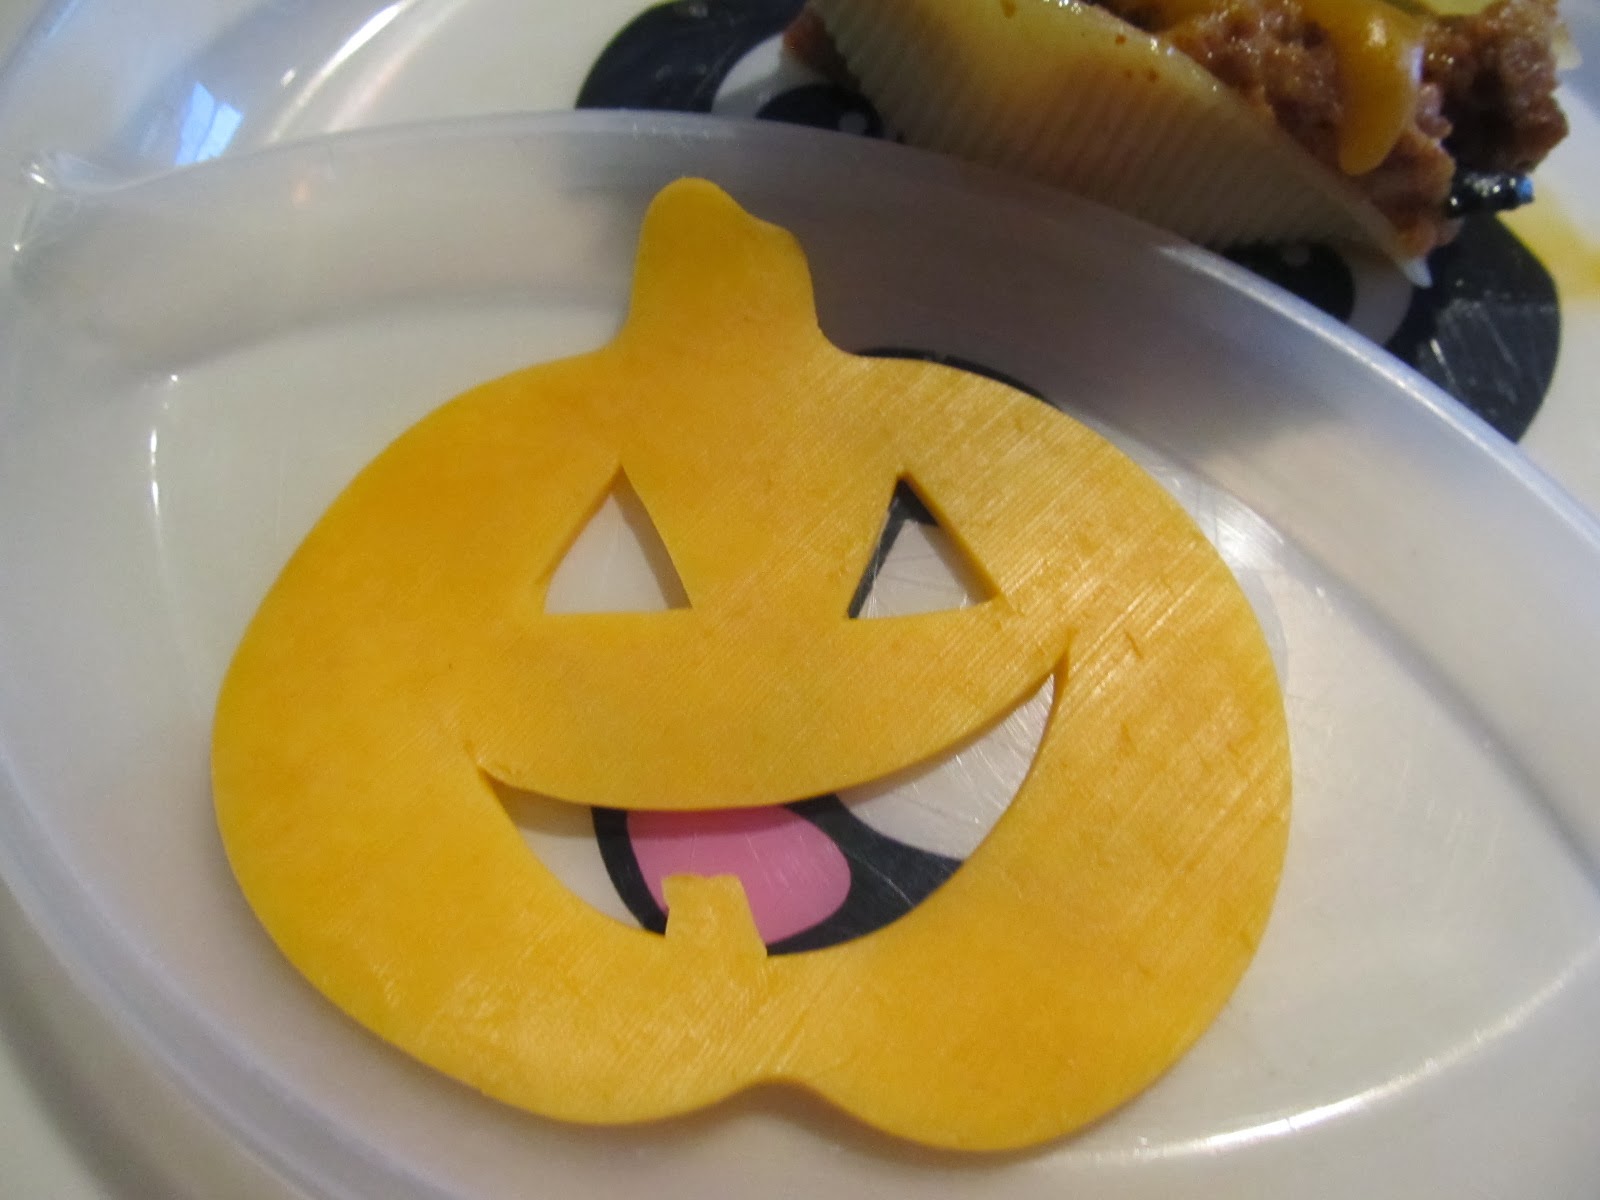
Above: Taco Stuffed Monster Shells with Jack-o'-Lantern Cheese.


Above: Who couldn't love this little monster? My two boys, that's who. They wouldn't eat them until the olive eyes were removed...and it's not because of the olives, because they like olives. They just have overactive imaginations!


Above: I used a cookie cutter for the pumpkin shape and then carved the face with a sharp knife.


Above: Here are the shells without their eyeballs. They looked cuter before the cheese was melted...but they tasted better with melted cheese...so, you make your call on whether to melt the cheese or not!


Above: I placed the majority of the shells in a bed of bottled red salsa and a few in a bed of bottled green salsa (because my husband prefers that kind). I created my own recipe for this (found below), but you could simply use your favorite stuffed shell recipe and add the sliced cheese and green olives for the teeth and eyes.


Above: They just have so much personality!
 

Taco Stuffed Monster Shells

Ingredients:

1/2 box jumbo baking pasta shells (22-24 shells)
1 pound ground beef
1 packet taco seasoning
1 cup shredded cheese (cheddar or Mexican blend)
1 cup sour cream
1 can (7.5 oz) sliced black olives
1 square piece of cornbread, crumbled (about 1 cup cornbread crumbs), optional
2 cups salsa (red, green, or a combination)
Cheese slices (Cheddar, Pepper Jack, etc.)
Green olives with pimentos
Shredded lettuce, sour cream, additional salsa, and cornbread for serving, optional

Directions:

Prepare pasta shells according to package directions. Drain and cool slightly.

Preheat oven to 400 degrees F.

Meanwhile, place large skillet over medium-high heat and brown ground beef until no longer pink. Add taco seasoning and stir. Add shredded cheese and stir until combined. Turn heat down to low and stir in sour cream and olives. If using cornbread, crumble one piece (to equal about 1 cup of cornbread crumbs) and stir into mixture. Heat through.

Pour salsa into a 9x13-inch baking dish. Spread evenly to coat bottom. Stuff cooled pasta shells with meat mixture and place in baking dish. Place baking dish in oven for 10 minutes.

Cut cheese slices to look like teeth. To do so, I cut each cheese slice in half, and each half into thirds. I then used a knife to cut a jagged line in the middle of each third.

Remove baking dish and carefully place cheese teeth onto each shell. Return to oven and bake for another 5-10 minutes until the cheese is melted.

Remove shells from oven and using toothpicks or thinly sliced carrot sticks, poke two holes into each shell. Poke the toothpicks or thinly sliced carrot sticks into the shells half-way. Poke two green olives onto each toothpick or thinly sliced carrot stick to resemble eyes.

Serve with shredded lettuce, sour cream, salsa, and cornbread, if you like.

Notes: I was inspired by an old cookbook of my mom's...but I didn't have all of the ingredients on hand to follow that recipe, so I decided to simply wing it and create my own recipe. I threw in the crumbled cornbread simply because I had it on hand and I wanted to bulk up the meat mixture a little bit. It was a great addition, but it still tasted great without the cornbread (I was tasting as I went since I was pretty much creating this as I went).

This would go great with cornbread, however, so if you wanted, you could bake some cornbread to serve alongside this dish beforehand and cut out one piece to crumble into the beef mixture. Here is the cornbread recipe I always use.


Above: They kind of remind me of Muppets...and I have always been a huge fan of the Muppets, so that is fine by me!


Above: Donut vampires. A friend of mine posted a picture of these on Facebook and I just had to try them! I believe they originally were found on Pinterest. You can find the picture here. Here is a recipe for pumpkin spice vampire donuts, made from scratch. I didn't make my donuts, however, I simply bought them. The donuts I bought weren't as uniform in shape as the donuts that the original poster used, but who cares? I think it gives each donut its own little personality. Simply place a pair of plastic vampire teeth into the donut hole and place two chocolate chips (pointy side down into the donut) into the donut for eyes. Voila! Breakfast is served!


Above: See what I mean about the shape of each donut giving it its own personality?


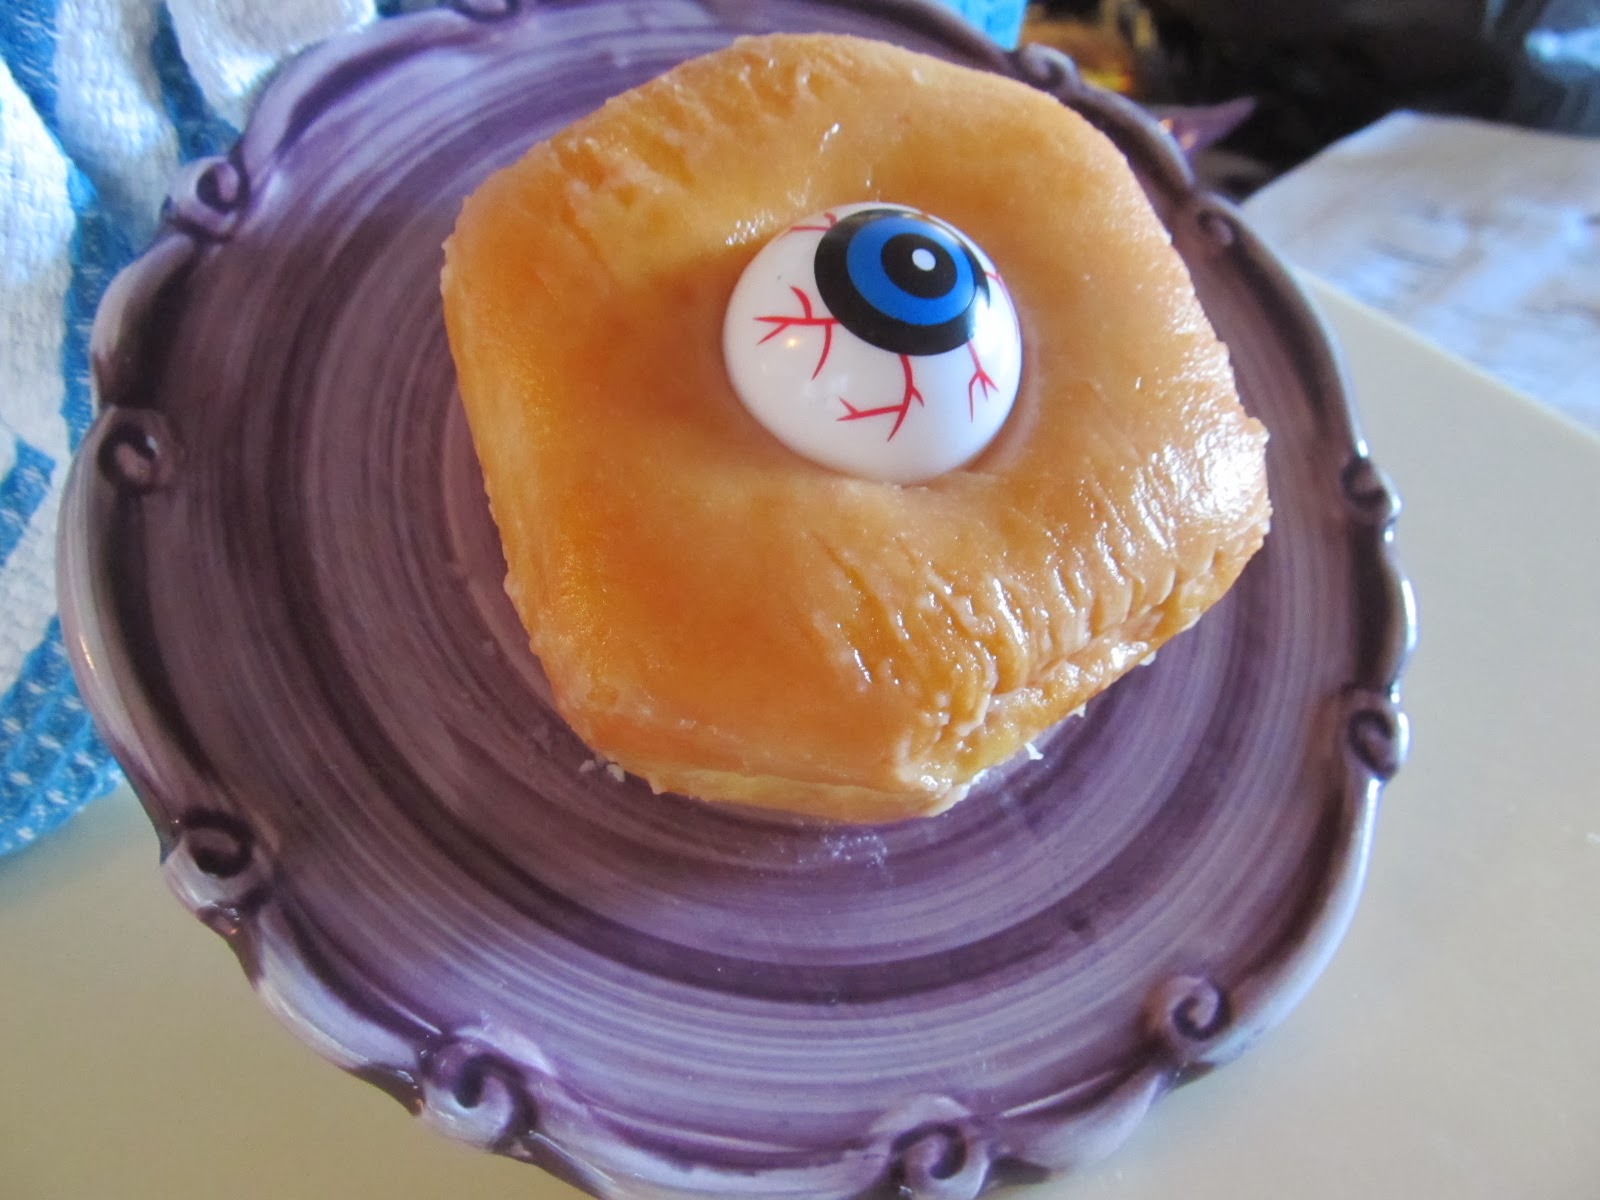
Above: Then it dawned on me that a donut hole was just perfect for a single plastic eyeball to make a little cyclops or alien donut. So since I had some on hand, I decided to try it out!


Above: I see you!


Above: Some people's eyes are too big for their stomach.


Above: Cute and scary! Besides, how fun to combine a party favor with a treat.


Above: We tried to find some purple make-up for my son's costume, but couldn't find any. So, I found a recipe online and we tried it. It worked great...except my son freaked out mid-way through the application and decided that he did not want to wear purple face paint after all. Here is the recipe I used.


Above: I made this dragon cake for a family get together where we were celebrating my nephew's birthday and I was assigned to bring the cake for dessert. Since it was a birthday for a little boy turning 6, I figured that it should be a fun cake. I have a gem mold for hard candy and I used this recipe. For the rest, I used Rolos for the dragon's gold, a plastic dragon toy from the dollar store, and a package of cake mix and a can of chocolate frosting.


Above: These pancake spiders and spider webs took a little bit of practice, but once I got the hang of it, they were pretty easy. Here are the instructions.Use your favorite pancake batter. It is a little easier with a thinner batter though, so if it is a thick batter, you might want to add a little extra water or milk.


Above: Here are some easy cake mix cookies. The chocolate ones were made using Devil's Food cake mix. The orange ones were made using a white cake mix, white chocolate chips, and orange food coloring. You can find the recipe for cake mix cookies here.

To end, I am going to share some pictures of our pumpkins that we made this year. Enjoy! Oh, and Happy Halloween!


Above: Glitter pumpkins. I have been making these for years. I originally found the idea on the Martha Stewart website. You can find the instructions here.


Above: I saw this in a magazine years ago. I just love the look of these pumpkins. They just look like little goblins to me. You can find the instructions here.


Above: Undead/Zombie Pumpkins. These were so quick and easy to make! I just love the look of them. They are so fun! You can find the instructions here


Above: Vampire Pumpkin. You can find the idea here. Next year, I am going to try this with mini white pumpkins. This is with a white squash.


Above: My happy pumpkin family!
Happy Halloween everyone! I hope you had a great holiday!