Thursday, March 17, 2011

No Longer Chilly (Chili) Outside


A few months ago I ran across an article with lots of chili recipes that looked pretty tasty. Unfortunately, it never seemed the right time to try them out. And unlike soup, you really can't have chili when it's not cold. I mean, can you?

Then it snowed last week while I was planning my menu. A lot. Perfect. No better time to try out a new chili recipe with 4 inches of fresh snow on the ground. Or even two or three! However, by the time the destined night to have my 'chili bar' rolled around, it was almost 70 degrees outside. Gotta love Utah weather!

It just didn't have the same feel, you know. Nevertheless, I found three very good, very different recipes to share with you.

This first recipe was the most mild. I left the onions out (nod to Emily). Also, I forgot and bought boneless meat so I skipped the pulling-it-off-of-the-bone step. However, I think it would be even more flavorful cooking it on the bone first. Nothing beats the taste of slow cooked chicken on the bone. The recipe is from BettyCrocker.com


Slow Cooker White Chicken Chili

Ingredients:

6 skinless chicken thighs (1 1/2 lb)
1 large onion, chopped (1 cup)
2 cloves garlic, finely chopped
1 3/4 cups Progresso chicken broth
1 teaspoon ground cumin
1 teaspoon dried oregano leaves
1/2 teaspoon salt
1/4 teaspoon red pepper sauce (may be increased to 1/2 t. for more kick)
2 cans (15 -16 oz. each) great northern beans, drained, rinsed
1 can (11 oz.) Green giant Niblest white shoepeg corn, drained
3 tablespoons lime juice
2 tablespoons chopped fresh cilantro

Directions:

Remove excess fat from chicken. In 3 1/2 to 4 qt slow cooker, mix onion, garlic, broth, cumin, orgeano, salt and pepper sauce. Add chicken

Cover; cook on low heat setting 4 to 5 hours.

Remove chicken from slow cooker. Use 2 forks to remove bones and shred chicken into pieces. Discard bones; return chicken to slow cooker. Stir in beans, corn, lime juice and cilantro. Cover; cook on Low heat setting 15 to 20 minutes or until beans and corn are hot.

Makes 8 servings


This next one was really flavorful and more robust. I couldn't find smoked chorizo sausage so mine didn't match the picture on the bettycrocker.com website. I just bought regular chorizo and it was one of the strangest cooking experiences I've had. The sausage instantly lost all of it's shaped and turned into soup. Nevertheless, it turned out well. I would love to hunt down the smoked chorizo and I think it would be even better. Oh, and I didn't use the wine. Although I have heard that for a good wine flavor to use 1/2 c. dark grape juice and 1/2 c. rice vinegar. I've done that before in other recipes and it works well.

Hot and Spicy Chorizo Chili

Ingredients:

1 can. (28 oz) Muir Glen organic whole peeled tomatoes, undrained
3 chipotle chiles in adobo sauce (from 7 oz. can)
2 lb. smoked chorizo sausage, sliced
3 large onions, chopped (3 cups..I only used about 1/2 this)
3 tablespoons finely chopped garlic
2 tablespoons paprika
1 tablespoon ground cumin
1 tablespoon dried oregano leaves
2 teaspoons kosher salt
1/2 to 1 teaspoon ground red pepper (cayenne)
1/2 teaspoon ground coriander
1 3/4 c. Progresso chicken broth
1 can 12 oz. lemon-lime cabonated beverage
1/2 c. dry red wine or additional chicken broth
1/2 c. water
3 cans (15 oz each) Progresso black beans, drained, rinsed
1 oz. unsweetened baking chocolate, chopped
1/4 cup fresh lime juice
1/4 cup chopped fresh cilantro
1 container (8 oz.) sour cream

Directions:

In food processor or blender, place tomatoes and chiles. Cover; process, using quick on-and-off motions, until blended. Set aside.

Heat 5 quart Dutch oven over medium-high heat. Add chorizo and onions; cook, stirring occasionally, until onions are softened. Add garlic, paprika, cumin, oregano, salt, red pepper and coriander; cook and stir 1 minute.

Stir in tomato mixture, broth, carbonated beverage, wine, water, beans and chocolate. Heat to boiling; reduce heat. Simmer uncovered 1 hour.

Stir in lime juice and cilantro. Serve with sour cream.

Note: You can use one can of black beans and one can of kidney if you prefer the difference in textures and color.

Makes 10 servings ( 1 1/2 c. each)


This next one was almost more of a soup but I liked it a lot. I would definitely increase the buffalo sauce as it was a little tame for me. Bettycrocker.com strikes again.


Slow Cooker Buffalo Chicken Chili

Ingredients:

2 1/2 lb boneless skinless chicken thighs, cut into 1-inch pieces
1 large onion, chopped (about 1 cup)
2 medium stalks celery, sliced (about 1 cup)
2 medium carrots, chopped (about 1 cup)
1 can (28 oz. ) Muir glen organic diced tomatoes, undrained
1 can (15 oz.) Progresso black beans, drained, rinsed
1 cup Progresso chicken broth
2 teaspoons chili powder
1/2 teaspoon salt
1/4 cup buffalo wing sauce (from 12-oz jar)
Crumbled bleu cheese, if desired

Directions:

Spray 5 to 6 quart slow cooker with cooking spray. In cooker, mix all ingredients except buffalo wing sauce and cheese.

Cover; cook on Low heat setting 8 to 10 hours.

Stir in buffalo wing sauce. Serve sprinkled with blue cheese.

Makes 6 servings (1 1/2 c. each)


Finally, the night I made the Buffalo Chicken Chili I made corn bread from a mix. But the night of the two chili choice; I made these biscuits.. They were a big hit. But for some reason they really went soggy the next day. Not quite sure why. I stored them in a ziploc bag and they might be better in a brown bag. This also came from bettycrocker.com The recipe could easily be halved. (Note made by another Foodie Family contributor: these biscuits were included last year on the blog. In that blog post, the big batch and the regular batch recipes were included if you don't want to have 40-48 biscuits on your hands! You can view the regular recipe here.)


Big Batch Cheese-Garlic Biscuits

Ingredients:

8 cups Original Bisquick mix
2 2/3 c. milk (I used some fat free 1/2 and 1/2 because I like the texture it gives biscuits)
2 cups shredded Cheddar cheese (8 oz.)
1 cup butter or margarine, melted
1 teaspoon garlic powder

Directions:

Heat oven to 450. In 3 1/2 to 4 quart bowl, stir Bisquick mix, milk and cheese until soft dough forms; beat 30 seconds.

On ungreased cooked cookie sheets, drop dough by 40 to 48 spoonfuls about 2 inches apart.

Bake 8 to 10 minutes or until golden brown. In small bowl, mix butter and garlic powder; brush on warm biscuits before removing from cookie sheets. Serve warm.

40-48 biscuits


Friday, March 11, 2011

Farewell to Soup Season


For some people, soup knows no season. I know that my sister can eat soup year-round. However, for me, I really only crave soup during the fall and winter. There's just something about September and that first crisp fall feeling in the air that puts me in the mood for soup. I feel the same way about sweaters. The smell and feel of the air is different in the fall and you just want to put on a pretty, comfy sweater.

However, the same holds true for spring. You finally start to hear the birds chirping in the mornings again and it's warm enough for either a light jacket or no jacket at all and you are sick of wearing sweaters! All you want to do is pack up the sweaters and break out the short-sleeved shirts and flip-flops. Once spring hits, I really don't want a bowl of hot soup again for at least six months!

So, now is the time to try out a few more soup recipes before it gets too hot for them. We might still have a few snow storms left in the season for you to exercise your soup skills!

The first two soup recipes are ones that I made myself. The last two soup recipes are ones that people brought in to me after my baby boy was born.

The first recipe is for winter squash soup. However, I had some extra sweet potatoes (yams) that I wanted to use up and I used the sweet potatoes in place of the winter squash. It was a great substitution and it tasted delicious!

The second recipe is for split pea soup. I am a big fan of split pea soup and this one was very simple and very traditional/classic. The funny story about this soup recipe is that I didn't actually get to eat it until about four days after I made it. You see, it is a slow cooker recipe, and I made it in the morning. While I was making it, I suspected that I was going into labor...a few hours later, I was on my way to the hospital and my husband was giving my in-laws the final preparation instructions so that they could enjoy it for dinner that night! While they were enjoying the soup I had prepared that morning, I was welcoming my newest son into the world!

The third recipe is for corn chowder. My Mom brought this in to me for dinner a few days after I got home from the hospital. It is so easy to make! In fact, I believe that my Mom sent this recipe to my sister (who had her baby exactly a week before me--both of us had our babies on our exact due dates!) and her mother-in-law prepared it for her.

The fourth and final recipe is for a cheesy vegetable soup. My sweet brother-in-law and sister-in-law brought this to us to give me a night off from cooking. It is super kid friendly. I knew it was a hit when my first son ate it two days in a row (that just doesn't happen--except with hot dogs!).

Oh, and don't forget the crackers! Each of these soup recipes are nice and creamy...perfect when combined with some of your favorite crackers.

I hope you get a chance to enjoy these before the soup season passes you by.


Pureed Squash Soup aka Katie Brown's Winter Squash Soup

Ingredients:

6 tablespoons butter
3 cloves garlic, chopped
1 medium onion, chopped
1 tablespoon chopped fresh thyme, or 1 teaspoon dried thyme
1 Russet potato, peeled and cut into 1 inch cubes
2 (14 1/2 ounce) cans low sodium chicken stock
2 (12 ounce) packages frozen winter squash, thawed (or 3-4 large sweet potatoes, peeled, and cut into 1 inch cubes)
1 cup heavy cream
1/2 teaspoon nutmeg
Salt

Directions:

Melt 4 tablespoons of butter in a large pot over medium heat. Add the garlic, onion, and thyme and cook until onion is translucent, about 3 or 4 minutes.

Add the potato and the chicken stock and bring to a simmer. Continue simmering until potato is cooked through.

Add the frozen winter squash and cook until heated through.

Transfer soup in batches to a blender and puree until smooth. Add back to the pot and bring to a simmer to heat through. Add the heavy cream and nutmeg, and season with salt to taste.

Serves 8.

Source: I found this recipe on a PBS show called The Katie Brown Workshop. I found the printed recipe on her website.

Notes: I got the idea for substituting sweet potatoes for the winter squash from another recipe on the Katie Brown website. It was a recipe for butternut squash soup that said that sweet potatoes could be substituted. I liked this idea because I had a hard time finding frozen winter squash at my grocery store. I added the diced sweet potatoes at the same time as the Russet potatoes and cooked them until they were tender. I then proceeded with the recipe as written. I used whole milk in place of the heavy cream. In order to get the texture, consistency, and thickness that you desire, I would suggest adding more or less milk to the soup. My soup turned out quite thick, so I added more milk than the recipe called for.


Slow Cooker Yellow Split Pea Soup with Canadian Bacon

Makes 8 servings

Ingredients:

8 cups water
1 package (1 pound) dried yellow split peas, sorted and rinsed (you can also use green split peas, or a mixture of yellow and green split peas)
3 medium carrots, diced (1 1/2 cups)
1 medium onion, chopped (1/2 cup)
1 medium stalk celery, chopped (1/2 cup)
1 cup diced Canadian-style bacon (5 ounces)
1 teaspoon salt
1 teaspoon dried thyme leaves
1/4 teaspoon dried rosemary leaves, crumbled
1/4 teaspoon pepper

Directions:

Mix all ingredients in a slow cooker.

Cover and cook on low heat setting for 8-10 hours or until peas and vegetables are tender.

Place 2 cups of the soup in blender or food processor. Cover and blend on medium speed until smooth; pour into bowl. Repeat with 2 more cups soup. Stir all blended soup into soup in slow cooker.

Nutrition information: 1 serving equals 160 calories, 2 g fat, 10 mg cholesterol, 530 mg sodium, 33 g carbohydrates, 13 g fiber, 16 g protein.

Source: Betty Crocker website.

Notes: My in-laws opted to puree the entire batch of soup, rather than just half of it as the recipe specifies. It was super tasty. I would suggest that you puree as much or as little of the soup as you want--depending on how chunky or creamy you want it to be.


Slow Cooked Corn Chowder


Ingredients:

2 1/2 cup 2% milk
1 can (10 3/4 ounces) cream of mushroom soup
1 can (14 3/4 ounces) cream-style corn
1 3/4 cup frozen corn
1 cup frozen shredded hash brown potatoes
1 cup cubed fully cooked ham
1 large onion, chopped
2 teaspoons dried parsley flakes
2 tablespoons butter
Salt and Pepper, to taste

Directions:

Combine all ingredients in a slow cooker. Cover and cook on low for 6 hours.

Yields: 8 servings.

Source: I'm not sure where my Mom found this recipe.


Kristin's Cheesy Vegetable Soup (two ways)

Original Recipe

Ingredients:

14 cups water
1/2 cup chicken boullion granuals
1 1/2 cups carrots, sliced
1/2 cup celery, sliced
1/4 cup minced onion
3 potatoes, peeled and cut
1 can corn, drained
1 1/2 cups butter
1 1/2 cups flour
1 jar Cheez Whiz

Directions:

Boil water and chicken boullion until dissolved. Add carrots, celery, and onion. Cook about 10 minutes, then add potatoes. Cook another 10 minutes, or until potatoes are tender.

In a saucepan, melt butter, add flour, and whisk until smooth. Add butter/flour mixture to broth and vegetables while whisking so that the soup doesn't become lumpy. Add corn and cheese after the soup is the texture that you want.

Kristin's Version

7-8 cups water
1/4 cup chicken boullion granules
8-10 baby red potatoes, cut into 1 inch cubes
1 cup diced carrots
1/8 cup minced onion
frozen corn
frozen peas
3/4 cup butter
3/4 cup flour
1 small jar of Cheez Whiz

Directions:

Boil water and chicken boullion until dissolved. Add potatoes, carrots, and minced onion. Boil until potatoes and carrots are tender.

In a saucepan, melt butter and add flour, whisk until smooth. Add butter/flour mixture to broth and vegetables while whisking so that the soup doesn't get lumpy. Add Cheez Whiz and stir until smooth. Add corn and peas.

Source: My sister-in-law sent me this recipe. She said that you can basically make the soup any way you want by adding your favorite veggies. You could add asparagus, cauliflower, broccoli, etc. It really is super kid friendly and very flavorful.

Monday, February 28, 2011

Hospital Food

Well, both my sister and I did it! We had our babies. And both of us had our babies on our actual due dates (no inductions...we went into labor on our own)! What are the chances of that, eh?

Oh, and I have to say that labor is A LOT easier the second time around! Thank goodness!

There are a lot of things that I don't like about staying in a hospital. One of those things is the food. I didn't have anything bad, mind you, but it's definitely not great food. But I will say this, hospitals have the best ice for chewing in the whole wide world. They also have a sweet little drink that I like to call a "Hospital Cocktail."

The nurses gave me a "Hospital Cocktail" after I finished my labor to help get my blood sugar level back up. It is a yummy mix of fruit juice and lemon-lime soda. I tried to guess the ingredients on my own (and almost got it right), but I eventually just asked one of the nurses what the drink consisted of.

Now, I don't want you to have to go to the hospital to have this yummy drink, so I'll share it with you right here!

Oh, and as a bonus, I'm sharing a recipe for chocolate bran muffins. Any of you out there who have ever been pregnant know that (and I apologize if this is too much information) you get a little backed up after labor and anything to help you get regular again is a welcome thing. These bran muffins are just the ticket. Honestly, they work better than laxatives. Again, sorry if it's TMI!


Hospital Cocktail

Ingredients:

Sprite, 7-Up, or other lemon-lime flavored soda
Cran-Raspberry Juice
Orange Juice
Apple Juice

Directions:

Mix equal parts of all ingredients to make desired quantity. Serve over crushed ice.


Chocolate Bran Muffins

Ingredients:

3 cups of All Bran cereal
2 1/2 cup water
1/2 tsp baking powder
1 tsp vanilla (or other flavoring)
1 pkg Krusteaz fat free brownie mix

Directions:

Soak All Bran in water for 10 minutes (until most, but not all of the water is absorbed). Stir in remaining ingredients. Bake at 350 degrees for 22-25 minutes.

Makes 24 muffins. 1 WW point each.

Source: I got this recipe from my mom. I think she got it at a WW meeting.

Notes: You can experiment with the flavorings/extracts. Almond, coconut, orange, etc. are all fun. Also, I used Fiber One cereal because I couldn't find All Bran. It worked pretty well, but it required a little more water. I would say to add about 1/2 cup more water (but not more than that, otherwise they will be too gooey). Also, I couldn't find the Krusteaz fat free brownie mix at my grocery store, so I used a Betty Crocker Low Fat brownie mix instead. It worked great.


Wednesday, February 23, 2011

Aloha!

Sometimes you just want to make something quick and easy. I stumbled upon this recipe from http://www.delish.com/ while surfing the web and the name intrigued me. This was an instant hit! The mix of flavors was incredibly wonderful and unusual and it couldn't be quicker or easier. The vanilla gave it a sweetness that mixed well with the salty ham and Swiss. Add some chips and canned baked beans and this would make a satisfying meal after a long work day or shopping-filled Saturday.


Hawaii Five-Oh

Ingredients:

1/4 cup brown sugar
1/2 teaspoon cinnamon
1/4 teaspoon chili powder
3/4 teaspoon vanilla extract
1 peeled and cored pineapple (found in the refrigerated produce section, cut into 5 thick slices)
5 onion rolls
5 slices Swiss cheese (enough to cover the bottom half of each bun)
5 slices thick ham (or 10 thin ones)
1 c. spinach leaves (which I forgot!)
Dijon mustard (I used honey mustard for my honey lovin' husband)

Directions:

Combine the brown sugar, cinnamon, chili powder, and vanilla extract in the plastic container that the pineapple came in. Put the sliced pineapple back in teh container, pop on the lid, and swirl it around to coat the pineapple in the seasonings. Let the flavors soak while you preheat the oven to 425 degrees.

Arrange the pineapple slices on the greased baking sheet. Roast them for 10-12 minutes on each side, using tongs to flip them, until golden brown. During the lst 5 minutes of roasting, heat up the buns in the oven. Put the ham and Swiss on the bottom halves of the buns so the meat heats up and the cheese melts. Then turn off the oven and use oven mitts to remove the pineapple and the buns.

Build the sandwiches: Top each ham-and-cheese bottom bun with a slice of pineapple, then a handful of spinach. Spread the mustard on the top half of each bun. Stack. Munch.

Notes: Okay, these directions are written directly from the recipe and they sound a little Mickey Mouse to me. Like you don't know to use mitts to take them from the oven, but whatever. And, since one daughter has had her baby last week and the other is due any day, you will have to rely on my less than great pictures taken from my cell phone because I can't work a digital camera. But trust me, the picture does not do it justice. I think this will become a new favorite for a quick and easy dinner. Oh, I said that already, didn't it? Well, trust me. :)

Monday, February 21, 2011

Alright...Go Ahead and Play With Your Food


A few days ago, I posted some recipes for non-edible items that kids could play with. But if you want to have your cake and eat it too (or in other words--play with your recipes and eat them too), then these recipes will be right up your alley.

The roses shown above are made out of Tootsie Rolls, and strawberry and lemon Starburst. You can also make chocolate roses by making chocolate plastic. I made some chocolate roses years ago for a Young Women's activity when I was about 15 (using a recipe almost identical to the ones I am sharing here). It was a lot of fun. If you don't want to just make them and eat them for the fun of it, you can make them and use them to decorate cupcakes/cakes.

I recently found a recipe for edible finger paint. I still haven't been daring enough (in other words, I haven't had the energy to clean up the aftermath) to let my 2 year old son do finger painting yet...but that time is not too far off.

I'm not including any recipes for marzipan, but it is a perfect food for kids to play with. In addition to tasting yummy, marzipan can be molded into a number of fun shapes. You can buy pre-made marzipan in the baking aisle at the grocery store, or you can find a number of basic marzipan recipes online. I take the easy route and just buy the pre-made marzipan whenever I use it. You can then "paint" the marzipan with food coloring--or even the homemade finger paint recipe.

While I haven't included any marzipan recipes, I have included a few edible play dough options here.

I'm also sharing some kid-friendly ice cream recipes. Individual portions of ice cream can easily be made in either a can or a plastic bag. They are a lot of fun for kids to make and they are yummy to boot! When I was a kid, we would make ice cream in a can frequently during the summer. My primary made the ice cream in plastic bags just this past summer for an activity. The kids thought it was so cool that they could make ice cream by themselves. I was surprised at how many of the kids wanted the recipe for themselves so that they could make it any time they wanted. I guess requesting recipes didn't seem to be something to me that was common for kids to do! But I can't blame them. If I didn't have this recipe, I would want it too!

In the fall, we made homemade butter using only mason jars and cream. Again, the kids had a blast and were surprised that they could make something like that themselves.

So, go ahead! Have fun with your food before you eat it!

Chocolate Roses

Ingredients:

One-half pound of white, milk, or dark chocolate plastic (recipe below)

Directions:

Begin by kneading your chocolate plastic until it is smooth and supple. If you are using white chocolate plastic, knead it in powdered sugar, and if you are using milk or dark chocolate plastic, knead it in unsweetened cocoa powder. If the plastic is too hard to knead, microwave it in five-second intervals just until it becomes pliable. Do not microwave it too long, or it will be too soft to work with.

Dust your work surface and a rolling pin with powdered sugar or cocoa powder, and roll the chocolate plastic out into a very thin layer, less than 1/8" thick. If you are working with a large amount of chocolate plastic, you might want to divide it in half and roll it out in batches.

Use a small round cutter to cut circles from the plastic. For one full-sized rose, you will need nine circles, and for rosebuds, you will need 4-5. The size of the circle cutter determines the size of your finished rose. A 1.5" cutter will yield a full-sized rose that is approximately 3" wide.

Begin by forming the center of your rose: take one of the cut circles and roll it into a cylinder. Leave a small hole at the top of the cylinder, and a larger hole at the bottom.

Take another circle, and use your fingers to flatten one end of it until it is paper-thin. This will be the top of the petal, and it helps give the rose a more delicate look. Wrap your petal around the cylinder, making the top of the petal level with the top of the cylinder, pressing it at the bottom to adhere the chocolate plastic.

Thin out the edge of another circle to add a second petal to your blossoming rose. The trick to getting a lifelike rose is to slip the second petal underneath the edge of the first one. Add a third petal whose edge starts just under the second one to complete the first layer of petals. If you want to make a rosebud, your flower is now complete. To make a full rose, continue to the next step.

Use the remaining five petals to add a second layer to the rose, thinning the top edges as before, and sliding the edge of each new petal under the previous one as with the first layer. Curl the outer petals back slightly to make your rose bloom. Pinch off any extra plastic at the base of the flower, and re-roll it with the plastic scraps to create more roses.

Allow the roses to sit at room temperature and dry for 24 hours. Once set, they can be stored in an airtight container indefinitely.

Source: About.com, recipe by Elizabeth LaBau

Notes: Again, I love this gal's recipes. She's very in-depth in the way she writes her recipes out though. Read through the entire recipe so that you know what she's explaining and then just have fun sculpting and molding your roses. It's not as hard as the recipe makes it look at first glance.

Chocolate Plastic

This recipe can also be made with milk or dark chocolate. The procedure for milk chocolate is the same, but if you are using dark chocolate, increase the amount of corn syrup to 2/3 cup. Note that you cannot achieve the same coloring effects when using milk or dark chocolate, and that you should roll out milk or dark chocolate plastic in cocoa powder instead of powdered sugar.

Ingredients:

1 lb. white chocolate (or milk or dark chocolate can be used as noted above)
1/2 cup light corn syrup
Food coloring (optional)

Directions:

Chop the chocolate and place it in a large microwave-safe bowl.

Microwave the chocolate until melted, stirring after ever 45 seconds to avoid overheating the chocolate.

Remove the melted chocolate from the microwave, and stir until smooth. Add the corn syrup and stir until the mixture is thoroughly combined.

Spoon the chocolate onto a large sheet of plastic wrap, and wrap it securely. Allow the chocolate to cool and solidify at room temperature, for at least 6 hours or overnight.

Soften the hardened chocolate by kneading it with glove-covered hands, or microwave it in short 10-second intervals until it becomes soft enough to work with. Continue to knead until it is smooth and pliable. Do not worry if your chooclate plastic has lumps--these can be worked out through the kneading process. Dust your hands with powdered sugar if the chocolate begins to stick. At this point, you can divide it and knead different food colorings into the chocolate, if desired. Be sure to change your gloves between batches to avoid muddying the colors.

Dust your work surface with a thin layer of powdered sugar. Roll out the chocolate plastic until it is very thin (about 1/8 inch). Alternately, you can use a pasta roller to make thin ribbons or strips.

Now you're ready to decorate with your chocolate plastic! You can cut out shapes or letters with cookie cutters or a knife, or form the chocolate plastic into ribbons and bows, or use large sheets of plastic to wrap entire cakes or petit fours.

Gather remaining scraps of chocolate plastic and wrap tightly. store in a cool cupboard and use within 2-3 weeks. To re-use, repeat the softening instructions in step 5.

Source: About.com, recipe by Elizabeth LaBau

Plastic Chocolate

Ingredients:

1 pound semisweet chocolate, chopped
3/4 cup light corn syrup

Directions:

Melt chocolate in a large metal bowl over a pan of simmering water. Stir occasionally until smooth. Remove from heat, and stir in the corn syrup. The mixture will become sticky, but keep stirring until very well blended.

Spoon onto a piece of plastic wrap, and wrap tightly. Let stand at room temperature until firm before using. Overnight is best. Use unsweetened cocoa powder on work surfaces to prevent sticking.

Source: Allrecipes.com, submitted by HBIC.

Notes: I included this version of the recipe so that you can see the difference between the way Elizabeth LaBau writes out her recipes and the very much simplified written version. This is basically the same recipe, but it is shortened quite a bit.

Tootsie Roll or Starburst Roses

Ingredients:

5-6 small Tootsie Rolls or Starburst candies
Shortening, optional

Directions:

Unwrap 5-6 Tootsie Rolls or Starburst candies (if using Starburst, use the same color) and put them in a microwave-safe bowl. Microwave the candy for 10 seconds. Check to see if they are soft and pliable in your hands. If not, microwave in 5-10 second increments until they are soft, but not too hot, or completely melted.

Grease your hands slightly with a little shortening to prevent stickiness. Take a small clump, about an inch around in size, from your soft Tootsie Rolls/Starburst. Make a sort of cone shape, with a larger flat bottom and a slightly tapered pointed top.

Take a small piece of Tootsie Roll/Starburst and flatten it between your fingers. Make it sort of rectangular or triangle shaped, and long enough to wrap around the cone/base of your rose. Wrap it around the cone.

Take a slightly smaller piece of Tootsie Roll/Starburst and flatten it between your fingers. Make this piece petal-shaped; slightly rounded on top. Place it against the side of your base, keeping the petal fairly closed, meaning don't let the top curl out. Make two more petal shaped pieces. Take the second piece and slightly overlapping the first, put it on your base. Follow with the third piece. The three pieces should go all the way around the rose base.

Make five more petals. Apply them as you did the inner petals, slightly overlapping each one. when five petals are attached, they should go all the way around the rose. Using your fingers, gently bend the tops of the petals outward, so the rose is more open.

Tips: Fruit-flavored Tootsie Rolls can also be used for more variety in color. Keep the petals thin for a more realistic appearance, but not too thin, or they may sag downwards.

Source: ehow.com (if you would like to see some step-by-step pictures, click here.)

Edible Peanut Butter Play Dough

Ingredients:

12 oz peanut butter
6 tbsp honey
1/2 cup (to 1 1/2 cups) nonfat dry milk powder

Directions:

Combine all ingredients. Add more dry milk, if needed, to keep it from being too sticky.

Source: About.com, recipe by Barbara Whiting

Edible Play Dough

Ingredients:

3/4 cup creamy or chunky peanut butter
3/4 cup nonfat dry milk powder
3/4 cup old-fashioned oats
1-2 tbsp honey

Directions:

In a bowl, combine peanut butter, milk powder, and oats.

Add enough honey to form a molding consistency. Kids can use dough to form fun shapes and animals, then eat them.

Store dough in an airtight container in the refrigerator.

Yield: 1 1/3 cups. 10 servings. 2 tablespoons per serving.

Source: Taste of Home Test Kitchens.

Peanut Butter Play Dough

Ingredients:

1 cup creamy peanut butter
2 cups powdered sugar
1/2 cup honey

Directions:

Combine all ingredients and mix well. Store in an air-tight container.

Source: OurBestBites.com

Homemade Finger Paint

Ingredients:

3 tbsp sugar
1/2 cup cornstarch
2 cups cold water
food coloring

Directions:

Mix sugar and cornstarch together in a saucepan. Add cold water and combine with a whisk. Cook on medium heat until the mixture thickens to a thin pudding consistency. I recommend stopping the cooking process a little before it's the consistency you'd like because it thickens upon standing. Once removed from heat, cool and then separate into bowls and color as desired.

Spread out big sheets of freezer/butcher paper or newsprint and let the kiddos go to town.

Source: OurBestBites.com

Soup Can Ice Cream

Ingredients:

Clean soup can
Medium size plastic bowl
Ice cubes
1/2 cup rock salt
1/2 cup milk
1 tbsp sugar
1/2 tsp vanilla flavoring

Directions:

Place can in bowl and surround it with ice cubes. Sprinkle rock salt on ice cubes only. Pour milk into can. Stir in sugar and vanilla. Continue stirring for 15-20 minutes or until mixture thickens into ice cream. Then eat!

You may add diced fruit, crushed cookies, or candy, nuts, chocolate chips, etc. for additional flavors.

Source: This is a recipe that we've had since we were kids. I'm not sure where my Mom got it from.

Ice Cream in a Bag

Ingredients:

1/2 cup milk
1 tablespoon sugar
1/4 teaspoon vanilla
6 tablespoons rock salt
1 pint-size plastic baggie (1 per child)
1 gallon-size plastic baggie (1 per child)
Spoons
Ice (large bag)

Directions:

Have the kids line up as you put vanilla, milk, and sugar into their pint-size bags. Then close those bags and seal them shut with duct tape. In the gallon-size bags, put about 2 cups of ice (fill the bag half way) and add the rock salt on top of it. The pint-size bag goes on top of the ice and then you can close the big bag. Shake the bags for 5-20 minutes, or until the milk mixture reaches the consistency you would like.

This is best as an outside activity because you will almost always have leaks while you are shaking the bag.

Cut off the tops of the pint-size bags and the kids can eat right out of the bag, or cut off a bottom corner of the bag and squeeze the ice cream into a cup or bowl.

Source: I found this in a random online search and neglected to write down the source.

Notes: I doubled the recipe. I used quart-size and gallon-size bags, 1 cup of milk, 2 tbsp sugar, and 1/2 teaspoon of vanilla per child. The kids loved it!

Ice Cream in a Bag

Makes about 1 1/2 cups

Ingredients:

1 cup heavy cream
1/2 cup milk
1/3 cup sugar
1/4 teaspoon pure vanilla extract
2 1/2 pounds ice cubes
2 1/2 pounds coarse salt

Directions:

In a large bowl, whisk together heavy cream, milk, sugar, and vanilla until well combined. Pour mixture into a 1 quart resealable plastic bag. Squeeze out all the air and seal to close.

In another large bowl, mix together ice and salt. Fill a 1 gallon resealable plastic bag 1/3 full with ice mixture. Add bag with cream mixture and continue adding ice and salt mixture until bag is filled; you may not need to use all the ice and salt. Seal to close.

Shake the bag about 10 minutes until cream mixture is no longer liquid. Let cream mixture rest, covered with ice for another 5 minutes, or until firm. Serve immediately.

Source: Martha Stewart website. The recipe comes from Saul Griffith's "Howtoons: The Possibilities Are Endless!"


I just posted the recipe for snow ice cream last month, but I thought I would include it again here because it fits the topic of kid-friendly/fun recipes so well (much better than it fit in with the blog post it was featured in: "Summer Soups").

Snow ice cream is so easy to make...as long as you have the right supplies! You just have to have a nice, fresh, pollution-free snowfall! There's no specific recipe either, because it's all about the right consistency and flavoring the ice cream to your taste. But here's the gist of it:

Snow Ice Cream

Ingredients:

Freshly fallen snow
Milk, to taste
Sugar, to taste
Flavoring of choice, to taste (vanilla extract, almond extract, other favorite extract flavoring, Italian Soda Syrup flavor of choice, etc.)

Directions:

Mix snow, milk, sugar, and desired flavoring together until you reach your desired consistency and taste. Use less snow if you want more of a shake-like consistency. Use more snow if you want a thicker ice cream. It's as easy as that!

Source: My grandma used to make this for my Mom and her sisters when they were kids. Then, my mom made it for us when we were kids.

Notes: You know, snow ice cream is one of the best things about winter. It brings back so many childhood memories for me. It just tastes soooooo good. The basic way to make it is to use vanilla extract for a basic vanilla snow ice cream. But I've used Italian soda syrup and made hazelnut and white chocolate snow ice cream so far this winter and those were super tasty too. So, get creative and have fun. If you're craving snow ice cream during the summer, you can satisfy your craving if you own an ice shaver or ice shaving machine. You can also make a snow slushy/snow cone and skip the milk altogether. You can mix the snow with Italian soda syrup, snow cone syrup, or soda pop until you find a consistency you like. I tried this with some sugar-free raspberry Italian soda syrup and it was really yummy--and a lot lighter on the calories too!

Homemade Butter

Ingredients:

1 pint heavy cream
Airtight container (such as a mason jar)

Directions:

Fill airtight containers approximately half full with heavy cream. Securely cover containers and shake until thickened (anywhere from 10-30 minutes).

Source: Allrecipes.com, recipe submitted by DD123

Notes: Once the butter separates from the buttermilk, pour out the buttermilk and either serve immediately or store in an airtight container in the refrigerator. When ready to re-use, allow butter to come to room temperature prior to serving to allow for easier spreading.

Homemade Butter

Ingredients:

2 cups heavy cream
1/4 tsp salt

Directions:

Pour cream into a food processor or blender. Process for 10 minutes, or until the butter separates. Strain off the liquid. Season to taste with salt, if you like. Press butter into a small bowl with the back of a spoon to further remove liquid.

Source: Allrecipes.com, submitted by Brian Perspect

Notes: This is the lazier (but noisier) version to make homemade butter. It's not as much fun for kids and not as good of a workout. But if you don't mind the noise from the blender, it's a lot easier on your triceps!

Friday, February 18, 2011

Kids' Stuff: Recipes to Play With...Not to Eat!

When I was a kid, my Mom did a lot of fun things with us. She took us on "field trips" all over Utah during summer vacation and on Saturdays during the school year. She also did kids' crafts with us.

I had to make some salt dough for a Primary sharing time object lesson. Making the salt dough took me back to my childhood and my memories of some of these kids' crafts that we made. So, I thought it might be fun to share a few of them (as well as some new discoveries).

My son isn't quite old enough to appreciate (or avoid eating) these kid crafts yet...but it won't be too long before he is old enough. Kids grow so fast!

I'm sharing a few versions of salt/play dough. I'm also sharing a fun way to reuse crayon pieces by making your own crayons (I know that for me at least, the way my son uses his crayons, they don't stay in one piece for very long). I also found a fun recipe for homemade water colors. Oh, and we can't forget silly putty and bubbles! What would childhood be like without those?

Oh, and just a warning...none of these recipes are edible (I know I already mentioned that, but I'd rather mention it too many times and be better safe than sorry!).

Salt Dough

Ingredients:

2 cups all-purpose flour
1 cup salt
1 cup cold water

Directions:

In a large bowl, mix table salt and flour together. Gradually add 1/2 of water and mix to desired consistency. Knead the dough on a flat surface, adding more water as needed (up to 1 cup--but be careful not to make the dough too moist).

Once the dough is made, you can divide it up into small portions and color it with a few drops of food coloring--knead the dough until the food coloring is evenly incorporated. You can add a little more flour if the food coloring makes the dough too moist.

You can keep the dough in an airtight container (such as tupperware or ziplock bags) and store it in the refrigerator to use as play dough.

You can also form the dough into shapes and dry and bake them to preserve it. Or, you can roll it out with a rolling pin and use cookie cutters to cut out a variety of shapes and place the shapes on wax paper to dry. You can make hanging ornaments this way too...just make sure to pierce a hole through the dough with a toothpick while it is still moist.

Allow the shapes to dry for a day or two, turning them over periodically to speed up the drying process. After the shapes dry, you can use sandpaper to smooth any rough edges.

You can speed up the drying process by baking them. Bake the cut-out or sculpted dough in a 200 degree F oven until hard. Baking times will vary depending on your oven and the thickness of the dough. Make sure the dough is completely baked. You can cover the dough with aluminum foil if it starts to darken before completely baked through.

Source: I found this particular recipe (I added in a few of my tips and additions above) by doing a Google search on salt dough. I found this recipe on some family website (though now I can't remember the specific site). It was submitted by Chris Dunmire.

Notes: Not edible. Do not eat!

Rainbow Dough

Ingredients:

1 1/2 cups flour
1 cup salt
1/4 cup McCormick Cream of Tartar
2 cups water
2 tablespoons vegetable oil
McCormick Assorted Food Colors and Egg Dye or McCormick Assorted Neon Food Colors and Egg Dye
Wax Paper

Directions:

Mix flour, salt, and cream of tartar in medium saucepan. Add water and oil; mix well. Add 20 drops of desired food color.

Cook about 5 minutes on medium heat, stirring constantly until mixture holds together (have a grown-up do the cooking).

Remove from heat. Scrape dough onto wax paper to cool. Knead slightly until dough is smooth.

Store in airtight container. May be kept for 2-4 weeks.

Test Kitchen Tips: To avoid stained hands, wear latex gloves.

Add 2-3 teaspoons of McCormick flavored extract, such as vanilla, strawberry, or raspberry extract, for a yummy scent.

Do Not Eat.

Source: McCormick website.

Bisquick Bug Fun Dough

Ingredients:

1 1/4 cups Original Bisquick mix
1/4 cup salt
1 teaspoon cream of tartar
1 cup water
1 teaspoon food color

Directions:

Stir Bisquick, salt, and cream of tartar in 4 cup microwaveable measuring cup until mixed; set aside. Mix water and food color in liquid measuring cup.

Stir a small amount of colored water at a time into dry mixture until all water is added. Microwave uncovered on high for 1 minute. Scrape mixture from side of cup and stir.

Microwave uncovered 2-3 minutes longer, stirring every minute, until mixture almost forms a ball. Let dough stand uncovered about 3 minutes.

Remove dough from measuring cup, using spoon. Knead dough in your hands or on the counter about 1 minute or until smooth. (If dough is sticky, add 1-2 tablespoons Bisquick.) Cool about 15 minutes. Use dough to make shapes and designs. Store in tightly covered container in the refrigerator.

Not edible! It's play dough!

Source: Betty Crocker website.

Crazy Crayons

Heat makes a crayon a little loopy; it may melt into a swirl or pool into a whirl. With this in mind, we chopped up crayons and baked them in shaped mini cake tins, making large blocks that are easy for toddlers to hold and will surely inspire older artists. Encourage kids to come up with combinations: a blue and white blend for drawing the sky, for example, and a mix of reds and oranges for sunsets.

Ingredients:

Kitchen knife
Old crayons
Mini-cake tins

Directions:

Parents can use the knife to chop crayons into pea-size pieces, taking care to keep colors separate so kids can combine them as they like.

Preheat the oven to 150 degrees while children fill the tin with crayon pieces, arranging them in interesting designs.

Bake just until the waxes have melted, 15-20 minutes.

Remove the shapes after they have cooled. If they stick, place tray in the freezer for an hour, and the crayons will pop out.

Source: Martha Stewart website.

Notes: You could also cover a jelly roll pan or cookie sheet with aluminum foil and place cookie cutters on top. Fill the cookie cutters with crayon pieces and bake as directed above.

Oh, and this isn't edible. Don't eat it!

Water Colors

Ingredients:

1 tablespoon white vinegar
2 teaspoons baking soda
1 tablespoon cornstarch
1/4 teaspoon glycerin
6-8 small paper cups
McCormick Assorted Food Colors and Egg Dye or McCormick Assorted Neon Food Colors and Egg Dye

Directions:

Mix vinegar and baking soda in small bowl. Slowly add cornstarch and glycerin.

Pour one teaspoon into each paper cup. Let dry overnight.

After they've dried, add food color. The color isn't as deep when it dries, so remember to add a lot of food color.

Dip a small paint brush into some water, and then into your paint. Use good construction paper that will soak up some of the water when you paint.

Test Kitchen Tips: Glycerin may be found in arts and crafts supply stores and some grocery stores. Allow the painting a long time to dry...put it in a safe place while drying.

Source: McCormick website.

Notes: Not edible. Don't eat.

Silly Putty

Ingredients:

1 cup glue
1/2 cup liquid starch
Food coloring, if desired

Directions:

Pour glue into a bowl. Gradually add liquid starch while whipping mixture with a fork until a ball forms. Once mixture is incorporated, you can add food coloring, if desired.

Caution: Not edible. Do not get on fabric or carpet.

Source: We've had this recipe since I was a kid...so I'm not sure where it came from. But I know that if you do a Google search for silly putty recipes, you can find a ton of similar (and exact) recipes for this.

Notes: Not edible. Do not eat.

Bubbles

Ingredients:

6 pts distilled water
1 pt liquid dish soap (such as Palmolive)
1 pt glycerin

Directions:

Combine water, liquid dish soap and glycerin. Let set overnight.

Notes: Not edible. Do not eat.

Bubble Wands and Bubble Solution

Note: Blowing the perfect bubble depends on equal parts science and magic. With a few twists of wire, you can make fantastic bubble wands and spend long, lazy days practicing your technique.

Bubble Solution

Ingredients:

10 cups water
4 cups dish-washing liquid
1 cup Karo corn syrup

Directions:

Mix all ingredients together.

Bubble Wands

Ingredients:

Large wands:

Plastic-coated wire coat hangers
Floral netting or plastic-coated chicken wire
Wire cutters
Needle-nose pliers
Scissors

Small wands:

18-guage cloth-covered wire
Glue

Directions:

For large wands, you'll need plastic-coated wire coat hangers and either floral netting or plastic-coated chicken wire. Hold the hook at the top of the hanger, and pull the bottom down so that it forms a circle. Cut away the hook and twisted neck of the hanger with wire cutters; you should have about a 31-inch length of wire. With needle-nose pliers, twist a tiny hook into one end of the wire. Bend that end around, and hook it on the wire about 9 inches from the opposite end, forming a 7-inch-diameter circle. Squeeze the hook with pliers to fasten, and straighten the end to form a handle. Cut an 8-inch-diameter of floral netting. With pliers, fold the netting's edge tightly around the frame, snipping off any sharp ends.

For small wands, use 18-gauge cloth-covered wire cut to a length of 15 inches. Bend the wire into a lollipop shape, securing the end of the wire where the loop meets the handle with a dab of glue. To make a star, divide the circle into five even increments, then crimp with pliers. To make a heart, crimp only the top center of the circle.

A tin can, with its top and bottom removed, also makes great bubbles--carefully trim any sharp edges, dip one end in solution, and pull through the air to make one long bubble.

Source: Martha Stewart website.

Notes: You can also simply save old bubble wands and bubble containers once you have used the bubble solution. Just refill it with your homemade bubble solution.

Not edible. Do not eat.

Monday, February 14, 2011

Happy Valentine's Day!


Happy Valentine's Day everyone! Yes, I'm still pregnant, but my husband is relieved that we didn't have a baby on Valentine's Day...especially since we already have a niece with a Valentine's Day birthday!

As you might know (since I created a chocolate hazelnut ice cream recipe which I posted last September), I'm a sucker for the combination of chocolate and hazelnut. So, when I ran across this recipe for a chocolate-covered-hazelnut-flavored-truffle-like concoction, I couldn't resist trying it. It turns out that they are fantastic! They are so rich...you won't be able to eat a ton, but you'll be glad you ate the ones you did. I was especially intrigued by this recipe because it called for prepared/canned chocolate frosting. It works (and tastes) great!

Also, I've already shared my sister-in-law's recipe for sugar cookies (aka cugar shookies due to my mom's initial mix-up of the name), but she made some more for Valentine's Day, so I thought I would share the recipe again...just in case you missed it. My mom is legendary for mixing up the names of things...especially in fast food drive-throughs. For instance, once she ordered an "Argy's roaf beast sandwich with fries to drink." Luckily the Arby's employee had a good sense of humor about it. His response? He said "I can give you fries, but I'm not sure you'll be able to drink them." Argy's roaf beast doesn't really roll off the tongue, but I think cugar shookies has a nice ring to it...so the name has stuck! It's one of the many things that helps set these sugar cookies apart from the rest of the crowd. These are the most melt-in-your mouth soft sugar cookies you'll ever come across.

I'm including another sugar cookie recipe that is slightly firmer. I don't like crunchy or hard sugar cookies. However, one fun way to decorate sugar cookies is to make Stained Glass or Window Sugar Cookies. These are especially cute for the holidays. I'll include some basic instructions following the second sugar cookie recipe for how to make stained glass/window sugar cookies. These stained glass window cookies would work a little better with a slightly firmer cookie than the Cugar Shookies recipe.

So, when you're in the mood for a few Valentine's Day treats, you can't go wrong with chocolate and classic frosting-covered sugar cookies.

Chocolate Nutella Hearts

Ingredients:

1 tub (16 oz) chocolate frosting
1 cup Nutella or other chocolate-hazelnut spread
2 1/4 cup powdered sugar
1/4 cup unsweetened cocoa powder
1 lb. chocolate-flavored candy coating
Sprinkles or other decorations, if desired

Directions:

Place the chocolate frosting and the Nutella in the bowl of a large stand mixer fitted with the paddle attachment. Mix on medium-low speed until combined.

Stop the mixer and add the powdered sugar and cocoa powder, then turn the mixer to low. Mix until the dry ingredients are completely incorporated, stopping periodically to scrape down the sides and bottom of the bowl, as needed.

After mixing, you should have a candy that is soft enough to shape, but firm enough to hold its body--similar in texture to Play-Doh. If it seems too soft, you can add additional powdered sugar, if it is too stiff, you can knead in an extra spoonful or two of Nutella.

If you don't have a small heart cookie cutter, you can form the hearts by hand, although this method is more time-consuming. If you do have a small cookie cutter, roll the candy out between two sheets of waxed paper until it is about 1/2 inch thick or a little thicker.

Use the cutter to cut out as many small hearts as you can fit. You can knead the candy scraps back together and roll it out again to cut more hearts.

Once you have your hearts cut out, melt the chocolate candy coating in a microwave-safe bowl, stirring after every 45 seconds to prevent overheating. STir until the coating is smooth and free of lumps.

Use a fork or dipping tools to dip a heart into the melted candy coating. Remove it from the coating and scrape the bottom against the lip of the bowl to remove excess coating. Place the dipped heart on a foil-covered baking sheet and repeat with remaining hearts and coating.

If desired, decorate with sprinkles while wet, or drizzle the hearts with white, pink, or red candy coating. Chocolate Nutella Hearts can be stored in an airtight container in the refrigerator or at cool room temperature for up to two weeks.

Source: About.com recipe created by Elizabeth LaBau.

Notes: I just used a hand mixer to incorporate all of the ingredients together. Towards the end, I had to knead it with my hands a little because it was thicker than the mixture could handle, but it worked fine. I doubled this...and I did NOT need to. It makes a lot. It's a really fun and easy recipe to make, but it's pretty time-consuming if you're doing it alone. At the end, I rolled the extra chocolate/Nutella mixture into little truffle-sized balls and rolled them in powdered sugar. This didn't really work out though. The Nutella makes these somewhat moist and as a result, it absorbed the powdered sugar by the next morning. They really do need to be dipped in chocolate (they are prettier and tastier that way--even though they do take a little longer to make).

I love Elizabeth LaBau's recipes on About.com (I also got the Halloween eyeball recipe that I posted in October from her too). Her recipes are written in a very detailed manner--so much so that often they tend to look a lot more difficult than they actually are. I like having all the details. It's great to read through and get all of her tips, but after that, just follow your instincts. It's not as hard as it looks!

Basically, the shortened version of this recipe could read as follows:

Blend together the frosting, Nutella, powdered sugar, and cocoa powder. Once you reach a consistency that is similar to Play-Doh, roll it out to about 1/2 inch thickness and cut out heart shapes with a small cookie cutter. Dip the hearts in melted chocolate-flavored candy coating. Place on a foil-covered baking sheet and allow it to set up. Decorate with additional sprinkles or drizzled candy coating, if desired.

Sugar Cookies aka Cugar Shookies

Ingredients:

1/2 c. butter
2 eggs
1 1/2 c. sugar
3 c. flour (you will need more flour)
2 tsp. baking powder
1 tsp. soda
1 tsp. salt
1 c. sour cream
1 tsp. vanilla

Directions:

Cream butter, eggs, and sugar. Combine rest of ingredients and mix well. Add extra flour until dough isn't too sticky, and chill for a couple of hours or overnight. Roll out and cut (they will be sticky so add more flour to roll them out). Bake 350 for 8-10 minutes.

Frosting:

Ingredients:

Powdered sugar
Butter
Milk
Vanilla, almond, or coconut flavoring

Directions:

Mix ingredients together in the proportions you desire to attain the consistency of frosting you prefer.

Source: My beautiful sister-in-law.

Karrie's Sugar Cookies

Ingredients:

2 cups sugar
2 cups butter or margarine, softened
6 eggs
2 tsp vanilla (or almond flavoring)
1 pinch salt
7 cups flour
3 tsp baking powder

Directions:

Cream sugar and butter. Add eggs and vanilla. Add flour mixed with baking powder and salt. Roll out the sugar cookie dough and cut out cookies.

Bake at 350 degrees for 8-10 minutes. Do not overbake (in fact, you don't even want these cookies to start to brown).

Sugar Cookie Glaze

Ingredients:

3 cups powdered sugar
1/4 cup warm water
1 tbsp light corn syrup
1/4 tsp flavoring (almond, orange, lemon, vanilla, etc.)
A couple drops of desired food coloring (if you want the frosting to be white, add a few drops of white food coloring. This makes the glaze opaque rather than transparent).

Directions:

Add corn syrup and extract to warm water in mixing bowl. Mix to dissolve syrup in warm water. Add sugar and food coloring.

Mix on low until you form a smooth glaze. Before putting it on the cookie, you want it warm. Store in a covered plastic container (no need to refrigerate).

Notes: This came from my Mom's friend, Karrie. When she gave the recipe to us, she called them "John's Sugar Cookies." I'm not sure who this John fellow is, but he makes a darn good sugar cookie!


Stained Glass/Window Sugar Cookies

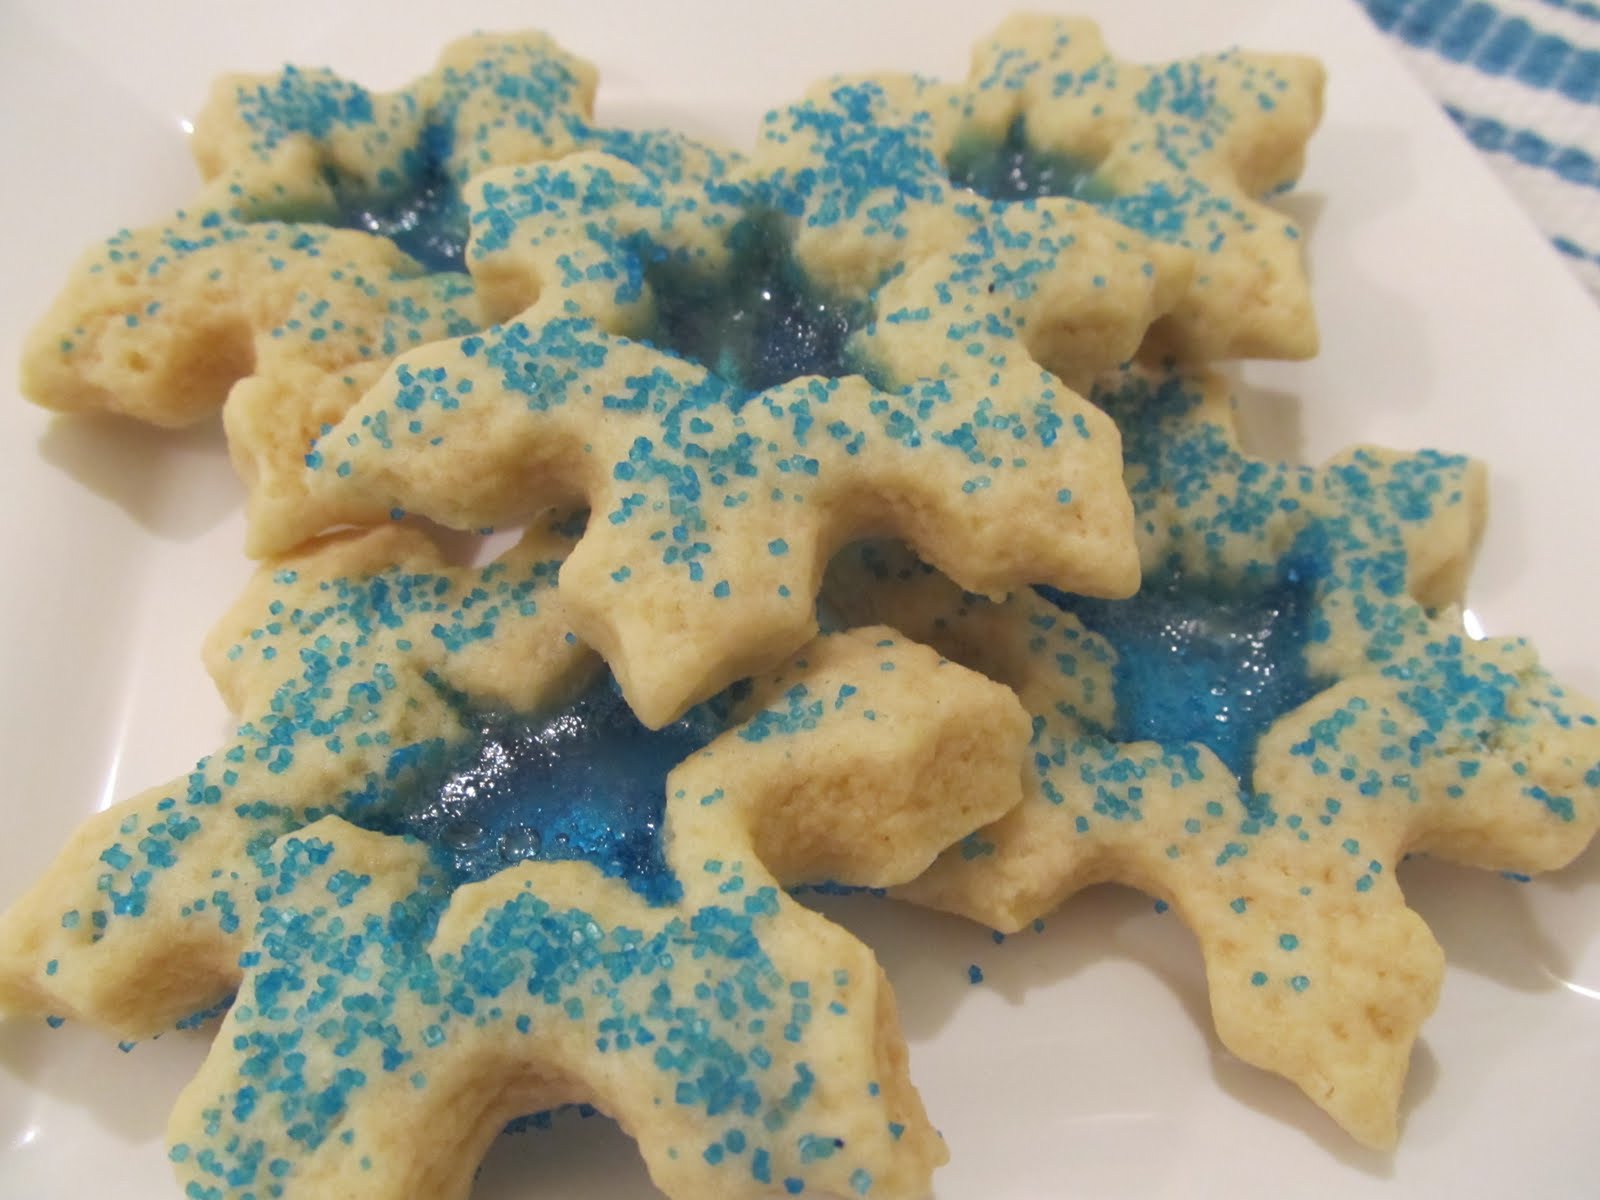
Using your favorite sugar cookie recipe, roll out the sugar cookie dough. Use a cookie cutter to cut out the sugar cookies. Using a smaller cookie cutter or a knife, cut out a "window" in the center of the cookie. Crush some hard candies (Jolly Ranchers work great)--keep the colors separate--and sprinkle some crushed hard candies in the "window" before you put the cookies in to bake. Sprinkling some colored sugar over the cookies in a matching color to your "window" also looks really cute. The hard candy will melt, and once the cookies are cooled, you will have a lovely stained glass "window" in the middle of your sugar cookie! You can then frost or decorate the cookie or just leave it plain. The window is sometimes enough of a decoration! I would say, however, that a somewhat firmer sugar cookie might work better when you are making stained glass cookies.

I finally just posted some pictures of these cookies, but you can find more pictures online. If you do a Google search for "stained glass cookies," you'll find a lot of examples. But, if you don't want to do that yourself and you would like more examples of what I'm trying to explain here, check this out. Also, click here, here, or here. Or, check here. Or, check this out. Or, here's a cute picture.

We've made some particularly cute stained glass window sugar cookies with a snowflake cookie cutter that we have. Get creative! These snowflake cookies use a different cookie cutter than my favorite snowflake cookie cutter, but you get the idea!


Sugar Cookie Glaze

Ingredients:

1 cup powdered sugar
1 tablespoon light corn syrup
2 tablespoons water
Food coloring, optional

Directions:

Stir confectioners' sugar, corn syrup, and water together. Stir in food coloring, if desired. Frost on cookies. Dries quickly.

Source: Allrecipes.com, submitted by cyndi. You can find it here.

Sugar Cookie Frosting

Ingredients:

4 cups confectioners' sugar
1/2 cup shortening
5 tablespoons milk (or more, if needed, to reach desired consistency)
1 tablespoon vanilla extract
Food coloring, if desired

Directions:

In a large bowl, cream together the confectioners' sugar and shortening until smooth. Gradually mix in the milk and vanilla with an electric mixer until smooth and stiff, about 6 minutes. Color with food coloring, if desired.

Source: Allrecipes.com, submitted by Kathy Brandt. You can find it here.

Notes: This is a great sugar cookie frosting (if you don't want to go with a sugar cookie glaze). I always find that I need more milk than called for in the recipe to make it more easily spreadable, however. Good stuff!