To quote Back to the Future, "Here's a red-letter date in the history of science: November 5, 1955. Yes! Of course! November 5, 1955! That was the day I invented time-travel. I remember it vividly. I was standing on the edge of my toilet hanging a clock, the porcelain was wet, I slipped, hit my head on the sink, and when I came to, I had a revelation! A vision! A picture in my head! A picture of this! This is what makes time travel possible: the flux capacitor!"
Anyway, when I saw that recipe, I thought, "That looks good." Then I thought, "Why didn't they add sugar?" After that I thought, "Also, it would have been better to toast the coconut." Also, "They should have combined the coconut and chocolate together." Then, "Why not make mini chocolate coated coconut haystacks instead of having the chocolate and coconut separate?" Finally, "It would probably work better with cream."
At any rate, it reminded me of one of my favorite childhood sweets that my grandpa used to make for us: Chocolate Coconut Haystacks.
After looking at the original ice cream recipe, I came to and had a revelation! A vision! A picture in my head! A pictures of this:
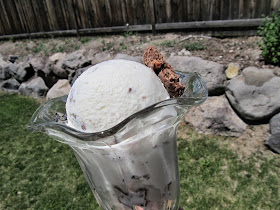
Chocolate Coconut Haystack Ice Cream
Ingredients:
6 cups heavy whipping cream
4 cups half-and-half
2 1/4 cups sugar
1 tablespoon coconut extract or flavoring
1 (7 oz) bag sweetened flake coconut (2 1/2 cups)
1 (12 oz) bag milk chocolate chips (2 cups)
Directions:
Place coconut in a microwave safe bowl or dish. Microwave in 1 minute increments, stirring after each time until toasted a light to medium brown. Set aside.
In another microwave safe bowl, microwave milk chocolate chips. Microwave for 1 minute and then stir. Microwave for another 30 minutes and stir again. If necessary, microwave for another 30 seconds and stir until completely smooth.
Mix chocolate and coconut until coconut is evenly coated.
Spread chocolate coconut mixture in one very thin layer on a foil lined jelly roll pan. Place in refrigerator or freezer until set up.
While waiting for the coconut chocolate bark to set up, mix heavy whipping cream, half-and-half, sugar, and coconut extract and freeze in a 4-quart ice cream maker according to manufacturer's instructions.
While the ice cream is mixing, break the chocolate coconut bark into small pieces. I used a knife to break it into small pieces (if you use your hands, it will begin to melt, and you will get really messy).
Once the ice cream is set up, gently fold in the chocolate coconut pieces. Ripen in a freezer for at least 4 hours before serving.
Source: As I said before, this one is my own creation that was inspired by the recipe that you can find in the link above.
Notes: I am not going to lie, it was good that I had the ice cream vision that I had. It was very, very good. This is one of the best ice creams I have ever had. Everyone loved it. Good, good stuff.
You can make additional chocolate coconut bark to use as a garnish when serving, if desired.
Above: This gives you an idea of how thin I spread the chocolate coconut bark.
Above: Half-way done! I would say that each little chocolate coconut haystack nugget was about the size of a small blueberry...or a little smaller than a dime...or the size of a fingernail...sheesh, I'm having a hard time coming up with size comparisons. Just break the bark into bite size pieces.
Above: You will end up with about 4 cups of chocolate coconut haystack bite size pieces.
Above: Here is the ice cream before folding in the chocolate coconut haystack pieces.
Above: Here is the ice cream with the chocolate coconut haystack pieces mixed in. This was so good, we made it twice this summer!


This was a big, big hit and a perfect tribute to Grandpa! How I miss his cooking!
ReplyDelete