Thursday, October 31, 2013

Halloween 2013


A lot of the Halloween-themed foods I made this year really don't require a recipe. It just revolves around making ordinary things look spooky. Very easy to do!


I will include all of the instructions and recipes in here as soon as I can. However, for now, I just wanted to get this post up. So, I have provided a link to the recipe/instructions, but some of the recipes/instructions aren't typed up in this actual post yet. I'll do it soon though!


Above: Meatball eyeballs. I made these with my favorite Greek meatball recipe, which you can find here. Here is the non-spooky version for my little boys.


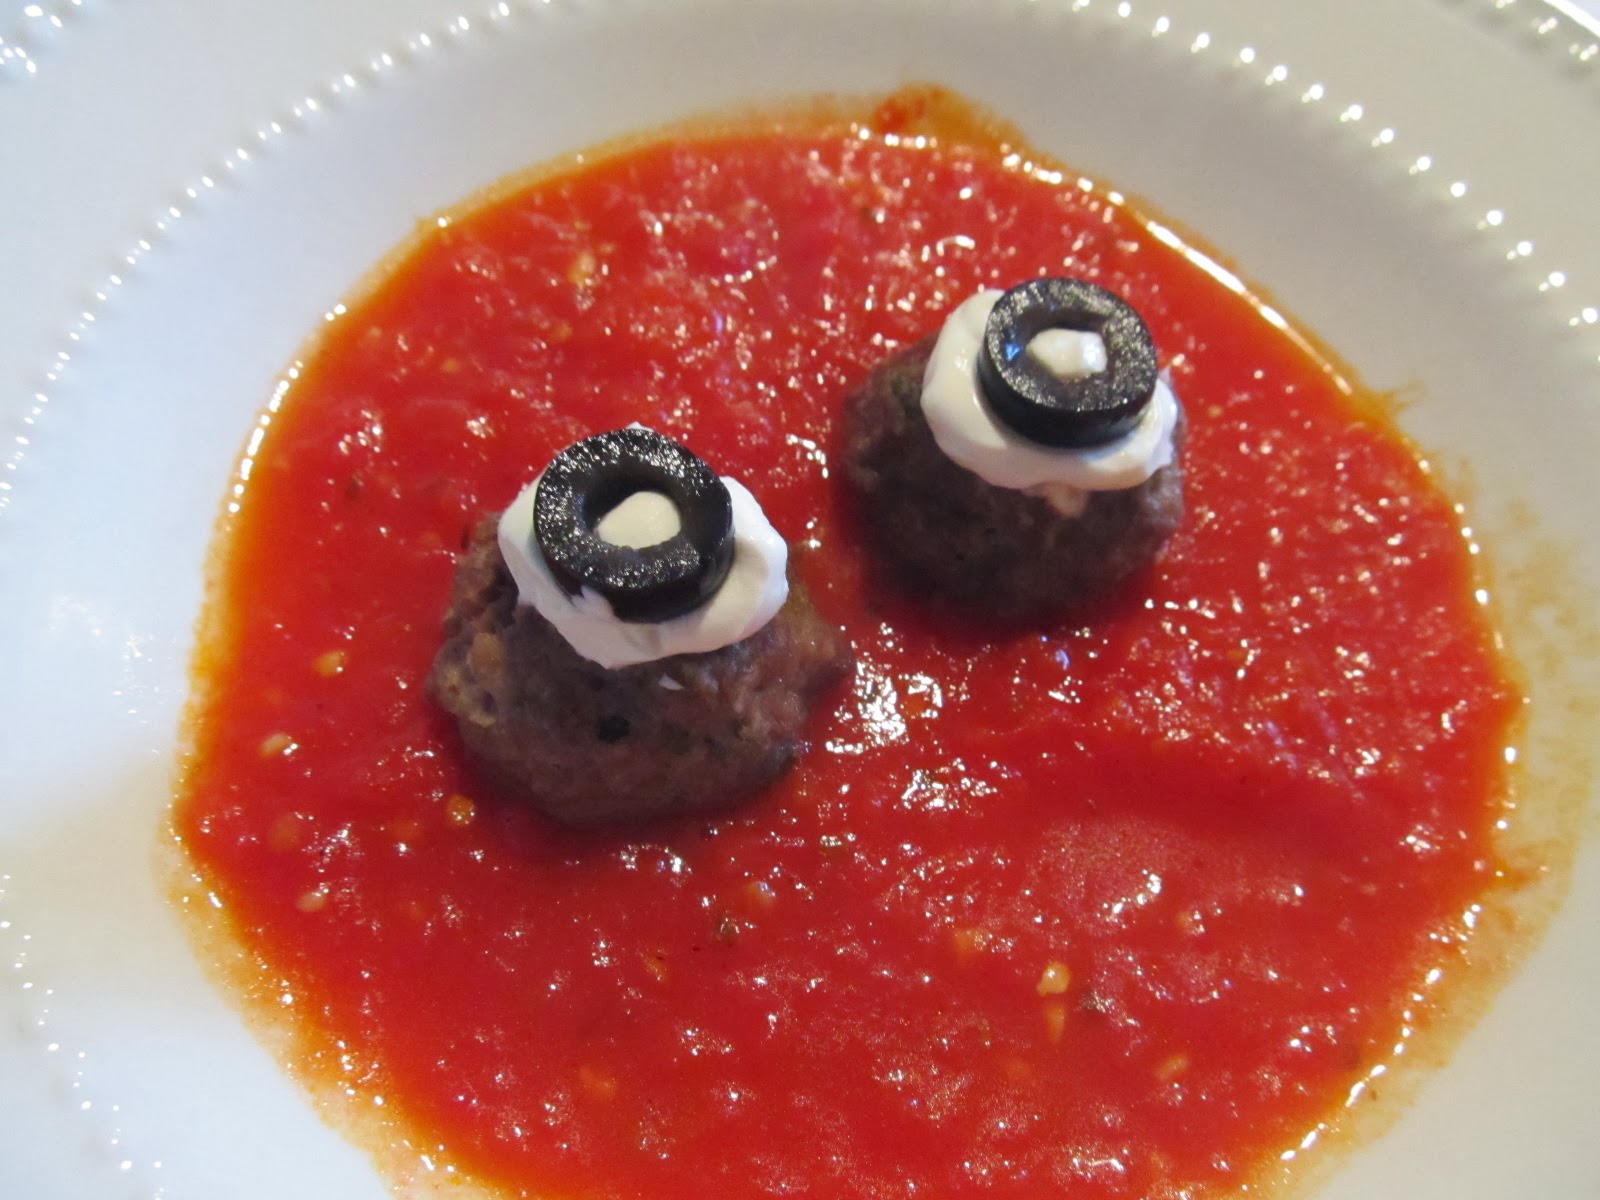
Above: Meatballs Floating in Blood. The spookier version for adults. I made some Three Ingredient Marinara (here) and added about 1 teaspoon of oregano to match the Greek meatballs. I served it with Greek potatoes (you can find that in the same link as the Greek meatballs above). Another way you can use the meatball eyeballs is to make meatball eyeball tacos by filling taco shells with cheese, lettuce, refried beans, etc. and flavoring your meatballs with taco seasoning in place of the other seasonings and serving the taco shells with two meatballs apiece. Simply put a dab of sour cream on each meatball and then top it with a sliced black olive.


Above: Taco Stuffed Monster Shells with Jack-o'-Lantern Cheese.


Above: Who couldn't love this little monster? My two boys, that's who. They wouldn't eat them until the olive eyes were removed...and it's not because of the olives, because they like olives. They just have overactive imaginations!


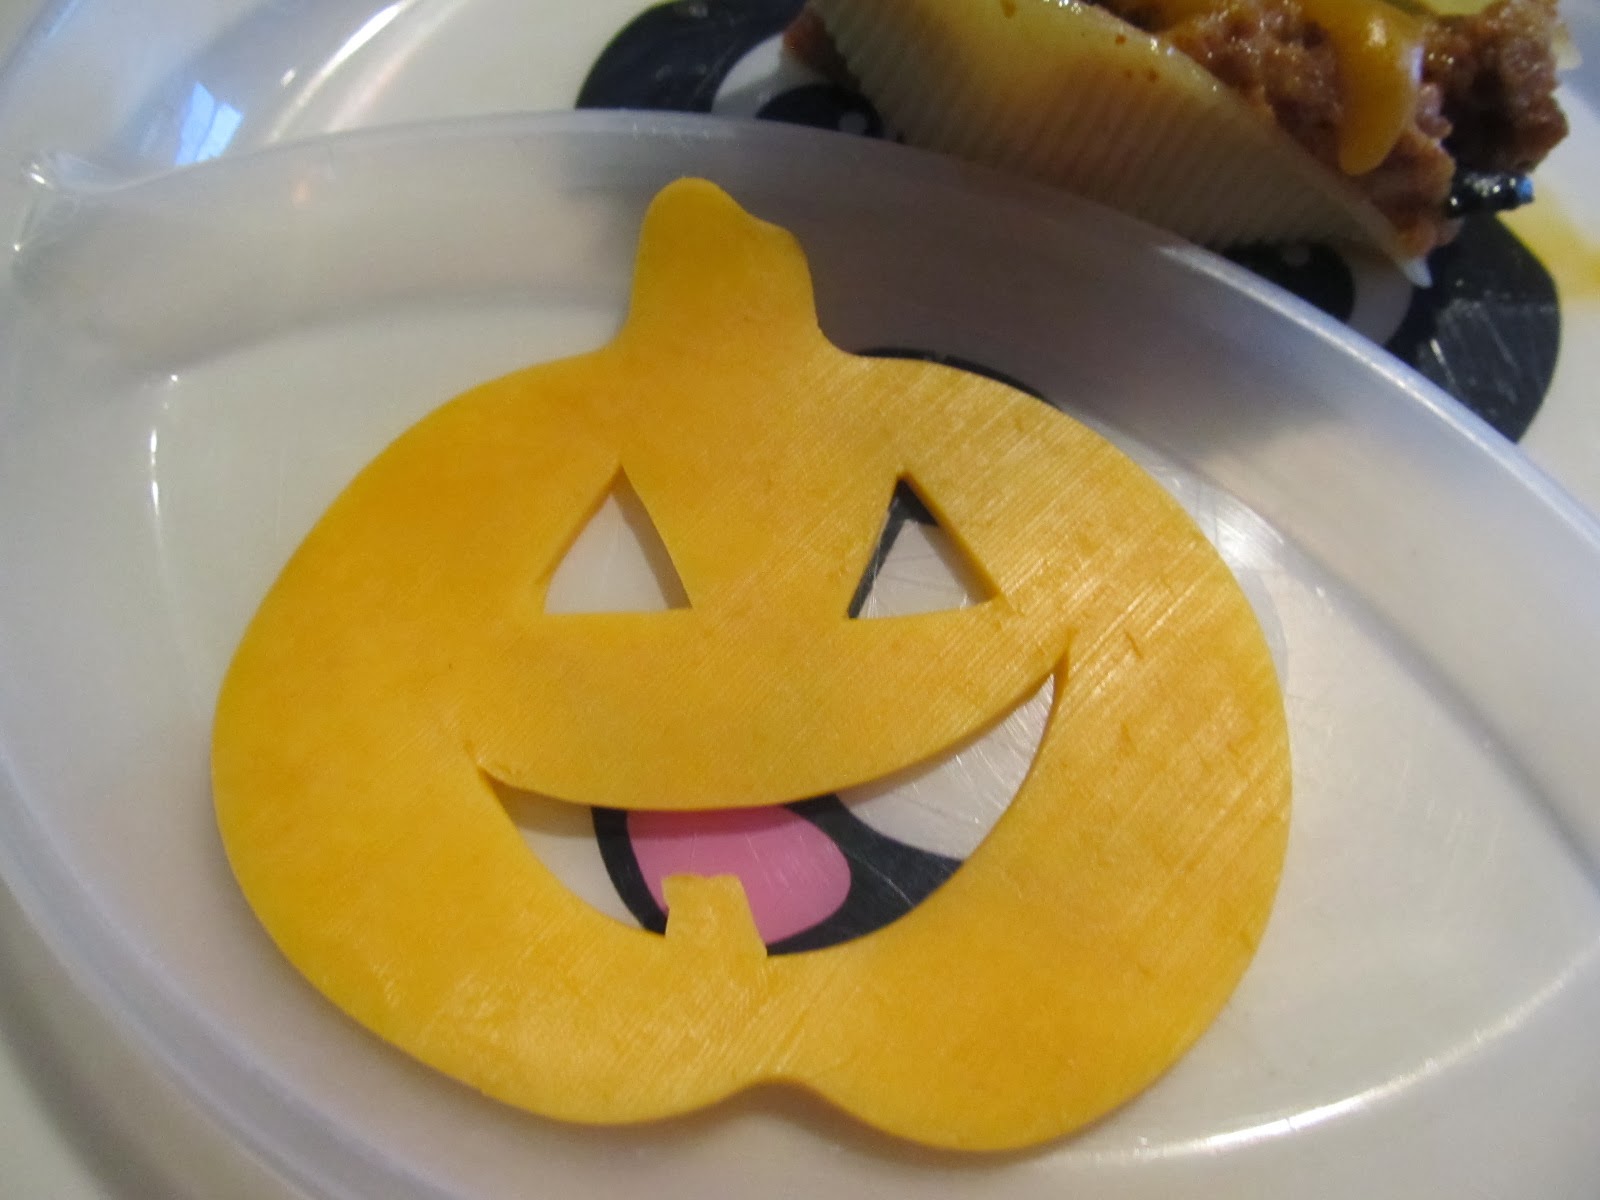
Above: I used a cookie cutter for the pumpkin shape and then carved the face with a sharp knife.


Above: Here are the shells without their eyeballs. They looked cuter before the cheese was melted...but they tasted better with melted cheese...so, you make your call on whether to melt the cheese or not!


Above: I placed the majority of the shells in a bed of bottled red salsa and a few in a bed of bottled green salsa (because my husband prefers that kind). I created my own recipe for this (found below), but you could simply use your favorite stuffed shell recipe and add the sliced cheese and green olives for the teeth and eyes.


Above: They just have so much personality!
 

Taco Stuffed Monster Shells

Ingredients:

1/2 box jumbo baking pasta shells (22-24 shells)
1 pound ground beef
1 packet taco seasoning
1 cup shredded cheese (cheddar or Mexican blend)
1 cup sour cream
1 can (7.5 oz) sliced black olives
1 square piece of cornbread, crumbled (about 1 cup cornbread crumbs), optional
2 cups salsa (red, green, or a combination)
Cheese slices (Cheddar, Pepper Jack, etc.)
Green olives with pimentos
Shredded lettuce, sour cream, additional salsa, and cornbread for serving, optional

Directions:

Prepare pasta shells according to package directions. Drain and cool slightly.

Preheat oven to 400 degrees F.

Meanwhile, place large skillet over medium-high heat and brown ground beef until no longer pink. Add taco seasoning and stir. Add shredded cheese and stir until combined. Turn heat down to low and stir in sour cream and olives. If using cornbread, crumble one piece (to equal about 1 cup of cornbread crumbs) and stir into mixture. Heat through.

Pour salsa into a 9x13-inch baking dish. Spread evenly to coat bottom. Stuff cooled pasta shells with meat mixture and place in baking dish. Place baking dish in oven for 10 minutes.

Cut cheese slices to look like teeth. To do so, I cut each cheese slice in half, and each half into thirds. I then used a knife to cut a jagged line in the middle of each third.

Remove baking dish and carefully place cheese teeth onto each shell. Return to oven and bake for another 5-10 minutes until the cheese is melted.

Remove shells from oven and using toothpicks or thinly sliced carrot sticks, poke two holes into each shell. Poke the toothpicks or thinly sliced carrot sticks into the shells half-way. Poke two green olives onto each toothpick or thinly sliced carrot stick to resemble eyes.

Serve with shredded lettuce, sour cream, salsa, and cornbread, if you like.

Notes: I was inspired by an old cookbook of my mom's...but I didn't have all of the ingredients on hand to follow that recipe, so I decided to simply wing it and create my own recipe. I threw in the crumbled cornbread simply because I had it on hand and I wanted to bulk up the meat mixture a little bit. It was a great addition, but it still tasted great without the cornbread (I was tasting as I went since I was pretty much creating this as I went).

This would go great with cornbread, however, so if you wanted, you could bake some cornbread to serve alongside this dish beforehand and cut out one piece to crumble into the beef mixture. Here is the cornbread recipe I always use.


Above: They kind of remind me of Muppets...and I have always been a huge fan of the Muppets, so that is fine by me!


Above: Donut vampires. A friend of mine posted a picture of these on Facebook and I just had to try them! I believe they originally were found on Pinterest. You can find the picture here. Here is a recipe for pumpkin spice vampire donuts, made from scratch. I didn't make my donuts, however, I simply bought them. The donuts I bought weren't as uniform in shape as the donuts that the original poster used, but who cares? I think it gives each donut its own little personality. Simply place a pair of plastic vampire teeth into the donut hole and place two chocolate chips (pointy side down into the donut) into the donut for eyes. Voila! Breakfast is served!


Above: See what I mean about the shape of each donut giving it its own personality?


Above: Then it dawned on me that a donut hole was just perfect for a single plastic eyeball to make a little cyclops or alien donut. So since I had some on hand, I decided to try it out!


Above: I see you!


Above: Some people's eyes are too big for their stomach.


Above: Cute and scary! Besides, how fun to combine a party favor with a treat.


Above: We tried to find some purple make-up for my son's costume, but couldn't find any. So, I found a recipe online and we tried it. It worked great...except my son freaked out mid-way through the application and decided that he did not want to wear purple face paint after all. Here is the recipe I used.


Above: I made this dragon cake for a family get together where we were celebrating my nephew's birthday and I was assigned to bring the cake for dessert. Since it was a birthday for a little boy turning 6, I figured that it should be a fun cake. I have a gem mold for hard candy and I used this recipe. For the rest, I used Rolos for the dragon's gold, a plastic dragon toy from the dollar store, and a package of cake mix and a can of chocolate frosting.


Above: These pancake spiders and spider webs took a little bit of practice, but once I got the hang of it, they were pretty easy. Here are the instructions.Use your favorite pancake batter. It is a little easier with a thinner batter though, so if it is a thick batter, you might want to add a little extra water or milk.


Above: Here are some easy cake mix cookies. The chocolate ones were made using Devil's Food cake mix. The orange ones were made using a white cake mix, white chocolate chips, and orange food coloring. You can find the recipe for cake mix cookies here.

To end, I am going to share some pictures of our pumpkins that we made this year. Enjoy! Oh, and Happy Halloween!


Above: Glitter pumpkins. I have been making these for years. I originally found the idea on the Martha Stewart website. You can find the instructions here.


Above: I saw this in a magazine years ago. I just love the look of these pumpkins. They just look like little goblins to me. You can find the instructions here.


Above: Undead/Zombie Pumpkins. These were so quick and easy to make! I just love the look of them. They are so fun! You can find the instructions here


Above: Vampire Pumpkin. You can find the idea here. Next year, I am going to try this with mini white pumpkins. This is with a white squash.


Above: My happy pumpkin family!

Happy Halloween everyone! I hope you had a great holiday!

Tuesday, October 29, 2013

Antipasti Flavors


Awesome Pasta Salad

Ingredients:

1 (16 ounce) package fusilli (spiral) pasta
3 cups cherry tomatoes, halved
1/2 pound provolone cheese, cubed
1/2 pound salami, cubed
1/4 pound sliced pepperoni, cut in half
1 large green bell pepper, cut into 1 inch pieces
1 (10 ounce) can black olives, drained
1 (4 ounce) jar pimentos, drained
1 (8 ounce) bottle Italian bottle Italian salad dressing

Directions:

Bring a large pot of lightly salted water to a boil. Add pasta, and cook for 8 to 10 minutes or until al dente. Drain, and rinse with cold water.

In a large bowl, combine pasta with tomatoes, cheese, salami, pepperoni, green bell pepper, olives, and pimentos. Pour in salad dressing, and toss to coat.

Source: Allrecipes.com, submitted by Irlandes. You can find it here.

Notes: I loved this, and the leftovers made for such a yummy lunch!


Poke Cakes are Great Cakes!


Raspberry-Lemonade Cake

Ingredients:

1 cup very hot water
1 box (4-serving size) raspberry-flavored gelatin
1 box Betty Crocker SuperMoist white cake mix
1/2 cup frozen (thawed) lemonade concentrate
1/4 cup water
1/3 cup vegetable oil
4 egg whites
1 container Betty Crocker Whipped vanilla frosting
1 cup frozen (thawed) whipped topping
1 1/2 cup fresh raspberries, if desired
Lemon peel strips, if desired

Directions:

Heat oven to 350 degrees F (325 for dark or nonstick pan). Spray bottom only of 13x9-inch pan with baking spray with flour. In a small bowl, mix hot water and gelatin until gelatin is completely dissolved; cool slightly.

In large bowl, beat cake mix, 1/4 cup of the gelatin mixture, 1/4 cup of the lemonade concentrate, the water, oil and egg whites with electric mixer on low speed 30 seconds, then on medium speed 2 minutes. Pour into pan. Reserve remaining gelatin mixture and lemonade concentrate.

Bake 25 to 31 minutes or until toothpick inserted in center comes out clean. Poke warm cake every inch with fork tines. Remove 1 tablespoon of the reserved gelatin mixture to microwavable custard cup or small bowl. In another small bowl, mix remaining gelatin mixture and remaining 1/4 cup lemonade concentrate; pour slowly over cake. Cool completely, about 1 hour.

In medium bowl, fold together frosting and whipped topping; frost cake. Microwave 1 tablespoon gelatin mixture uncovered on high 10 seconds to liquefy. Using 1/4 teaspoon measuring spoon, place small drops of gelatin mixture over frosting; with spoon or toothpick, swirl gelatin into frosting. Garnish each piece with raspberries and lemon peel strips. Store covered in refrigerator.

Source: Betty Crocker. You can find it here.

Notes: A few people thought this was too sweet. One reviewer (in regards to this recipe on the Betty Crocker website) said that the recipe had been changed from the original recipe that she had printed in a cookbook. In the original recipe, canned frosting was not used--only whipped topping.

I would suggest skipping the frosting and only using whipped topping. Besides, that just makes it even easier to make, right?


Better Than "Better Than?"


One of my brother's favorite cakes is this one. We recently discovered that there is a pumpkin version of this cake! Oh, and holy cow, it is sooooo good. I think it will probably become a tradition to make this cake every fall. It is that good.


Pumpkin Better Than ? Cake

Ingredients:

1 box yellow cake mix
Water and eggs called for on cake mix box (oil will be replaced by the pumpkin puree)
1 (15 oz) can pumpkin puree (not pumpkin pie mix)
1 (14 oz) can sweetened condensed milk
1 (12 oz) jar caramel topping
1 (8 oz) tub frozen whipped topping (thawed) or real whipped cream
1/2 bag Heath bits (optional)

Directions:

In a large bowl, mix together cake mix, water, and eggs called for on cake mix box, and can of pumpkin puree until a smooth batter forms.

Pour batter into a greased 9x13-inch baking dish, and bake at 350 degrees F. according to the directions on the cake mix box (or until a toothpick inserted comes out clean).

Remove cake from oven and let cool for about 10 minutes after baking.

Poke top of warm cake every 1/2 inch with handle of wooden spoon. Mix condensed milk and caramel topping together. Drizzle milk/caramel topping mixture evenly over top of cake; let stand until it has been absorbed into cake. Run knife around sides of pan to loosen cake. Cover and refrigerate about 2 hours or until chilled.

Spread whipped topping or real whipped cream over top of cake. Sprinkle with toffee chips, if desired. Chill for 3-4 hours. 

Store covered in refrigerator.

Recipe tips: The cake may stick to the wooden spoon handle while you're using it to make the holes, so occasionally wipe off the handle.

The caramel topping will be easier to drizzle if it has been kept at room temperature. If refrigerated, remove the lid and microwave on High about 15 seconds.


Source: We found this on Facebook. I found a few sources of origin that you can check out here, here, here, here, and here.

Notes: This was so, so, so, so, good. I am thinking I need to search and see if there is a Christmas version...say an eggnog, peppermint, or gingerbread better than ? cake! The hunt is on---or maybe I need to create some of my own!


Monday, October 28, 2013

More Chicken!

Chicken is one of the easiest and most affordable ways to provide protein for dinner. As a result, we sure have made a lot of chicken recipes in the history of our family! When I was growing up, we would ask my mom what was for dinner. Her response would be, "A new kind of chicken."

So, for your enjoyment, two new kinds of chicken.


White Barbecue Chicken

Ingredients:

1/2 cup Kraft Mayo with Olive Oil Reduced Fat Mayonnaise (I used Original Vegenaise due to my son's egg allergy)
1/4 cup cider vinegar
1 tablespoon lemon juice
1 teaspoon smoked paprika
3/4 teaspoon ground black pepper
1/2 teaspoon garlic powder
1 broiler-fryer chicken (3 1/2 pounds), cut up (I used boneless, skinless chicken breasts)

Directions:

Mix all ingredients except chicken. Reserve 1/3 cup mayo mixture; refrigerate until ready to use. Pour remaining mayo mixture over chicken in shallow dish; turn to coat both sides of each piece. Refrigerate 2 hours.

Heat charcoal grill to medium heat. Arrange coals for indirect heat, placing coals evenly on both sides of charcoal grate. Remove chicken from marinade; discard marinade. Place chicken over hot coals; grill 8 to 10 minutes or until seared, turning after 5 minutes.

Move chicken to center of grate to cook over indirect heat; cover. Grill 18 to 20 minutes or until done (165 degrees F), brushing occasionally with reserved mayo mixture.

Recipe notes: Chicken can be marinated up to 24 hours before grilling. This longer marinating time will help boost the flavor of the grilled chicken.

Source: Kraftrecipes.com. You can find the recipe here.


Unbelievable Chicken

Ingredients:

1/4 cup cider vinegar
3 tablespoons prepared coarse-ground mustard
3 cloves garlic, peeled and minced
1 lime, juiced
1/2 lemon, juiced
1/2 cup brown sugar
1 1/2 teaspoons salt
Ground black pepper, to taste
6 tablespoons olive oil
6 skinless boneless chicken breast halves

Directions:

In a large glass bowl, mix the cider vinegar, mustard, garlic, lime juice, lemon juice, brown sugar, salt, and pepper. Whisk in olive oil. Place chicken in the mixture. Cover, and marinate 8 hours, or overnight.

Preheat an outdoor grill for high heat.

Lightly oil the grate. Place chicken on the prepared grill, and cook 6 to 8 minutes per side, until juices run clear. Discard marinade.

Source: Allrecipes.com, submitted by LETSGGGO. You can find it here.

Notes: Currently at 4 1/2 stars and over 1,100 reviews. I reserved the marinade and heated it to boiling on the stove top. Use additional marinade for basting. If you grill it, wait until right at the end to baste the chicken with additional marinade, otherwise the sugar in the marinade will cause the chicken to burn. I personally feel that this recipe is slightly better when broiled instead of grilled. My mom made this on the grill, but she wrapped all the chicken in aluminum foil so that the sugar in the marinade wouldn't cause the chicken to scorch.


Above: Grilled (see how quickly the sugar in the marinade chars on the chicken?). The picture for this recipe above the title was cooked on the grill but wrapped in aluminum foil for the majority of the cooking time (and grilled right at the end). This chicken would be perfect broiled too.

Paddington Bear's Favorite


I was intrigued when I saw these three glazes using the base of marmalade. I love marmalade...and I think it is really a great thing to have on hand for cooking purposes.

I loved all of these flavor combinations. I am going to type these recipes as originally written...but I will also tell you that I totally changed the proportions of all of these glazes. I doubled them all, and I increased the flavor enhancers because the marmalade should be like a canvas--a backdrop--to enhance, showcase, and complement the other flavors...rather than to be the overpowering flavor. As written, I felt that the flavor enhancers were just too subtle, and in some cases, they were completely overpowered by the marmalade. However, when the other ingredients were increased, the flavors were just so good.

So, I doubled the marmalade because I would rather have too much glaze than not enough (and I like a lot of glaze), and I increased the other ingredients in addition to doubling them. My advice would be to taste the glaze and adjust the ingredients to your own personal taste. The flavor combinations are so awesome though. A great, easy idea for dinner.


Soy-Ginger Glaze

Ingredients:

1/4 cup orange marmalade
1 1/2 teaspoons soy sauce
1 teaspoon grated peeled fresh ginger

Directions:

In a small bowl, stir together marmalade, soy sauce, and ginger.

Recipe Note: This sweet-sour glaze is great on grilled shrimp, turkey, beef, chicken, and pork, as well as salmon. When grilling, brush glaze on all sides 2 minutes before meat or seafood finishes cooking, then brush on again right after removing from the grill. For roasted salmon, brush fish with glaze before baking.

Source: Everyday Food, June 2010. You can find it here.

Notes: As mentioned above, I doubled the marmalade (1/2 cup) and added the soy sauce and ginger to my taste...more than what is called for in the recipe.


Orange-Mustard Glaze

Ingredients:

1/4 cup orange marmalade
1 1/2 teaspoons grainy mustard

Directions:

In a small bowl, stir together marmalade and mustard.

Recipe Note: This sweet-sour glaze is great on grilled shrimp, turkey, beef, chicken, and pork, as well as salmon. When grilling, brush glaze on all sides 2 minutes before meat or seafood finishes cooking, then brush on again right after removing from the grill. For roasted salmon, brush fish with glaze before baking.

Source: Everyday Food, June 2010. You can find it here.


Chipotle-Lime Glaze

Ingredients:

1/4 cup orange marmalade
1 1/2 teaspoons liquid from chipotle chiles in adobo
1 teaspoon fresh lime juice

Directions:

In a small bowl, stir together marmalade, chipotle liquid, and lime juice.

Recipe Note: This sweet-sour glaze is great on grilled shrimp, turkey, beef, chicken, and pork, as well as salmon. When grilling, brush glaze on all sides 2 minutes before meat or seafood finishes cooking, then brush on again right after removing from the grill. For roasted salmon, brush fish with glaze before baking.

Source: Everyday Food, June 2010. You can find it here.

Notes: I doubled the marmalade. I also added a little minced chipotle chile in addition to the liquid. Finally, 1 teaspoon of lime juice is nowhere near enough. I would say more like a tablespoon or more. Again, add the chipotle and lime according to your personal taste.