Monday, September 30, 2013

Meatballs: Part 4


For the final stop on our meatball journey, we are taking a trip to Sweden. As you can imagine, after having four different kinds of meatballs in one month, my husband said he was ready for a change of pace. However, after trying these meatballs, he said, "If you had to end on one kind of meatballs, these would be the ones." This recipe was by far his favorite. I'm not going to lie, this is an awesome meatball recipe.

However, before I share this recipe with you, let us not forget that I already made a meatball visit to Greece a few years ago (in search of a recipe that came close to the meatballs found at the Greek Festival in Salt Lake City, Utah every September). This recipe is pretty darned close to those Greek Festival meatballs and it is absolutely delicious. I need to make those again sometime soon because those old pictures don't do it justice...but believe me, those Greek meatballs are one of the best meatball recipes you will ever have.


Swedish Meatballs

Ingredients:

1 pound ground beef chuck
1 pound ground pork
3 cups panko (Japanese breadcrumbs)
1 1/2 cups whole milk
2 large eggs, lightly beaten
2 garlic cloves, minced
Coarse salt and ground pepper
1/4 teaspoon allspice
3 tablespoons butter
1/3 cup all-purpose flour (I used 1/2 cup, see notes below)
3 cups canned reduced-sodium beef broth
Grape or red-current jelly, cooked egg noodles, chopped parsley for serving, optional

Directions:

Preheat oven to 475 degrees F. In a large bowl, combine beef, pork, panko, 1/2 cup milk, eggs, garlic, 1 tablespoon salt, 1/2 teaspoon pepper, and allspice. Mix until just combined.

Using a rounded 1-tablespoon for each, form mixture into meatballs (you should have about 48). Place meatballs onto two rimmed baking sheets; bake until golden brown and cooked through, 10 to 12 minutes, rotating sheets halfway through.

Meanwhile, make sauce: In a medium saucepan, melt butter over medium-high. Add flour; cook, whisking, 1 minute (do not let darken). Gradually whisk in remaining cup milk and broth; bring to a boil. Reduce heat and simmer until sauce has slightly thickened, 2 to 3 minutes. Transfer to a large bowl.

Using a slotted spoon, add meatballs to bowl with sauce; gently toss to combine.

Serve as an appetizer on toothpicks with jelly on the side; or as a main, over noodles, garnished with parsley, with jelly on the side.

Source: Everyday Food, December 2008. You can find it here.


Notes: A couple of the reviews on the Martha Stewart site were negative. One review complained that it wasn't an authentic recipe due to its use of garlic and panko. I guess I am not super familiar with authentic Swedish meatballs. However, what I do know is that these were absolutely delicious and I will definitely be making them again. This recipe is going to become a staple in my house.


The only change I would make is that I felt that the recipe didn't call for enough flour to thicken the sauce. I added more flour to thicken it more. I would say that you need about 1/2 cup of flour to thicken this. You could add some salt and pepper, to taste, to the sauce. However, after tasting the sauce, I didn't feel that was necessary for me and my tastes. I thought it had a subtle, yet rich flavor as is and it complemented the meatballs perfectly.

I also tried it with a little grape jelly on the side (dipping my meatballs into it from time to time). I really liked the flavor contrast that added. This recipe is a keeper!

Sunday, September 29, 2013

Meatballs: Part 3


Next stop on our journey...meatballs with an Asian influence.

We really liked these meatballs. I would suggest adding a little soy sauce or teriyaki sauce to the rice for some extra flavor.


Asian Turkey Meatballs with Carrot Rice

Ingredients:

Coarse salt
1 cup long-grain white rice
1 carrot, shredded
3/4 cup fresh breadcrumbs
1 1/2 pounds ground dark-meat turkey or ground pork
3 scallions, white and green parts separated and thinly sliced
1/3 cup chopped fresh cilantro leaves
4 teaspoons fish sauce (or you could use soy sauce or teriyaki sauce)
4 teaspoons hot-pepper sauce (preferably Sriracha)
4 teaspoons sugar
1 large garlic clove, minced
2 teaspoons vegetable oil
Lime wedges, for serving

Directions:

Preheat oven to 450 degrees F. In a medium saucepan, bring 1 1/2 cups salted water to a boil. Add rice, stir, and return to a boil. Cover, reduce to a simmer, and cook until rice is tender, about 15 minutes. Remove from heat and top with carrot. Let stand, covered, 5 minutes, then stir in carrot and fluff rice with a fork.

Meanwhile, in a medium bowl, combine breadcrumbs and 3 tablespoons water. Let stand 5 minutes. Add turkey, scallion whites, cilantro, fish sauce (or soy or teriyaki sauce), hot-pepper sauce, sugar, garlic, and 1 1/2 teaspoons salt. Gently mix to combine and form into 12 meatballs.

In a large nonstick skillet, heat 1 teaspoon oil over medium-high. In batches, brown meatballs on all sides, 10 minutes total (add up to 1 teaspoon oil as needed). Transfer to a rimmed baking sheet and bake until cooked through, 10 minutes. Serve meatballs with rice, scallion greens, and lime wedges.

Source: Everyday Food, November 2010. You can find it here.

Notes: I had to improvise a little when I made these. My cilantro, unbeknownst to me, had gone bad in my fridge, so I had to use dried cilantro. It definitely would have been better with the fresh cilantro. I also forgot to top the rice with the green parts of the scallions. Oh, and I completely forgot about using limes. All of those things would have made these meatballs even better...which is saying something because these meatballs were awesome.

I used teriyaki sauce in place of the fish sauce. I had fish sauce on hand, but my boys are allergic to everything and I figured it would be just my luck that they would end up being allergic to fish too and happen to have an allergic reaction while eating meatballs that night. I know that is ridiculous. I know I need to just get them each another appointment with the allergist to check on their status. At any rate, that is the call I made. The meatballs were great with teriyaki sauce. We tossed the rice in additional teriyaki sauce as well.

Oh, and just so you know, the Sriracha gives the meatballs a pinkish color. Don't worry, they are fully cooked!

I also baked the meatballs in the oven for 20 minutes. I just wasn't in the mood to get a pan dirty for the meatball browning process. It was one of those nights, I guess!

Meatballs: Part 2


Next stop on our meatball journey: Spain. Now, I don't know how authentically Spanish this recipe is, but it definitely has a unique flavor. I thought the meatballs were good when I first tried them, but honestly, where they really shine is as leftovers. I don't know, but the flavors just melded together overnight and the next day, these were even better than the first day.


Slow Cooker Spanish Meatballs

Ingredients:

2 pounds ground pork
1 medium yellow onion, finely chopped (about 3/4 cup)
1 1/2 teaspoons ground cumin
1 1/2 teaspoons smoked paprika
5 tablespoons plain dried breadcrumbs
2 large eggs, lightly beaten
3 tablespoons chopped fresh parsley
Coarse salt and ground pepper
3 tablespoons extra-virgin olive oil
1 can (28 ounces) diced tomatoes
Rustic bread (optional), for serving

Directions:

In a large bowl, combine pork, 1/4 cup onion, cumin, 1/2 teaspoon paprika, breadcrumbs, eggs, and parsley. Season with salt and pepper. With a wooden spoon, gently mix to combine and, using your hands, roll into 25 meatballs (each 1 1/2 inches wide).

In a large nonstick skillet, heat 1 1/2 tablespoons oil over medium-high. In two batches, brown meatballs on all sides, 8 minutes per batch. Transfer meatballs to a 5- to 6- quart slow cooker. Add remaining onion to skillet; cook until fragrant, 2 minutes. Transfer onion to slow cooker, along with 1 teaspoon paprika and tomatoes. Season with salt and pepper. Cook on low until meatballs are tender, 5 hours. Serve with rustic bread, if desired.

Source: Everyday Food, May 2011. You can find the recipe here.

Notes: Due to my son's allergy to eggs, I baked the meatballs in the oven at 350 degrees for 20-25 minutes to replace the browning process in the skillet.

I also sauteed the onion and then added the paprika, tomatoes, salt and pepper before pouring over the meatballs in the slow cooker.

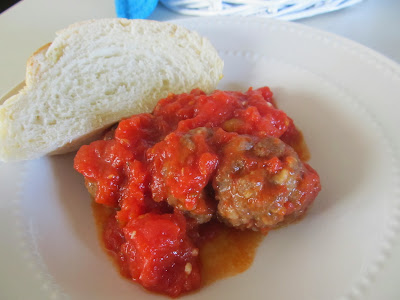
I served the meatballs over rice, but I'm not sure if that really worked for me. Maybe I would have liked it over pasta a little better. Or, simply served with crusty bread on the side as directed in the recipe.

Meatballs: Part 1


My youngest son has taken a liking to meatballs lately, so I went on the hunt to try out a bunch of new meatball recipes...a little meatball trip around the world, if you will. To start our journey, we will start with Italy, because honestly, when I think of meatballs, Italian meatballs are the first that come to mind. Here is my favorite recipe for spaghetti and meatballs. This recipe is a close second.

However, when my son asked for meatballs for dinner, I found a very basic recipe simply served with bread to sop up the sauce (as opposed to pasta or rice).


Meatballs with Garlic Bread

Ingredients:

3 hoagie rolls
1 pound ground beef chuck
1 large egg, lightly beaten
3 teaspoons minced garlic
Coarse salt and ground pepper
3/4 teaspoon dried oregano
2 tablespoons plus 1 teaspoon extra-virgin olive oil
1 can (28 ounces) crushed tomatoes
1 can (15 ounces) whole peeled tomatoes

Directions:

Preheat oven to 400 degrees F. Tear 1 roll into pieces; pulse in a food processor until fine crumbs form. In a large bowl, toss crumbs with 1/3 cup water. Add beef, egg, 1 teaspoon garlic, 1/4 teaspoon pepper, and 1/2 teaspoon oregano; mix just until combined. Gently form into 12 meatballs.

In a large Dutch oven or heavy pot, heat 1 teaspoon oil over medium-high; swirl to coat. Add meatballs and cook, turning occasionally, until browned, about 7 minutes.

Add crushed and whole tomatoes with juice (breaking up tomatoes), 1 teaspoon garlic, teaspoon oregano, and pinch of sugar. Season with salt and pepper. Bring sauce to a boil; reduce to a rapid simmer and cook until meatballs are cooked through, about 15 minutes.

Meanwhile, split two rolls and place, cut side up, on a rimmed baking sheet. Brush with 2 tablespoons oil and sprinkle with 1 teaspoon garlic; season with salt and pepper. Bake until golden, about 10 minutes. Serve meatballs with garlic bread.

Source: Everyday Food, October 2009. You can find it here.

Notes: I improvised on this recipe a lot. I didn't have hoagie rolls, so I used sandwich bread (about 3 pieces) in my meatballs. I didn't pulse it in a food processor either. I just poured the 1/3 cup water over the bread, let it sit, and then mixed it with all the other ingredients.

I also got more than 12 meatballs (maybe I formed my meatballs smaller than the recipe stated). I baked them in an oven for 25 to 30 minutes at 350 degrees rather than browning them due to my son's egg allergy.

I made homemade French bread. You can find that recipe here. I didn't toast it initially, and I didn't put garlic on it. However, when I had leftovers, I toasted the bread and it was awesome dipped in the marinara. I would highly suggest that you toast the bread.

This was a very basic, easy meatball recipe. Comfort food at its best!

Muffin To It


I have mentioned before that I make a lot of baked goods such as muffins and quick breads for my husband to eat for breakfast since he is usually on the go. Here is a super easy and tasty muffin recipe that I discovered recently.


Grandma's Honey Muffins

Ingredients:

2 cups all-purpose flour
1/2 cup sugar
3 teaspoons baking powder
1/2 teaspoon salt
1 egg
1 cup 2% milk
1/4 cup butter, melted
1/4 cup honey

Directions:

Preheat oven to 400 degrees F. In a large bowl, combine flour, sugar, baking powder, and salt. In a small bowl, combine egg, milk, butter, and honey. Stir into dry ingredients until moistened.

Fill greased or paper-lined muffin cups three-fourths full. Bake 15-18 minutes or until a toothpick inserted in center comes out clean. Cool 5 minutes before removing from pan to wire rack. Serve warm.

Yield: 1 dozen.

Source: Taste of Home April/May 2007, submitted by Darlis A. Wilfer of West Bend, Wisconsin. You can find it here.

Notes: I cooked these 20 minutes because of my son's egg allergies, so mine are a little more browned than maybe they should be. Even so, these were really yummy.

A Chocolate Version of an Old Favorite


If you love German pancakes, you have to try these Dutch babies. If you have never tried either, your life has a serious void that needs to be filled.

In addition to sharing my old favorite recipe for Dutch babies, I am going to share a new chocolate Dutch babies recipe that I just recently tried. I still prefer the original Dutch babies...nothing can dethrone that. However, this was delicious too. Almost like a breakfast version of a brownie--and there is nothing wrong with that!


Chocolate Dutch Baby

Ingredients:

3/4 cup whole milk
3 large eggs
1/3 cup all-purpose flour (spooned and leveled)
1/4 cup unsweetened cocoa powder, sifted
1/4 teaspoon coarse salt
1/2 teaspoon pure vanilla extract
1/4 cup granulated sugar
2 tablespoons unsalted butter
3 tablespoons confectioners' sugar, for dusting

Directions:

Preheat oven to 425 degrees. In a blender, combine milk, eggs, flour, cocoa powder, salt, vanilla, and granulated sugar. Blend until foamy, 1 minute. In a large cast-iron skillet, melt butter over medium. Pour batter into skillet and immediately transfer to oven. Bake until puffed and set, 20 minutes. Dust with confectioners' sugar and serve immediately.

Source: Everyday Food, May 2011. You can find the recipe here.


Above: Delicious from any angle.

Notes: This was really good. I almost thought it was even better after it had cooled. Maybe that is just my preference though. You should try it both ways and see for yourself!


Dutch Baby Pancake

Ingredients:

3 tablespoons unsalted butter, room temperature
3 large eggs
3/4 cup whole milk
1/2 cup all-purpose flour (spooned and leveled)
1/4 teaspoon salt
1/2 teaspoon pure vanilla extract
1/4 cup, plus 1 tablespoon sugar
1 tablespoon fresh lemon juice

Directions:

Preheat oven to 425 degrees. In a medium cast-iron or ovenproof nonstick skillet, melt 2 tablespoons butter over medium heat; set aside.

In a blender, combine eggs, milk, flour, salt, vanilla, and 1/4 cup sugar. Blend until foamy, about 1 minute. pour batter into skillet; bake until pancake is puffed and lightly browned, about 20 minutes.

Working quickly, dot pancake with 1 tablespoon butter, and sprinkle with 1 tablespoon sugar and lemon juice. Slice into wedges, and serve immediately.

Source: Martha Stewart Everyday Food, March 2009. You can find it here.

Notes: This is really similar to a German pancake. However, this one has sugar inside and on top of it, so you can serve it as-is. No need to add syrup or any other toppings (or you still can, if you like!).
 

Above: These really puff up in the oven and deflate once you take them out.

Chill Out


Need something cool and refreshing (whether it is cold or hot outside?). Try these! One option for summer, one for winter.


Raspberry Buttermilk Sherbet

Ingredients:

6 cups raspberries (4 to 5 pints)
1/4 cup 100% grape or apple juice
1 cup superfine sugar
1 1/2 cups buttermilk
1/4 cup heavy cream
Salt and freshly cracked pepper (optional)

Directions:

Puree the raspberries, juice, and sugar in a food processor until smooth. Pour through a mesh strainer into a bowl and discard the raspberry seeds. Stir in the buttermilk, cream, and a pinch of salt, then cover and refrigerate until cold, about 1 hour.

Transfer the mixture to an ice cream maker and freeze according to manufacturer's instructions. Transfer to an airtight container and freeze until firm, at least 2 hours. Serve sprinkled with pepper, if desired.

Source: Food Network website, recipe courtesy of Food Network Magazine. You can find the recipe here.

Notes: We skipped the pepper. People were divided on this. Some people thought it was too tart. However, the people who enjoyed the tartness (I would be one of those people) thought this recipe was awesome. The fresh raspberry taste was to die for and the texture was so smooth.

I should have let it soften just a little more before serving it though. The pictures make it look more like a granita. Oh well. It was awesome anyway! When I served some another day, I let it soften more and it scooped beautifully and smoothly...I just didn't take any pictures that day.


Snow Ice Cream

Ingredients:

Freshly fallen snow
Milk, to taste
Sugar, to taste
Flavoring of choice, to taste (vanilla extract, almond extract, other favorite extract flavors, Italian Soda Syrup flavor of choice, etc.)

Directions:

Mix snow, milk, sugar, and desired flavoring together until you reach your desired consistency and taste. Use less snow if you want more of a shake-like consistency. Use more snow if you want a thicker ice cream. It's as easy as that!

Source: My grandma used to make this for my Mom and her sisters when they were kids. Then, my mom made it for us when we were kids.

Notes: You know, snow ice cream is one of the best things about winter. It brings back so many childhood memories for me. It just tastes soooooo good. The basic way to make it is to use vanilla extract for a classic vanilla snow ice cream. But I've used Italian soda syrups as well and those were super tasty too. So, get creative and have fun. If you're craving snow ice cream during the summer, you can satisfy your craving if you own an ice shaver or ice shaving machine. You can also make a snow slushy/snow cone and skip the milk altogether. You can mix the snow with Italian soda syrup, snow cone syrup, or soda pop until you find a consistency you like. I tried this with some sugar-free raspberry Italian soda syrup and it was really yummy--and a lot lighter on the calories too!

We got our first snow storm of the season on Friday. Luckily for me, it melted that afternoon. However, there was enough for a batch of snow ice cream. Next time it snows, I will make real snow cones and post a picture of that. 

I had previously posted this recipe for snow ice cream a few years ago. However, it was a random addition to a blog post about gazpacho, so I thought it fit better here. You can find the original post here.


Above: This made enough for 3-4 servings. I probably used a little over a cup of milk and between 1/4 and 1/2 cup of sugar with 1 teaspoon of vanilla.


Above: It takes awhile to mix everything together, but it is so worth it!


Above: Eat it fast, because it melts quickly! Basically, this doesn't really work in an ice cream cone--eat it in a bowl or as a shake depending on the thickness/consistency of your ice cream.

A Great Discovery


This dinner was such a nice change of pace. The rice is so simple, and yet it was so flavorful. I never thought of adding these flavors to rice before. It was really yummy.


Teriyaki Chicken with Rice Salad

Ingredients:

3 tablespoons soy sauce
2 tablespoons honey
6 tablespoons rice vinegar, divided
1 smashed garlic clove
4 cups cooled cooked rice
1 cup sliced cucumber
1 tablespoon toasted sesame oil
4 boneless, skinless chicken breasts

Directions:

In a small saucepan, combine soy sauce, honey, and 1 tablespoon rice vinegar, and garlic; bring to a boil and reduce by half.

Toss together rice and cucumber; dress with 5 tablespoons rice vinegar and sesame oil; season. Grill chicken, brushing with soy glaze and turning often.

Serve chicken with rice salad.

Source: Everyday Food, July/August 2013. You can find it here.

Notes: I doubled the sauce, and I broiled the chicken rather than grilling it. I would maybe triple the sauce in the future and use some for dipping. This was really good. As I mentioned, I loved the rice salad. It was just a nice change from our normal weeknight dinners. Yummy stuff!

Similar, Yet Different


This recipe bears a strong resemblance to another recipe I recently posted which you can find here. However, they are both great pantry recipes and just different enough, so I thought I would give it a go. Well, just as the first one was tasty, so was this one. A great recipe to have on hand when you don't know what you want to cook for dinner.


Chipotle Chicken

Ingredients:

4 pounds bone-in, skin-on chicken breast halves (about 2 3/4 pounds)
Salt and pepper
2 tablespoons vegetable oil
1 medium yellow onion, thinly sliced
4 cloves garlic, coarsely chopped
1 1/2 teaspoons ground cumin
1 chipotle pepper in adobo sauce, chopped
1 can (28 ounces) whole peeled tomatoes, coarsely chopped
Cooked rice, for serving

Directions:

Season chicken with salt and pepper. In a large Dutch oven or heavy pot, heat oil over medium-high. In batches, if necessary, cook chicken skin side down until browned, about 7 minutes. Transfer to plate.

Reduce heat to medium. Add onion and saute until soft and translucent, about 5 minutes, scraping up any browned bits from pot. Add 2 tablespoons water.

Add garlic, cumin, and chipotle; cook until garlic is soft and fragrant, about 2 minutes. Add tomatoes, season, and bring to a simmer; cook five minutes, breaking tomatoes down with wooden spoon. Return chicken and any accumulated juices to pot; bring to a simmer, cover, and cook until chicken is cooked through, about 15 minutes. Serve over rice.

Source: Everyday Food, March 2013. You can find the recipe here.

Notes: I used boneless, skinless chicken breasts and I cut them into cubes just to see if I liked it better this way. I think it worked well this way, but I might shred the chicken in the future. This was a good, basic, tasty recipe.

The Test of Time (aka Best Artisan No-Knead Bread Ever)


Some recipes definitely stand the test of time and become staples in your home. Last year, I found a number of amazing recipes for no-knead artisan bread. You can find that post here. Over the past year, one of those recipes has clearly stood out as my favorite...my staple, go-to recipe for no-knead artisan bread. I make it, minimum, twice a month. It is so easy. I wanted to share the recipe that has stood out from the pack and give it the spotlight it deserves.

So, without further ado...


Above: This is the equivalent of two loaves. It's great with butter, or dipped in olive oil and balsamic vinegar, or made into sandwiches.

No-Knead Bread, recipe by Jim Lahey of Sullivan Street Bakery

Ingredients:

3 cups all-purpose or bread flour, more for dusting
1/4 teaspoon instant yeast
1 1/4 teaspoons salt
Cornmeal or wheat bran as needed, optional

Directions:

In a large bowl, combine flour, yeast, and salt.  Add 1 5/8 cup water, and stir until blended; dough will be shaggy and sticky.  Cover bowl with plastic wrap.  Let dough rest at least 12 hours, preferably 18 (and as long as 24), at warm room temperature, about 70 degrees.

Dough is ready when its surface is dotted with bubbles. Lightly flour a work surface and place dough on it; sprinkle it with a little more flour and fold it over on itself once or twice. Cover loosely with plastic wrap and let rest about 15 minutes.

Using just enough flour to keep dough from sticking to work surface or to your fingers, gently and quickly shape dough into a ball. Generously coat a cotton towel (not terry cloth) with flour, wheat bran, or cornmeal; put dough seam side down on towel and dust with more flour, wheat bran, or cornmeal. Cover with another cotton towel and let rise for about 2 hours. When it is ready, dough will be more than double in size and will not readily spring back when poked with a finger.

At least a half-hour before dough is ready, heat oven to 450 degrees. Put a 6- to 8-quart heavy covered pot (cast iron, enamel, Pyrex, or ceramic) in oven as it heats. When dough is ready, carefully remove pot from oven. Slide your hand under the towel and turn the dough over into the pot; seam side up; it may look like a mess, but that is okay. Shake pan once or twice if dough is unevenly distributed; it will straighten out as it bakes. Cover with lid and bake 30 minutes, then remove lid and bake another 15-30 minutes, until loaf is beautifully browned. Cool on a rack.

Yield: One 1 1/2 pound loaf.

Source: New York Times. You can find the recipe here.

Notes: Best no-knead artisan-style bread recipe ever. Period. The only change I make is that I use wax paper or parchment paper instead of a cotton towel coated with flour when I let the dough rise. There is just less sticking (and less laundry) that way.

An Old Favorite Deserving of the Spotlight


This recipe was already been posted on our blog about three years ago. However, it is just so good and easy that I thought it needed a repeat appearance. I make it every year for my husband's birthday. Soooo good! You can find the original post here.

The main reason for this being that my sister-in-law said to me, "Carrot cake is so time consuming and so much work to make." That is not the case for this carrot cake! It is greatly simplified by the fact that the wet ingredients are mixed together with the carrots in a blender until smooth. No peeling and grating of carrots necessary. Super easy...oh, and did I mention that this is the most delicious carrot cake I have ever had? The search is over. No need to look for another carrot cake recipe. This is the one.


Heather's Carrot Pineapple Cake

Cake:

1 1/2 cup flour
1 cup sugar
1 teaspoon baking powder
1 teaspoon baking soda
1 teaspoon cinnamon
1/2 teaspoon salt
2/3 cup salad oil (vegetable oil)
2 eggs
1 teaspoon vanilla
carrots, roughly sliced or chopped (enough to make 1 cup shredded)
1 cup crushed pineapple with juice (or half cup, if preferred. I use one 8 oz can)

Frosting:

1 package cream cheese
2 Tbsp. butter
4 cups confectioners sugar
1 tsp. vanilla

Sift together first six ingredients (flour through salt).

Blend together next 4 ingredients (salad oil through carrots) in a blender.

Combine dry and wet ingredients. Then add crushed pineapple with juice.

Pour batter into 3 greased baking pans. Bake at 350 degrees for 25-30 minutes.

For the frosting, whip together the final four ingredients (cream cheese through vanilla) and frost on top of cooled cake.

Source: My wonderful former co-worker, Heather Bowen.

Notes: I like a lot of frosting, so I would suggest doubling the frosting recipe. I always do. Also, I highly suggest using three cake pans instead of two. It is necessary for the consistency of the cake. If you do try to use two cake pans, you might have to cook the cake a little longer. Check the cake using the toothpick method to ensure that it is cooked completely, otherwise it might be too crumbly.


Above: I use baby carrots so I don't have to peel or cut them. I fill the blender with carrots to almost the 2 cup line. Here is the blender filled with all of the wet ingredients.


Above: When everything is blended, you will have about 2 cups of wet ingredients (eggs, vegetable oil, carrots and vanilla).


Above: Throw all of your ingredients together in one bowl (wet, dry, and pineapple).


Above: Mix it all together and pour it into your pans.


Above: Bake for 25-30 minutes in three pans. Once cooled, frost. I like to frost my cake the day before. Somehow the texture of the cake is just more awesome that way. :) Keep your cake covered and it won't dry out. It will just be absolutely delicious.

Saturday, September 28, 2013

The Return of Soup Season


I live up on a mountain, and we got our first snow storm yesterday. Thank goodness it is all melted again...I'm just not ready for snow to stick around yet! However, one part of this time of year that I always welcome is that it is the perfect weather for soup. Soup is so comforting and filling. Not to mention the fact that it is very economical. A little goes a long way.

Let me share two very easy soup recipes that I just found. They are both really delicious. I hope you like them.


Above: Shown without the Parmesan. It is great both ways!

15-Minute White Bean Soup

Ingredients:

2 teaspoons olive oil
2 scallions, thinly sliced
1 garlic clove, minced
1/2 teaspoon dried oregano
1 can (14 1/2 ounces) vegetable or chicken broth
1 can (19 ounces) white beans, rinsed and drained
1 1/2 teaspoons fresh lemon juice
Coarse salt and ground pepper
2 tablespoons freshly grated Parmesan, for serving

Directions:

In a medium saucepan, heat oil over medium. Add scallions, garlic, and oregano; cook, stirring frequently, until scallions begin to soften, about 3 minutes.

Stir in broth and beans; cook until heated through, about 4 minutes. Using a wooden spoon or potato masher, lightly mash some of the beans to thicken the soup. Stir in lemon juice; season with salt and pepper. Before serving, sprinkle with Parmesan.

Source: Everyday Food, December 2008. You can find it here.

Notes: So, so easy. I used chicken broth instead of vegetable broth and I added two cans of white beans instead of just one. I mashed about half of one can of beans to thicken the soup. So good! The lemon juice added such a nice flavor.


Six-Ingredient Chicken Noodle Soup

Ingredients:

2 bone-in, skin-on chicken breast halves (1 1/2 pounds total)
4 bone-in, skin-on chicken thighs (1 1/2 pounds total)
8 cups low sodium chicken broth
4 medium carrots, cut into 1/4 inch rounds
4 ounces spaghetti, broken into 2 inch pieces (about 1 cup)
1 cup frozen peas
Coarse salt and ground pepper

Ingredients:

In a large pot, combine chicken, broth, and 8 cups water. Bring to a boil; reduce to a rapid simmer and cook until chicken is cooked through (skim off foam), about 18 minutes. With tongs, transfer chicken to a rimmed baking sheet and refrigerate 10 minutes.

Add carrots to pot and cook until crisp-tender, about 10 minutes. Add pasta and cook until tender, about 8 minutes. Remove skin and bones from chicken and discard. Shred chicken and add, along with peas, to pot. Cook until heated through. Season to taste with salt and pepper.

Source: Everyday Food, September 2010. You can find the recipe here.

Notes: I didn't use chicken thighs, and as for the chicken breasts, I used boneless, skinless. I worried that this might make it less flavorful, but it was what I had on hand, so I thought I would give it a go anyway. I also used less water so there wasn't quite as much broth (I like my soup with a lot of stuff in it and less broth). It was sooo easy and sooo flavorful. I really loved this. My boys actually tried it and liked it too. It made a great lunch for me for the next couple of days as well.


Above: Yummy lunch leftovers.

Rather than breaking the spaghetti up myself, I happened to have some Barilla cut spaghetti. I got it once upon a time for my boys. It worked perfectly in this soup. I liked that it was a perfect spoon size pasta.